
JumpCloud Vault enables your team to securely manage and share passwords, 2FA (two-factor authentication) tokens, and other types of sensitive information while providing you with full visibility and control over passwords used across your organization. Admins and users will have a seamless authentication experience without relying on a third-party solution.
![]()
Reach out to JumpCloud to enable Privilege Access Management (PAM) features.
![]()
Password Vault is available only to the new Password Manager customers who have not activated the existing JumpCloud password manager.
Password Vault Activation
In the Admin portal, Admins can activate the JumpCloud Vault.
To activate the vault:
- Log in to JumpCloud Admin Portal.
![]()
If your data is stored outside of the US, check which login URL you should be using depending on your region. If your organization uses LDAP, RADIUS, or requires firewall allow list configuration, the Fully Qualified Domain Names (FQDNs) will also be region specific. See JumpCloud Data Centers for the URLs, FQDNs, and IP addresses.
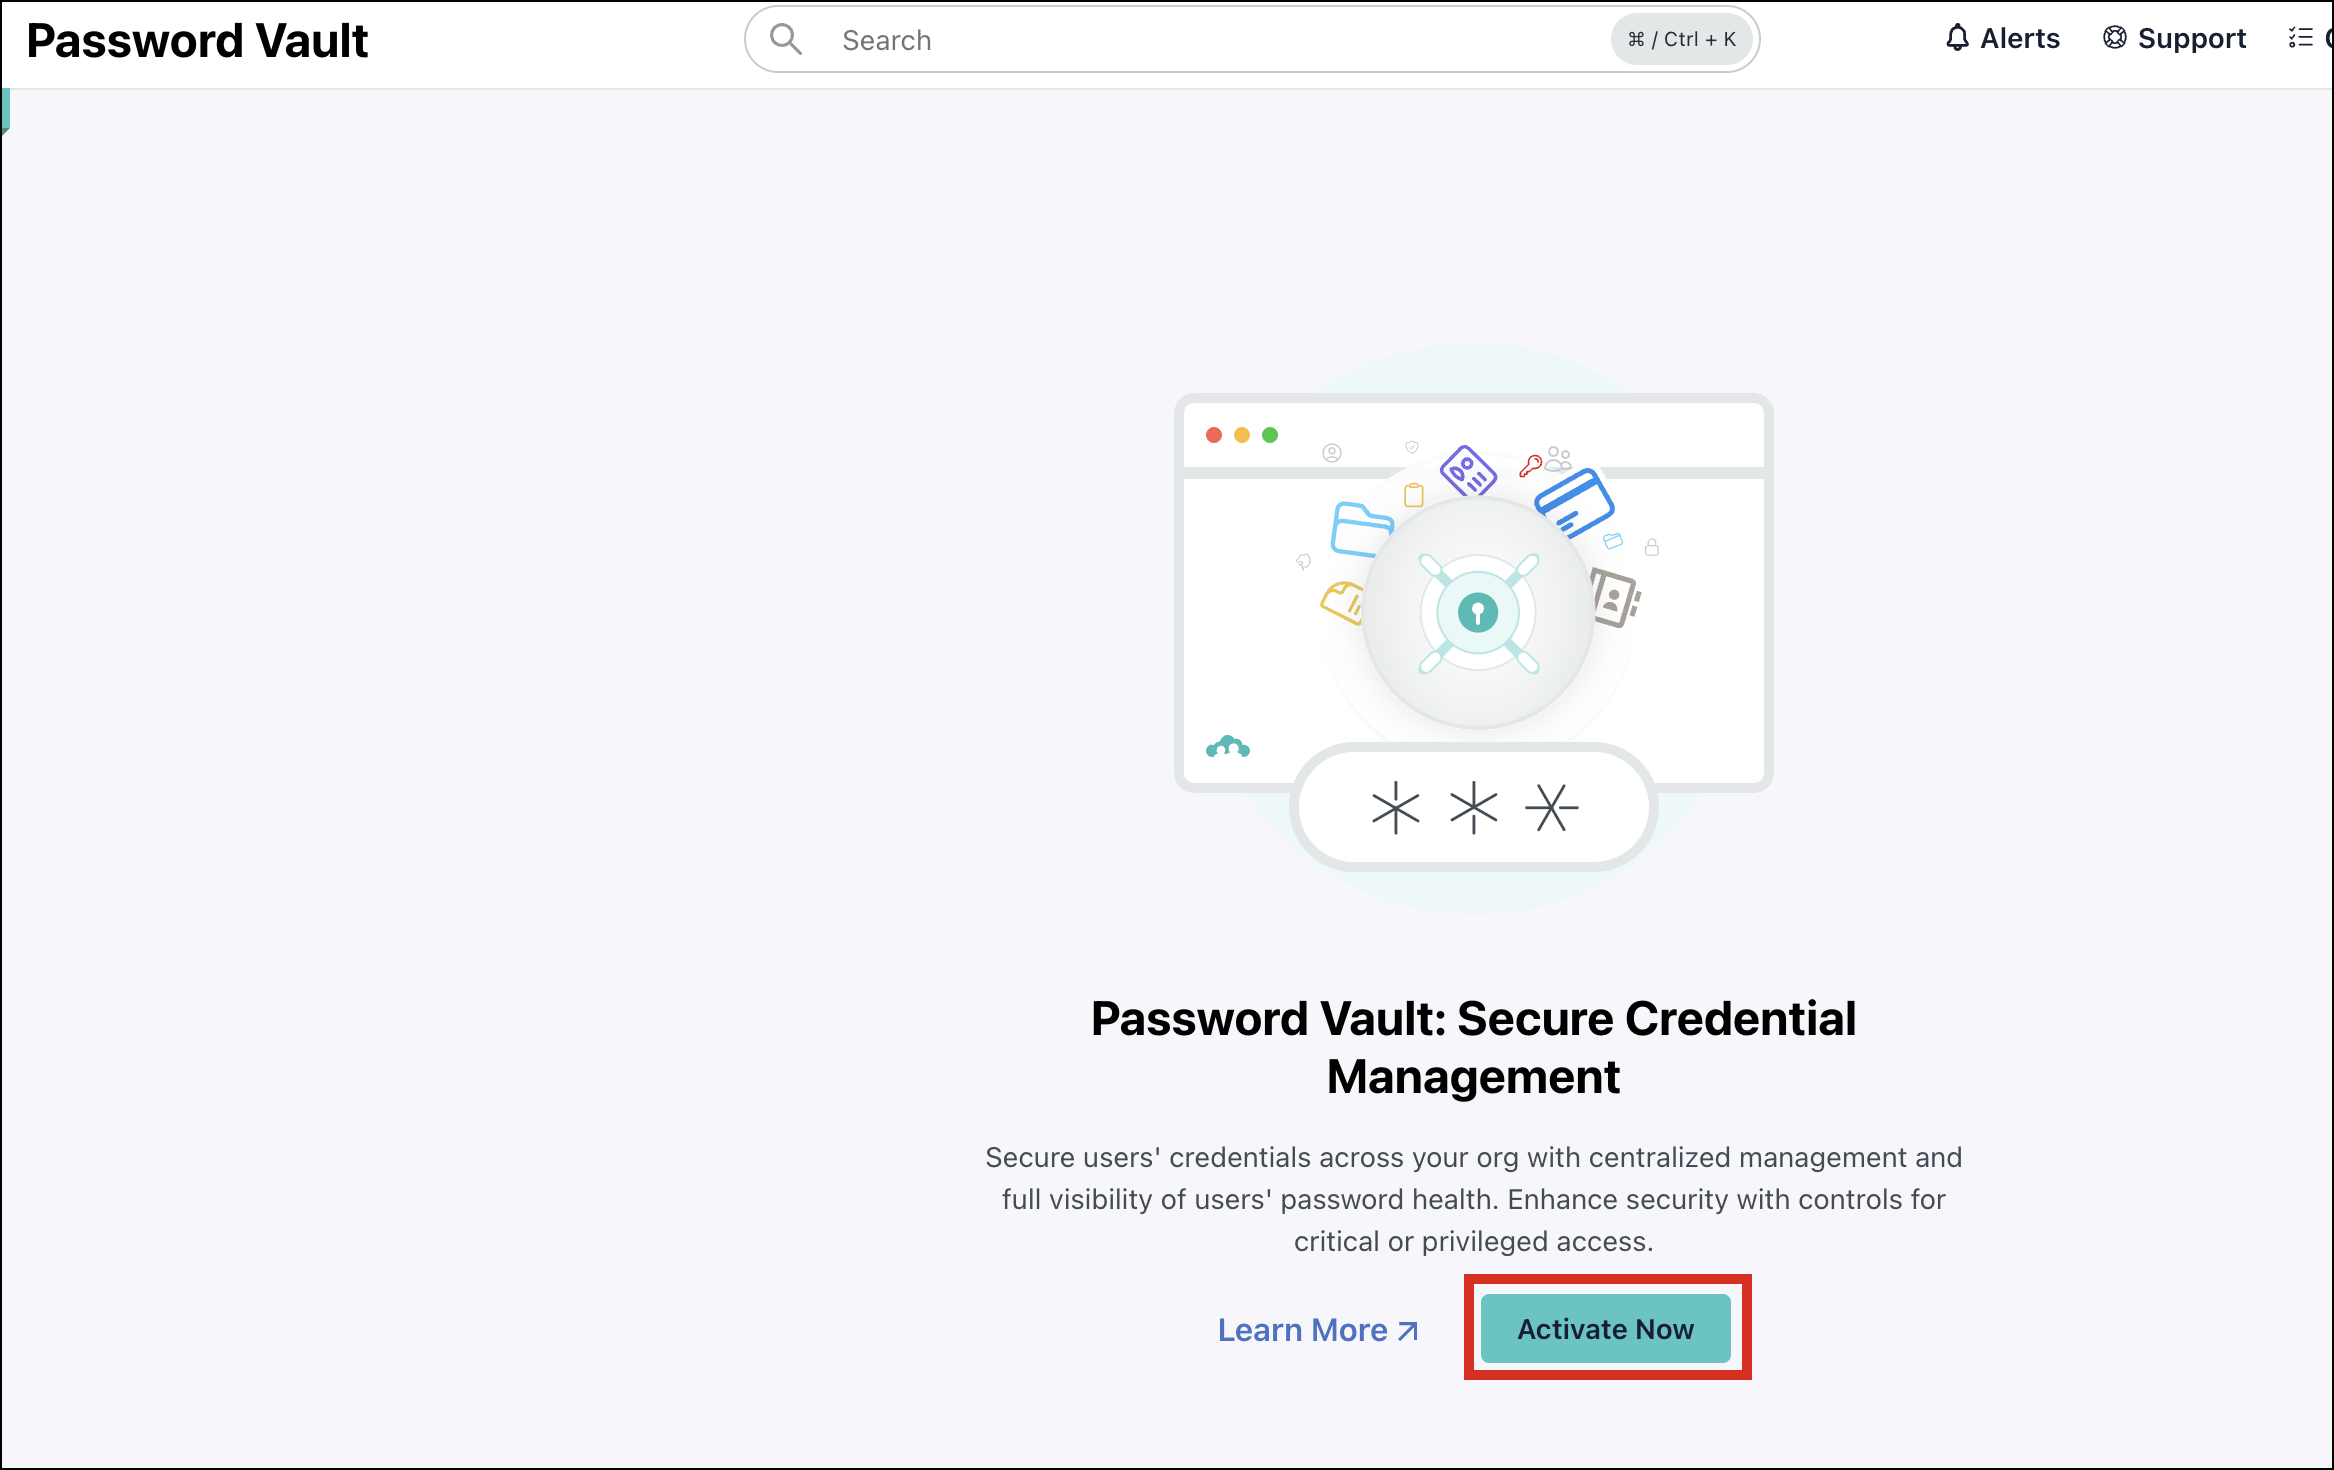
- Go to Access > Vault.
- Click Activate Now.

- In the Activate Password Vault pop-up window, click Activate.
- Admins receive an activation email and credentials for their Master Admin account to begin using the vault.
A success message is displayed in the top right corner and you have successfully activated the password vault. - A new SSO app is created which you can verify by going to Access > SSO Applications.
User Enrollment
Upon user group enrollment, users receive an email to log in to JumpCloud Vault. Users can see this application when they log in to the JumpCloud user portal.
All onboarded users are assigned the User role. To modify a user's role, Admins can log in with their Admin account, go to the Users section, and select Roles. If you want to grant Master Admin permissions to an existing user, see Vault: Add Master Admin Permission to learn more.
Enrolling User Groups
To enroll user groups in Password Vault:
- Log in to JumpCloud Admin Portal.
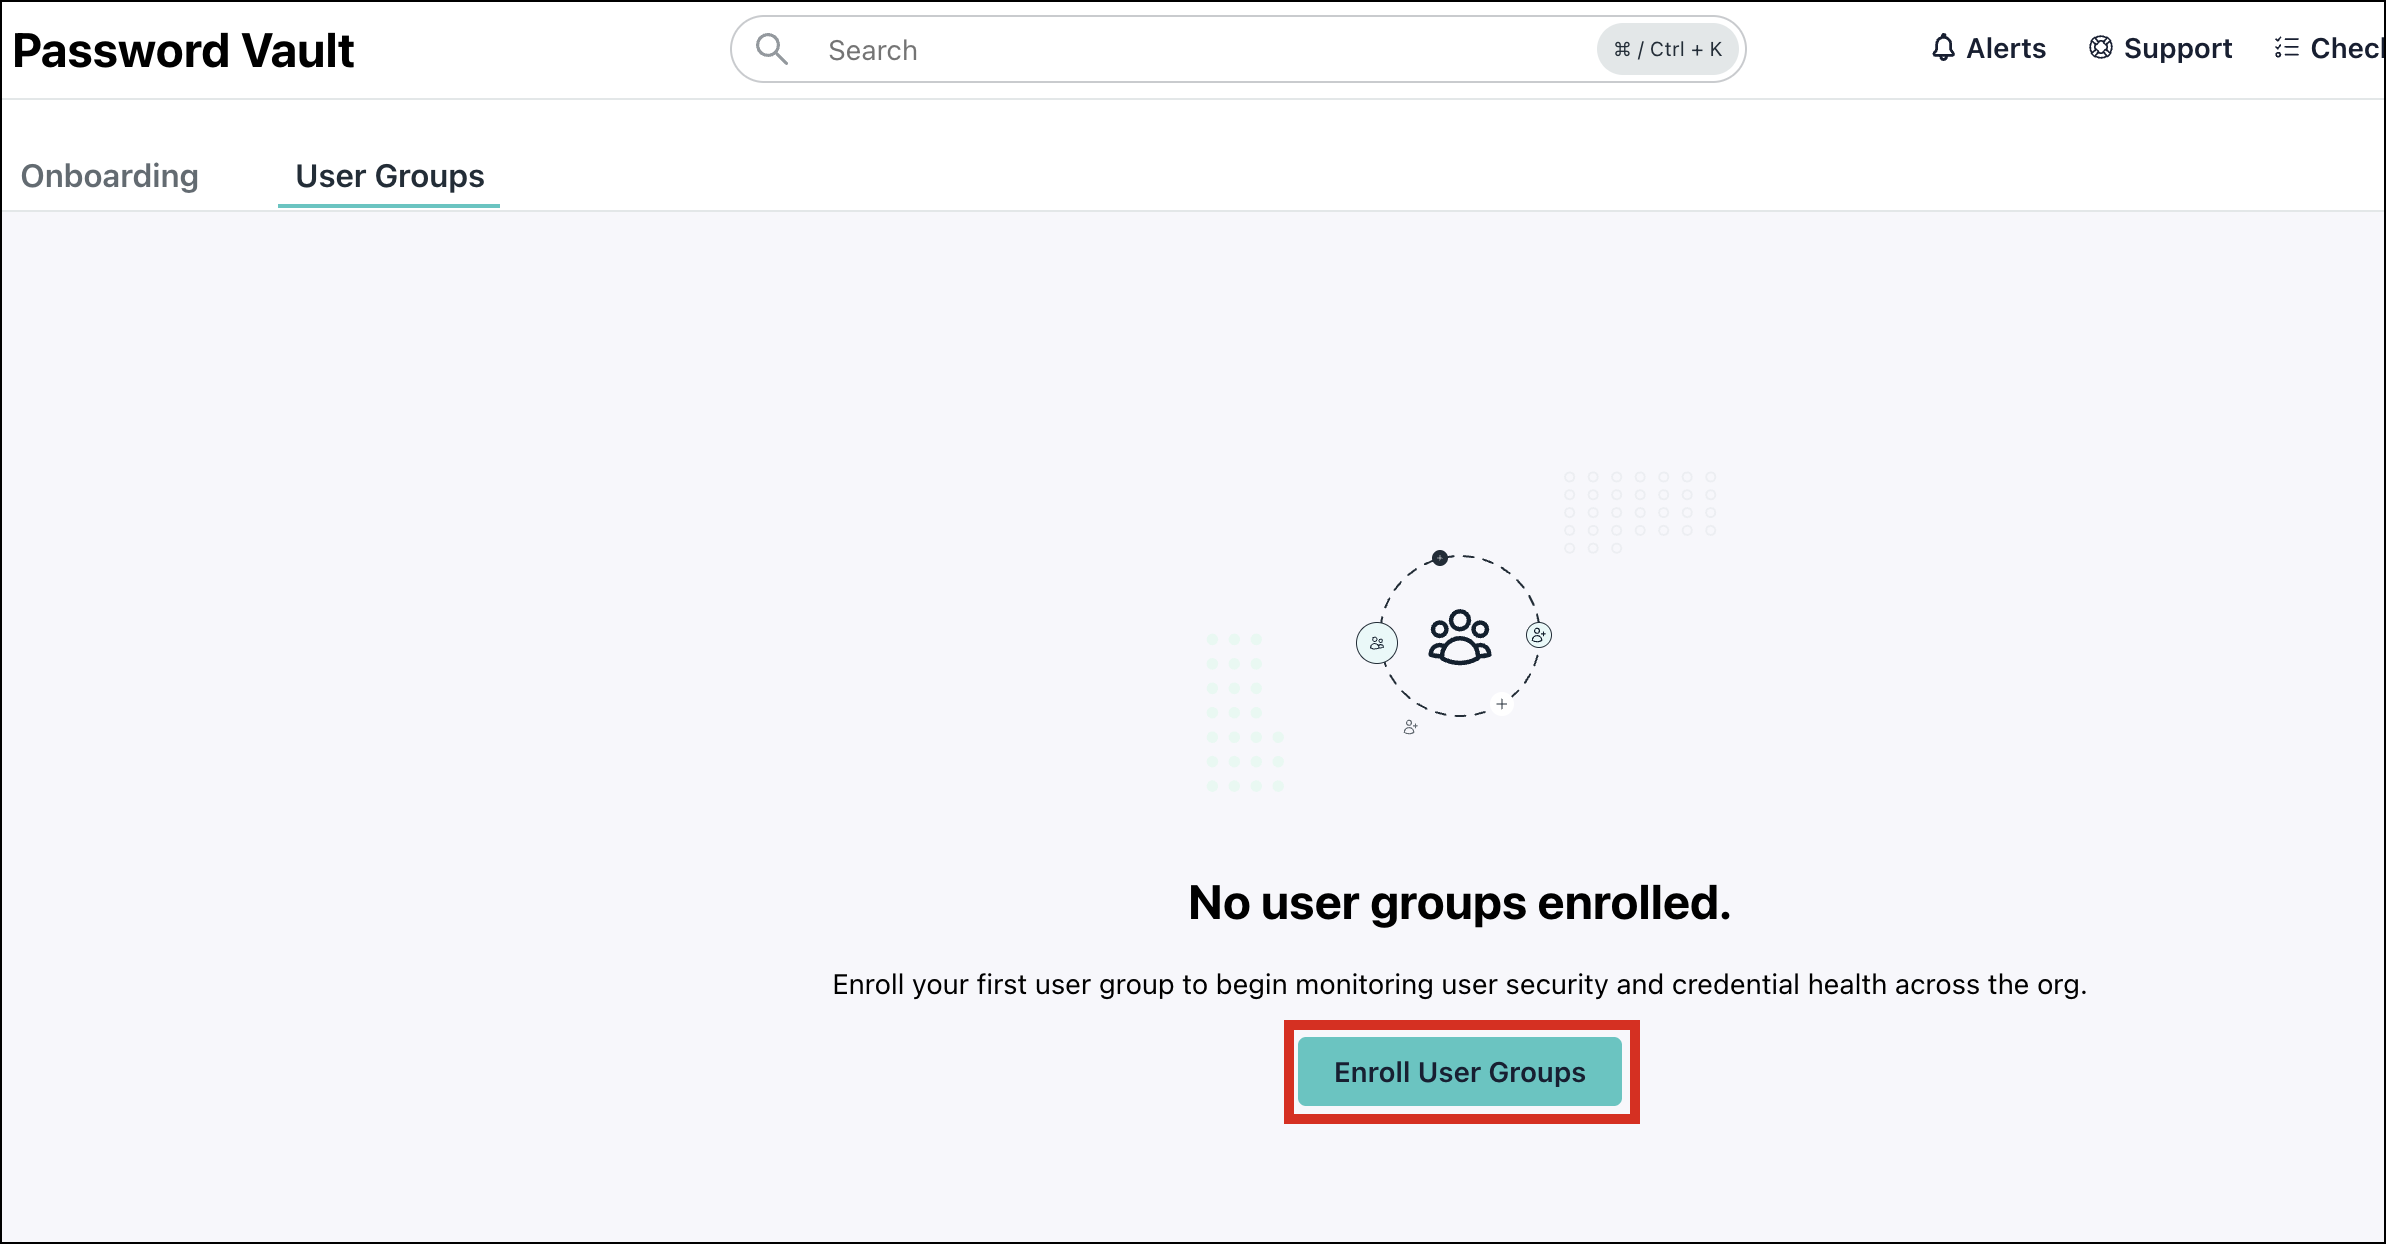
- Go to Access > Vault > User Groups.

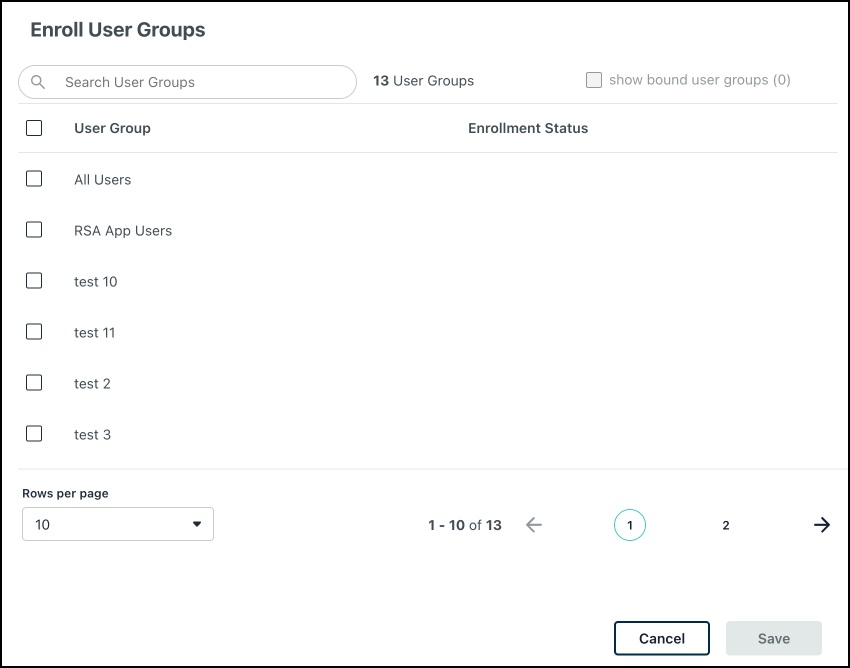
- Click Enroll User Groups. A popup appears.
- Select the desired user groups and click Save.

You have successfully enrolled a user group in the password manager.
To remove everyone’s access in a user group, click the three dots next to a user group and then click Revoke Access.
Browser Extensions
Password Manager autofill capabilities are available using the JC Go extension. See Installing the JumpCloud Go Browser Extension to learn more.
The autofill icon is displayed when users click the username field while logging in.
System Requirements
The JumpCloud Go browser extension must be installed on a supported web browser:
- Chromium-based browsers with the JumpCloud Go Chrome extension.
- Google Chrome, Microsoft Edge, and Brave (all platforms)
- Arc and Island (macOS only)
- Firefox with the JumpCloud Go Firefox extension.
- Safari browser on Mac.
- If the browser extension isn't installed, see Installing Browser Extensions Manually.
Overview
- Logging in: Users can log in using their JumpCloud SSO or access the password manager from the user console. A security code is sent to their email to verify user identity.
In the top right, following options are available:
- Language: Change the language as required.
- Bell icon: Click this icon to see notifications. You can also edit the notification settings from here.
- User Profile: Click this icon to see various user settings.
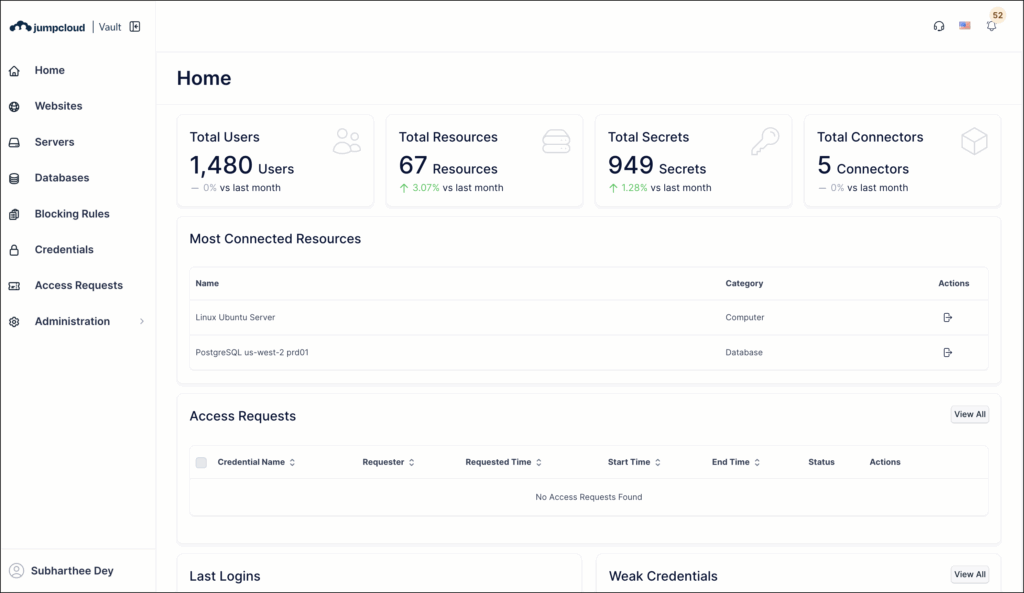
Dashboard
The dashboard gives an overview of some of the most important password manager statistics like:
- Most connected resources
- Latest activity
- Approval Requests
- Password Generator
- Resources
- Expiring and Expired credentials
- Old and Weak credentials
Credentials
Manage and share your administrative passwords, keys, and credentials on this page.
Adding and Managing Credentials
Go to the Credentials section to add and manage credentials.
- If you want to add credentials, see Vault: Add Credentials to learn more.
- If you want to add a private password, see Vault: Add Private Passwords to learn more.
- If you want to import credentials, see Vault: Import Credentials from External Tools to learn more.
Importing items from the existing JumpCloud Password Manager
To import items/credentials from the existing JumpCloud Password Manager:
- Open your existing JumpCloud Password Manager.
- Go to Settings > General and click Export as CSV option. Each .csv file corresponds to an item type/folder.
- Open the JumpCloud Vault.
- Go to Credentials.
- In the Excel Operation dropdown, click Import from external tools.
- Map the appropriate columns corresponding to Vault's credential fields.
- Select sharing preferences as required and click Import.
If you want to set the credential expiration, see Vault: Configure Credential Expiration Dates to learn more.
If you want to configure a request approval workflow, see Vault: Create Workflows to learn more.
You can add labels to your credentials to organize your resources. See Vault: Use Labels to Organize Resources to learn more.
Sharing credentials
Securely share resources with other users. See Vault: Securely Share Access with Other Vault Users to learn more.
You can also share credentials and websites through nested groups. See Vault: Groups to learn more.
Websites
See and manage websites to centralize credentials and secure access of users in your Org. If you want to add websites, see Vault: Add and Secure a Website to learn more.
Administration
![]()
This section is visible only to Admins.
- Groups: Share credentials and websites through nested groups. See Vault: Groups to learn more.
- Roles: Create roles and assign them custom permissions. See Vault: Roles to learn more.
- Users: Manage users and permissions. If you want to grant Master Admin permissions to an existing user, see Vault: Add Master Admin Permission to learn more.
- Languages: Manage the languages on the user interface. If you want to modify user interface text, see Vault: Modify Texts to learn more.
- Audit logs: View and manage audit logs. See Vault: Monitor Credential Activity to learn more.
- Settings: View and manage your application settings. See Vault: Configure Security Settings to learn more.
If users want to store private secrets, they can enable this option in Settings. See Vault: Private Passwords to learn more.