
JumpCloud Go™ provides the most secure and convenient way for you to access JumpCloud-protected resources the moment you unlock your managed device. Other than initial registration, you won’t need to enter your email, password, and MFA every time you access your resources. Instead, verify your identity at device login, unlock, or in the browser using your device password or biometric device authenticator (Apple Touch ID and Windows Hello).
![]()
This article covers JumpCloud Go for desktops. To use JumpCloud Go on Apple and Android mobile devices, see following to learn more:
Prerequisites:
- JumpCloud Go needs to be enabled by your admin in the Admin Portal. See Get Started: JumpCloud Go.
- A supported web browser with the appropriate JumpCloud Go extension installed:
- Chromium-based browsers (Google Chrome, Microsoft Edge, Brave, Arc, and Island) and the JumpCloud Go Chrome extension.
- Firefox and the JumpCloud Go Firefox extension.
- Safari and the JumpCloud Go Safari extension.
- If you don’t see the extension installed, jump to Installing the Browser Extension Manually.
- You need to be working from a JumpCloud-managed device and logged into your organizational device account.
- JumpCloud Go supports the following device types that meet these hardware requirements:
- macOS devices with a Secure Enclave.
- Windows devices with a Trusted Platform Module (TPM) 2.0.
- Linux devices with a Trusted Platform Module (TPM) 2.0.
- Biometrics are only supported on macOS and Windows devices. You’ll need to configure biometrics on your device authenticator to use them with JumpCloud Go:
- For macOS devices, see Apple’s Use Touch ID on Mac.
- For Windows devices, see Microsoft’s Learn about Windows Hello and set it up.
Considerations:
- On macOS devices, JumpCloud Go requires use of the onboard Touch ID sensor, so it does not support laptops docked with the lid closed (clamshell mode).
- For Linux devices:
- Biometrics aren't supported. You'll need to enter your local device password to verify your identity.
Registering JumpCloud Go
You'll have to register JumpCloud Go the first time you use it, and anytime you change your password. The registration flow is a traditional user portal login using your company email address and password.
![]()
Jump to Additional Resources for a tutorial video on using JumpCloud Go.

- In your browser, go to the JumpCloud User Portal.
- If you’re viewing the Administrator Portal Login, click User Portal Login in the top left of the page.
- Click Register Device.
- Enter your company email address and click Continue.
- On the next screen, enter your password and click Log in.
- If your organization enforces MFA, approve the authentication request with your configured authentication method. See MFA for Users.
- The Passwordless Login screen appears and your device is registered, redirecting you to the User Portal.
Using JumpCloud Go After Registration
After you’ve registered JumpCloud Go, you’ll have seamless and secure access to all of your JumpCloud-managed resources for 12 hours.
![]()
Logging in to your device or unlocking it will automatically refresh your JumpCloud Go session. The next time you go to the User Portal, you’ll have seamless access and won’t need to enter your device password or biometrics again.
If you're using a macOS or Windows device and you've configured biometrics, complete user verification with these authenticators:
- For macOS devices, see Apple’s Use Touch ID on Mac.
- For Windows devices, see Microsoft’s Learn about Windows Hello and set it up.
If you're using a Linux device or haven't configured biometrics on your macOS or Windows device, enter your device password to verify your identity with JumpCloud Go.
![]()
To test or troubleshoot verification with your device authenticator, see Troubleshoot: JumpCloud Go.
JumpCloud Go User Verification Workflows
When accessing a JumpCloud-managed resource where user verification is required, the login screen displays your company email and device avatar.
You’ll verify your identity using your device authenticator (macOS and Windows) or your local device password (Linux).
Verifying Your Identity on macOS Using Touch ID
- Go to the JumpCloud User Portal.
- On the Welcome Back! screen, click Log in with JumpCloud Go.

- On the Approve on Device screen, you’ll see a request from JumpCloud Go to use Apple Touch ID to verify your identity.
- Enter your fingerprint with Touch ID to complete the authentication.

![]()
If you haven't configured Touch ID on your device, you’ll need to enter your device password to verify your identity with JumpCloud Go.
- You're directed to the JumpCloud User Portal to access your resources.
Verifying Your Identity on Windows Using Hello
- Go to the JumpCloud User Portal.
- On the Welcome Back! screen, click Log in with JumpCloud Go.
- On the Passwordless Login screen, you’ll see a request from JumpCloud Go to use Windows Hello to verify your identity.

- Enter your fingerprint (or other configured biometric) to complete the verification.


![]()
If you have not configured Windows Hello on your device, you’ll need to enter your device password to verify your identity with JumpCloud Go.
- You’ll see Hello upon successful authentication.
- You're directed to the JumpCloud User Portal to access your resources.
Verifying Your Identity on Linux
- Go to the JumpCloud User Portal.
- On the Welcome Back! screen, click Log in with JumpCloud Go.
- Enter your local device password to verify your identity.
- You're directed to the JumpCloud User Portal to access your resources.
Logging Out of JumpCloud Go
Logging out of the User Portal preserves your JumpCloud Go session so you don't have to register the next time you access a resource. If you need to end your JumpCloud Go session to re-register your device or to troubleshoot an issue, you can do so from the User Portal Security tab.
To log out of JumpCloud Go and end your session on your device:
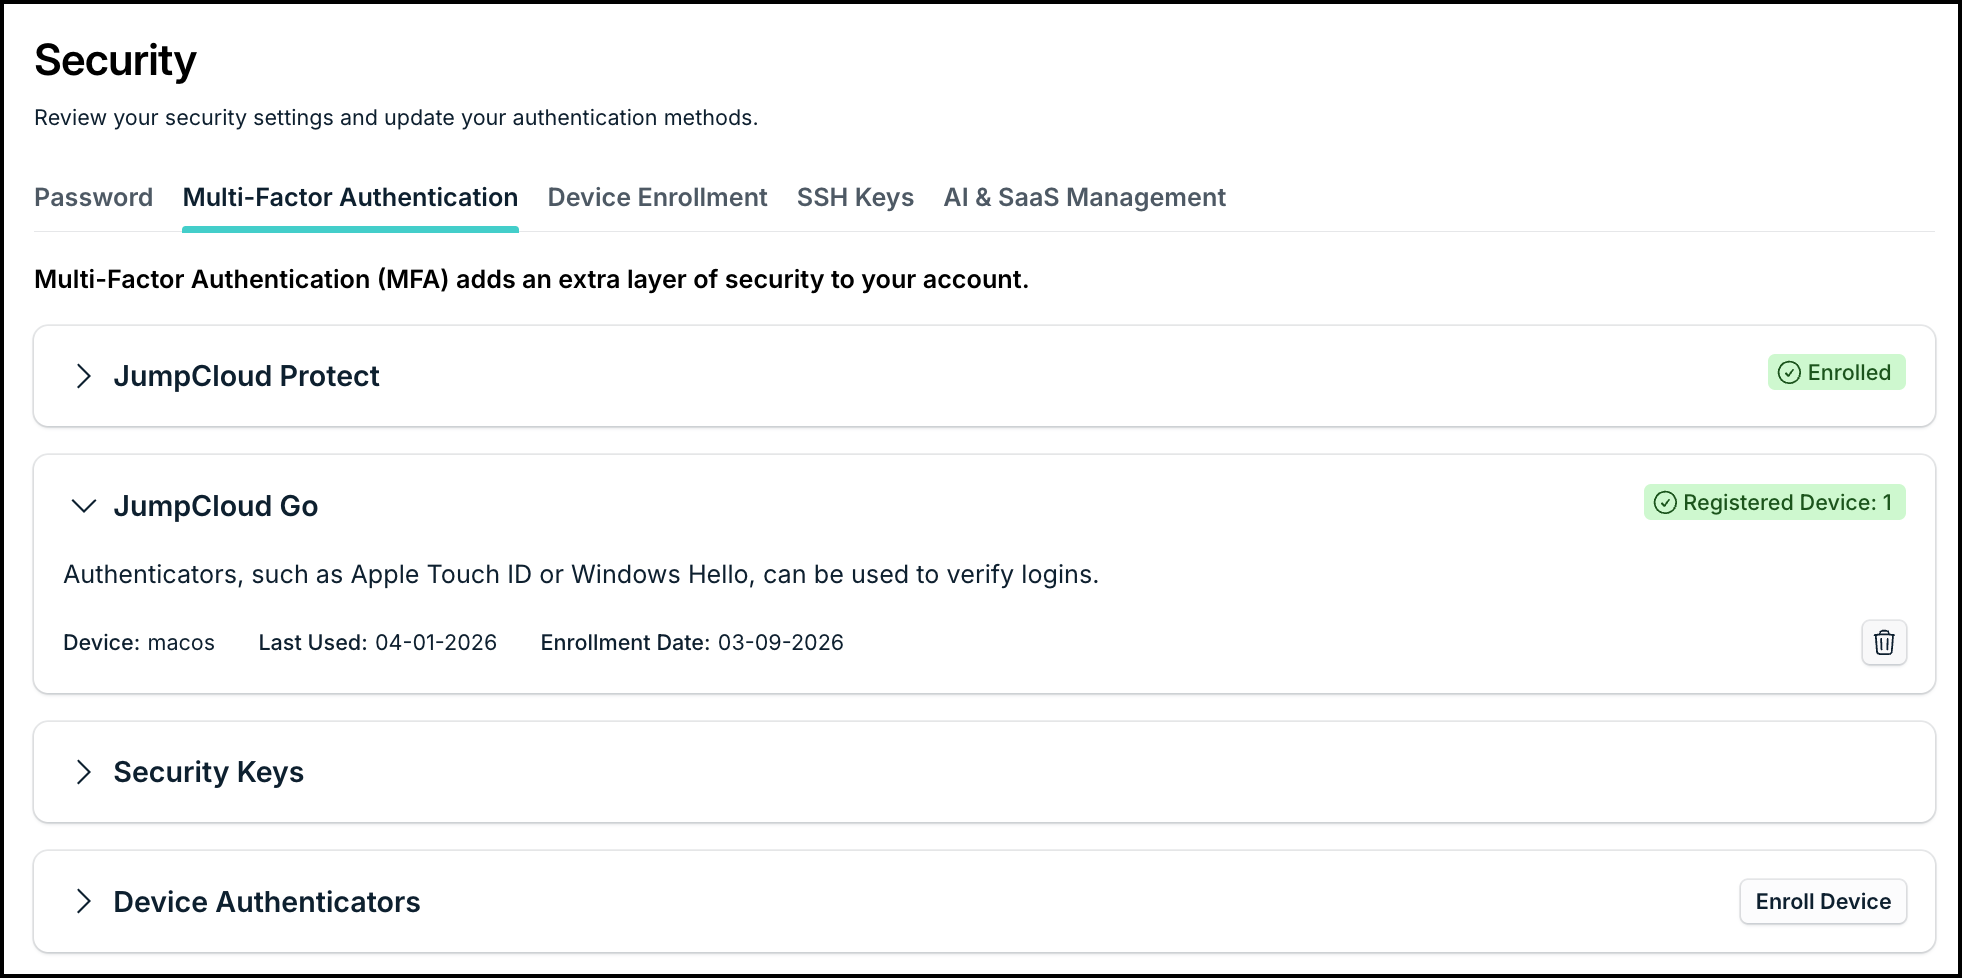
- In the JumpCloud User Portal, go to Security > Multi-factor Authentication.
- Expand the JumpCloud Go section.

- Click the Delete icon for the device for which you want to delete the JumpCloud Go credential.
- Then, click Delete Credentials.
Installing the Browser Extension Manually
If you don’t see the JumpCloud Go extension in the browser on your device, install it manually using the steps in the following section.
Google Chrome

To add the JumpCloud Go browser extension to Google Chrome:
- Go to the JumpCloud Go browser extension in the Chrome Web Store.
- Click Add to Chrome.
- When prompted to Add “JumpCloud Go?”, click Add extension.
- The extension is added to Google Chrome.
![]()
With the JumpCloud Go browser extension installed in Google Chrome, you can access the User Portal at any time by clicking on the Go extension button.
To pin the JumpCloud Go extension to the toolbar:
- In Google Chrome, click the Extensions (puzzle piece) button.
- In the drop-down list of extensions, click the pin next to the JumpCloud Go extension.
- Click the JumpCloud Go icon to access the User Portal at any time.


Microsoft Edge
To add the JumpCloud Go extension to Microsoft Edge:
- In Edge, go to the JumpCloud Go browser extension in the Chrome Web Store.
- In the top banner under JumpCloud Go™ works on Microsoft Edge, click Get Extension.

- Click Allow under Allow extensions from other stores.
- When prompted to Add “JumpCloud Go™" to Microsoft Edge?, click Add extension.
- The extension is added to Edge and you can now use JumpCloud Go.

Chromium-based Browsers
You can also add the JumpCloud Go browser extension to other Chromium-based browsers (Brave) by installing it directly from the Chrome web store.
![]()
The process to install the extension may differ slightly depending on the browser you're using.
Firefox
To add the JumpCloud Go extension to Firefox:
- In Firefox, go to the JumpCloud Go browser extension.
- Click Add to Firefox.
- In the top-right Add JumpCloud Go popup, click Add and then click Okay.
- The extension is added to Firefox and you can now use JumpCloud Go.
Uninstalling the Browser Extension
To manually remove the JumpCloud Go extension from the browser on your device:
- In the browser, go to Settings by clicking the 3 dots at the top-right corner.
- Click Extensions > Manage Extensions.
- Locate the JumpCloud Go Browser Extension and click Remove.
Troubleshooting
See Troubleshoot: JumpCloud Go.
Additional Resources
- Enroll: JumpCloud Go
- Show Me: Using JumpCloud Go