


 Subscribe to Help Center RSS Feed
The Approval Flow page lets admins create approval flows for end users to submit access requests. Admins can also organize resources and set up auto-approval flows, reducing their workload.
To create an approval flow:
- Log in to the JumpCloud Admin Portal.

If your data is stored outside of the US, check which login URL you should be using depending on your region. If your organization uses LDAP, RADIUS, or requires firewall allow list configuration, the Fully Qualified Domain Names (FQDNs) will also be region specific. See JumpCloud Data Centers for the URLs, FQDNs, and IP addresses.
- Go to Access > Access Requests.
- On the Access Requests page, go to the Approval Flow tab.

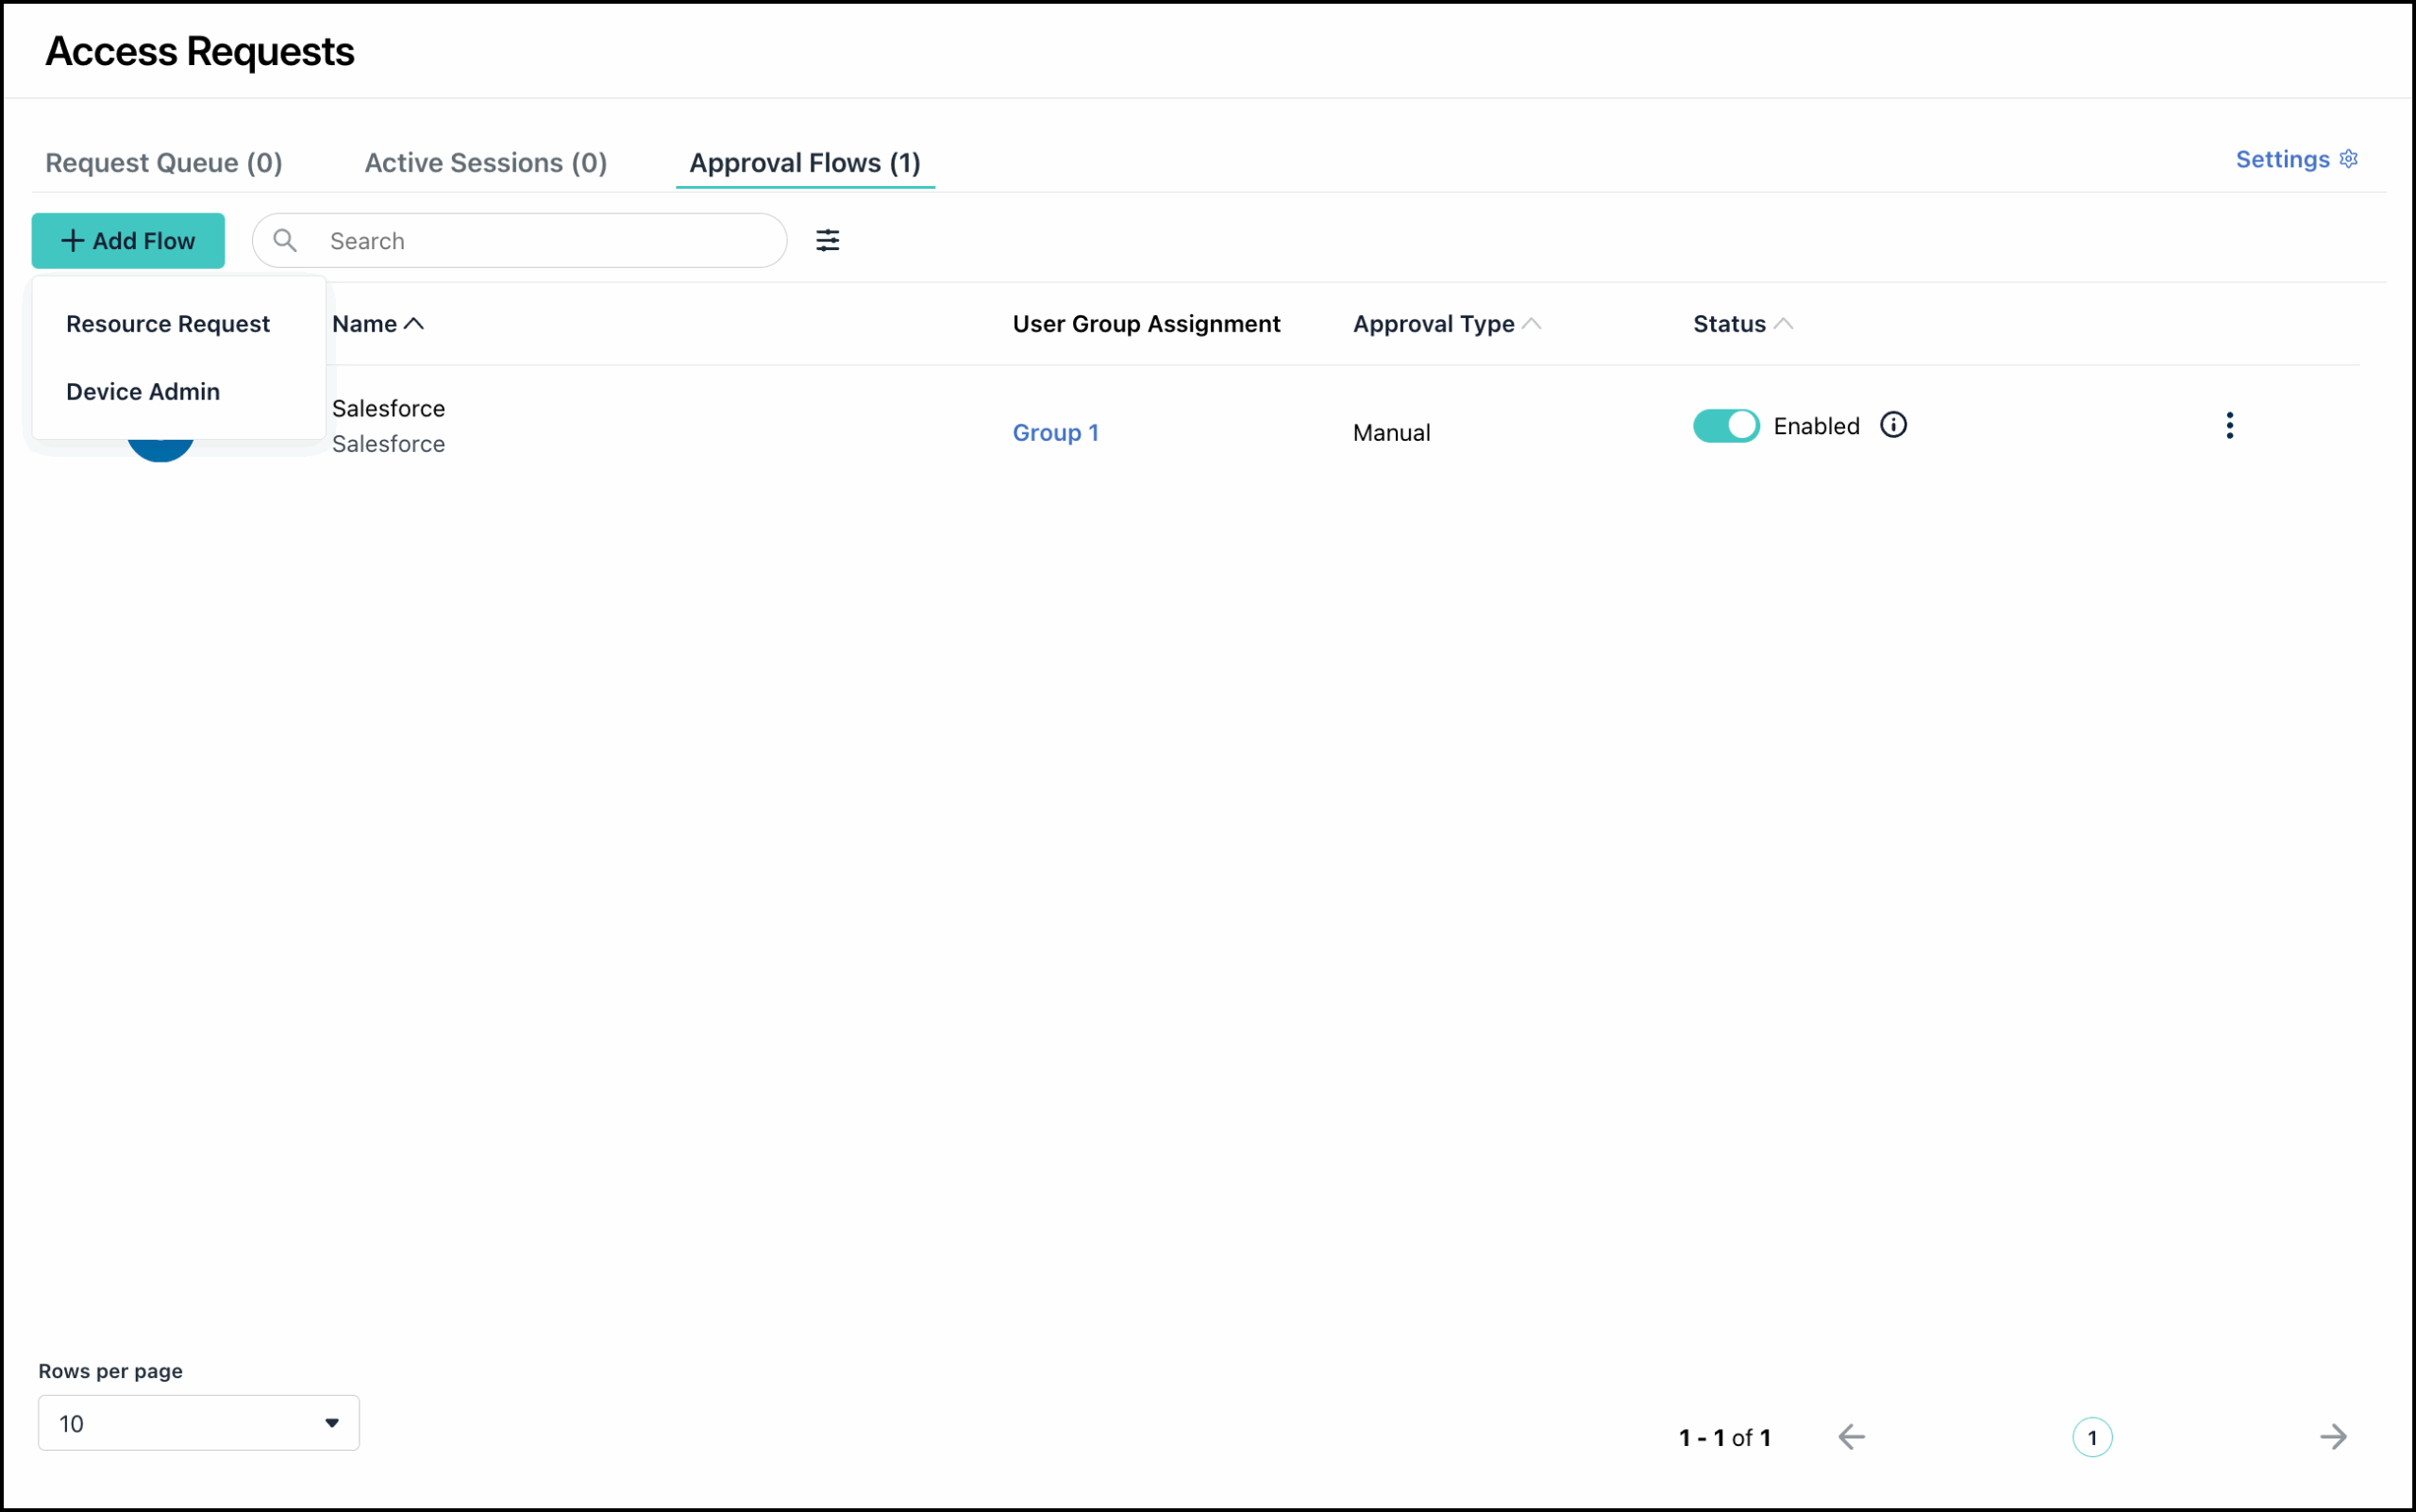
- On the Approval Flow page, click Add Flow.
You will see two options:- Resource Request: Use this for standard application access (SaaS apps, internal tools, and so on).
- Device Admin: Use this for device admin privileges for specific devices.
- Select the required option to proceed creating the approval flow.
Creating a Resource Request Flow
Creating resource request flows can help you efficiently manage how users gain access to required tools and applications. By defining Timed Access presets, you can ensure permissions automatically expire once the need is met. You can assign specific approvers and enable Slack Integration to receive and manage access requests directly within your configured channels.
To create a resource request flow:
- On the Approval Flow page, click Add Flow.
- Select Resource Request from the dropdown. You will see the Add Approval flow page.

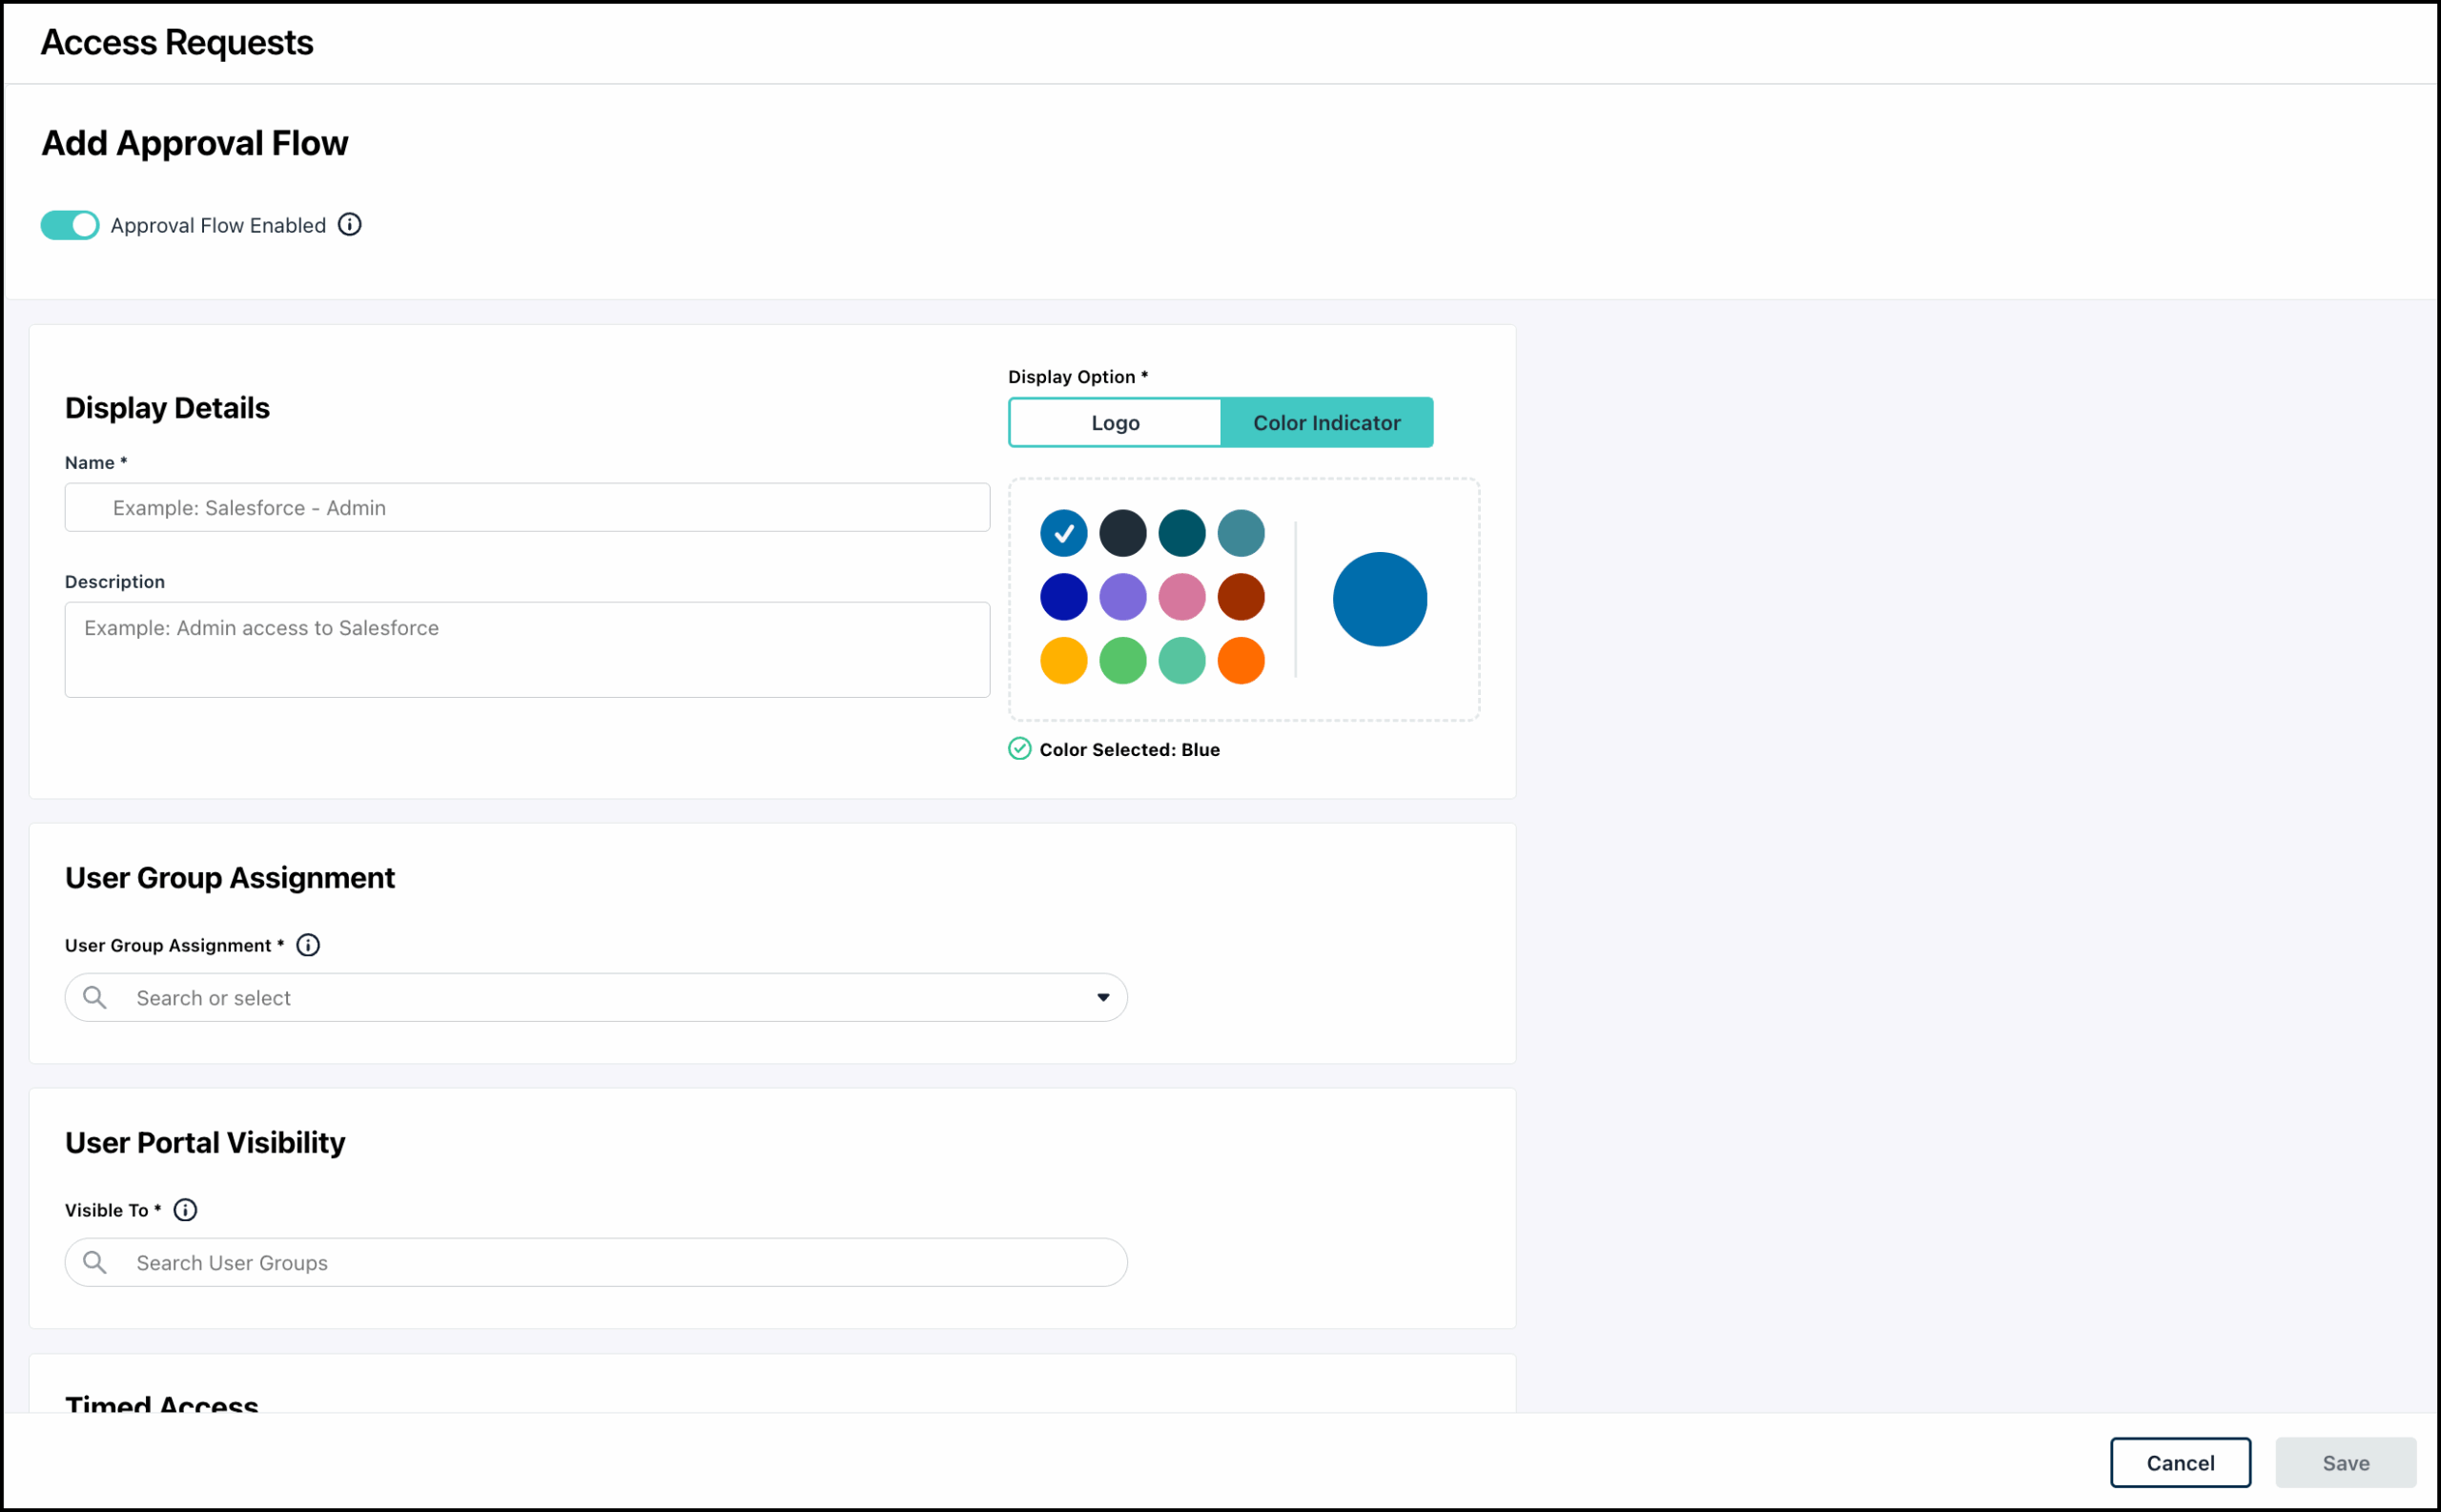

Leave the Approval Flow Enabled toggle as is. Users will not see the approval flow in the Resource Request section if this is disabled.
- Enter a name as it should appear to users in the user portal.

The name should be concise, clear, and describe the approval flow's purpose.
- Enter a description. This will also be visible to the users in the user portal. You can add more details about the approval flow here.
- For Display Option, you can select:
- Logo: Select the resource logo from the available options.
- Click Choose A Logo.
- Use the search bar to search and select the logo.
- Click Choose.
- Color Indicator: If the logo is not listed, you can assign a color to the resource instead.
- Logo: Select the resource logo from the available options.
- Use the User Group Assignment dropdown to select the user group to which users will be assigned once approved. After approval, users will be added to the selected group and gain access to all resources approved for that group.
- Use the User Portal Visibility dropdown to select the user group that can view this approval flow. All users in the selected group will be able to see it in the Requests section of the User Portal under Resources.
- In the Timed Access section, select Enable Time-based Access to allow users to request access for a specific time period.
You can use this option to grant temporary, just-in-time access instead of permanent permissions, making the system much safer and easier to manage.
- To configure the duration of access, select the appropriate option from the Time to Live Configuration drop-down. The following options are available:
- Define Durations for users to choose - When selected, this option lets users choose from a predefined set of durations that you configure in this section.
- Select a fixed duration - When selected, users will be able to request access for a duration that you specify.
- Next, in the Time to Live section, select one of the predefined duration options or set a Custom duration.
The options displayed in this section are dependent on your selection in the previous step. You must select at least one duration to proceed.
- Select the Approval type:
- Automatic: Select this for requests where users can have access, but need to request it first.
- Manual: Select this for critical resources that require review and access granted based on user justification.
- If you selected Manual in the previous step, select the Approver Type from the dropdown to add assigned approvers (non admin users) for the flow.
- Administrator: Assign other admin users as approvers
If you select this option, you cannot assign other approver types. To add a specific admin as approver and use other approver types, use the Resource Owner option instead, and assign the admin user as an approver.
- Requester’s Manager: Assign the requester’s manager as approver.
Ensure the user’s manager is defined in Identity Management > Users > Details > Employment Information. See Add Users to the Admin Portal to learn more.
- Resource Owner: Assign the owner for the requested resource as an approver.
- User Group: Assign users from a user group as approvers. If you want approval from all users, select Require approval from all users in this group.
If an approver's details change - such as a requester's manager changing or an approver becoming inactive - an administrator must manually update the workflow. Any pending requests will enter an error state, requiring the admin to deny or cancel them and ask the requester to submit a new one.
- Search and select the user that you want to assign as Approver from the list.
- Click the (+) icon to add more approvers to the approval flow.
- Select your preferred Approver Requirement:
- At least one approver type
- All approver types
- All approver types, in specific order
- (Optional) Enable Slack Channel Approvals to receive notifications and manage the entire approval process directly within Slack.
- Click Allow Slack Approvals.
If you’ve selected Administrator as the approver, you can choose to send notifications to channels or via direct messages. For all other approver types, users will be notified via direct messages.
- If your approver is the administrator, you can either:
- Send in-channel notifications: Search and select the notification channels that you want to be notified. All slack channels configured in the JumpCloud portal will be displayed here. If you don’t have channels configured, see Configure a Slack Channel to learn more.
- Send notifications via direct message: Approver will receive notifications via direct messages.
- Once a request is submitted, your assigned approvers will get a notification so they can approve or deny it directly in Slack. See Managing Approvals in Slack to learn more.
Go to Settings > Notifications > Slack. If you already have your Slack workspace configured, you will see a banner to reconnect your Slack. Click Reconnect Slack and follow the steps above, to connect your Slack workspace with the updated settings for receiving direct messages. See Configure a Slack Channel to learn more.
- Click Save.
The approval flow is created and displayed in the Approval Flow page.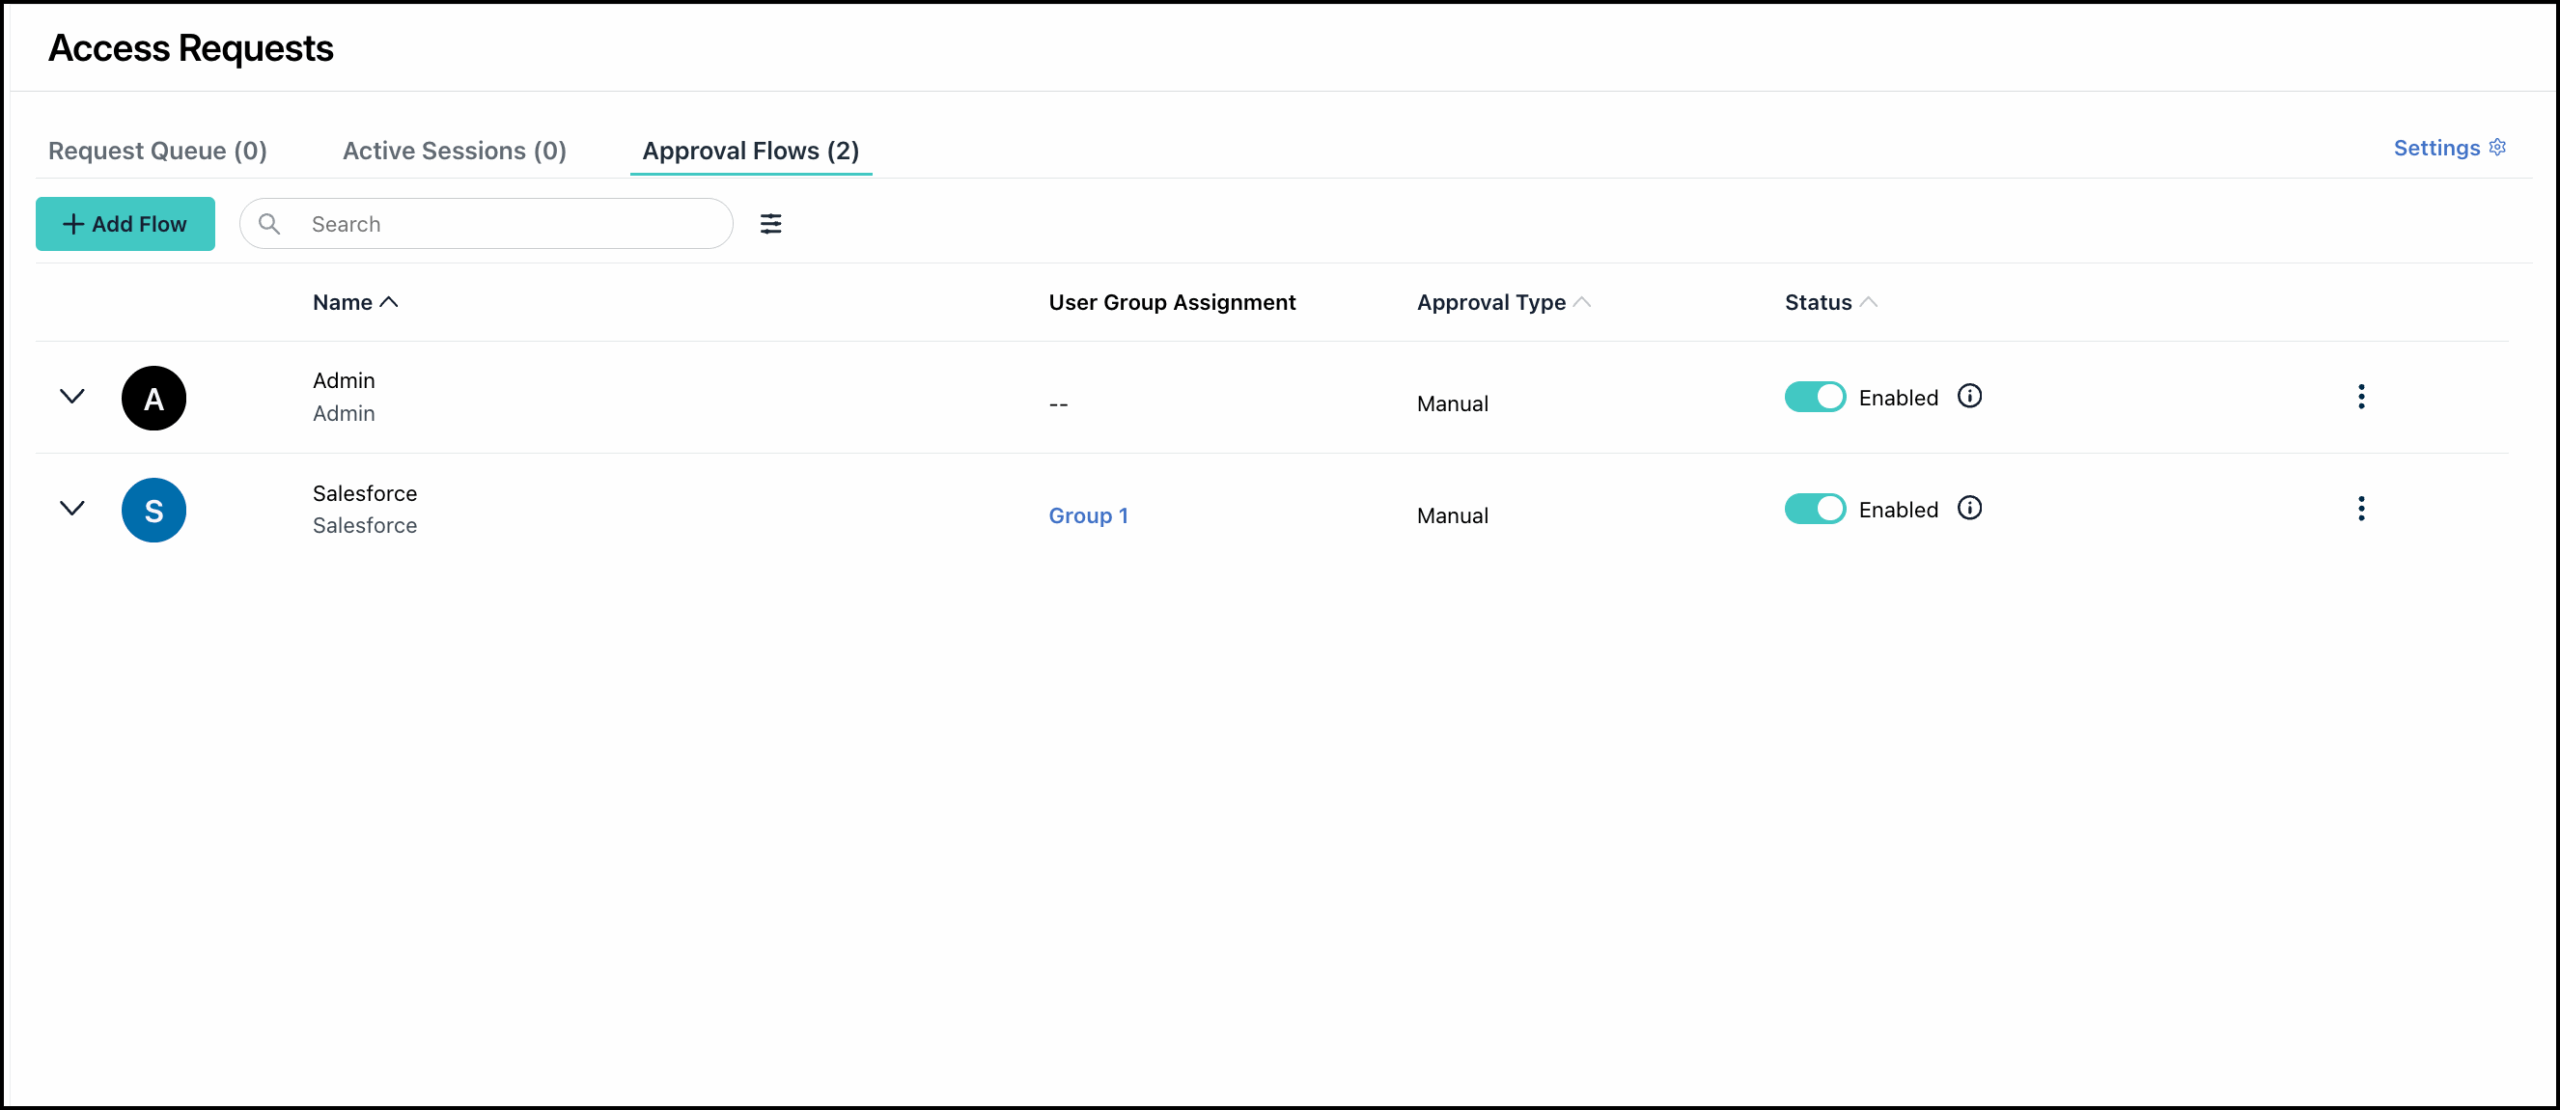
This will also appear in the Requests > Resources section of the User Portal for all users in the selected user group under User Portal Visibility.
Creating a Device Admin Flow
Creating device admin flows can help you efficiently manage how you grant admin permissions. Define which users (user groups) can request admin privileges and set strict time limits to ensure high-level access is automatically revoked once the task is complete. With Device Admin flows, you can ensure the right users get the keys to the right devices, but only for as long as they actually need them.
To ensure the Device Admin Flow functions correctly, you must enable Global Certificate Distribution via Conditional Access Policies (CAP). Certificate distribution is required for the authentication mechanism to recognize if requests are coming from JumpCloud managed devices. See Manage Conditional Access Policy Certificates for Desktop to learn more about enabling this. 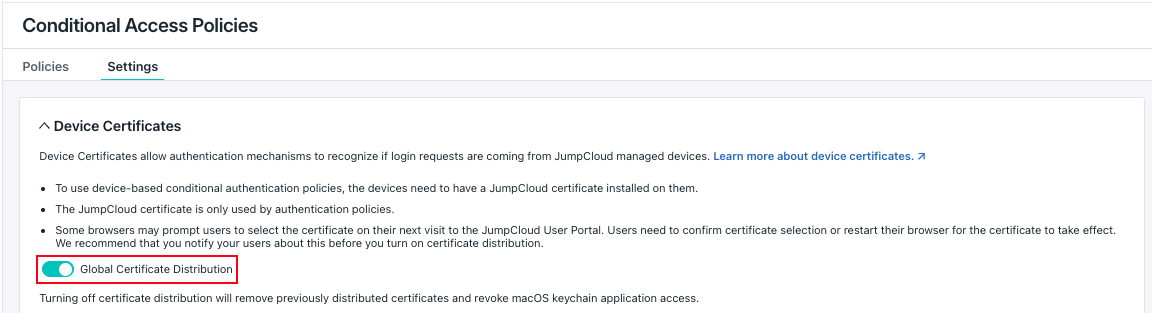
- For Windows and Linux, the certificate install silently.
- Mac users may see a prompt to add the certificate to their keychain.
Once the certificate is installed, JumpCloud will automatically recognize the device as "Managed" during authentication.
To create a device admin flow:
- On the Approval Flow page, click Add Flow.
- Select Device Admin from the dropdown. You will see the Add Device Admin Flow page.

- Enter a name as it should appear to users in the user portal.
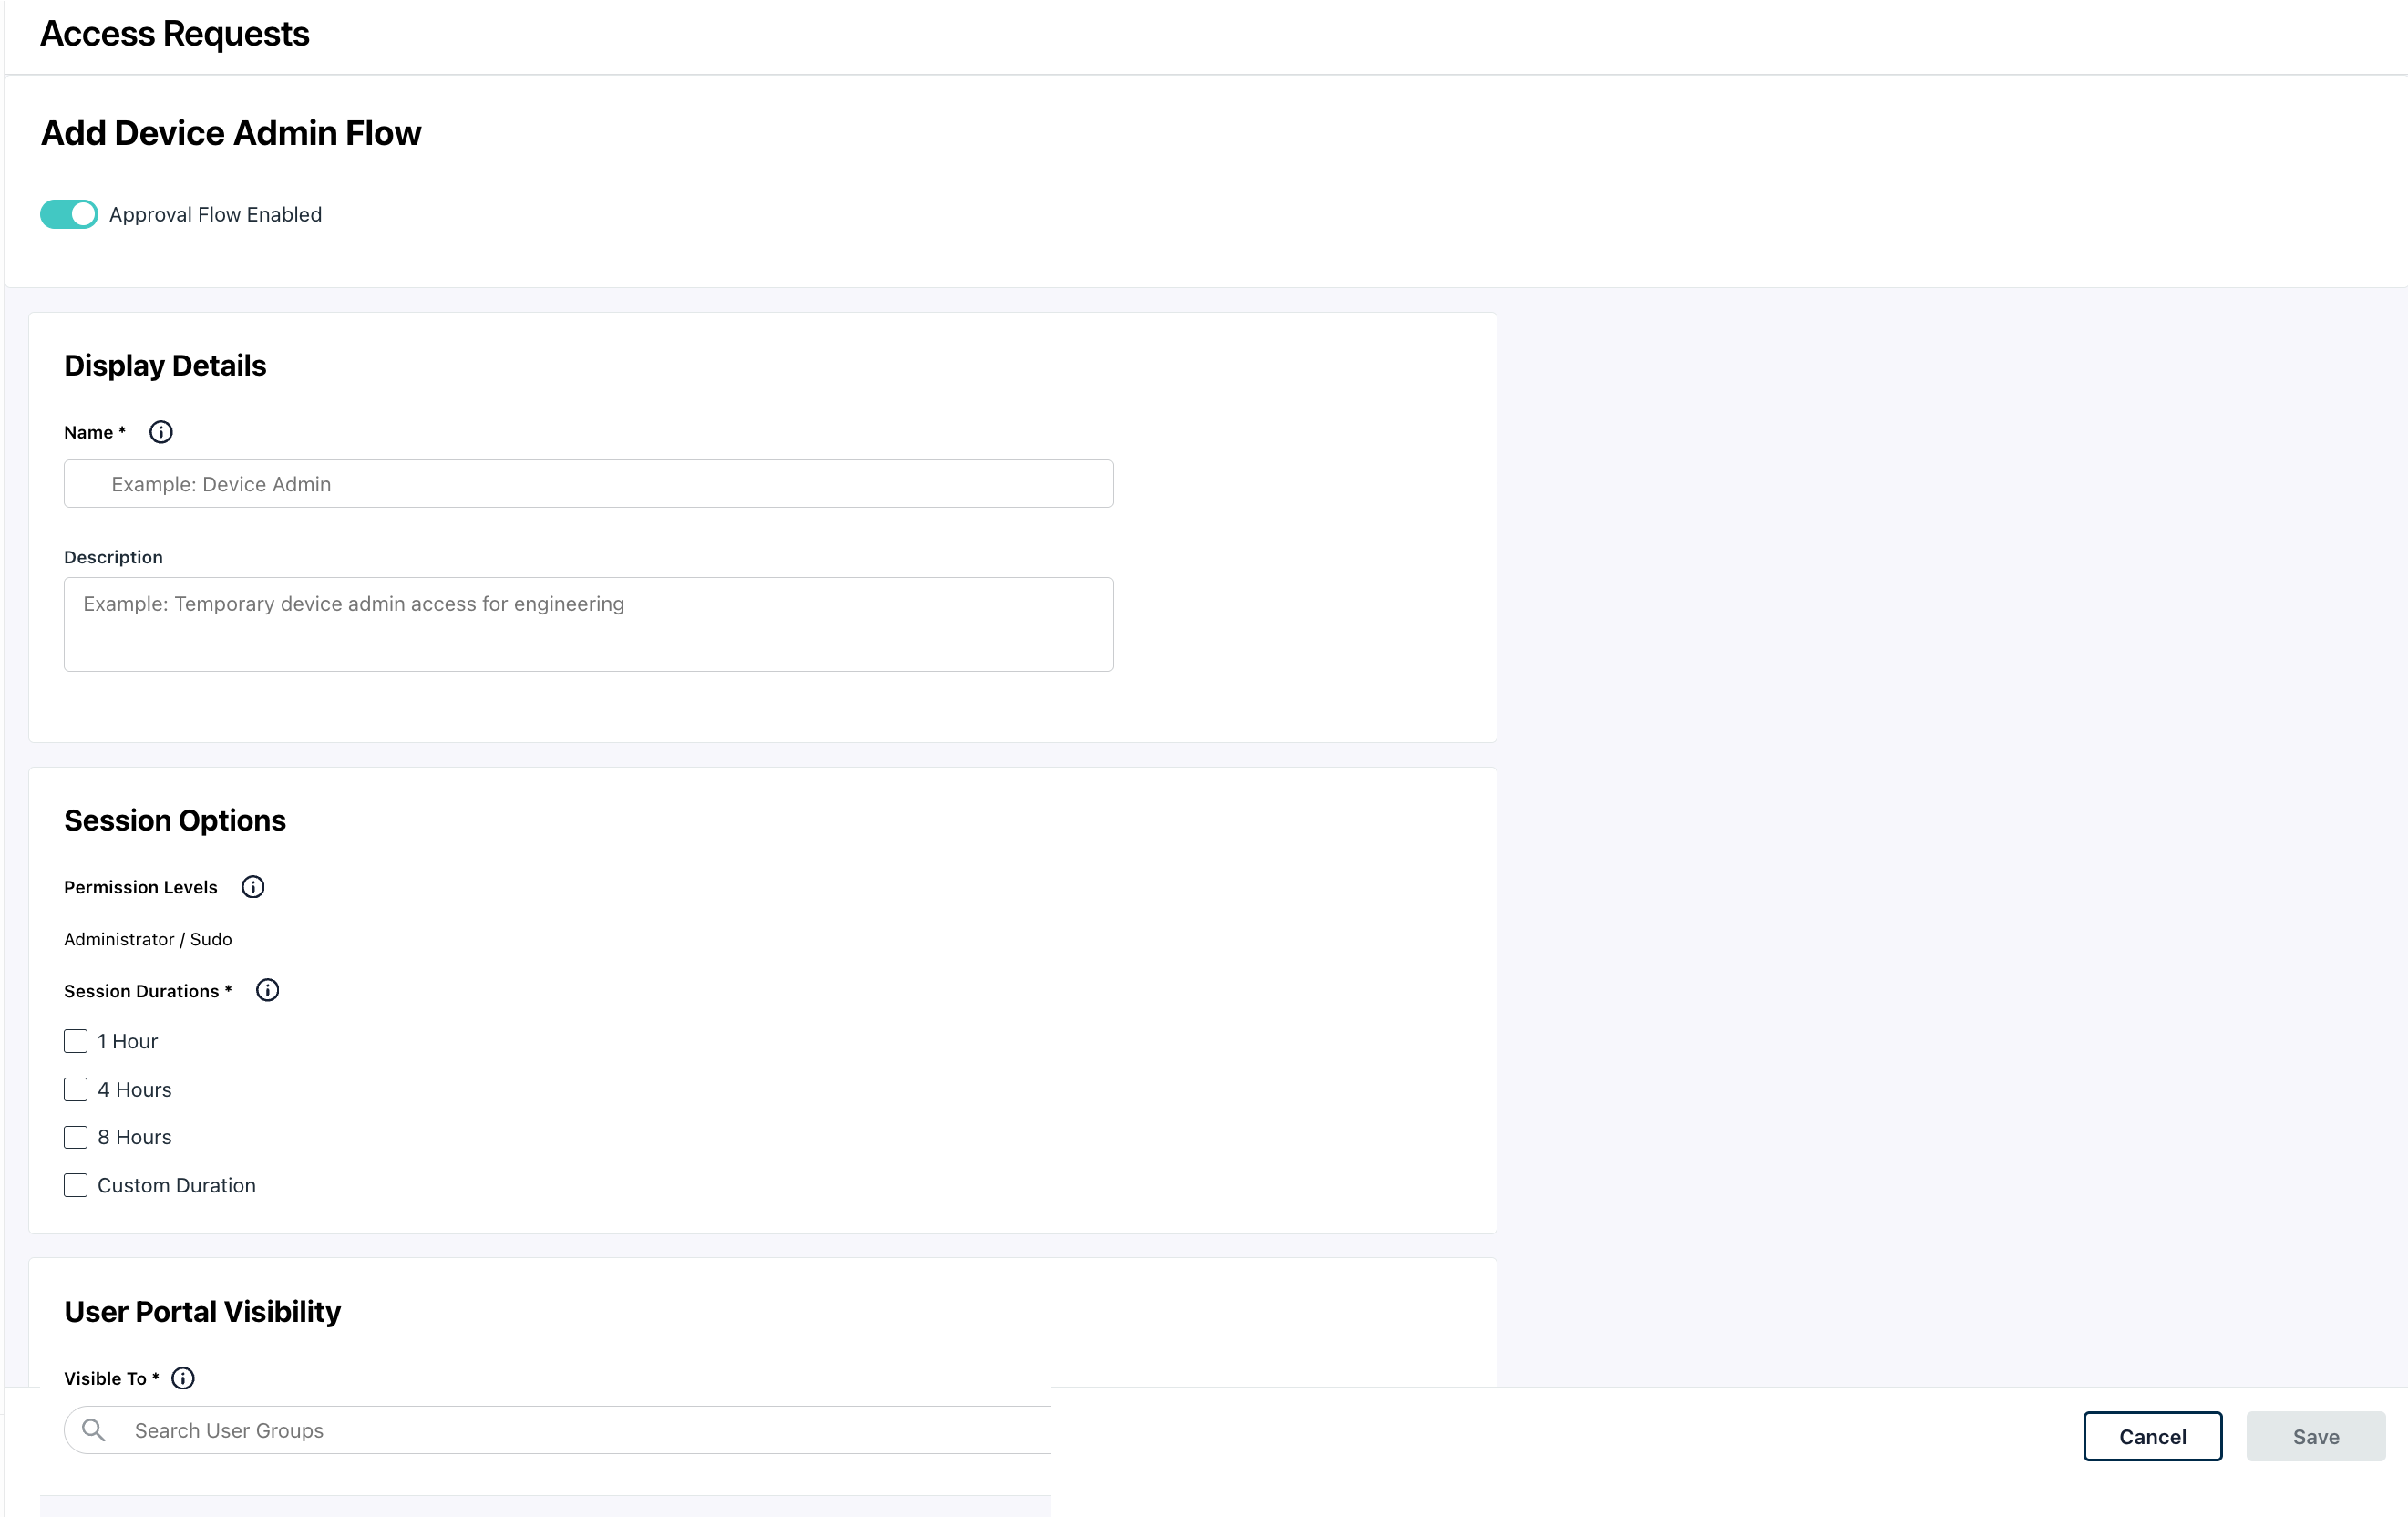
The name should be concise, clear, and describe the approval flow's purpose.
- Enter a description. This will also be visible to users in the user portal. You can add more details about the approval flow here.
- In the Session Options section, choose how long the admin access should remain active for the selected user and device. You can select one of the predefined Session Durations or set a Custom duration.
If you select more than one option here, users will be able to pick a duration from the dropdown while creating a request.
- Use the User Portal Visibility dropdown to select the user groups that can view this approval flow. All users in the selected group will be able to see it in the Requests section of the User Portal under Access.
- Select the Approval type:
- Automatic: Select this for requests where users can have access, but need to request it first.
- Manual: Select this for critical resources that require review and access granted based on user justification. For Manual approvals, Administrator is selected by default. Currently, only admins can approve Device Admin access requests.
- Click Save.
The approval flow is created and displayed in the Approval Flow page.
This will also appear in the Requests > Access section of the User Portal for all users in the selected user group under User Portal Visibility.
Once you approve a request, the user must click Start Session to begin. You can monitor all ongoing activity in the Active Sessions tab, however, a session will only appear there after the user has officially started it.
Users will also be able to submit requests and start their sessions from the JumpCloud Menu Bar App. See Users: Access Requests to learn more.
 In this Article
 Learn More