
You can manage approval flows in the Approval Flows page in Access Requests. You can view, edit, delete and disable flows as required.
- Login to the JumpCloud Admin portal.
![]()
If your data is stored outside of the US, check which login URL you should be using depending on your region, see JumpCloud Data Centers to learn more.
- Go to Access > Access Requests.
- On the Access Requests page, click Approval Flow.
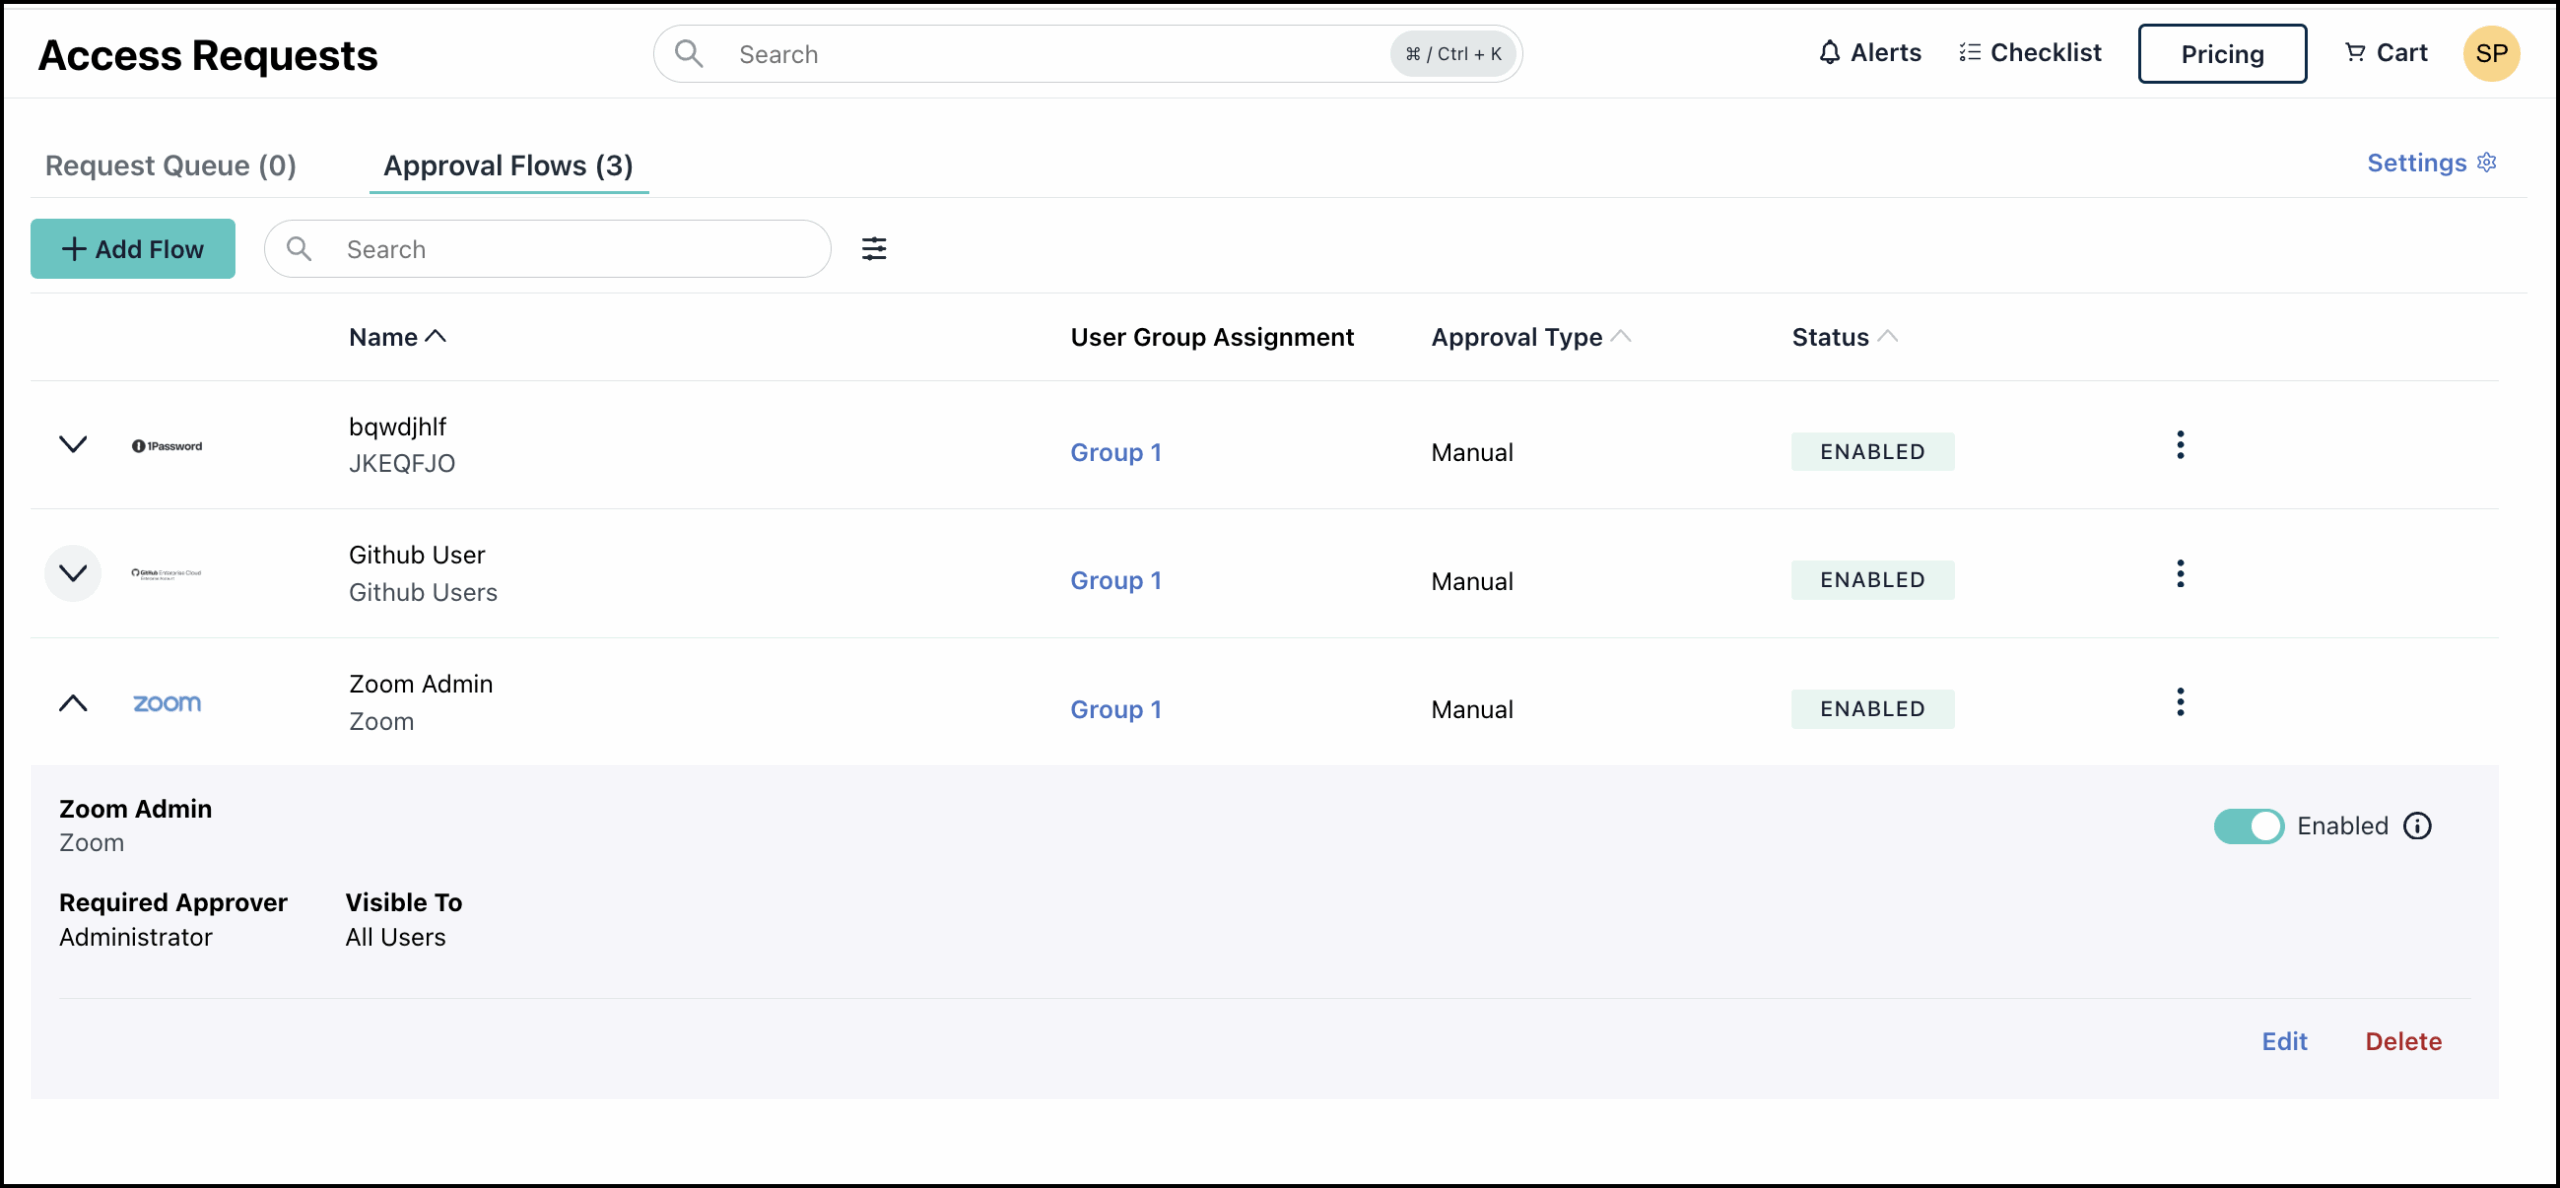
Viewing Approval Flow Details
Click the expand arrow next to each approval flow to view its details. You can view details such as approval flow name, approval type and the Visible To user groups.
- Use the toggle button to enable or disable the approval flow.
- You can edit or delete the approval flow using the respective buttons.
Editing Approval Flows
You can also modify approval flow details from the Approval Flows page.
To edit a approval flow:
- On the Approval Flows page, you can either:
- Click the expand arrow next to a approval flow to view its details and click Edit.
- Click the three dots next to each approval flow and select Edit from the dropdown.
- On the Edit Approval Flow page, modify the details as required. You can:
- Enable/Disable the approval flow
- Change the approval flow name, description, and logo
- Add/Remove user groups
- Update the Approval Type
- Add/ Remove Approver
- Update the Approver Requirement
- After making your changes, click Save.
If there are any pending requests associated with the approval flow, a warning message will appear. Click Edit Approval Flow to continue editing, or click Cancel to abort.
Copying Approval Flows
You can copy an existing approval flow and quickly edit it to make a new one.
- On the Approval Flows page, you can either:
- Click the expand arrow next to an approval flow and click the Copy button.
- Click the three dots next to each approval flow and select Copy from the dropdown.
The Edit Approval Flow page is displayed. Make changes as required. Don’t forget to Update the name and description to easily identify the flow.Click Save to create the new approval flow.
Disabling Approval Flows
If you don't want users to view or use an approval flow to request access, you can disable it as needed.
To disable an approval flow:
- On the Approval Flows page, you can either:
- Click the expand arrow next to an approval flow, and use the Enabled/Disabled toggle button.
- Click the three dots next to each approval flow, and select Disable from the dropdown.
If an approval flow is disabled, users won't be able to see it or submit requests through it in the User Portal. Admin can still manage the approval flow and re-enable it later.
![]()
Pending requests are unaffected by disabling a approval flow and will time out after 30 days of inactivity.
Deleting Approval Flows
You can also delete an approval flow from the Approval Flows page.
To delete an approval flow:
- On the Approval Flows page, you can either:
- Click the expand arrow next to a approval flow to view its details and click Delete.
- Click the three dots next to each approval and select Delete from the dropdown.
- A warning message will appear. Click Delete Approval Flow to proceed with deletion, or click Cancel if you wish to abort.
The approval flow is deleted and removed from the page.
![]()
Any pending requests related to the deleted approval flow will be Canceled, and users will be notified by email.
Managing Approvals in Slack
You can now create Approval Flows with Slack Channel Approvals to send approval request notifications directly to configured slack channels. You can also manage requests in Slack. You will receive a notification when a user submits a request.
To manage approvals in Slack:
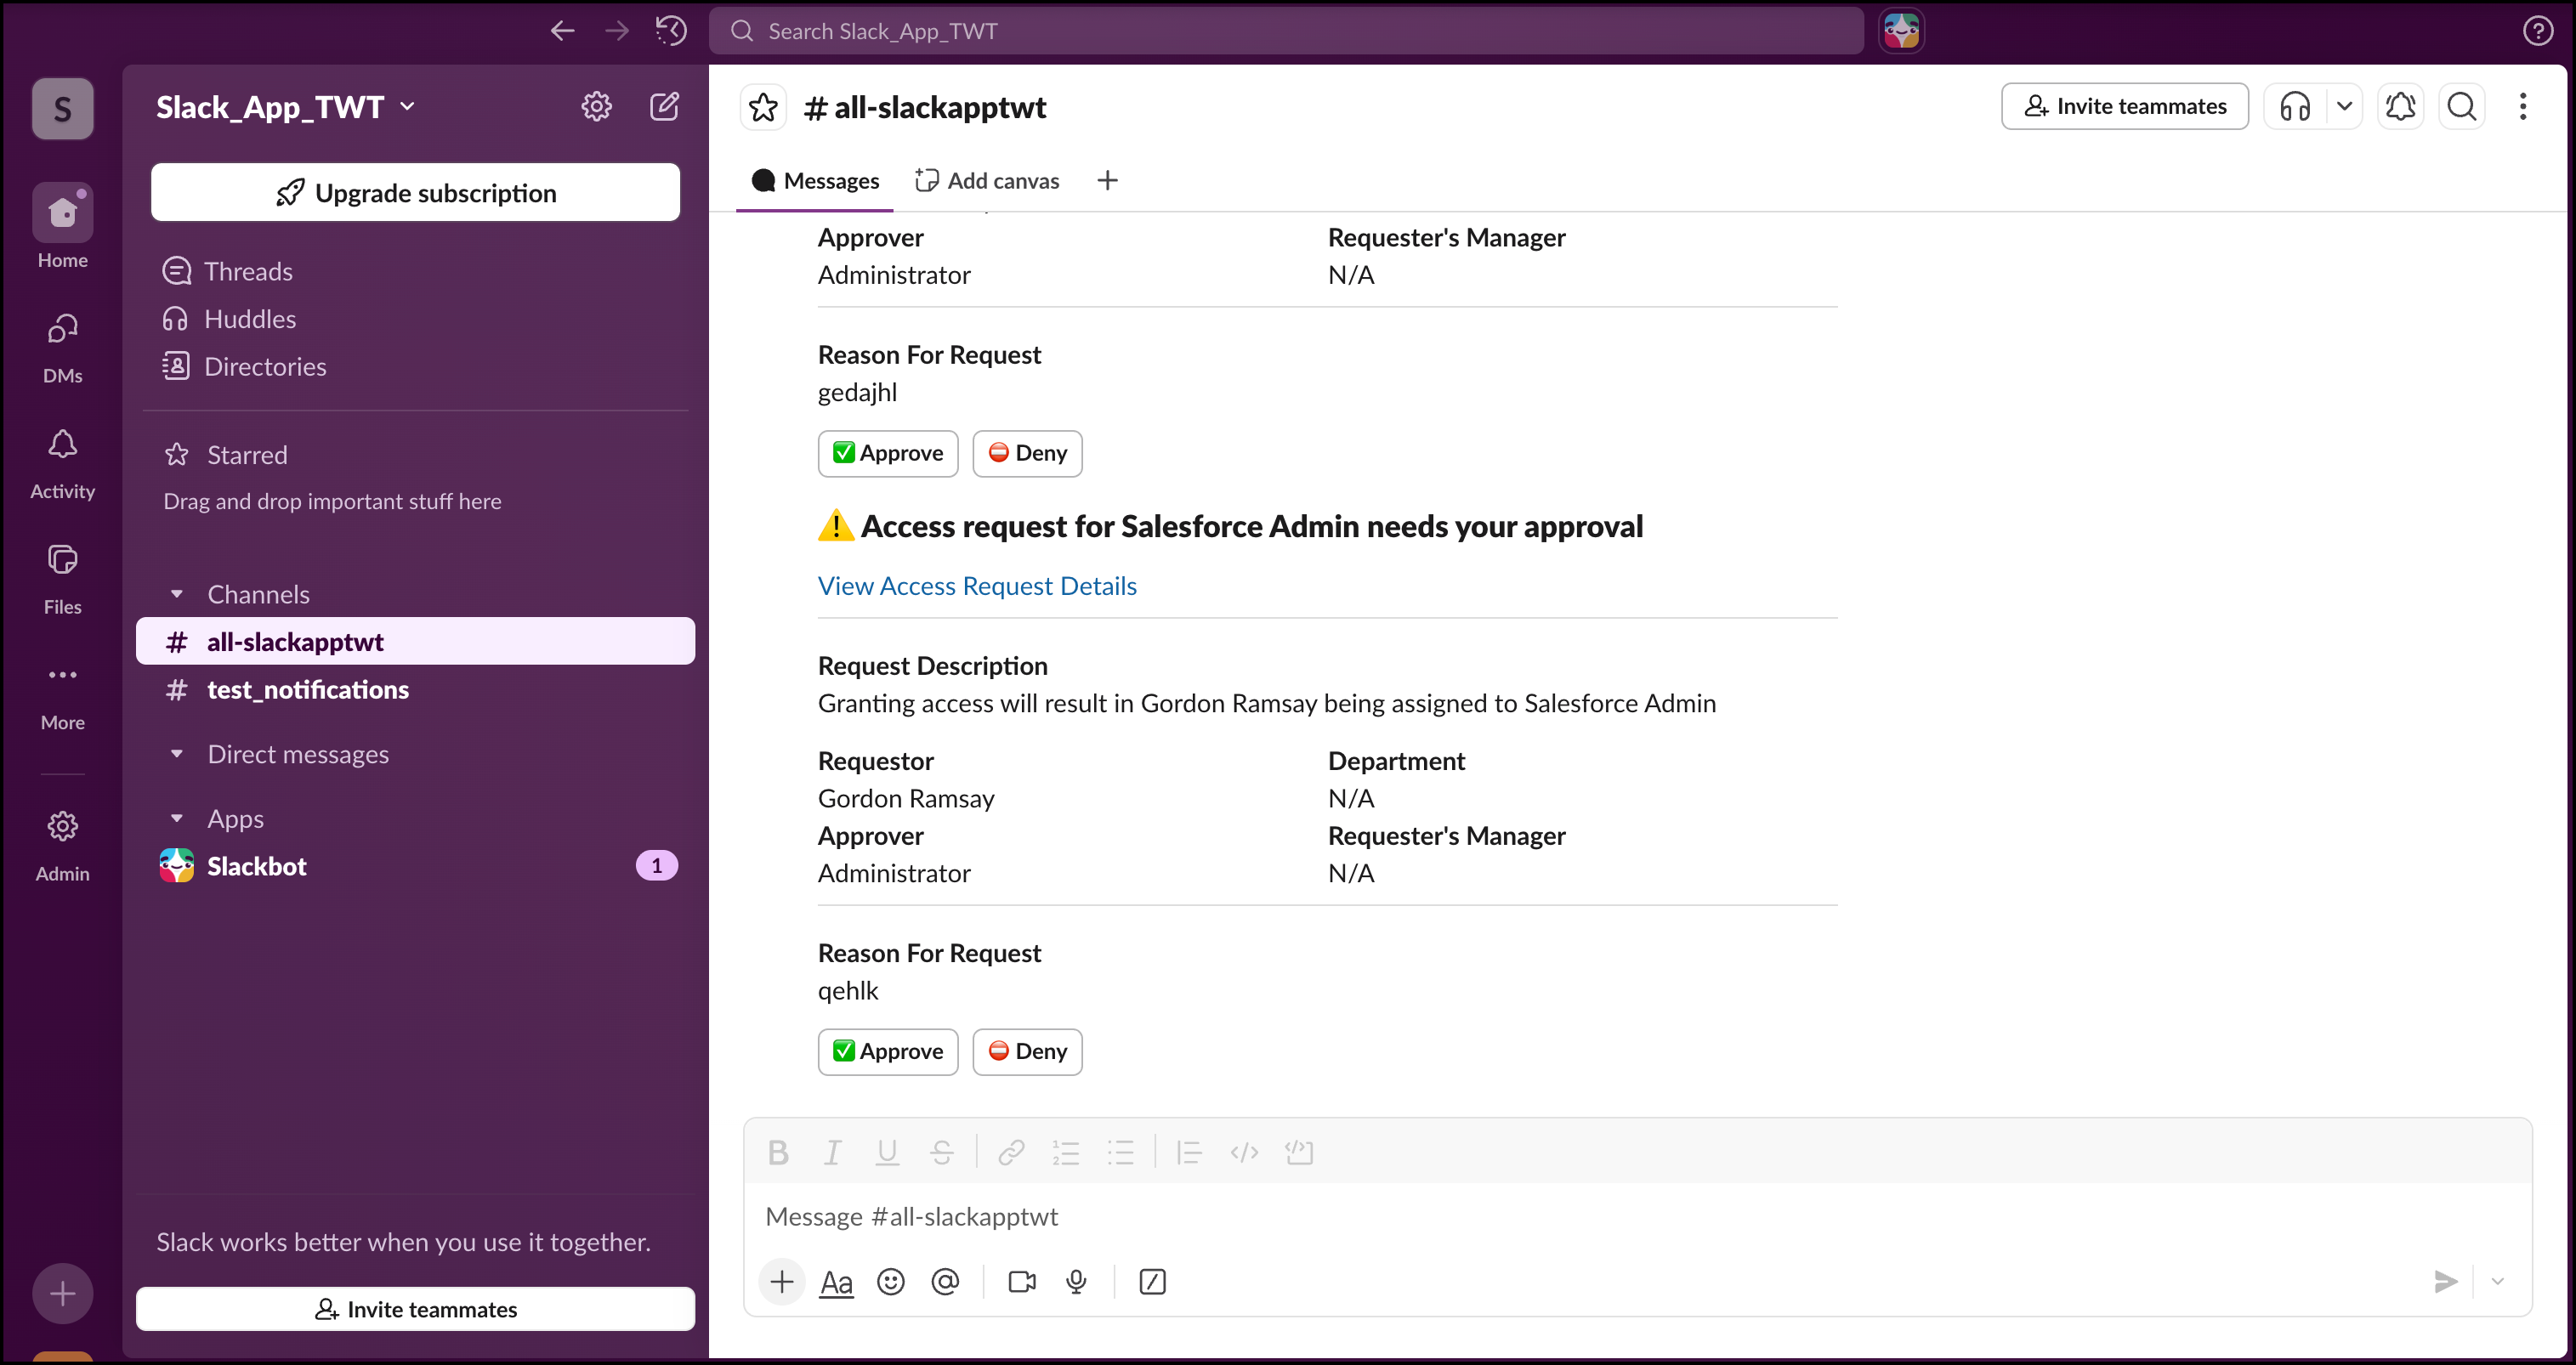
- Go to your Slack app and open the channel that you configured while creating the approval flow.
You will receive a notification when a user submits a request with details such as Request Description, Approver, Requestor, Requester’s Manager and so on.
- Click View Access Request Details to view the details in the Access Requests page. This takes you directly to the Access Requests page in JumpCloud for a deeper dive.
- To manage the request directly from your Slack channel:
- Click the Approve button to approve the request, and then in the Approve click Grant access. Optionally, you can also add notes in the Reason section.
- If you wish to deny the request, click the Deny button and provide a reason for denial. Then click Deny Access.
The request will be approved/ denied and status will be updated in the Access Requests page.
![]()
Ensure the email that you use to login to Slack must be connected to your JumpCloud admin portal. If you haven’t connected your JumpCloud admin profile to Slack yet, you will not be able to perform any actions. See Connect JumpCloud Admin to Slack to learn more.