JumpCloud Access Requests enables users to submit access requests directly within the JumpCloud platform, thus making it easier to gain access to the tools you need to be more productive.
You can now directly request access to applications from the user portal.
To create a new request:
- Login to the JumpCloud User Portal.
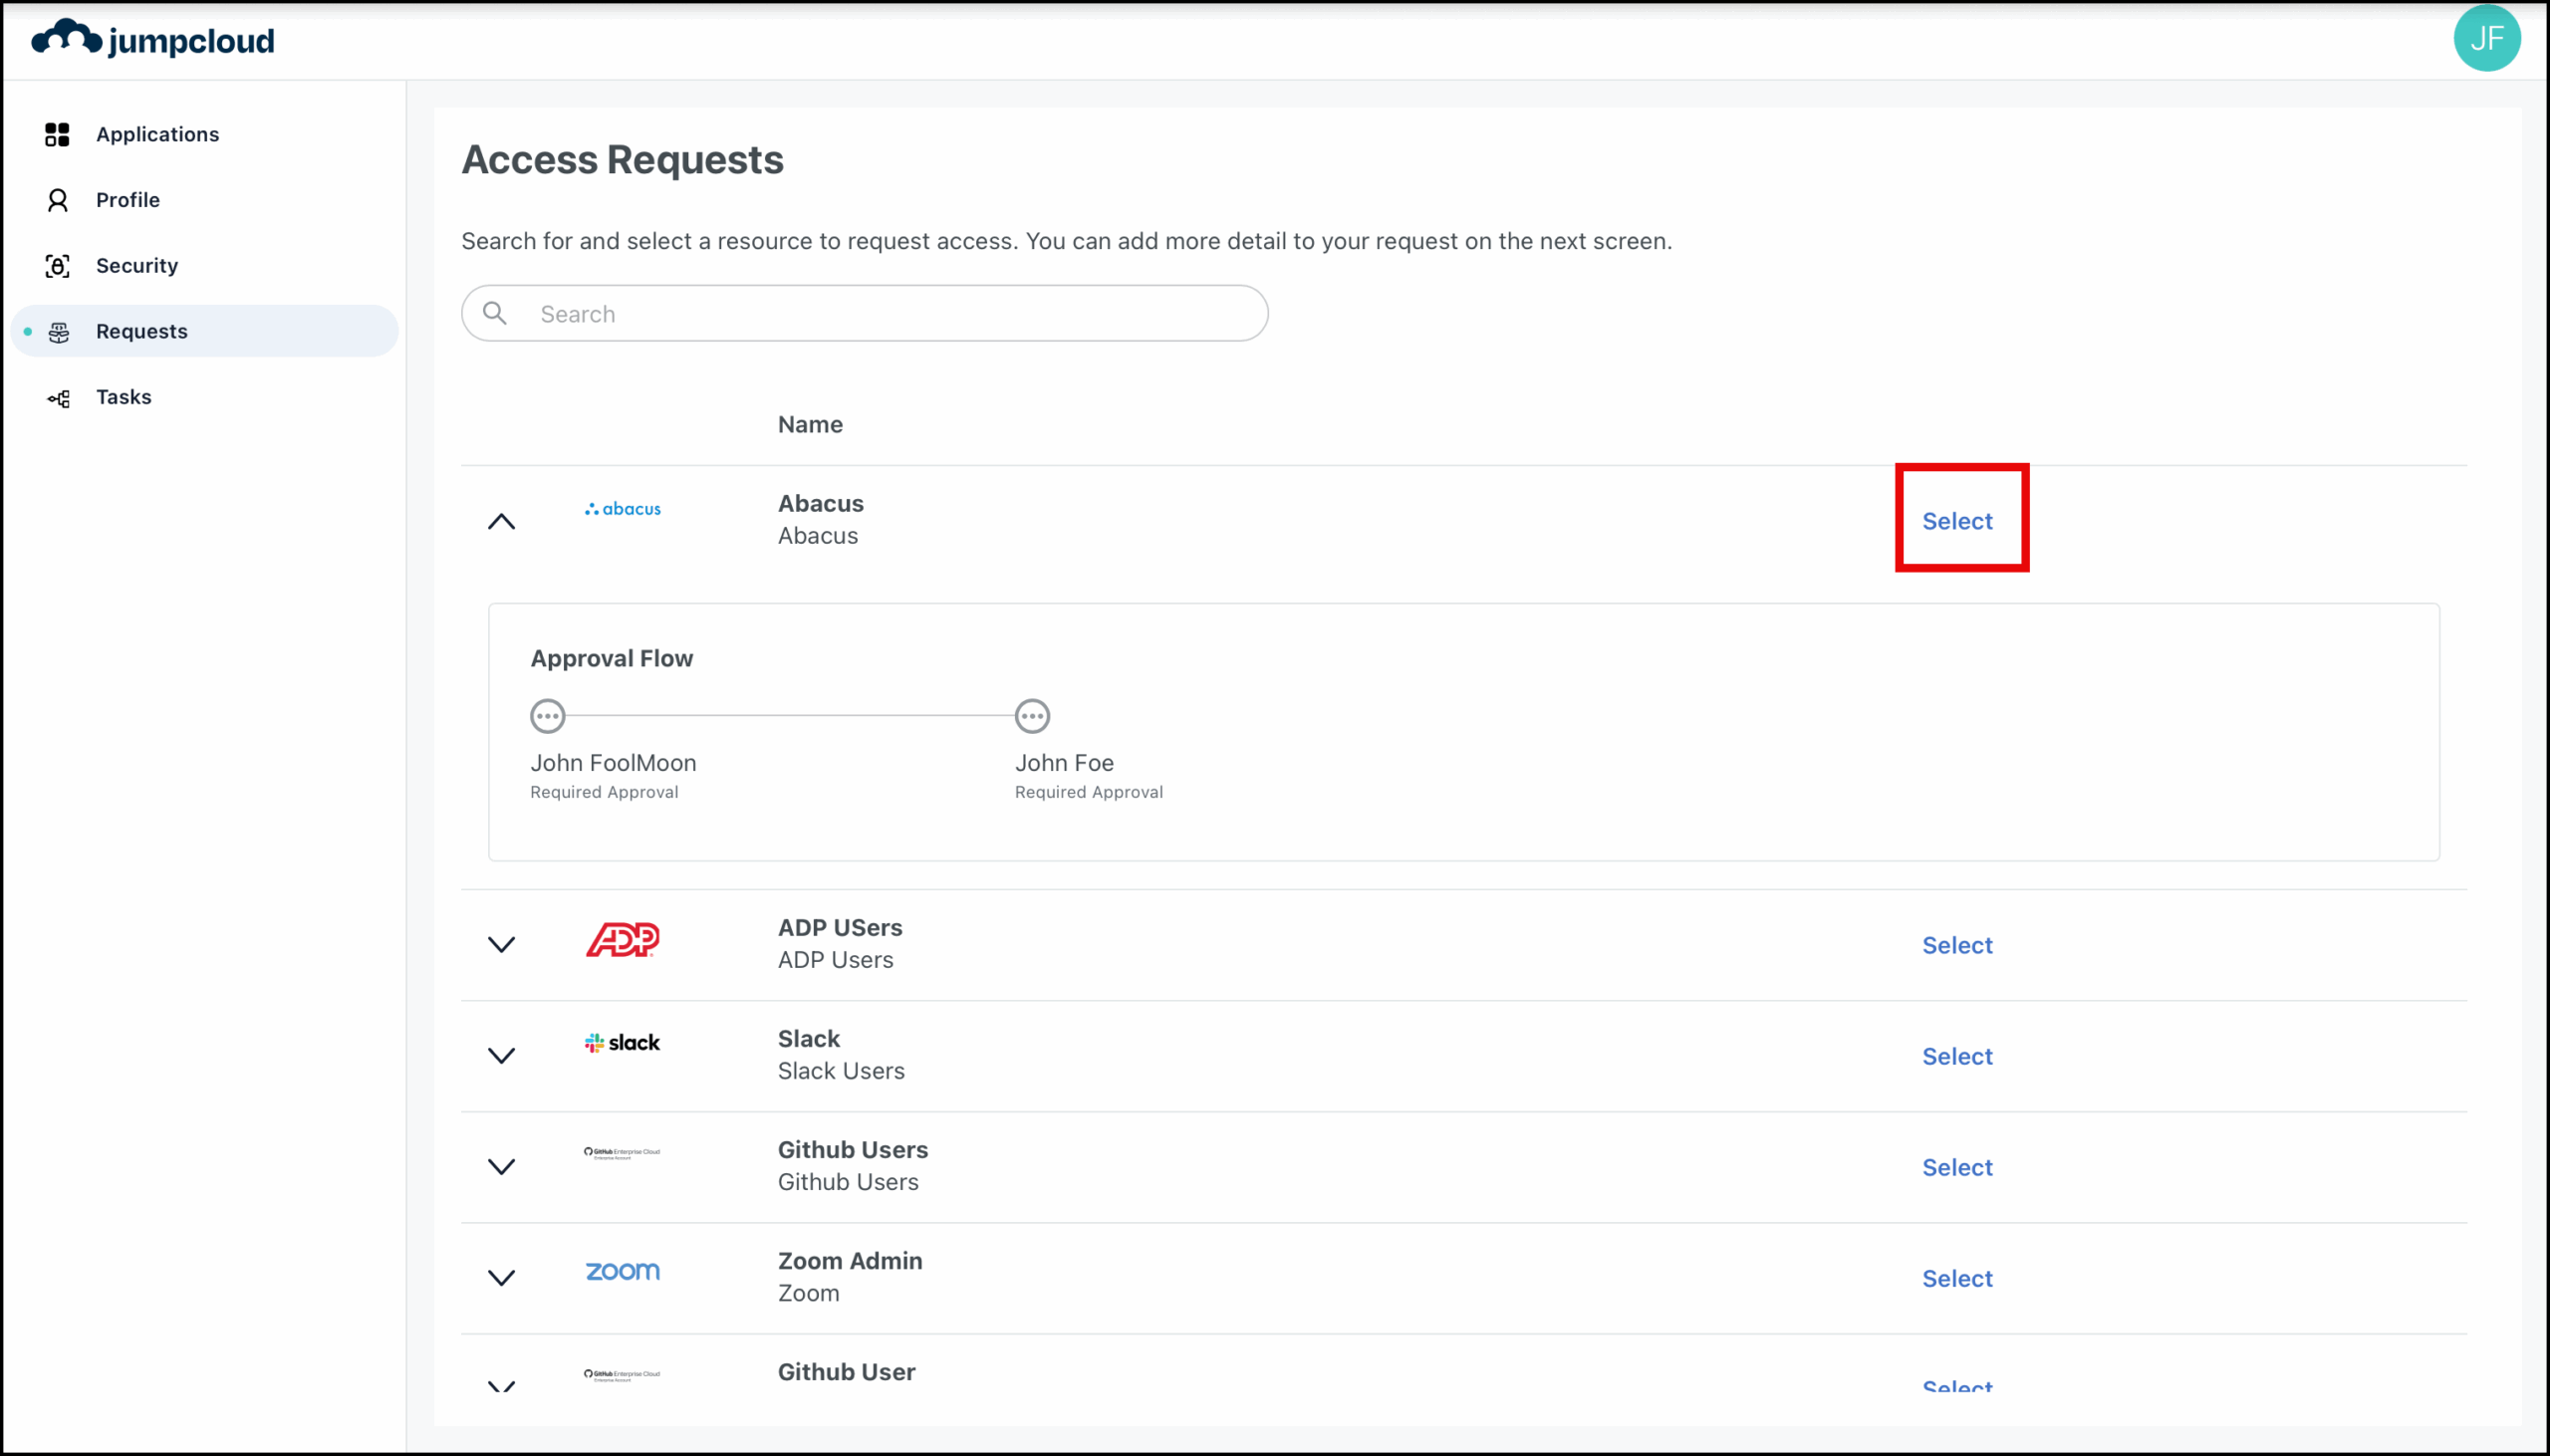
- Go to Requests. All resources eligible for you to request access to will be listed here.

You can expand each resource to see the details of who needs to approve this request.
A request can be approved by either an admin or another user who has been assigned to approve that resource. - In the search bar, enter the resource name you need access to .
- Click the Select button next to the resource.
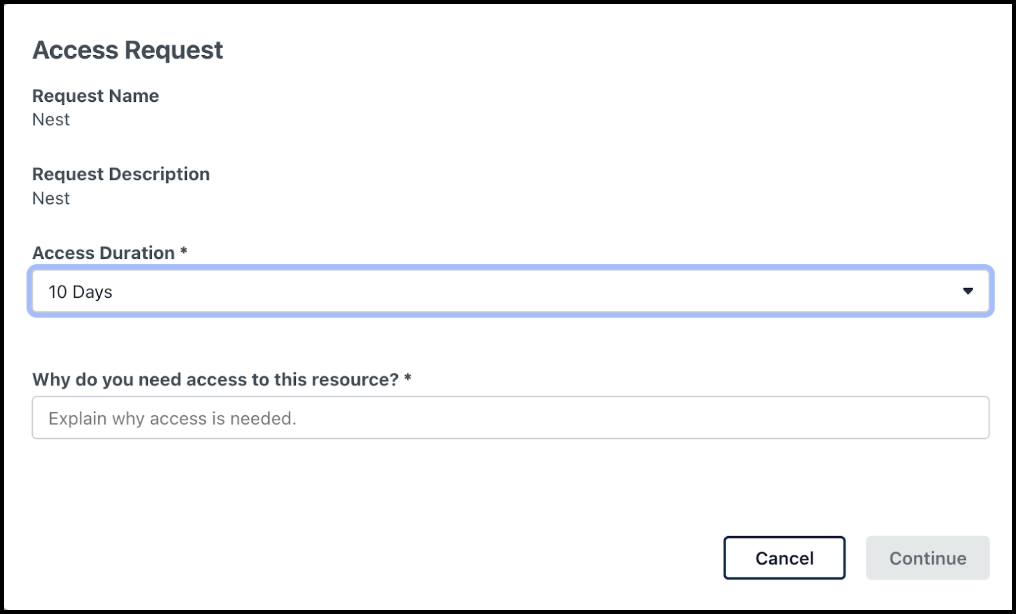
- In the subsequent screen, provide a valid reason in the Why do you need access to this resource? field.
Help the approver understand your requirement by explaining what you intend to do with the resource.

For certain resources, you might be able to request access for a specific period of time. Depending on how the approval flow is configured by your admin, you will find the option to select the duration for which you want the access from the Access Duration dropdown list. If the duration is fixed, you will only see the duration displayed here instead of the dropdown.
- Click Continue.
The request will be submitted, and you will receive a confirmation email. Expand the resource to view the status of your request in the Approval Progress flow.
You might not see the Approval Progress flow until your admin enables it.
Once processed, you'll receive another email notifying you of the decision.
- If approved, the resource will be added to the Application section of your user portal.
- If your access is timed, you will see a timer next to your application displaying the duration of your remaining access.
- If denied, you may be asked to provide additional information and resubmit the request.
Managing Resource Requests
JumpCloud Access Requests lets admins configure approval flows for end users to submit access requests. Admins can also add assigned approvers to the approval flow who can approve or deny access requests.
If your admin adds you to an approval flow as an assigned approver, you can manage and approve resource requests directly within the JumpCloud platform.
To approve or deny resource requests in JumpCloud, an admin must add you to an approval flow as an assigned approver.
To manage requests:
- In the JumpCloud user portal, go to Tasks.
- All the requests that need your attention are listed here. You can expand each request to view the details.
- If the request is timed, you will see the duration for which the request is made.
Admins can override the requested duration before approving the request.
- Once you’ve verified the request details, you can:
- Click Grant Access to approve the request.
- Click Deny Access to reject the request.
Your action's effect depends on the approval flow's configuration (as defined by the admin):
- Single Approver: If you are the only approver, your action immediately approves or denies the request, and the requester is notified.
- Multiple Approvers: If the flow requires multiple approvers, the request is only approved or denied once all configured conditions are met. The requester is then notified.
An admin can override a request from the Admin Portal. The user will be notified accordingly.
If you are an admin assigned as an approver (as a resource owner, requester’s manager, or part of a user group), approve or deny the request in the User Portal to maintain the approval flow progress. Actions taken in the Admin Portal will override the defined approval flow.
The Requests section is only available when the admin enables Approval Flows for you. Get in touch with your admin to have some approval flows enabled for you.
No, currently you can’t cancel a request that has been submitted.