
JumpCloud Access Requests allows admins to create approval flows to manage user access requests efficiently. End users can then use these approval flows to submit their access requests.
You can add, edit, and delete request approval flows from the Access Requests section in the JumpCloud Admin portal.
To view the Access Requests console:
- Log in to the JumpCloud Admin Portal.
![]()
If your data is stored outside of the US, check which login URL you should be using depending on your region. If your organization uses LDAP, RADIUS, or requires firewall allow list configuration, the Fully Qualified Domain Names (FQDNs) will also be region specific. See JumpCloud Data Centers for the URLs, FQDNs, and IP addresses.
- Go to Access > Access Requests.
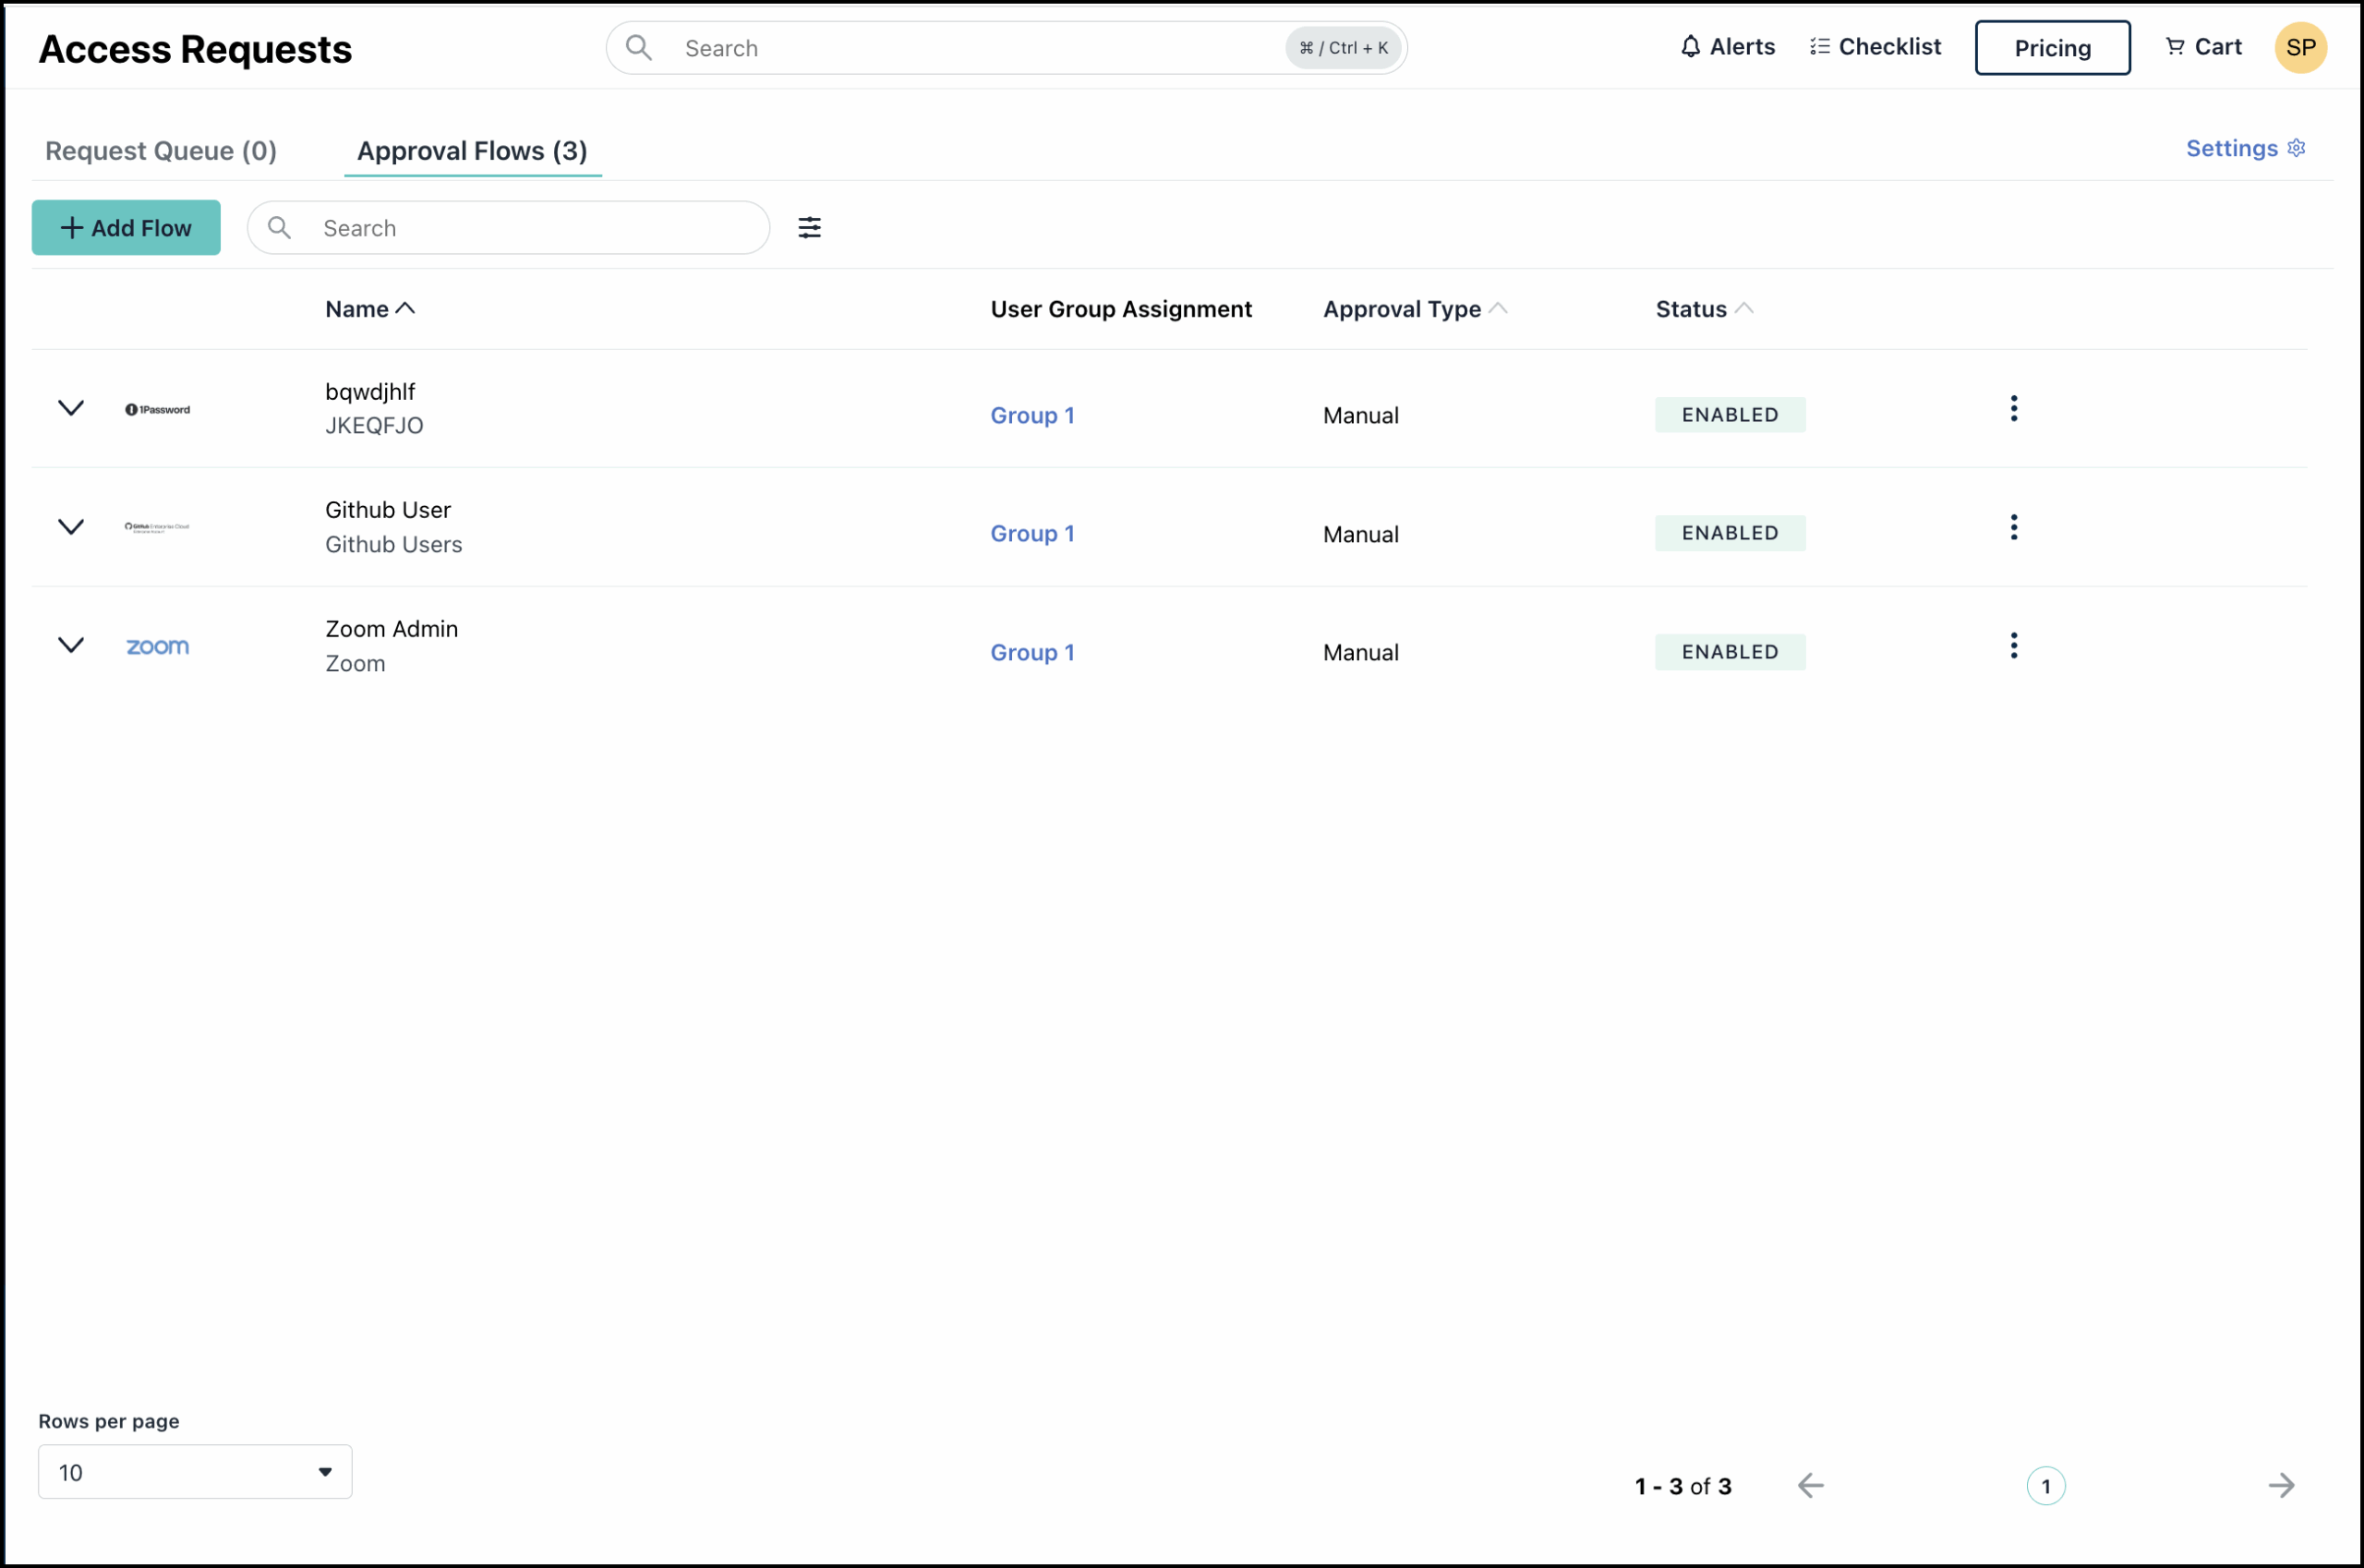
You will see the Access Requests console displaying two tabs:- Requests Queue - A central hub for managing all user access requests that require approval.
- Active Sessions - Provides real-time visibility into users and devices with elevated access.
- Approval Flows - Lets you create and manage approval flows that users can use to submit access requests.
![]()
For Device Admin flows a session will only appear in the Active Sessions tab after the user has clicked Start Session..
Configuring Access Requests Settings
Before you proceed to create approval flows, it is important to configure the Access Requests settings for your organization.
- Click Settings at the top right of the Access Requests console.
- Use the Resource Requests toggle to enable the feature, allowing end users to request access to resources from their user portal. If disabled, users will not see the Requests option.
- Specify the Notifications settings as required:
- Receive Resource Request Notifications via
- Email - When selected, this sends resource request updates via email to the requester, admin, and other assigned approvers (if any).
- Send end user notification emails for the following events
- Request Received Confirmation – Sends an email when a request is submitted.
- Request Approval/Denial - Sends an email when a request is approved or denied.
- Receive Resource Request Notifications via
- Expose Approval Progress Indicator - This option allows you to display the Approval Progress for users in the user portal.
- Select the Expose the Approval Progress to end users checkbox.
- Configure Webhook Notifications - This option allows you to select existing webhook channels within the platform to receive event notifications related to Access Requests.
- Click Select Channel.
- In the Select Channel window, click the Webhook Channels search bar to view the available webhook channels.
- Select the webhook channels that you want to use to receive notifications. You can also search and select the channels by name. The selected channels appear as chips below the search bar. Click the x (delete) icon to remove chips if needed.
- Click Add. The selected channels are displayed under Webhook Channels.
- Click Select Channel.
![]()
All the webhook channels configured within your org will be available for selection. For details regarding the available channels or to create new webhook channels, see Create Webhook Channels to learn more.
- Expand each channel to view the specific events for which notifications can be received.
- Select the events that you want to receive notifications for. Jump to Events: Access Requests for a list of the available events.
- Click Save.
Viewing Directory Insights
Directory Insights data is useful for auditing & compliance or for troubleshooting issues. You can use the Directory Insights data to know more details about the events created for access requests. Go to Insights > Directory and expand each event to view the details. You can switch to the JSON view for more details. See View the Directory Insights Data Activity Log to learn more.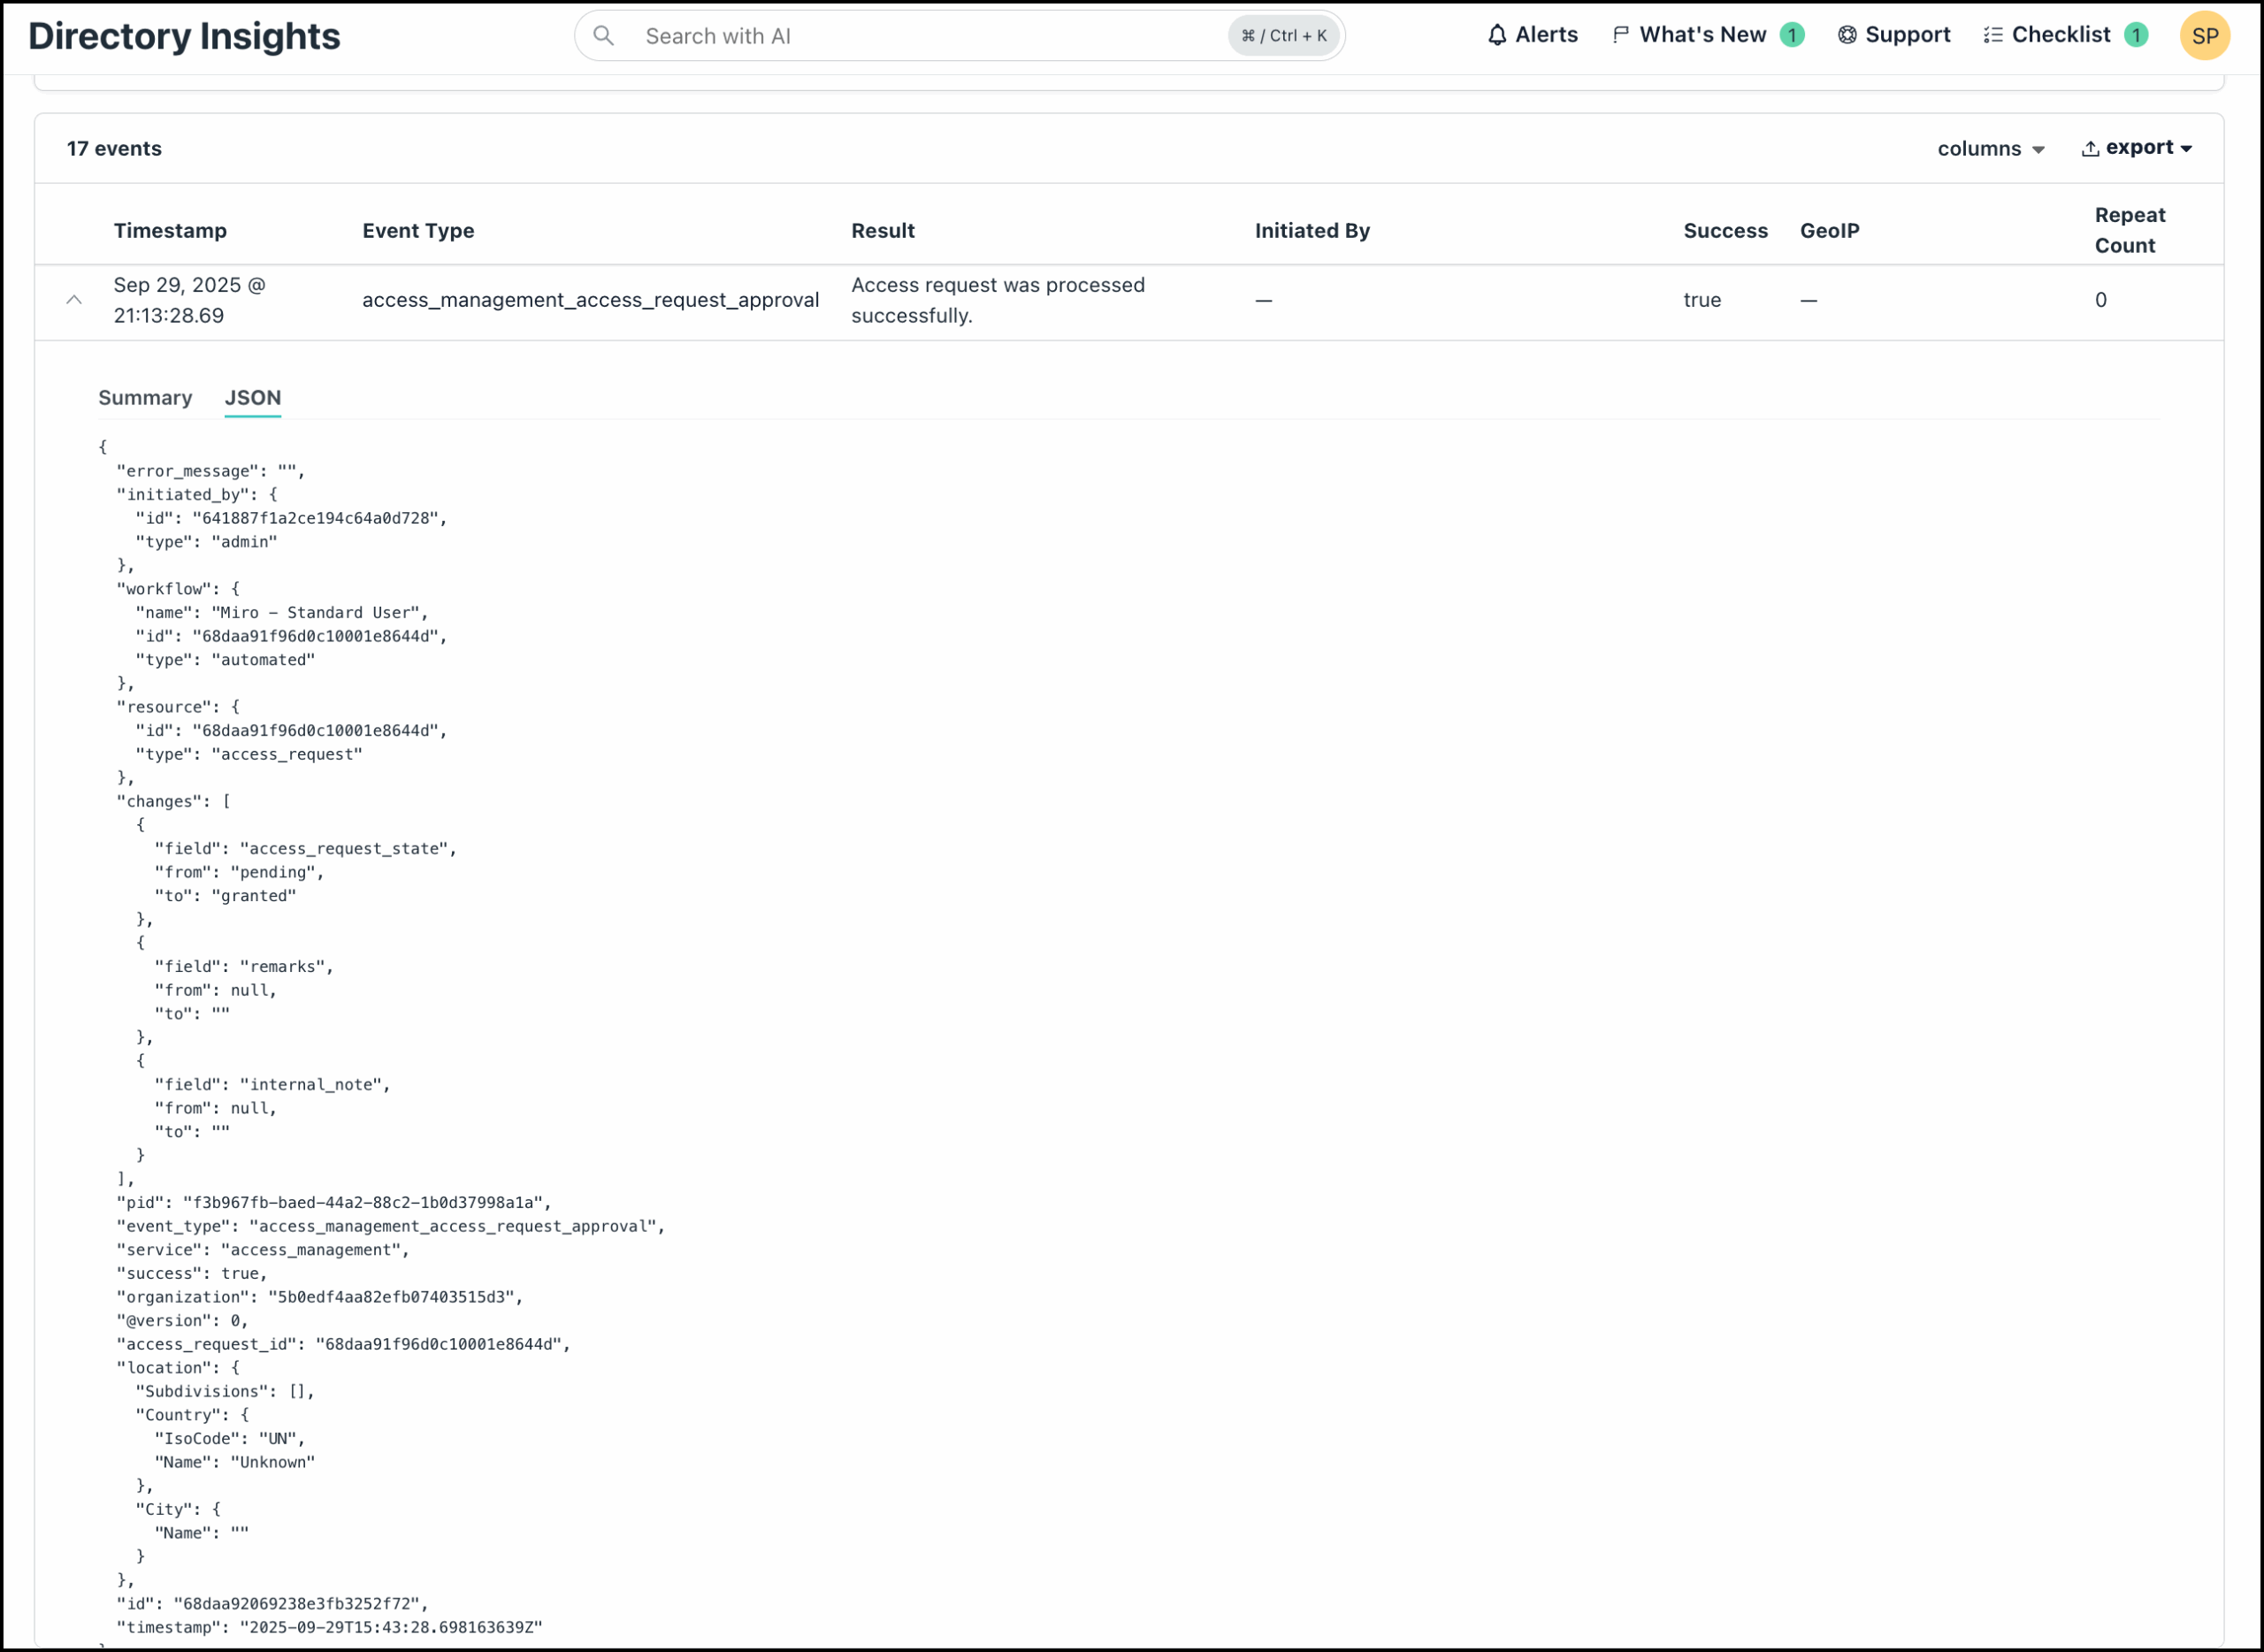
Events: Access Requests
This is a list of the events related to Access Requests for which you can receive notifications via webhooks.
Access Requests Events
| Event Type | Description |
| access_management_access_request | Access Management request is created. |
| access_management_access_request_approval(/deny) | Access Management request is approved or denied. |
| access_management_association_change | Access Approval Flow request is executed. |
| access_management_approval_flow_create | Access Approval Flow is created. |
| access_management_approval_flow_update | Access Approval Flow is updated. |
| access_management_approval_flow_delete | Access Approval Flow is deleted. |
| access_management_access_request_settings_update | Access Approval Flow settings is updated. |
Access Requests Webhook Payload Data
The table below details all field names and descriptions included in the webhook payload data for Access Request events, which are nested under the di_events field.
Access Requests Payload Data
| Field Name | Description |
| initiated_by | User who initiated the change. It typically contains the initiator's ID, type, and email address. |
| workflow.id | The unique identifier (ID) of the access request approval flow |
| workflow.name | The name of the access request approval flow |
| workflow.type | The type of approval required for a specific access request approval flow |
| event_type | The category of the change that occurred (like, access_management_approval_flow_create, user_update). |
| organization | The unique identifier (ID) of the org where the event occurred |
| non_admin_approval | Indicates if the approval flow had an assigned approver |
| approvers_requirement | Specifies the assigned approvers that must approve the request for it to be successful. |
| access_to | The resource(s) (like User Groups, LDAP Groups) that the user will be granted access to once their request is approved by the workflow. |
| visible_to | The user groups who are able to see and submit a request using the approval flow |
| request_workflow | The type of resource being acted upon, specifically designating an Access Request Workflow. |
| resource.name | The name of the specific resource being acted upon |
| resource.id | The unique identifier (ID) of the specific resource being acted upon |
| access_type | The nature of access being requested |
| approval_type | The type of approval required to complete the request |
| user_remarks | The reason that user provides for requesting the resource |
| access_request_id | The unique identifier (ID) of the resource request |
| access_request_state | The status of the resource request |
| internal_notes | The reason that admin provides for denying a request. These are only available in Directory Insights. |
| remarks | The reason that admin provides for accepting/denying a request |
![]()
For a detailed list of all webhook related events for alerts, see Webhook Payloads.
Creating User Groups
Before creating approval flows in JumpCloud Access Requests, ensure you have your User Groups configured. Approval Flows are created and assigned to existing User Groups. See Get Started: User Groups to learn more.
To make the best use of Jumpcloud Access Requests, consider carefully organizing your users and creating user groups accordingly so they can be directly mapped to resources.
For example, while the entire engineering team may need access to Github, only Managers and above would need admin access to it. In this case, create user groups as follows -
- Engineering User - End users in engineering team
- Engineering Admin - Engineering Managers and above
- Engineering All - All users in engineering team including managers and above
Following this example, here’s how the approval flow must be created and assigned.
- Approval Flow Creation and Assignment:
Create separate approval flows for different access levels:- GitHub User approval flow: Assign this approval flow to the Engineering User group. Configure it for auto-approval to streamline access for standard users. This allows you to track GitHub access without manual intervention for each request.
- GitHub Admin approval flow: Assign this approval flows to the Engineering Admin group. Configure it for manual approval to maintain control over administrative access. This allows for review and decision-making on each request.
- Approval Flow Best Practices
- Automated Approvals: Setting up approval flows for resources that can be auto approved can significantly take down your workload.
- Manual Approvals: Reserve manual approval for critical resources requiring careful oversight.
In this example, GitHub User access can be auto-approved, allowing you to track all users granted access to GitHub without needing to approve each request individually. However, GitHub Admin access may require manual approval, allowing you to review and decide on each request.