
You can run JumpCloud commands to execute scripts on fleets of machines through JumpCloud's agent. You can deploy files, schedule maintenance activity, or install software on endpoints in PowerShell, Bash, Shell, and more. Commands can run across one or more devices in parallel and retrieve command results, including stdout, stderr, and exit codes.
A manual command is run once and the Time To Live setting controls the queue timeout based on your requirements.
To create a new command manually:
- Log in to the JumpCloud Admin Portal.
![]()
If your data is stored outside of the US, check which login URL you should be using depending on your region. If your organization uses LDAP, RADIUS, or requires firewall allow list configuration, the Fully Qualified Domain Names (FQDNs) will also be region specific. See JumpCloud Data Centers for the URLs, FQDNs, and IP addresses.
- Go to Device Management > Commands.
- In the Commands page, click + Command, then select Command.
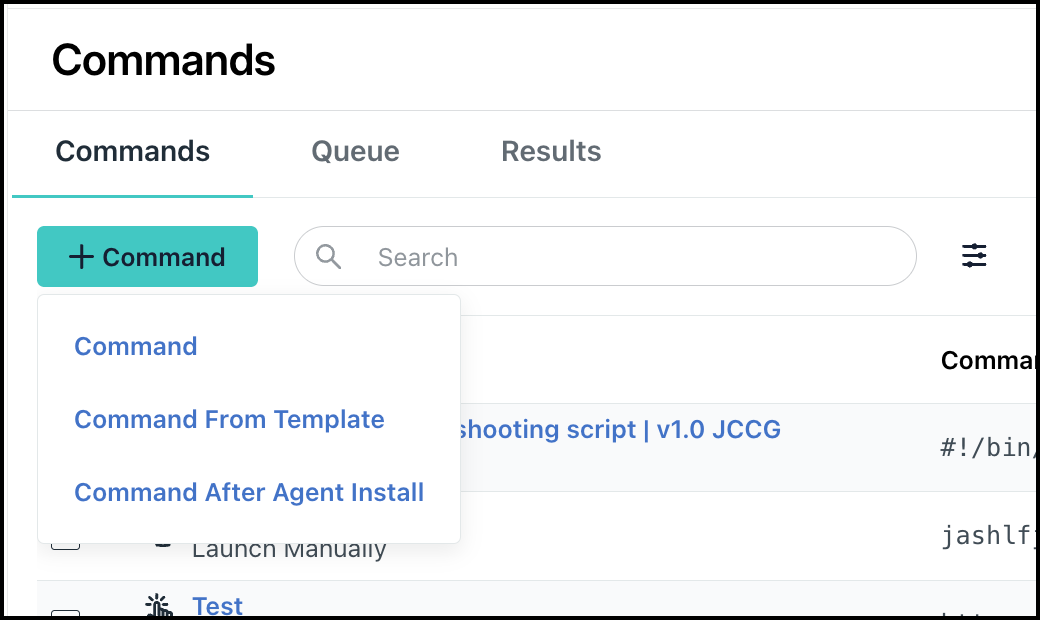
You will view the Details tab in the New Command page.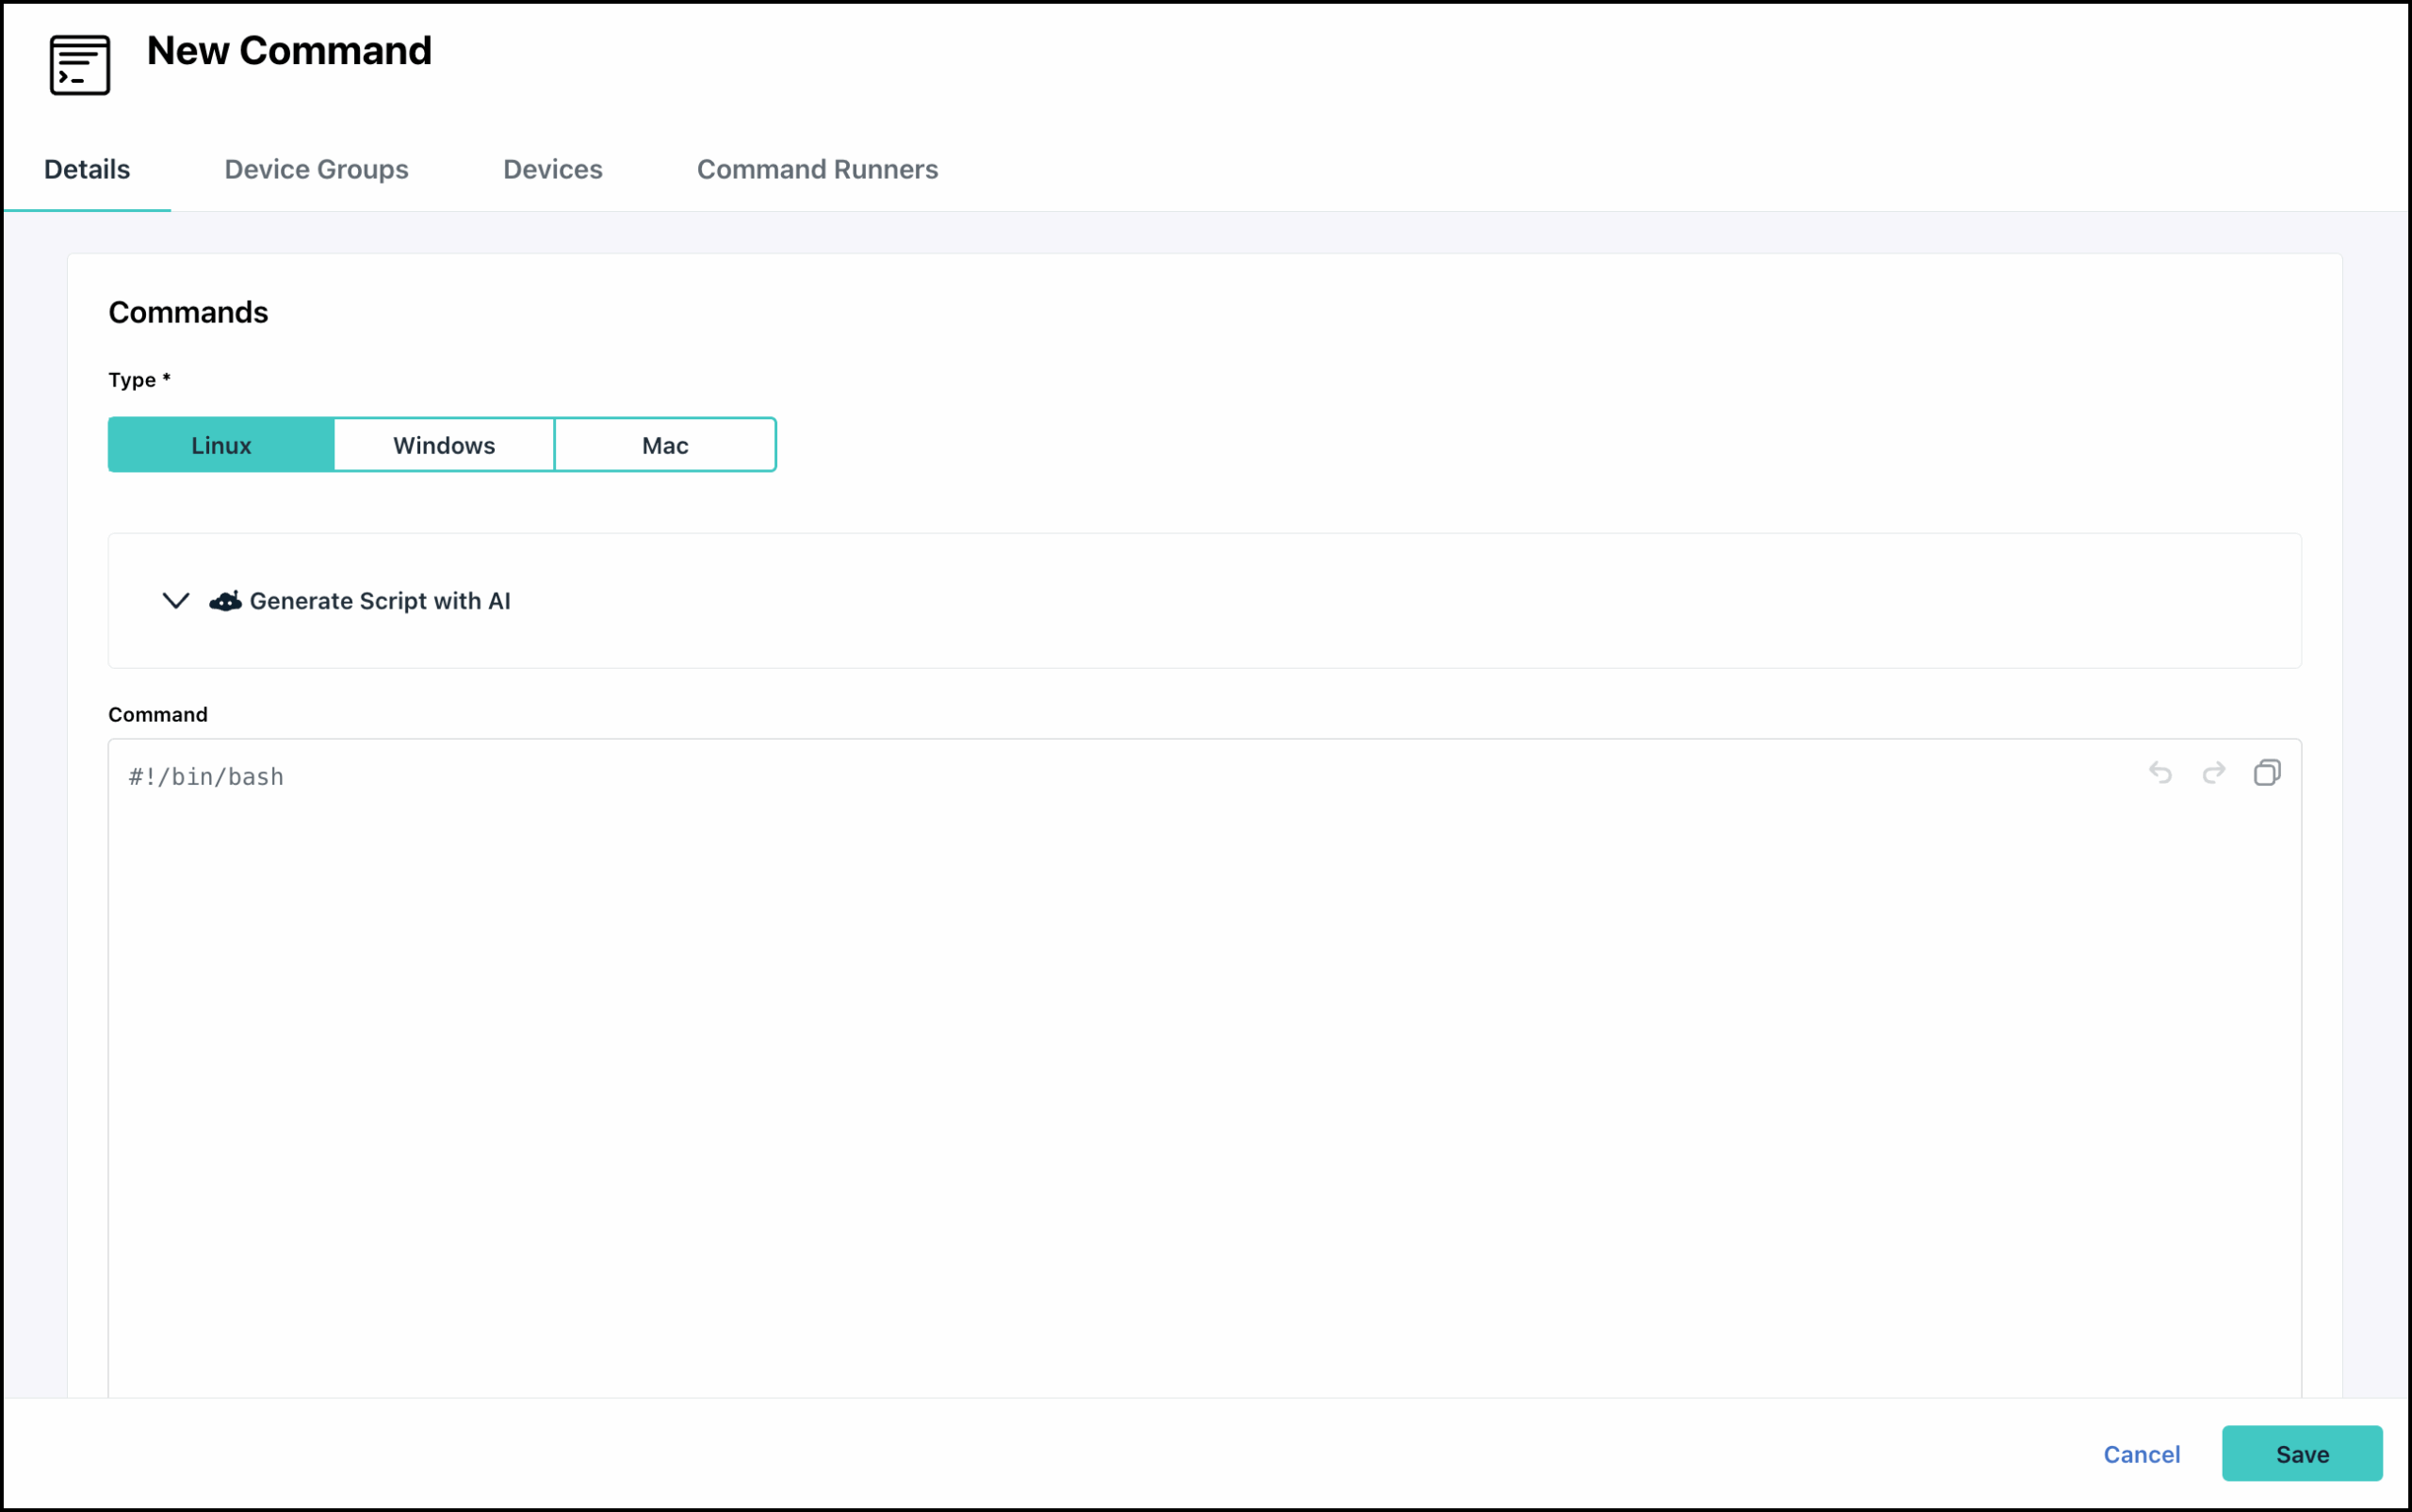
- In the Commands section, for Type, select the target Operating System - Linux, Windows, or Mac.
- For Command, type or paste a script. The script can be in any language that your servers can execute.
- (Optional) You can also enter a prompt in the Generate Script with AI section to generate the script using AI. See Get Started: AI Commands Builder to learn more.
- (Optional) In the Variables section, you will see the Platform Variables and Custom Variables. See Get Started: Command Variables to learn more.
- To create a custom variable, click Create Variable and then follow steps 4-9 in Creating a Variable.
- Use the copy icon next to each variable to copy and use it in the Command script. See Using Variables in a Command Script to learn more.
- You can also edit and delete variables if required using the respective icons.
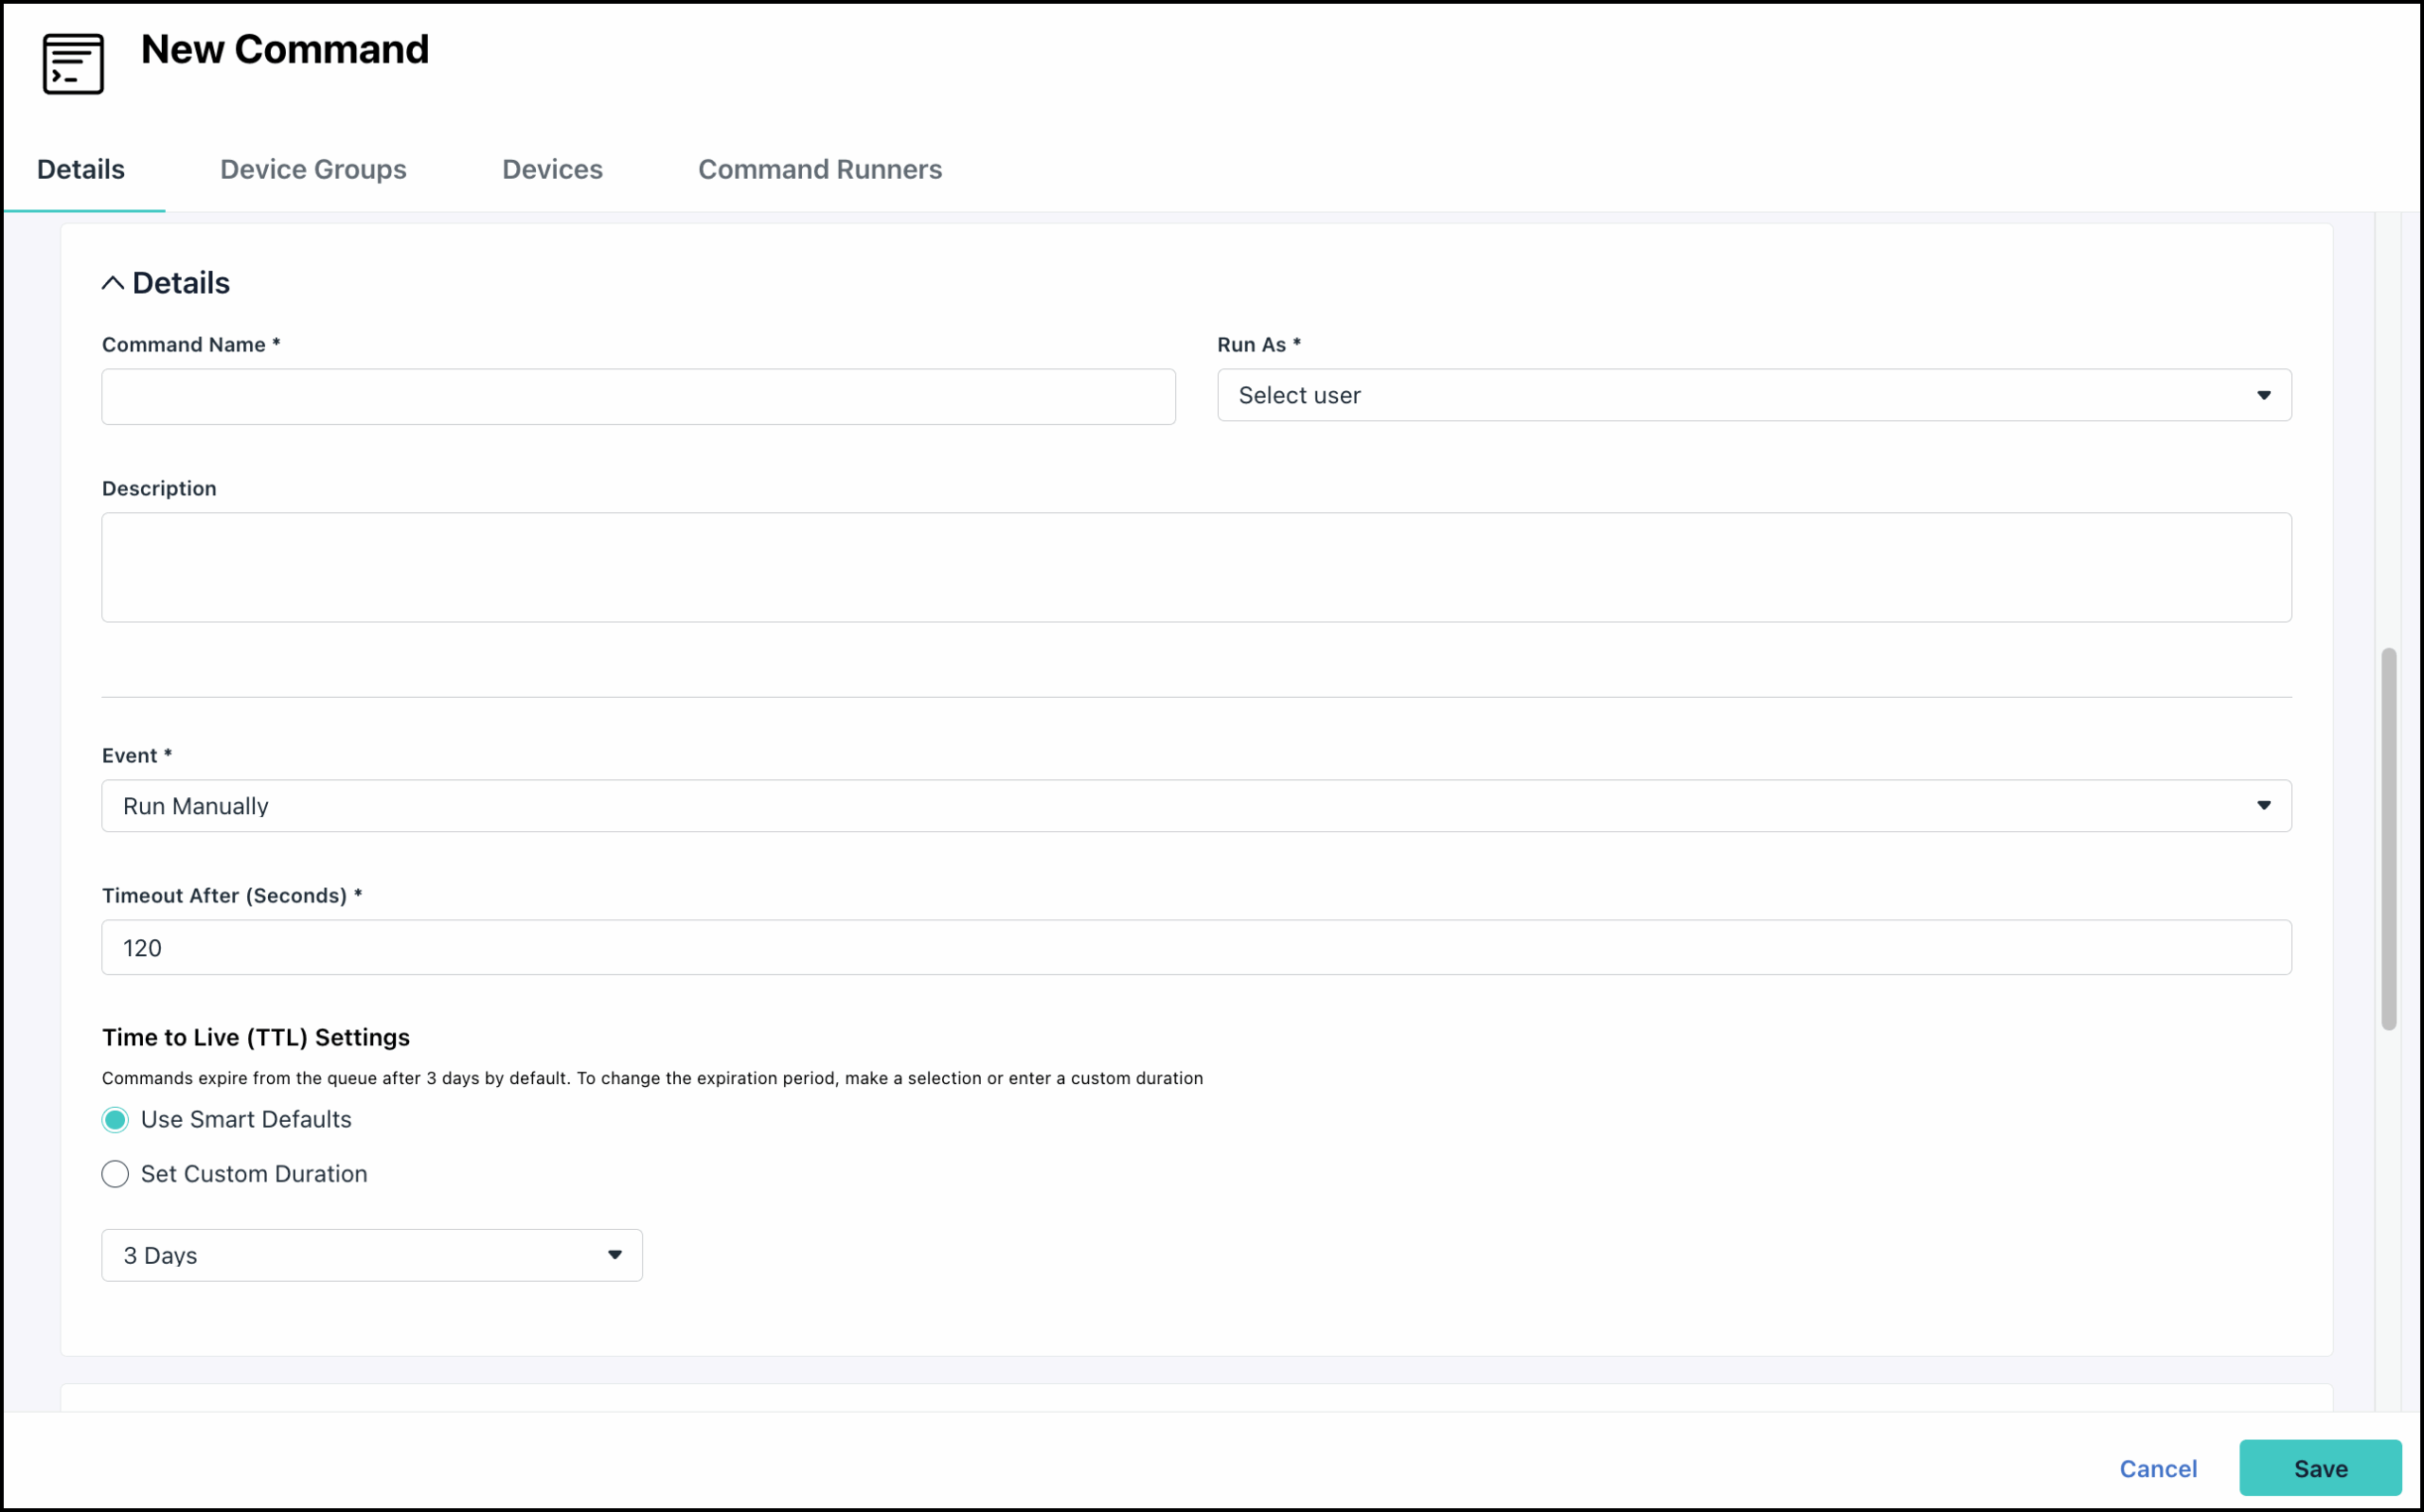
- In the Details section, enter a new name for the command. This is the name shown in the sortable list view of commands.

- Select the Run As user account that will run the command.
- Enter a description.
- For Event, choose a method to launch the command:
- Run Manually: Execute this command from the Commands tab. To quickly execute a command manually, click Run Now next to the command's name in the Commands page.
- Run as Scheduled: Execute this command one time on the day and time that you specify in Schedule run for. This setting is useful for one-time operations that need to run during a change window. For more detail, see Understanding Scheduled Commands below.
- Run as Repeating: Execute this command on the interval you specify:
- Command Repeats By: Specify when the command should repeat. You can select that it repeat by a specific Minute/Hour/Day/Week/Month.
- Repeat Every: Specify the number of days after which the command should repeat.
- Run At: Specify the time at which the command should run. Enter the time in the 24-hour format: HH:MM, such as 13:30 (1:30 PM), or 03:30 (3:30 AM).
- Run on Trigger (webhook): Commands set to run on trigger execute when a webhook is received from an external source. Enter the name of the trigger. See Use Command Triggers to learn more.
- Note: The execution time for scheduled and repeating launch events corresponds with the target device's time zone. In the Admin Portal, the event is labeled as Server Time.
- Run on Next Login: Run the command once on the next login of the JumpCloud-managed user.
- Note: Login commands apply only to logins from the device login screen, and not screen unlock and terminal logins. Additionally, next login commands will not run when rebinding the command to a device where the command has been previously bound.
- Run on Every Login: Run the command on every login of the JumpCloud-managed user.
- Login commands apply only to logins from the device login screen, and not screen unlock and terminal logins.
- For Timeout After, enter a value in seconds. This determines how long the command can continue running before the agent will terminate it.
- For Time to Live (TTL) Settings, select a queue timeout to determine how long a command can sit in the queue before it's automatically removed. This is useful when configuring commands to run on devices that are temporarily unavailable.
- Use Smart Defaults - Choose a predefined default timeout of 1 Hour, 1 Day, 3 Days, 7 Days, or 10 Days.
- Set Custom Duration - Enter a duration using Days and Hours, with a minimum of 1 hour and a maximum of 10 days.
![]()
A 3-day default is set for all new commands, unless a custom timeout is configured here. TTL isn’t applicable to scheduled or repeating commands.
- (Optional) In the Files section, click + File to attach a file to the command. You can upload multiple files.


- Select the file from your computer. You can just click the delete icon next to the file if you need to remove it. The file will stay in Pending status and be uploaded once you save the command.
- Once the file is uploaded, it's ready for the command to execute on the endpoint. You can update the file anytime, and the command will use the latest version during its next run.
![]()
- You can upload any file type, but unsigned .msi and .pkg files are not supported.
- Files can be up to 150 MB each.
- Each org is allocated up to 10GB of cloud storage space. This space is shared with Software Management. See Manage Software with JumpCloud Private Repository to learn more.
- For successful command execution, ensure your devices are running agent version 2.38.0 or higher.
![]()
If the file you're uploading exceeds 1 MB, and any of the associated devices are running agent version lower than 2.38.0, you may see a notification after clicking Save.
The command will be saved, but devices with agent versions older than 2.38.0 will not have access to file attachments over 1 MB. Upgrade your agent to ensure successful command execution.
Once the Command is saved, if you added a file exceeding 1MB and haven’t updated your devices to agent version 2.38.0 or higher, you will also see the following banner until the devices are updated or the file is removed.
![]()
Once you’ve saved the command, look for a Rejected badge that appears next to unsupported file names. Commands may fail if they use a rejected file, so remove such files and save the command again to ensure proper execution. If you want to use Commands to remotely install applications, see Install Applications Remotely.
- Click the Device Groups tab to set the specific device groups where this command will execute.
- Click the Devices tab to set the specific devices where this command will execute.
- (Optional) Click the Command Runners tab to select a user as a Command Runner with access to run the command. By default, Admins can run commands on all devices.
- Click Save.
- Run the command by clicking Run Now on the Commands page.
![]()
You can quickly delete a command in the Commands page by clicking Delete. You can remove multiple commands by selecting the checkbox next to the command and clicking Delete.
Review the exit code that was reported by selecting the checkbox next to the command on the Commands page and selecting the Results tab. See Understand Command Results for a list of exit codes. If multiple commands are processed at runtime, only the last exit code is reported. Click view to see the results and log file.
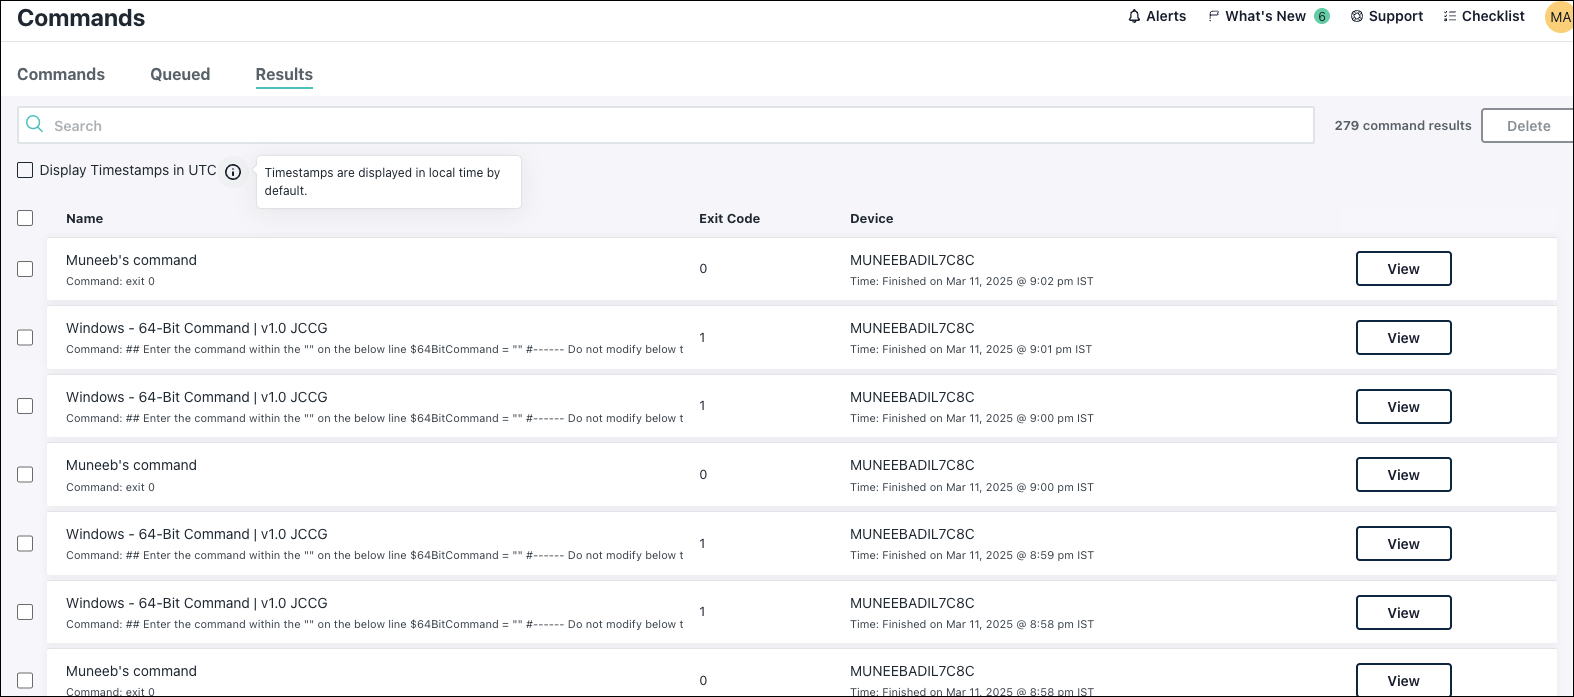
- The timestamps in the Command Results window display the current time on the device where the command ran. If you wish to view the time in UTC, select the Display Timestamps in the UTC checkbox. Your time preference is saved across sessions until you change it.
- Command results are stored for 30 days. After 30 days, results are removed and can't be retrieved.
- Command results are only updated from the device following the execution of the command on that machine, so there isn’t a path for a command result to be generated for an offline device.
Understanding Scheduled Commands
When you create a scheduled or repeating command, it will run at the time specified in the device’s local time zone. If you have devices in multiple time zones, this can lead to undesired effects.
For example, assume that you reside in San Francisco, California, which is in Pacific Standard Time. Assume that the current time is 10:00 AM Pacific time and you schedule a command to run at 12:00 noon the same day. And finally, assume that you have devices in various time zones.
- Devices in Pacific Time execute the command at 12 noon PST, two hours after you completed scheduling the command.
- Devices in Mountain Time execute the command at 12 noon MST, one hour after you completed scheduling the command.
- Devices in Central Time execute the command at 12 noon CST, upon receiving the command. However, if the device does not receive the command in time, it may not run at all.
- Devices in Eastern Time won't execute the command at all, as by the time the command was scheduled, 10:00 am PST, 12:00 noon EST will have already passed.
Command payloads expire after 10 minutes if they are not received by the device. If the device is online and receives the payload within the 10 minutes, the command is scheduled to run according to the configuration. If the scheduled time has already expired when the payload is received, the command will not run.
![]()
You should schedule commands with as much lead time as possible to accommodate your devices in other time zones. If your organization has a global presence, schedule commands at least 24 hours in advance.