
JumpCloud Command Variables allows admins to define, manage, and reuse configuration variables that can be referenced in JumpCloud Commands. You can create and manage variables from Settings > Automation Variables that will be available across JumpCloud platform (currently only Commands). You can also manage variables from the Commands page.
Creating a Variable
With JumpCloud Variables, you can create custom variables that you can reuse locally and across your organization.
- Log in to the JumpCloud Admin Portal.
![]()
If your data is stored outside of the US, check which login URL you should be using depending on your region. If your organization uses LDAP, RADIUS, or requires firewall allow list configuration, the Fully Qualified Domain Names (FQDNs) will also be region specific. See JumpCloud Data Centers for the URLs, FQDNs, and IP addresses.
- Go to Settings > Automation Variables.
- Click +Variable.

- In the Create New Variable dialog, enter the Variable Name.
- Select the Data Type:
- String: Text-based data for names, URLs, or paths.
- Number: Numerical values for IDs, ports, or versions.
- Boolean: Logical datatype for True or False state.
- Enter the Value.
![]()
If String or Number is selected as datatype, a Secret Variable toggle is available. When enabled, the Secret Variable option ensures that the value is encrypted at rest and injected safely at runtime.
- Define the Scope:
- Organisation: Make the variable available across the organisation
![]()
If you are creating the variable from a Command Details page using the +Create Variable button, you will also see a Local option here. Select this to make the variable available only for the specific command.
- Click Create Variable.
The variable is created. You will find it listed in the Variables section of the Command Details page under Custom Variables, as well as in Settings > Automation Variables.
Editing a Variable
You can modify the details of a variable and replace the value directly from the Automation Variables page.
- Find the variable that you want to edit and click the three dots next to the variable.
- Click Edit.
- In the Edit Variable dialog, update the datatype and scope.

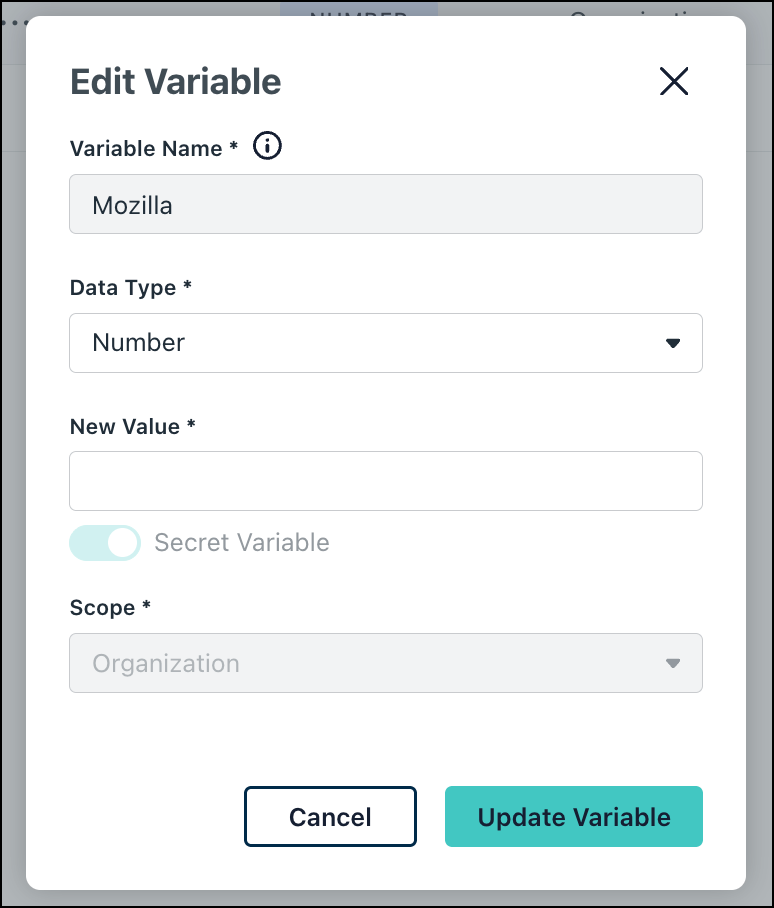
![]()
If the variable is used in any command, you will not be able to update the name of the command.
- Enter the New Value. This will automatically replace the older value once the dialog is saved.
- Click Update Variable.
You can also go to Device Management > Commands > Details, find the variable in the Variables section, and follow the steps above.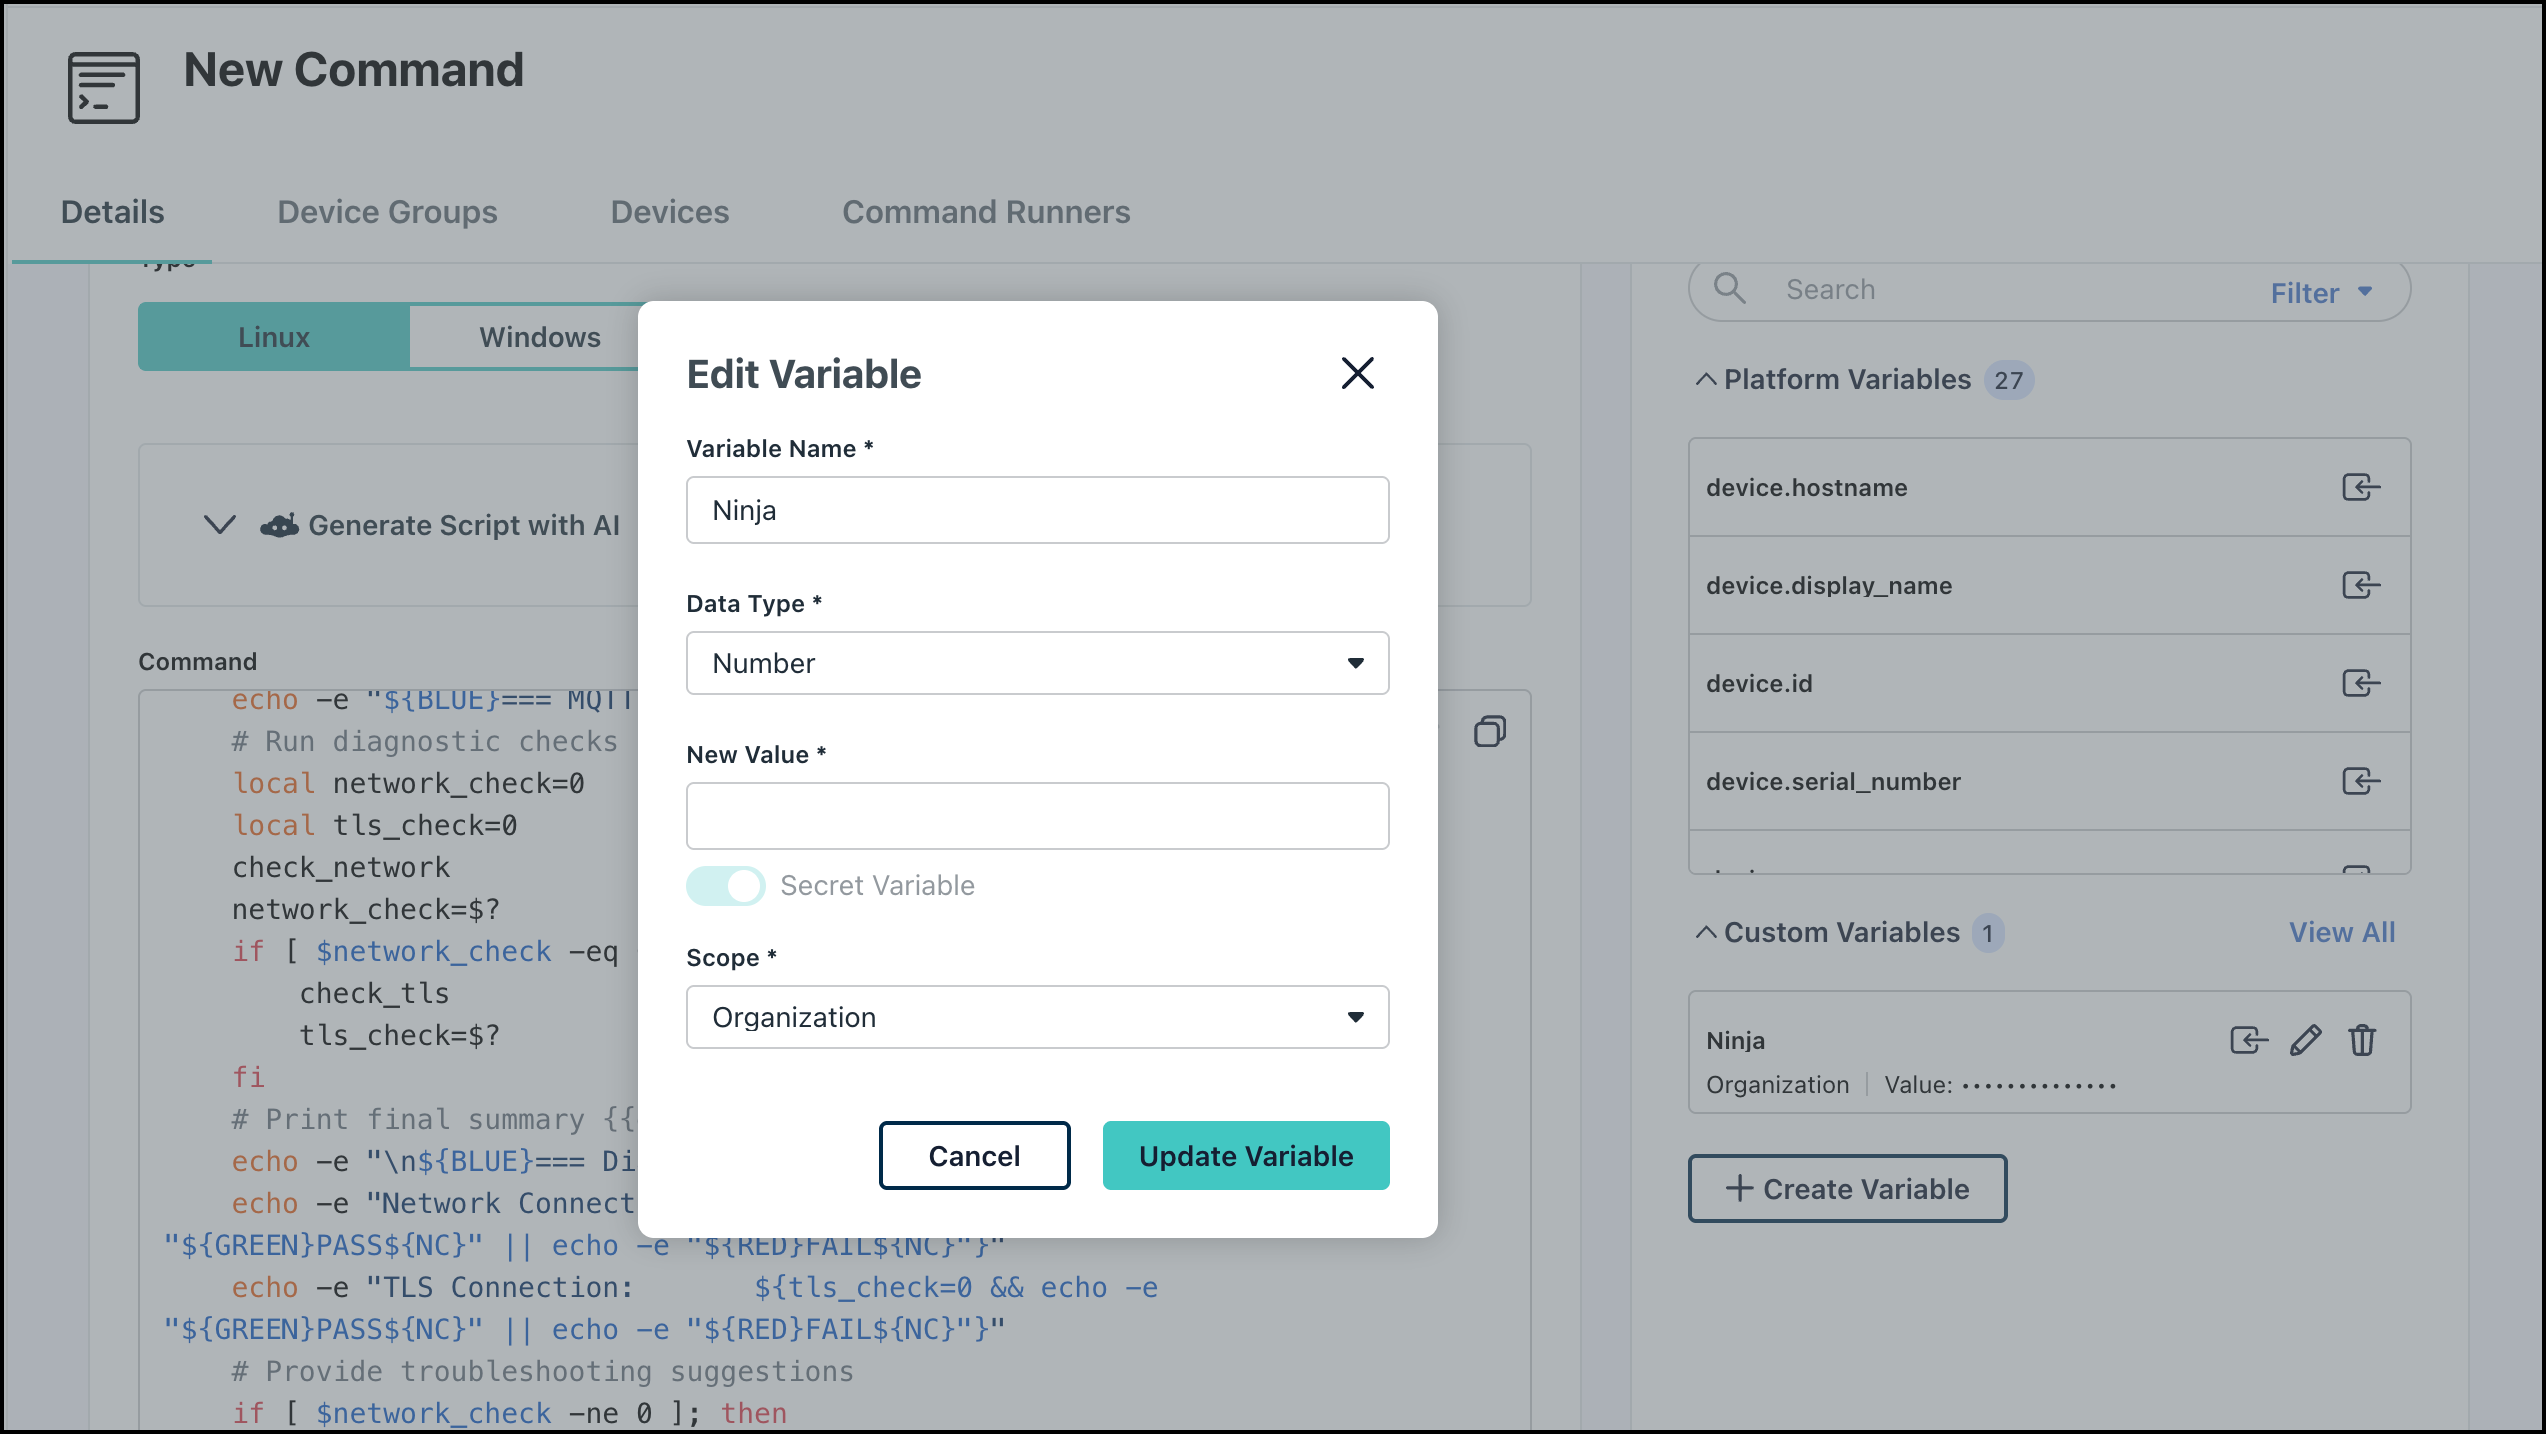
Your changes will be saved and the variable details will be updated.
Deleting Variables
You can delete one or multiple variables from the Automation Variables page.
To delete a variable:
- Search and select the variables that you want to delete.
- Click the Delete button in the top right corner.
- In the Delete Variable dialog, enter the number of variables you are about delete.
- Click Delete Variable.
The variables will be deleted. If the variables are associated with any commands, the commands will stop working. You must manually remove any references to the deleted variables in the associated commands.
You can also delete a specific custom variable from the Command Details page.
- Go to Device Management > Commands.
- You can either:
- Click +Command and then select Command to create a new command. You will be taken to the Details tab of the New Command page.
- Click a specific command name to edit the command and view the Details tab
- Find the Custom Variable in the Variables section.
- Click the delete icon next to the variable.
- Follow steps 3-4 above.
Using Variables in a Command Script
Once you’ve created a variable, you can use that variable in a command script without hard-coding the value in the Command Details section.
- Go to Device Management > Commands.
- Click +Command to create a new command. See Create a Command to learn more about creating commands.
To use a variable in a command:
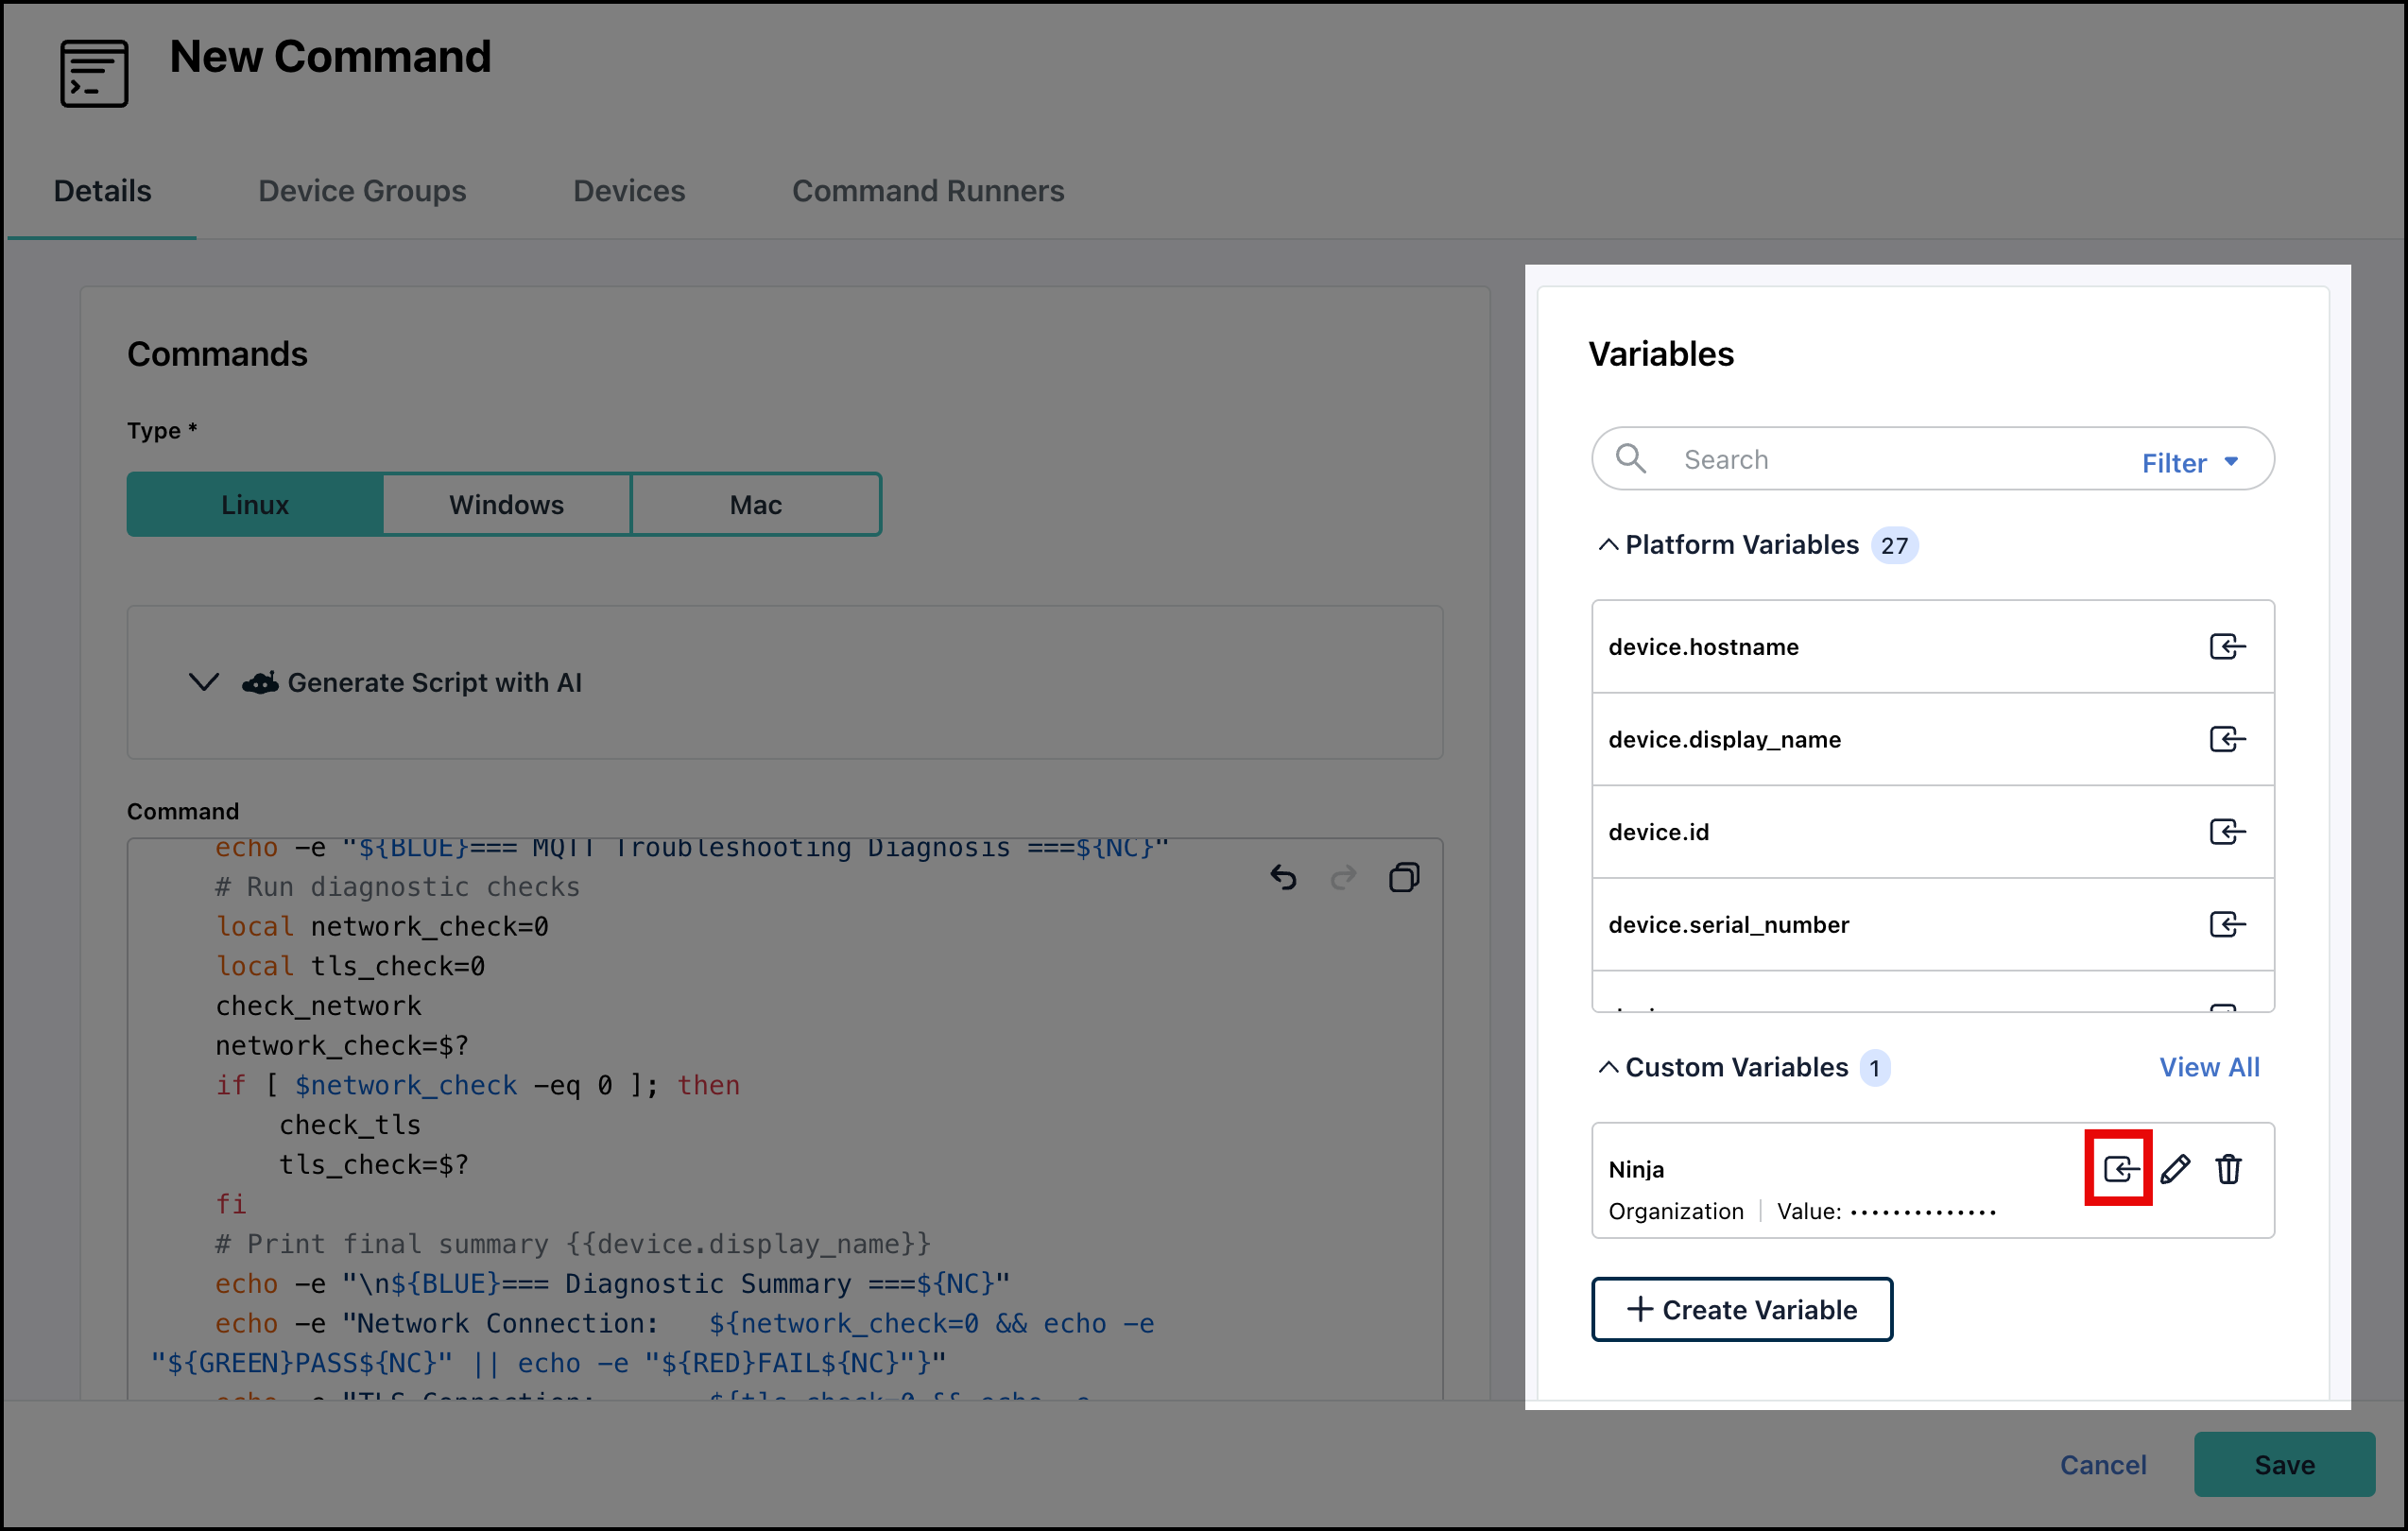
- In the Command Details page, go to the Variables section.

All available variables are listed here in two sections:- Platform Variables - These are automatically populated placeholders that pull real-time contextual data (such as device hostnames, serial numbers, and OS versions). These can’t be modified.
- Custom Variables - These are manually defined parameters created by admins to securely store reusable values for use locally and across organizations.
- In the Command editor, place your cursor where you want to insert the variable.
- Find the variable you created in the Custom Variables section and click the insert icon next to it. You can also insert Platform Variables where required.
![]()
When you insert a variable, {{variable name}} is inserted at your cursor’s position. At runtime, the system automatically wraps the variable's value in single quotes. For example, a value of 12345 will execute as '12345'. You can confirm the final syntax on the Command Results page.
Verify that the variable name is within {{ }} syntax. For example, if the variable name is crowdstrike_api_key, when adding it to the command, make sure it uses this syntax - {{crowdstrike_api_key}}.
6. Once done, follow the steps in Create a Command to save and run the command.
Creating a Custom Variable
You can also create a variable directly from the Command Details page.
- In the Command Details page, click +Create Variable in the Variables section to create a new variable. Jump to Creating an Automation Variable to learn more.
Editing and Deleting Custom Variables
You can also edit and delete Custom Variables from the Command Details page.
- To edit a custom variable, click the Edit icon next to each custom variable. Jump to Editing a Variable for detailed steps.
- To delete a custom variable, click the Delete icon next to each custom variable. Jump to Deleting Variables for detailed steps.
![]()
If the variable is used in a command, you will be prompted to confirm you understand the consequences. The associated commands might fail and you would have to manually find and update the commands later.
Using Update Variables and Run
You can also update the variable used in a command directly from the Commands dashboard.
- On the Commands page, for a specific command, click the three dots under Actions.
- Click Update Variables & Run. This is only available if the command uses variables.
- Update the variables as required.
- Click Update & Run.
The variable is updated and the command runs. You can check the results in the Command Results section.