


 Subscribe to Help Center RSS Feed
JumpCloud’s Access Risk Detection continuously monitors login activity across your organization and identifies logins that look suspicious. To begin assessing your system’s access risk, you must first define the Access Risk Detection configurations.
- Login to the JumpCloud Admin Portal.

If your data is stored outside of the US, check which login URL you should be using depending on your region. If your organization uses LDAP, RADIUS, or requires firewall allow list configuration, the Fully Qualified Domain Names (FQDNs) will also be region specific. See JumpCloud Data Centers for the URLs, FQDNs, and IP addresses.
- Go to Monitoring > Access Risk.

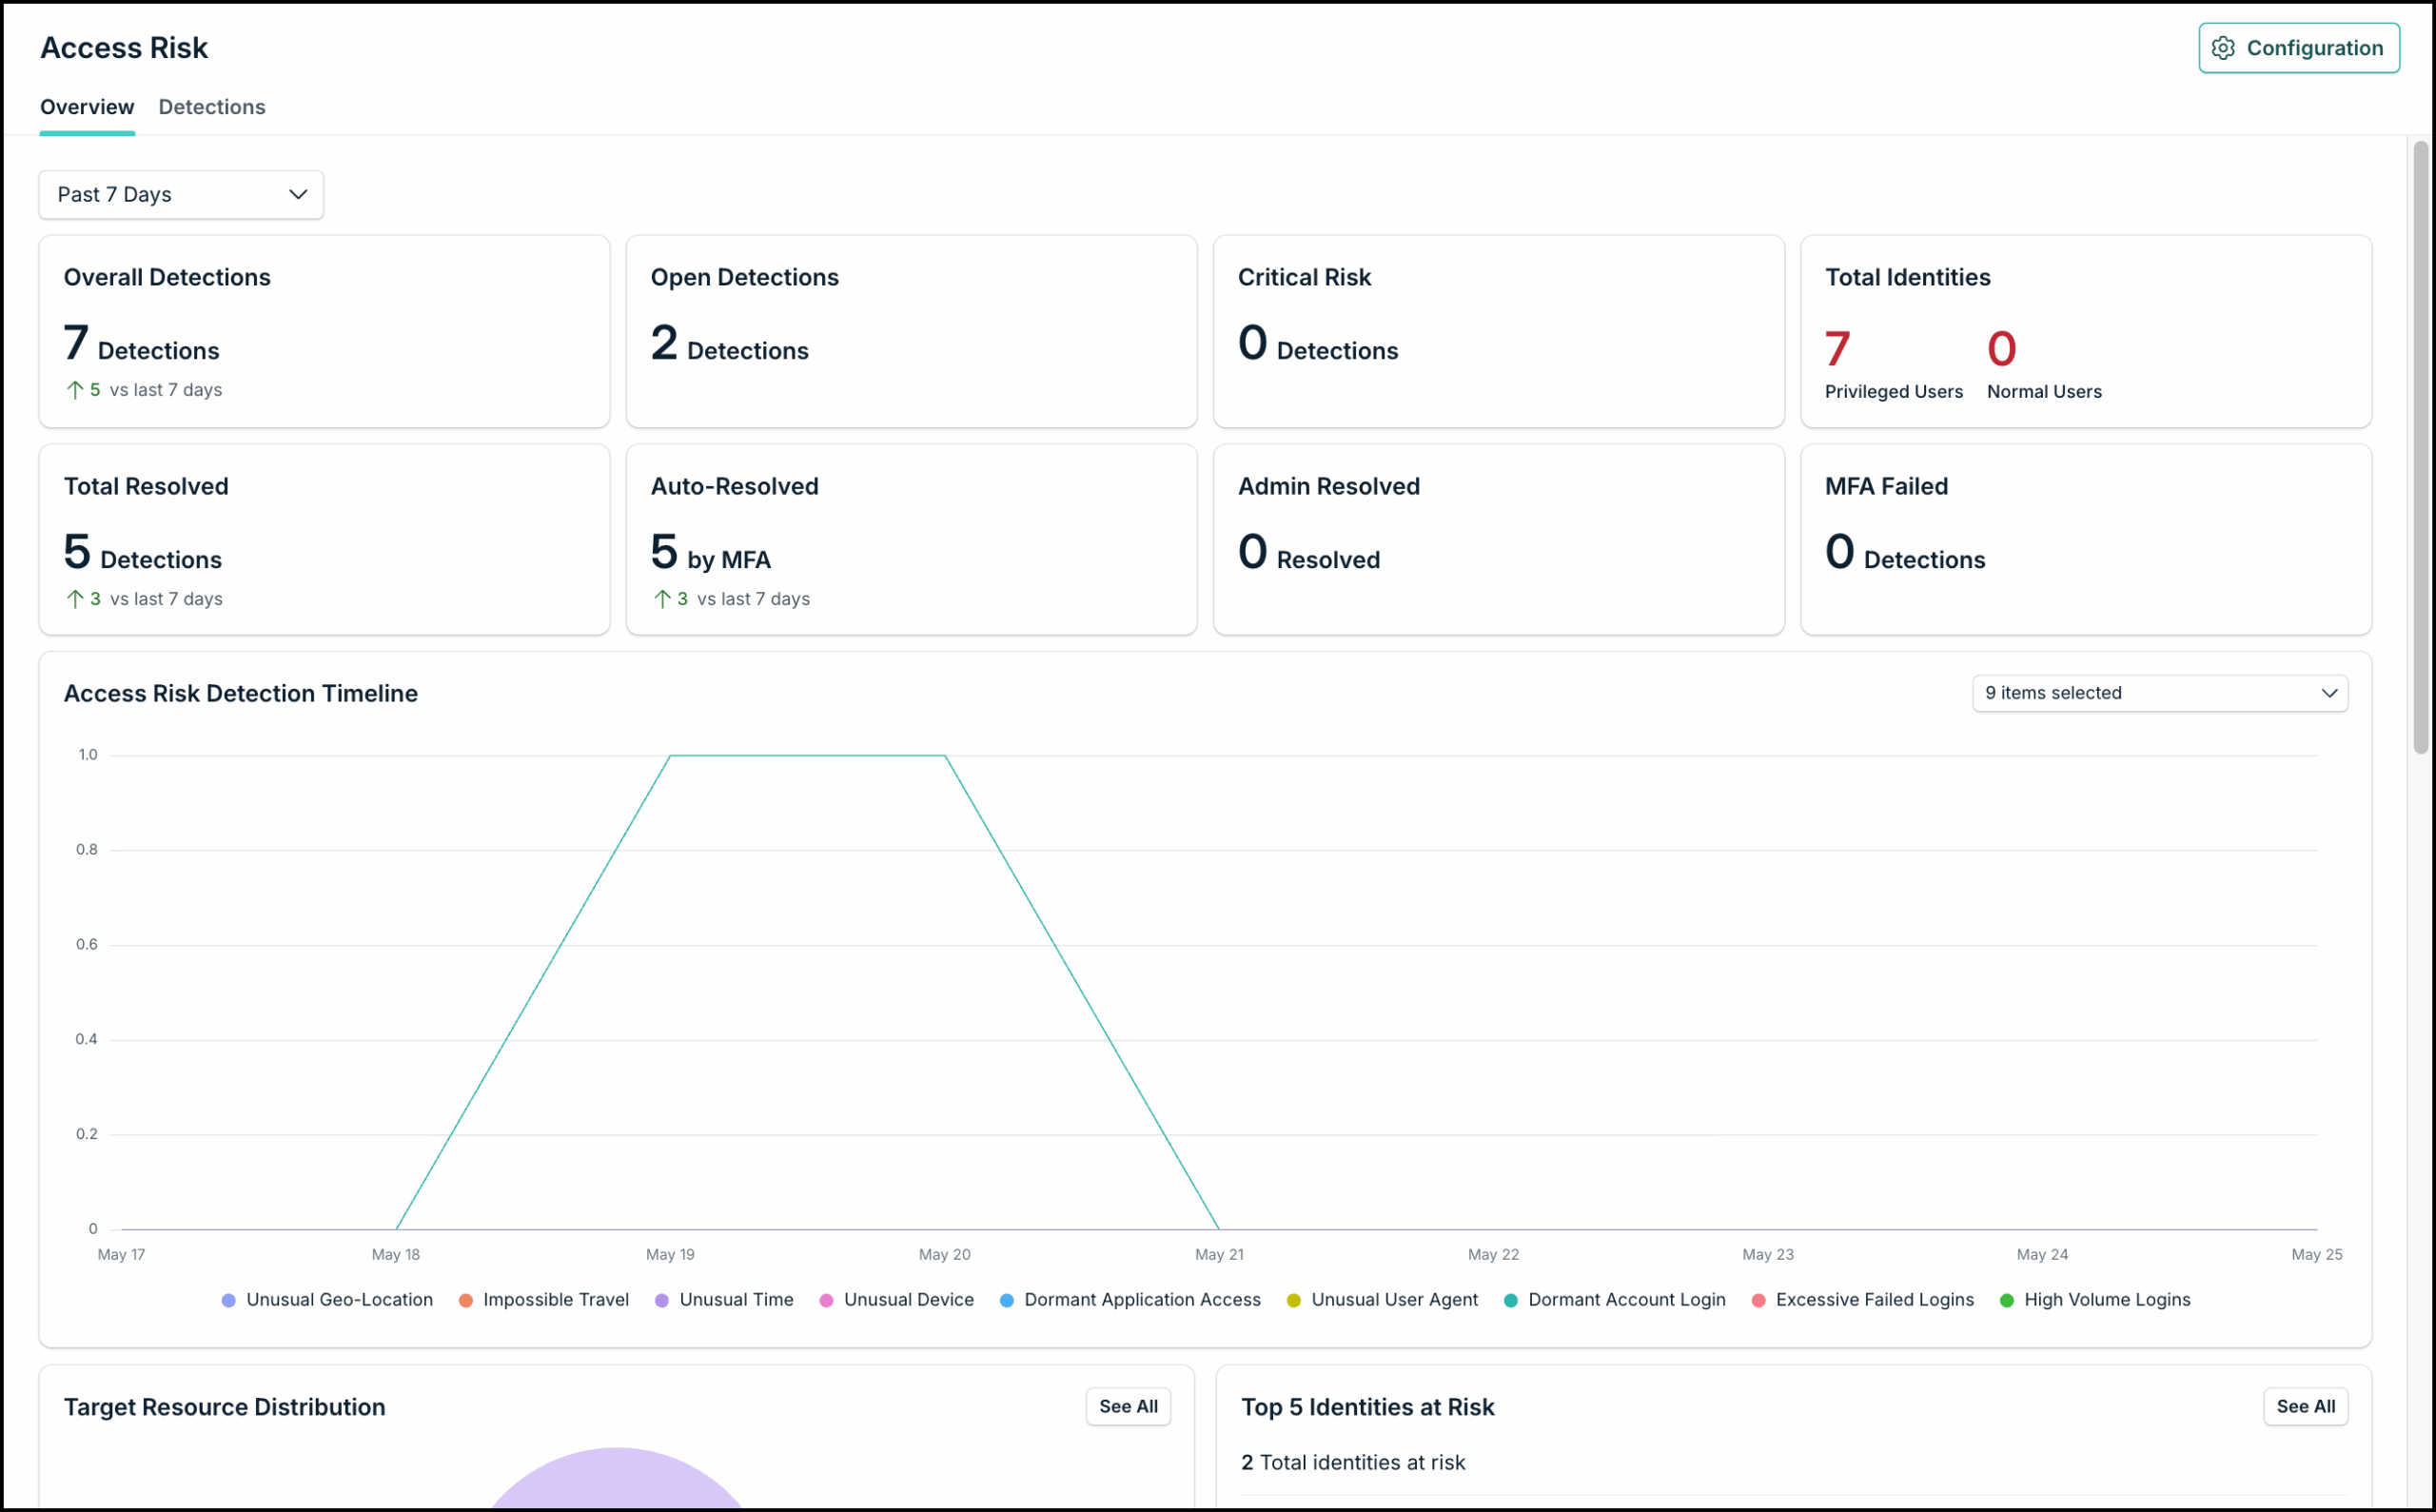
Access Risk consists of two tabs:
- Overview: Provides a high-level summary of all risk detections across your org with real-time risk factors and trend data, allowing you to monitor the overall health of your environment at a glance.
- Detections: Lists all identified detections with all important factors such as Severity, Status, Location, time and so on.
Setting Up Access Risk Detection
The first time you open Access Risk, you will view the Overview dashboard. To begin, you need to enable the feature in the Configuration page where you can also configure the settings for Access Risk and select your default landing page.
- In the Overview page, click Configuration.
- Enable Access Risk Detection.
- In the Configuration page, use the toggle to enable Access Risk Detection. Once enabled, Access Risk begins evaluating all login events in your organization.
- (Optional) Select the default landing page. You can customize your Access Risk experience by selecting a default landing page from the dropdown menu.
- (Optional) Choose the risk factor you want to monitor. Access Risk evaluates nine different signals. Unusual Time factor is set to off by default. You can enable/disable any signal you don't want to track.

We recommend keeping all nine signals enabled during your initial rollout so you can see which are most useful in your environment. You can tune which signals are active after you have a few weeks of data to review.
- (Optional) Configure MFA auto-resolution - If MFA is configured in your organization, you can have Access Risk automatically close detections when the user successfully completes an MFA challenge. This reduces the number of detections your admins need to review manually.
- In the Auto Resolution section, select the Auto-Resolve on MFA Success checkbox. If MFA is not yet configured, click the Configure MFA link to set it up. See Get Started: MFA to learn more.

When auto-resolution is enabled, a detection is automatically marked as Safe if the user completes MFA successfully during or after the flagged login. This applies to detections where MFA was required as part of the login flow. If MFA is not required for the login, the detection remains open for manual review.
- (Optional) In the Notifications section, configure when and how you want to be notified.
- Click Add Condition.
- Select one or more Severity levels for the detection.
- From the Notification Channel dropdown, choose where to send the alerts. You can send notifications via Email, Webhooks, or Slack.
All channels previously configured in Settings > Notifications will appear in this dropdown. If no channels are available, navigate there first to set them up. See Get Started: Notifications to learn more. Once channels are configured, you will receive real-time notifications whenever a risk is detected.
- Configure Advanced Settings - Use the Advanced Settings section to define specific thresholds for physical travel, trusted networks, and High Volume/Failed login indicators. Jump to Understanding Advanced Settings to know more about each.
- Under Impossible Travel: Distance Threshold, enter the minimum physical distance (in kilometers) required to trigger a travel velocity alert. The default recommended value is 500 km. Setting lower thresholds may increase false positives for mobile device users.
- Under Max Speed Threshold, enter the maximum speed threshold (in km/h) required to trigger an impossible travel detection.
- Under Trusted IPs and Networks field, enter the specific IP addresses belonging to your network that you want to exclude from geo-location alerts. This prevents false alarms from VPNs, NAT gateways, or centralized egress infrastructure.
- Under Unusual Login Time, enter the Familiar Login Time Window value. This defines how many hours before and after a user's typical login time are considered familiar. The system uses UTC hours to match behavioral profiles. Weekday matching does not use a radius.
Let’s consider the following examples of a few hour familiarity radius values:
- 2: Matches up to two hours before and after the known login hour.
- Higher numbers: Increases tolerance for users with irregular login schedules. - Under High Volume/Failed Logins: Thresholds, configure your rolling 24-hour brute-force parameters:
- High Volume Logins Threshold: Enter the maximum number of allowed successful logins from a single user within 24 hours before a detection triggers.
- Excessive Failed Logins Threshold: Enter the maximum number of allowed failed login attempts from a single user within 24 hours before a detection triggers.
- Login Volume Spike Multiplier - It measures current login activity against the user's typical daily average. To trigger this detection, a user's login count must beat their daily average by the multiplier you set here (while also passing your minimum count rules).
- Under Dormant Account, configure the Dormant Account Threshold field. Enter the minimum days since the last successful login before dormant-account detection triggers.
- Under Behavioral Detection, configure the Minimum Login History field. Enter the minimum login history samples required before behavioral novelty detections (such as unusual geolocation, user agent, application, login time, and new device login) trigger.
While standard password lockout policies stop rapid-fire brute-force attacks, these thresholds are designed to catch slower, distributed credential-stuffing campaigns that attempt to fly below standard lockout limits. You can click Go to Password Policy Settings to review your baseline lockout rules.
Once the setup is done, you will view your selected landing page first when you login again. After a day or two of live monitoring, the Overview dashboard will begin populating with:
- Total detections count reflecting recent login events
- A login types breakdown showing which login surfaces are contributing to risk
- A geo-location distribution map showing where your users are logging in from
Access Risk learns from your users' login patterns. In the first 30 to 60 days after enablement, you may see more detections than usual as baselines are still forming. This is expected behavior and detection quality improves over time as more login data accumulates. User profiles are built after monitoring a minimum 60 days of activity or after 50 successful login events, whichever is more comprehensive.
If you see no detections at all after several days, verify that Access Risk Detection is still toggled on in Configuration and that login events are flowing through Directory Insights.
Understanding Advanced Settings
Impossible Travel: Distance Threshold
An Impossible Travel risk factor triggers when a single user account logs in from two separate geographic locations within a timeframe that is physically impossible to achieve by commercial aviation (for example, authenticating from New York and then authenticating from Tokyo just one hour later).
JumpCloud doesn't just look at the distance; it looks at Distance ÷ Time Elapsed. If a user logs in from Location A and then Location B, the system calculates the distance between those two IP addresses and checks how long it took the user to travel that far. If the resulting speed required to make that trip is physically impossible, an alert triggers.
We recommend keeping this value set to 500 km. This establishes a buffer large enough to absorb routine network routing shifts (such as a mobile device connecting to a distant regional cellular hub) while still reliably catching high-confidence cross-country or international account takeover attempts.
- If you set this value too low, a user whose mobile phone rapidly hops between a cellular tower in one town and a Wi-Fi network in a neighboring city might trigger a false positive.
- If you set this value too high, you might miss tighter-range local credential compromises.
Currently, the Impossible Travel engine only triggers a risk detection if the two conflicting login events originate from different countries. If a user logs in from Los Angeles and then from New York thirty minutes later, the system will not flag it as a risk, because both destinations reside within the same national territory.
Trusted IPs and Networks
When users authenticate through corporate VPNs, cloud egress gateways, or shared infrastructure, the source IP doesn't reflect their actual location. This can cause Unusual Geolocation or Impossible Travel detections for legitimate sessions.
Adding an IP to the Trusted IPs list tells JumpCloud to disregard that source when evaluating geolocation-based risk. For example, an employee in Chicago connecting through a VPN gateway in Germany will appear to authenticate from Germany. Adding the German gateway's public IP suppresses the false alert.
What's affected: Only Unusual Geolocation and Impossible Travel are suppressed for trusted sources. All other risk factors continue to evaluate normally. The authentication event is still logged for audit.
Supported Network Formats
The configuration field accepts public IPv4 and IPv6 addresses. To ensure proper parsing, enter your network infrastructure parameters using the following standardized formats:
| Format Type | Use Case | Example Syntax |
|---|---|---|
| Individual IP | Excludes a single, dedicated static endpoint (such as a specific remote office firewall gateway). | 2001:db8::1 |
| IP Range | Excludes a continuous, sequential block of public IP addresses assigned by your ISP. | 2001:db8:: - 2001:db8::ffff |
| CIDR Notation | Excludes an entire network subnet or IP routing block with a routing prefix. | 2001:db8::/32 |
Follow these formatting rules:
- One entry per line
- For ranges, use a spaced hyphen: start - end
-
198.51.100.0 - 198.51.100.255 2001:db8:: - 2001:db8::ffff
-
- Do not mix IPv4 and IPv6 in the same range (example,
192.0.2.1 - 2001:db8::1is invalid).
Points to remember
- Only valid public IP addresses are accepted.
- The following IP ranges are strictly rejected:
- Private Ranges:
10.0.0.0/8, 172.16.0.0/12, and 192.168.0.0/16 - Loopback Addresses: Localhost/loopback ranges.
- Catch-all Route:
0.0.0.0/0 - A maximum of 500 entries can be added per list.
Trusted ASNs
The Trusted ASNs setting lets Admins specify Autonomous System Numbers (ASNs) for trusted corporate egress networks, such as corporate VPNs, secure web gateways (SWGs), or Zero Trust Network Access (ZTNA) providers. Logins originating from ASNs on the Trusted ASN list are excluded from location-based detections, such as Unusual Geolocation and Impossible Travel.
Alternatively, enable Suppress risk score for trusted ASNs to generate these detections at reduced severity instead of suppressing them entirely.
Add only ASNs for trusted corporate egress networks that your organization controls or uses (for example, Zscaler or Netskope). Do not add ASNs for public cloud providers (such as AWS, Azure, or Google Cloud), hosting providers, CDNs, or ISPs, as these networks are shared by many organizations and trusting them may reduce detection accuracy.
Example
Many organizations route employee traffic through a secure web gateway (SWG) or corporate VPN. Depending on whether a user is connected to the gateway, the same user may appear to sign in from different cities or countries because the login originates from the gateway's egress location rather than the user's physical location. This can trigger location-based detections such as Impossible Travel even though the login is legitimate.
For example:
- AS62044 (Zscaler) may be added as a Trusted ASN if your organization uses Zscaler as its corporate secure web gateway.
- AS16509 (AWS) should not be added because it represents shared cloud infrastructure used by many organizations.
Consider the following scenario:
- A user signs in from New York while connected directly to the internet.
- Later, the same user signs in while connected through Zscaler, and the login appears to originate from London, where the organization's Zscaler egress gateway is located.
- AS62044 (Zscaler) has been added to the Trusted ASN list.
| Suppress risk score for trusted ASNs | Result |
| Disabled (default) | No Impossible Travel alert is generated because the login originated from a trusted ASN. |
| Enabled | An Impossible Travel alert is generated at reduced severity, allowing the event to remain visible while reducing its contribution to the overall risk score. |
High Volume/Failed Logins: Thresholds
By configuring the High Volume/Failed Logins: Thresholds, you can catch anomalous bots, credential-stuffing campaigns, and attacks that operate over an extended window.
High Volume Logins Threshold
This tracks an unusual surge of successful authentications tied to a single identity.
- Enter the maximum number of successful logins allowed from a single user within a rolling 24-hour window before triggering a threat detection. This is set to 50 by default.
Under normal business operations, it is rare for a single human user to successfully log in dozens of times within 24 hours. A surge crossing this boundary frequently indicates machine-driven programmatic access, such as compromised credentials being used by an attacker to rapidly scrape data.
Excessive Failed Logins Threshold
This tracks low-and-slow authentication failures targeting an individual account name.
- Enter the maximum number of failed login attempts allowed from a single user within a rolling 24-hour window before a risk detection is generated. This is set to 20 by default.
This setting is specifically engineered to flag "slow" password-guessing or credential-stuffing patterns that remain just below your strict lockout policies.
For example, if your company’s password policy locks an account after 5 failed attempts in 5 minutes, an attacker might script an attack to attempt only 3 failures an hour. While this avoids a standard account lockout, it will cross the rolling 24-hour Excessive Failed Logins Threshold, flagging the distributed threat to your administrators.
 In this Article
 Learn More