
JumpCloud can automatically send a notification to an external application or service, such as JIRA. You can set up webhook notification channels to get system alerts delivered to specified URLs.
In this document, you will learn how to integrate JIRA within the JumpCloud admin portal by setting up a webhook channel. This integration allows you to automatically receive notifications and create JIRA tickets based on system alerts and access request events.
Prerequisites
- Ensure you have access to the JumpCloud Admin Portal.
- Ensure you have Webhooks, Alerts, and Access Requests enabled for your org.
- Ensure you have the required JIRA permissions to configure automation rules.
- JIRA Details you must know:
- The Project Key (e.g., ITSERV, OPS, or JC) where tickets will be created.
- The Issue Type Name you want the alert to create such as Story, Task, Subtask, Bug.
Creating the URL and Secret Token for Webhook in JIRA
First, you must go to your JIRA project and configure the automation rule for an incoming webhook. See JIRA’s documentation to Configure the incoming webhook trigger in Atlassian Automation to learn more.
![]()
Ensure you’re logged in as a user with the Administer Jira global permission.
While configuring the automation rule, include the following details:
- Create a rule for an Incoming Webhook trigger and set the condition to create a new work item like Story, Task, Subtask, Bug.

- Specify the Project where you want the new work item to be created.
- In the Summary, use
{{webhookData}}to define what the notification title should include using custom XML. You can add the specific events that you want to be included.

![]()
- Go to Insights > Directory in the JumpCloud admin portal and check the JSON for a specific event to know the event details.
- See Webhook Payload Fields to learn more about specific fields in the Webhook Payload.
- See Access Requests Webhook Payloads Data to learn more about Access Requests related fields in the Webhook Payload.
- See Events: Access Requests to learn more about events related to access requests.
Here is an example:
Alert: {{webhookData.alert_title}} - {{webhookData.event_description}} for {{webhookData.source_name}}
- In the Description section, you can add all other details that you want to include in the ticket such as an Overview, Priority, Current status, Event Specifications, and so on.
Here is an example:
Alert Overview:
This Jira story was automatically generated due to an alert triggered by a significant event within your systems.
- Priority: {{webhookData.priority}}
- Current Status: {{webhookData.status}}
- Triggered At: {{webhookData.occurred_at}}
- Associated Rule ID: {{webhookData.rule_id}}
Event Specifics:
- Event Description: {{webhookData.event_description}}
- Event Type: (Requires parsing from "Raw DI Event Data" - look for 'event_type')
- Initiated By: {{webhookData.initiated_by}}
- Organization ID: (Requires parsing from "Raw DI Event Data" - look for 'organization')
- Affected Resource Name: {{webhookData.source_name}}
- Affected Resource Type: {{webhookData.source_type}}
- Resource Link: {{webhookData.source_url}}
Raw DI Event Data (for detailed analysis):
{{webhookData.di_event}}
![]()
The webhook notification payload for access requests is slightly different from alerts. See Access Requests Payload Data to learn more about Access Requests related fields in the webhook payload.
For access requests, the events are nested under di_event. So you have to configure the attributes accordingly.
Here’s an example:
{{webhookData.di_event.workflow.name}} by {{webhookData.di_event.initiated_by.username}}
Reason: {{#webhookData.di_event.changes}}
{{#if(equals(field,"user_remarks"))}}
{{to}}
{{/}}
{{/webhookData.di_event.changes}}
Location: {{webhookData.di_event.location.City.Name}},
{{webhookData.di_event.location.Subdivisions.0.Name}},
{{webhookData.di_event.location.Country.Name}}
Client IP: {{webhookData.di_event.client_ip}}
Timestamp: {{webhookData.di_event.timestamp}}
- To keep it simple, select No work items from the webhook as the Work item criteria.

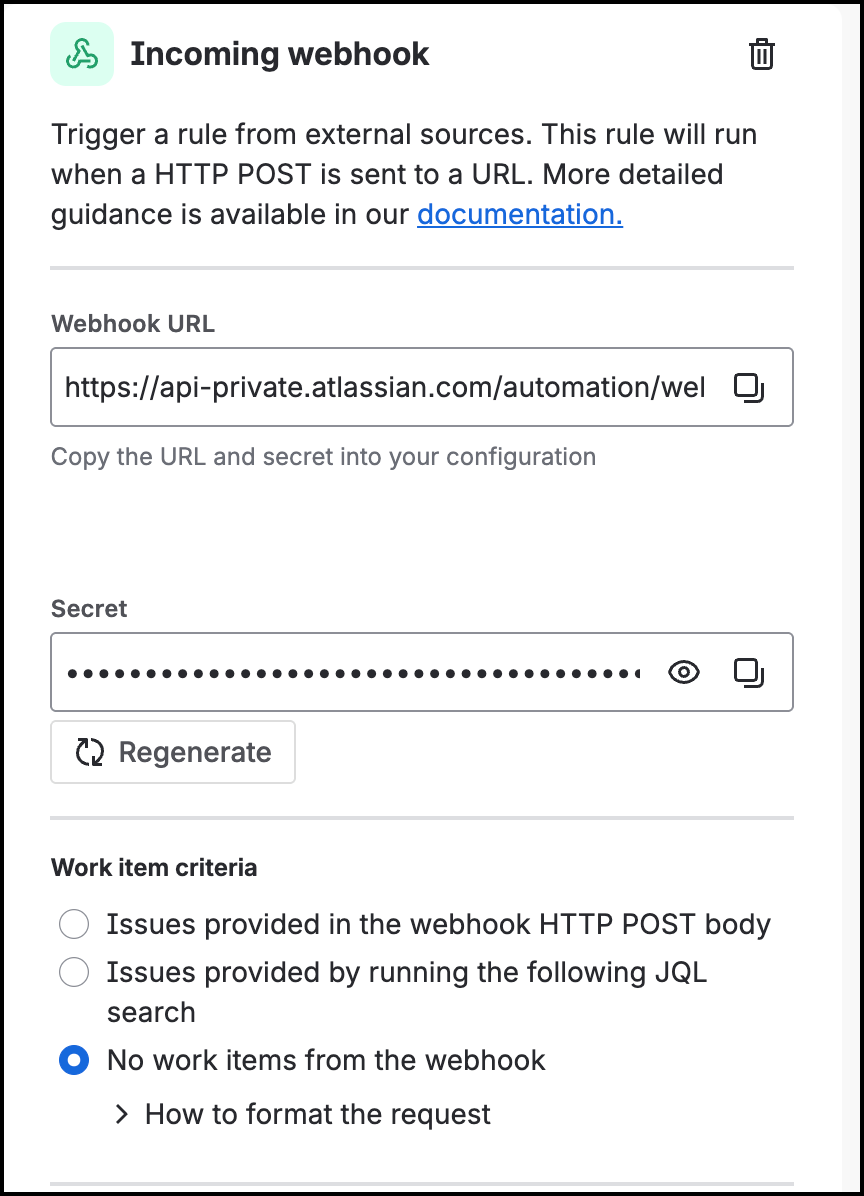
Once you configure the rule, copy the Webhook URL and Secret key and save it in your notepad. We will use this while configuring the Webhook.
Configuring the Webhook in JumpCloud Admin Portal
Next, let’s login to the JumpCloud admin portal and create a webhook channel. See Create Webhook Channels to learn more.
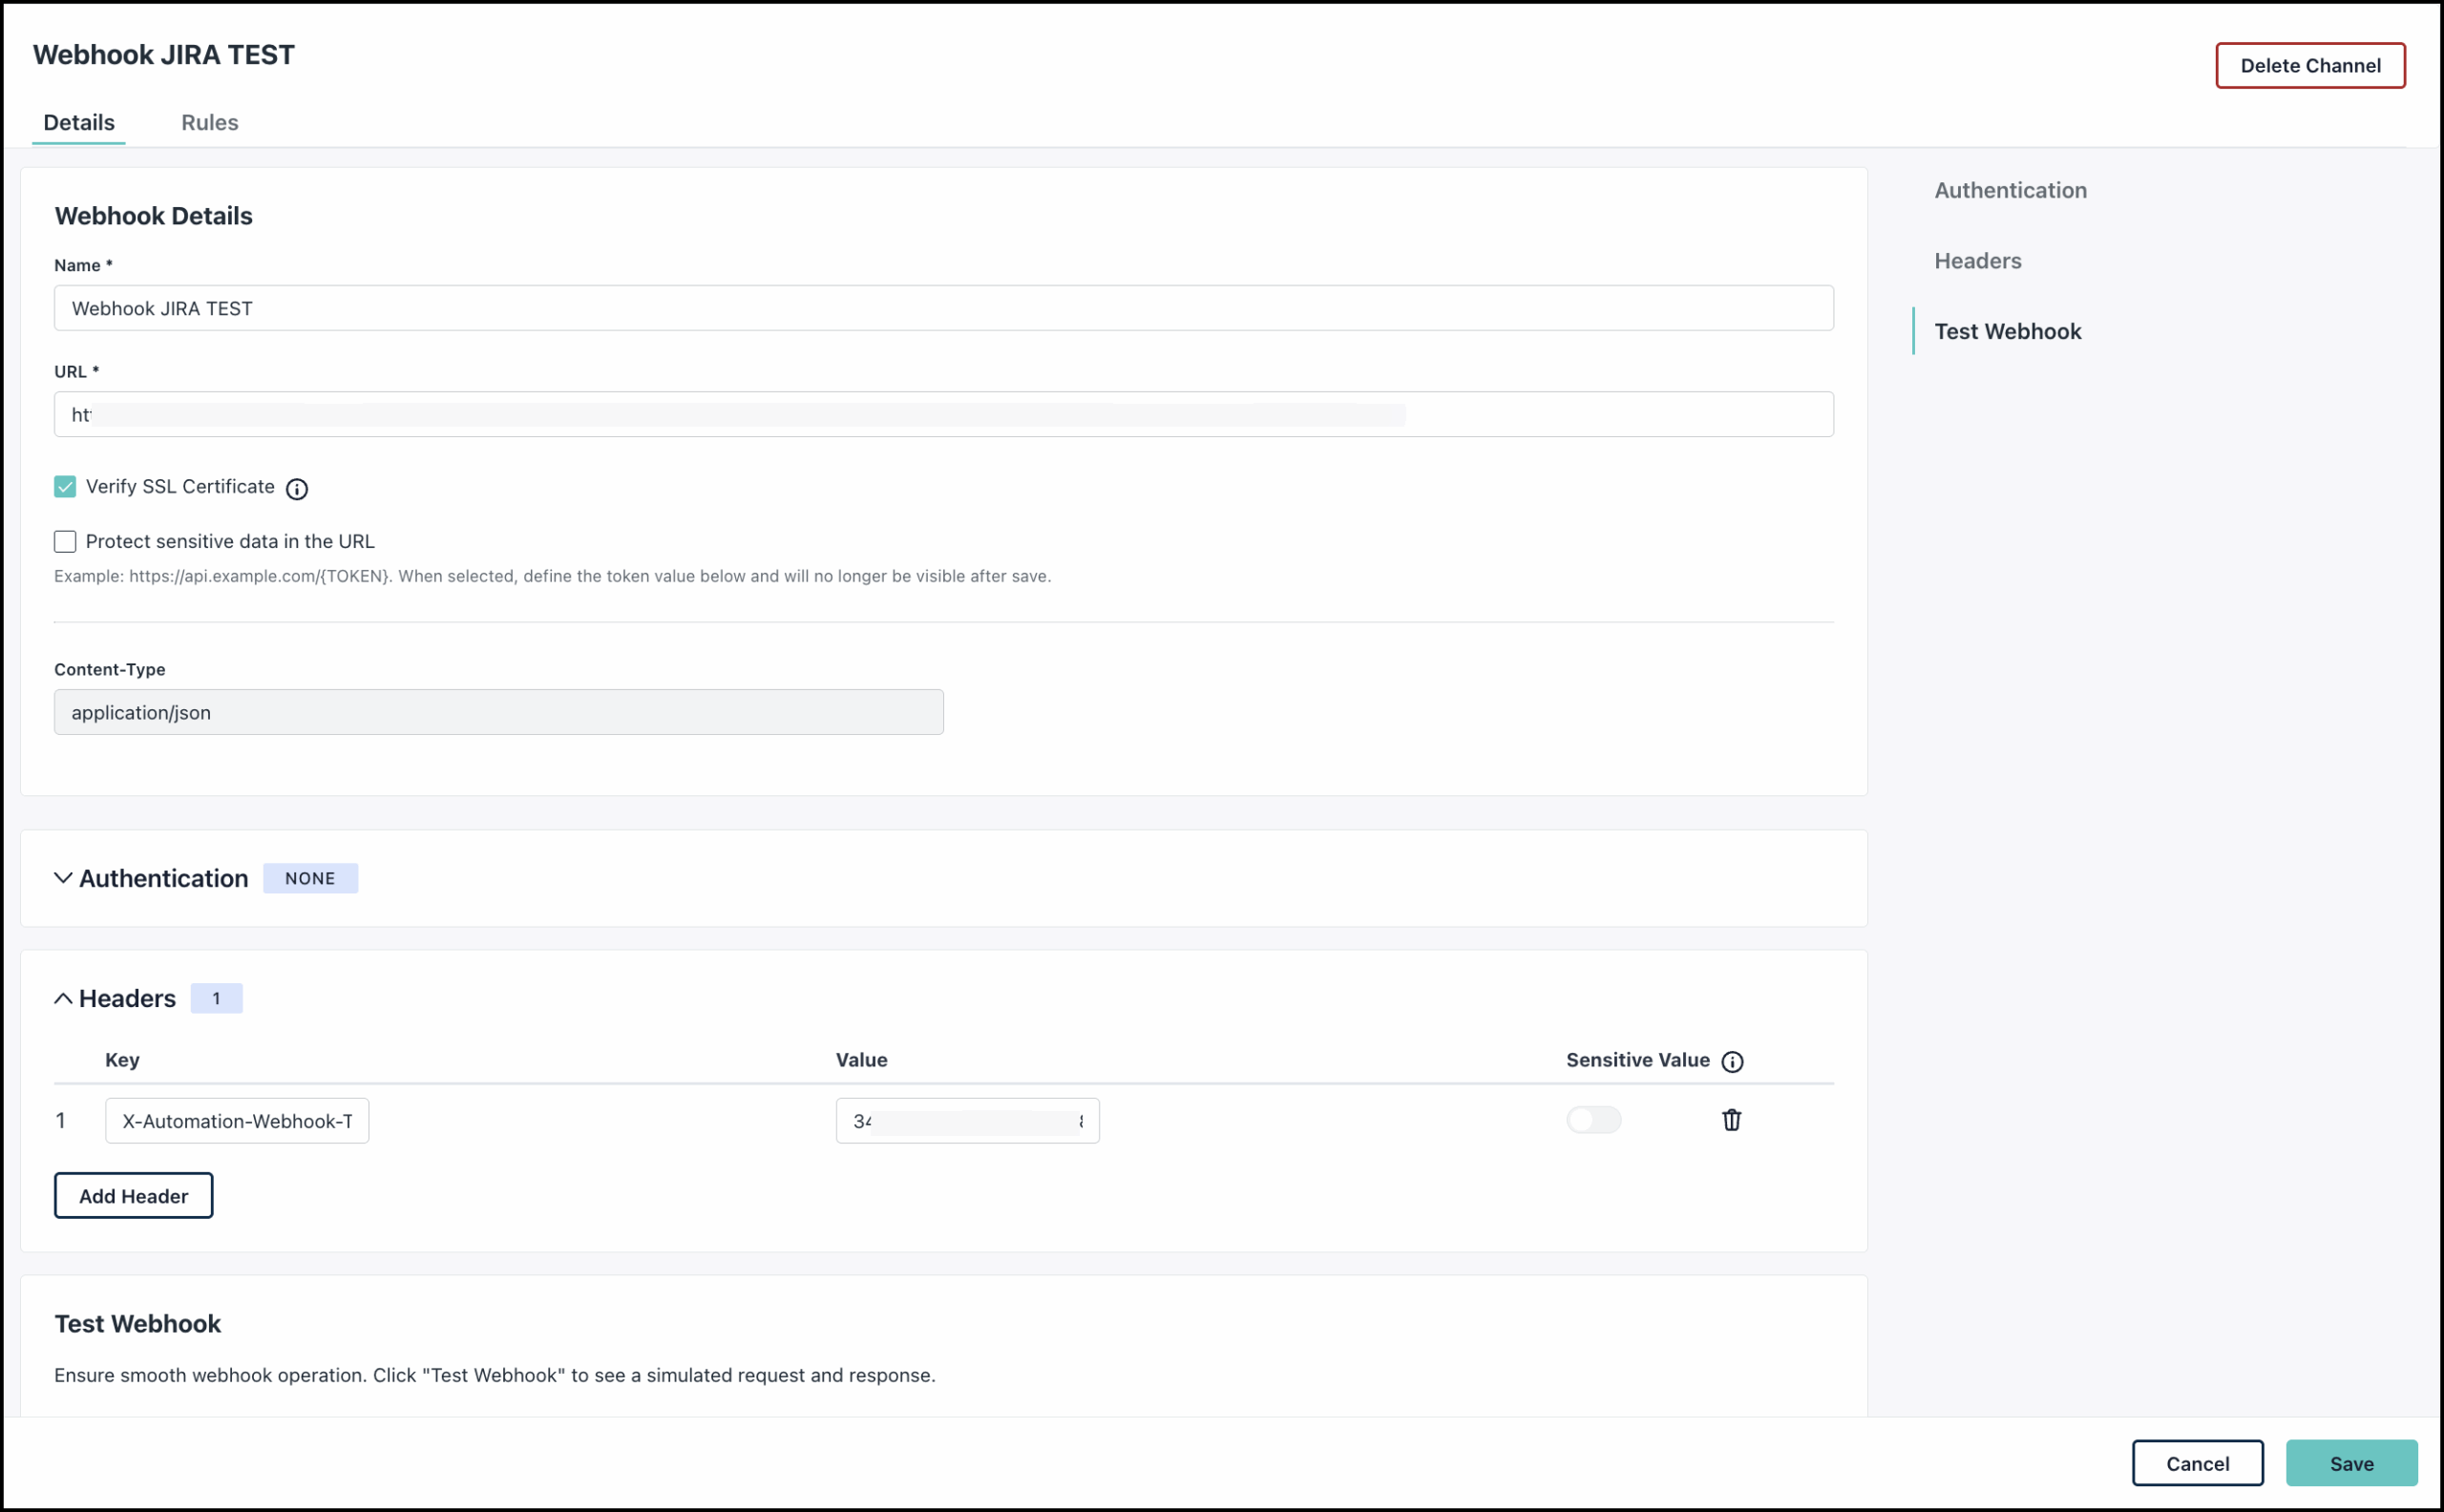
While configuring the webhook, include the following details:
- In the URL field, copy and paste the Webhook URL that you created while configuring the rule in JIRA.

- For Authentication, select None. For JIRA, we will add required authentication details as HTTP Headers.
- Expand the Headers field and click Add Header.
- In the Key field, enter -
X-Automation-Webhook-Token. - In the Value field, paste the Secret key that we copied from the JIRA rule.
- In the Key field, enter -
- Click Test Webhook to ensure it’s working properly.
- Click Save.
Configuring the Insights Rule in JumpCloud Admin Portal
Next, go ahead and configure the Insights Rule to receive alert notifications. See Create an Insights Rule to learn more.
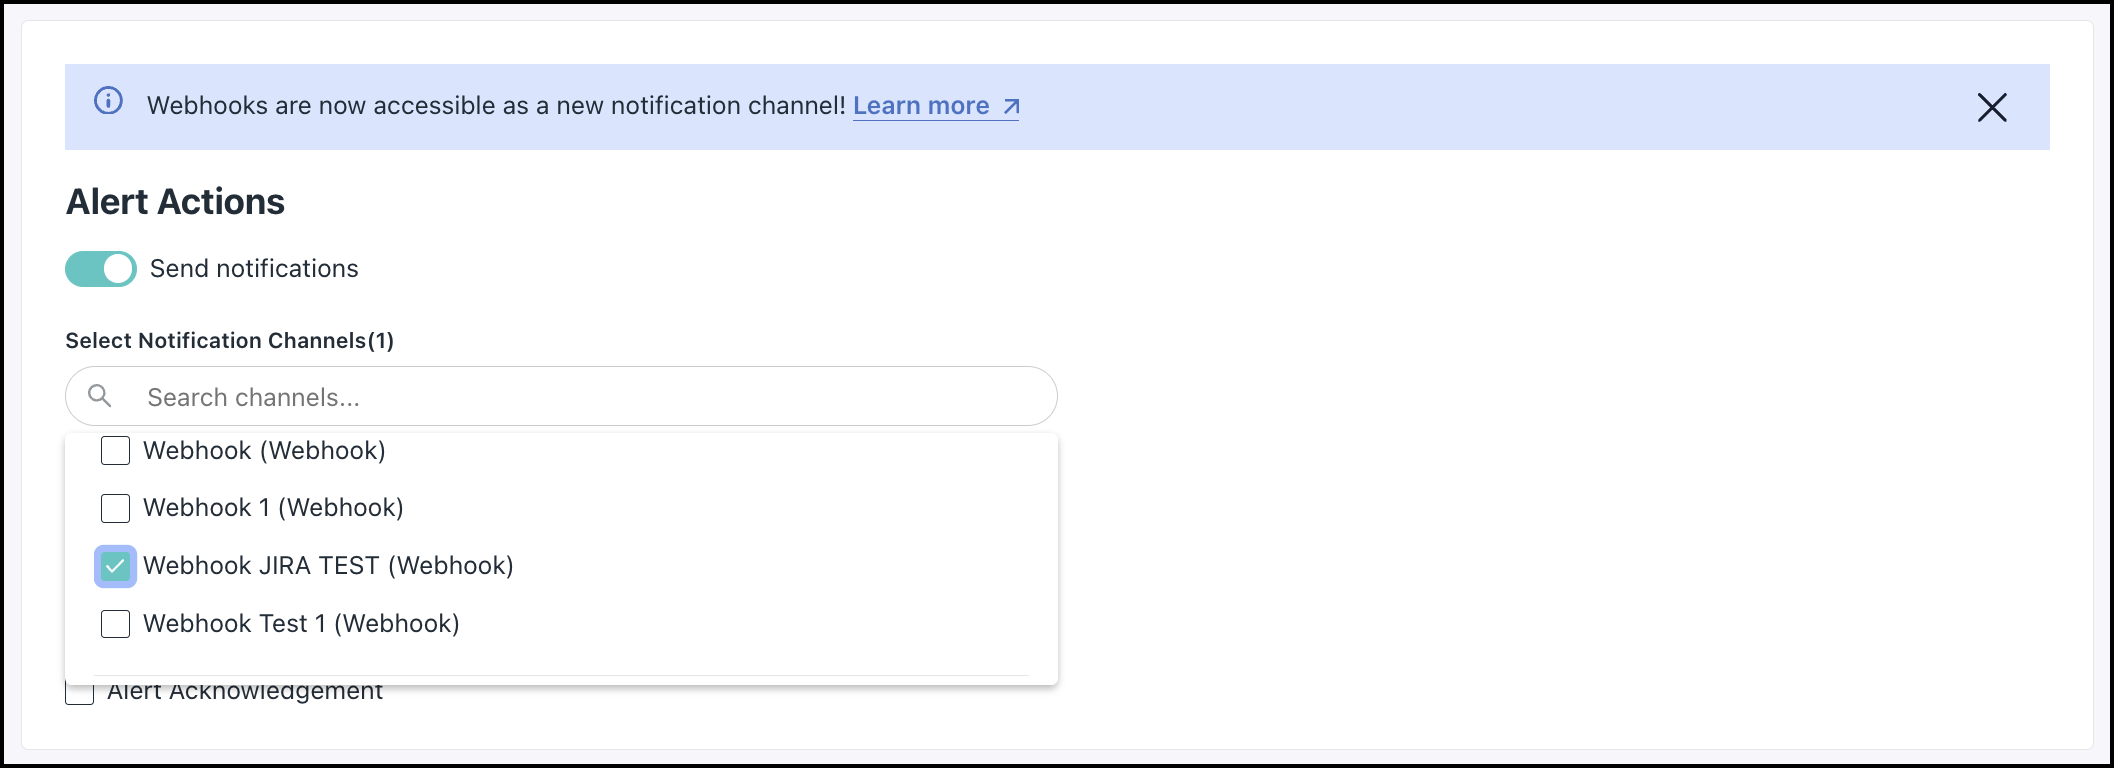
While configuring the rule, ensure the following:
- In the Conditions section, select the specific events that you want to be notified for.
- In the Alert Actions section, select the appropriate webhook channel that you just created from the Select Notification Channels dropdown.

- To be notified for alert resolution and acknowledgement events, you can select the respective checkboxes.
After setup, any of the selected events will trigger a webhook notification that JIRA uses to automatically create a ticket. This ticket will include details based on the configured JIRA rule.
Configuring Webhook Notifications in Access Requests Settings
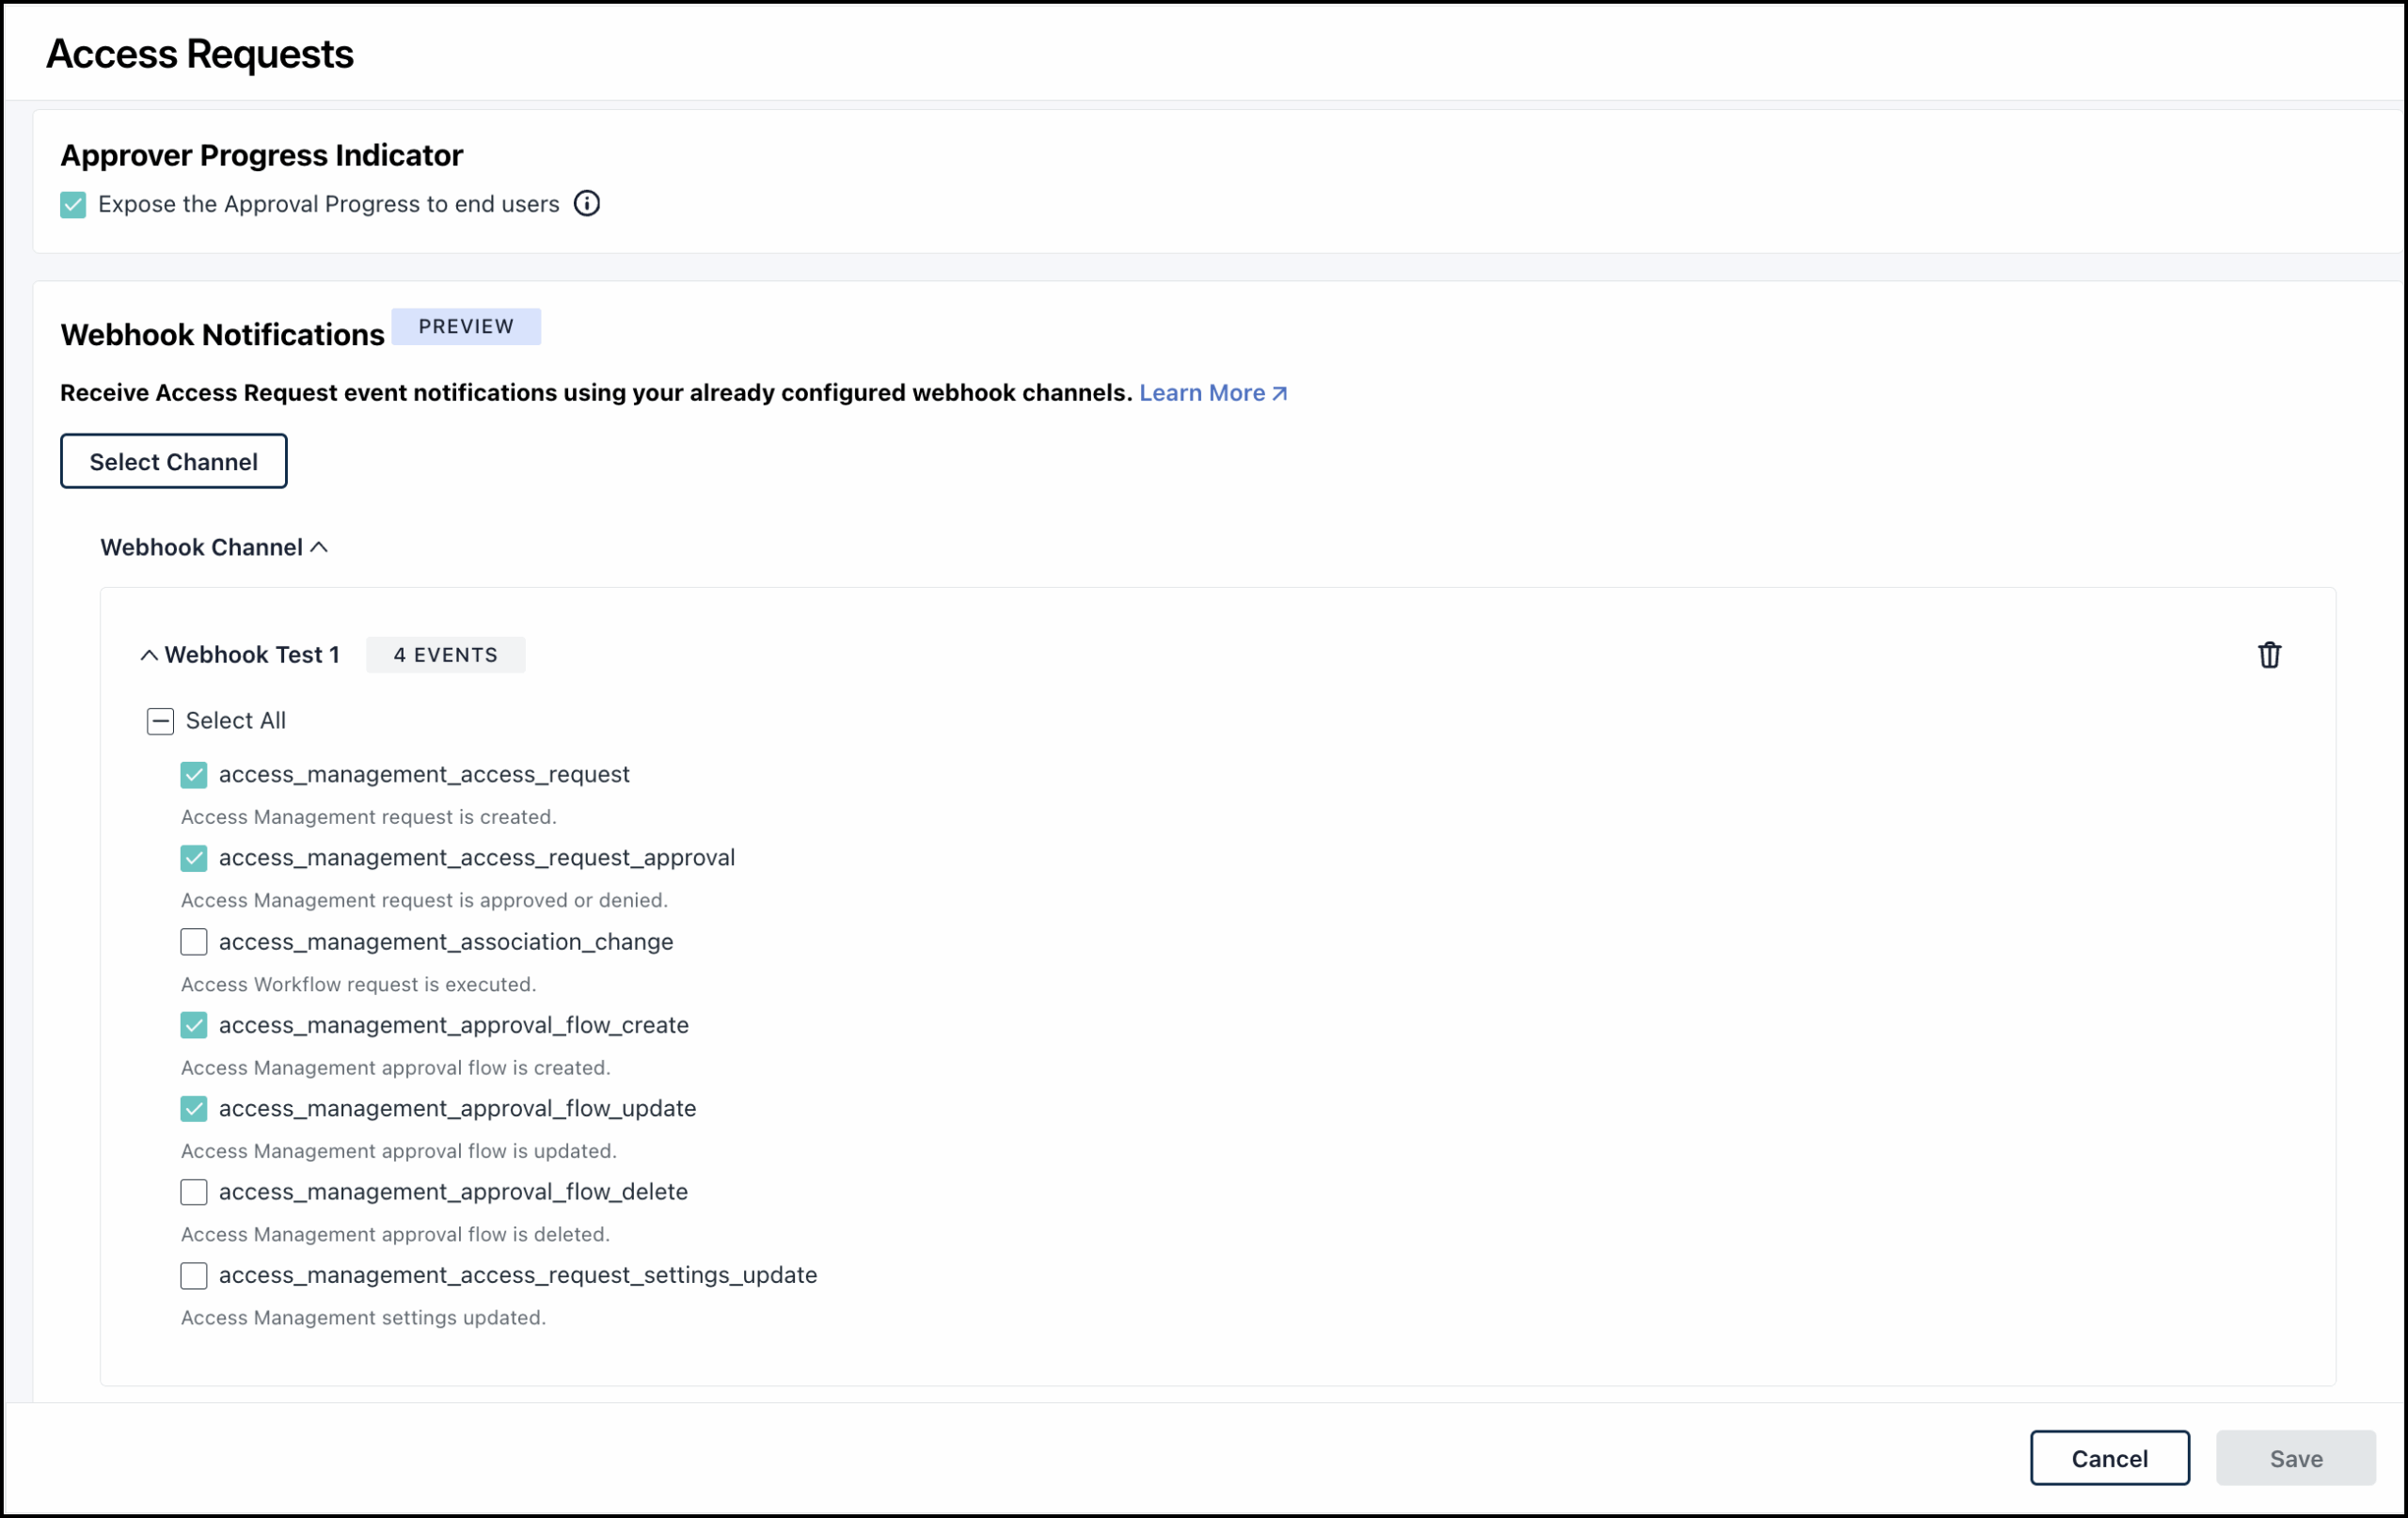
You can select existing webhook channels within the JumpCloud Admin Portal to receive event notifications related to Access Requests.
- Login to the JumpCloud admin portal.
- Go to Security Management > Access Requests.
- Follow the steps in Configuring Access Requests Settings to complete the Webhook Notification configuration.
- Ensure you select the events that you want to receive notifications for.

- Click Save.
After setup, any of the selected events will trigger a webhook notification that JIRA uses to automatically create a ticket. This ticket will include details based on the configured JIRA rule.