
A template or system image lets you set up multiple devices that include the JumpCloud agent and share the same configuration. After you customize the operating system, applications, drivers, and settings on a single computer (the imaging host), pre-install the JumpCloud agent before you create the image and deploy it to other computers.
Any device deployed from the template or image has a unique device record in your JumpCloud organization.
Considerations:
- Pre-installing the agent on a template or image does not create JumpCloud user account associations. You must associate users with devices after each deployed device creates its unique device record. You can automate user associations with the JumpCloud’s API.
- On Windows imaging hosts, the default Windows service start timeout can be too short for the JumpCloud agent to start after deployment. If the agent service fails to start and returns Windows Error 1053, apply the registry modification in the procedure below before you capture the image.
![]()
Do not reboot the device or restart the agent after removing the files in Step 4 of the following procedure. The agent is configured to start on boot. When the agent starts, it recreates the files and creates a unique device record in your organization. Deploying from an image with certificates and configuration files in place results in duplicate device records.
Disabling Automatic Windows MDM Enrollment
To pre-install the agent on a template or system image:
- Before proceeding with installing the agent on a Windows imaging host, ensure that automatic enrollment is disabled for Windows 10 & 11 devices:
- Log in to the JumpCloud Admin Portal.
![]()
If your data is stored outside of the US, check which login URL you should be using depending on your region. If your organization uses LDAP, RADIUS, or requires firewall allow list configuration, the Fully Qualified Domain Names (FQDNs) will also be region specific. See JumpCloud Data Centers for the URLs, FQDNs, and IP addresses.
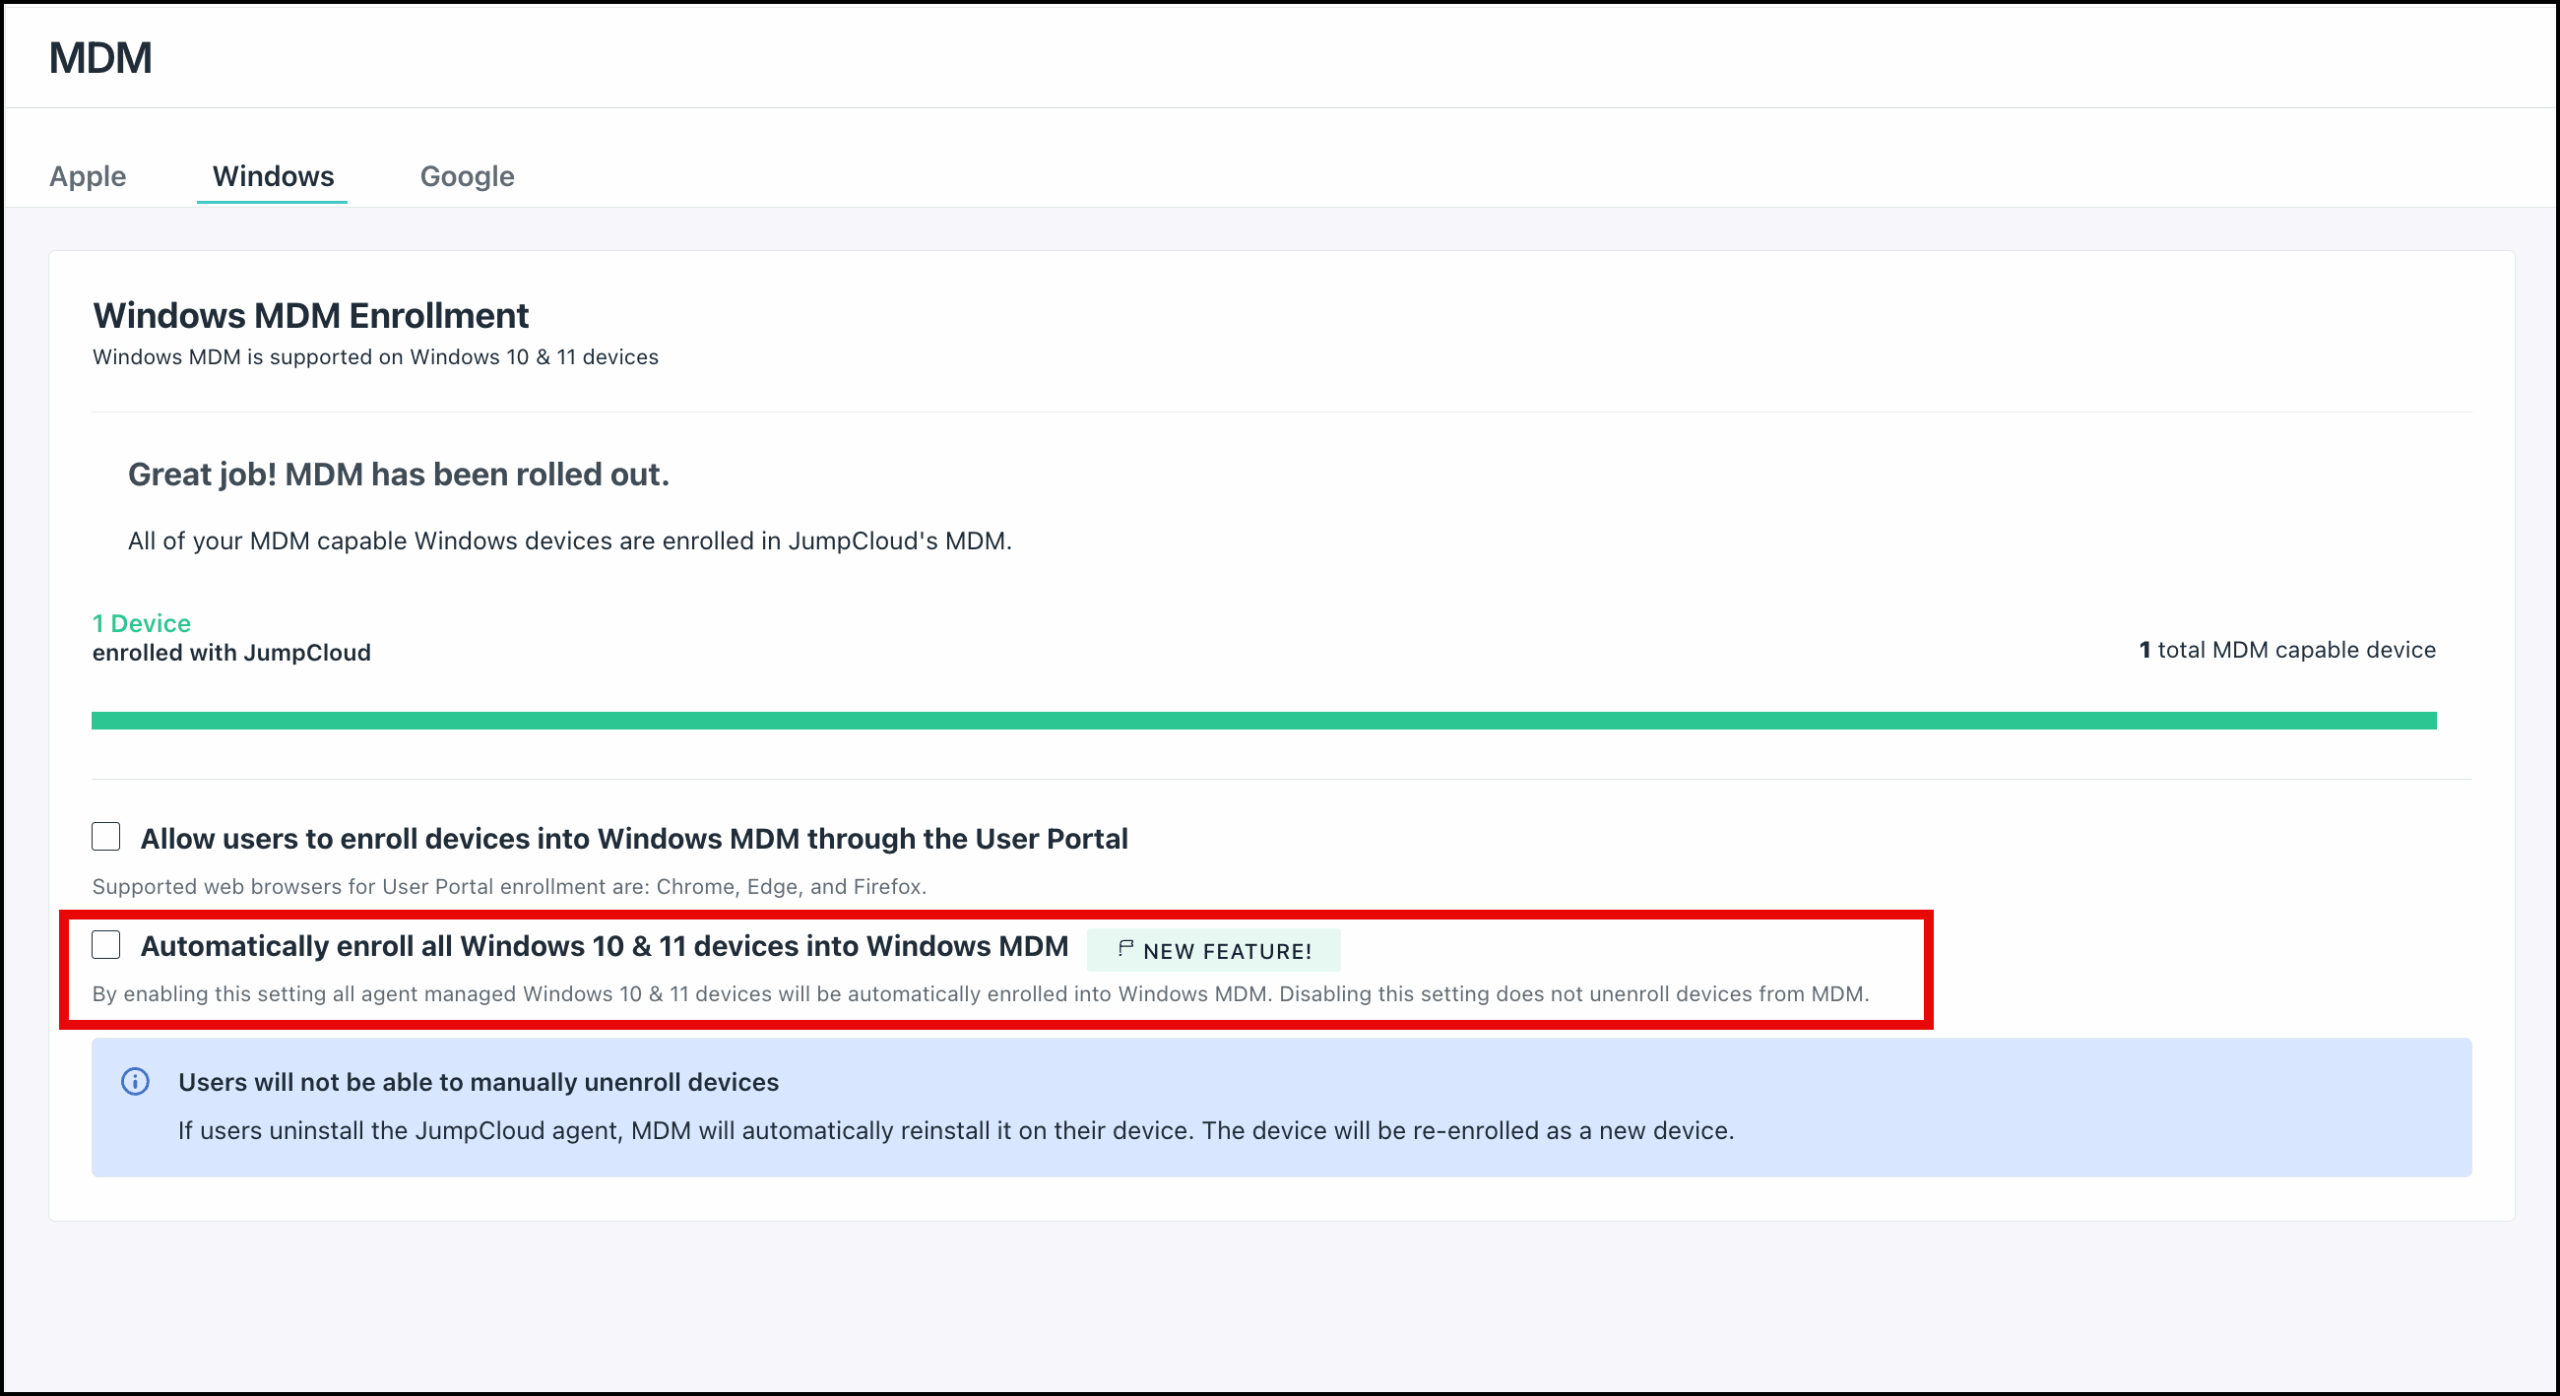
- Go to Device Management > MDM.
- Click the Windows tab.
- Remove selection for Automatically enroll all Windows 10 & 11 devices into Windows MDM checkbox.

![]()
After you have completed creating or updating the system image, you can re-enable this option.
Applying the Windows Service Timeout Registry Fix
Before you create your system image on a Windows imaging host, apply the following registry modification on the machine where the image is being created.
- Press Windows + R.
- Type regedit and press Enter.
- Click Yes on the User Account Control (UAC) prompt.
- In the Registry Editor address bar, paste this path and press Enter:
HKEY_LOCAL_MACHINE\SYSTEM\CurrentControlSet\Control - Right-click the Control folder, click New > DWORD (32-bit) Value, and name the value ServicesPipeTimeout.
- Right-click ServicesPipeTimeout and click Modify.
- Set Base to Decimal, type 240000 in Value data, and click OK.
- Fully restart the imaging host.
Installing and Preparing the Agent on the Imaging Host
- On the imaging host, install the agent from the Admin Portal or the command line, wait for the installation to complete.
- Verify that the JumpCloud agent service is running:
- Press Windows + R, type services.msc, and press Enter.
- Confirm that the JumpCloud Agent service status is Running.
- Stop the agent on the imaging host in one of the following ways:
- Windows: Open Command Prompt as an administrator and run:
sc stop jumpcloud-agent - Linux: Run:
service jcagent stop - For newer Linux devices with systemd, you can also run:
systemctl stop jcagent
- Windows: Open Command Prompt as an administrator and run:
- Remove the following files: ca.crt, client.crt, client.key, and jcagent.conf.
- Use one of these methods to remove the files:
- Windows — Open C:\Program Files\JumpCloud\Plugins\Contrib and delete the files.
- Linux — Run:
sudo rm -f /opt/jc/ca.crt /opt/jc/client.crt /opt/jc/client.key /opt/jc/jcagent.conf
- Remove the device record created for this template in the Admin Portal. Otherwise, this device is orphaned.
- All operating systems use these steps. You can also use the JumpCloud API.
- In the JumpCloud Admin Portal, go to Device Management > Devices.
- Select the checkbox next to the imaging host.
- Click delete.
- Configure the template or image to set unique network parameters such as hostname, IP, and MAC before the agent starts. This forces the agent to use the details for the specific device when it checks in with JumpCloud rather than using those assigned to the template.
- Without rebooting the imaging host, create the template or image.
- Deploy the image to other machines.
- On a deployed machine, verify that the JumpCloud agent service shows Running in services.msc.
- Associate users with devices in the Admin Portal or through the JumpCloud API.
Admin Portal:- In the JumpCloud Admin Portal, go to Device Management > Devices.
- Select a device.
- Click the Users tab.
- Select the checkbox for the user’s account.
- Click save device.
JumpCloud API:- Use the following endpoint:
POST /users/{user_id}/associations - See JumpCloud API Users documentation.
- Use the following endpoint: