
JumpCloud offers a full feature password manager integrated into the JumpCloud product and all of our single sign-on applications. The JumpCloud Password Manager enables your team to securely manage and share passwords, 2FA (two-factor authentication) tokens, and other types of sensitive information while providing you with full visibility and control over passwords used across your organization. Admins and users will have a seamless authentication experience without relying on a third-party solution.
![]()
Users will be given a link to download the desktop app when they receive an invitation to enroll from their IT admin or you can find the download link here.
System Requirements
- Supported MacOS Versions
- Big Sur 11.x
- Monterey 12.x
- Ventura 13.x
- Sonoma 14.x
- Sequoia 15.x
- Supported Windows Versions
- 10 (64-bit)
- 11 (64-bit)
- Supported Linux Versions
- Jump to Linux Specific Information section.
![]()
Automatic updates are now supported with the Linux Debian and the Linux RPM build. The Appimage build is no longer supported.
Desktop App Overview
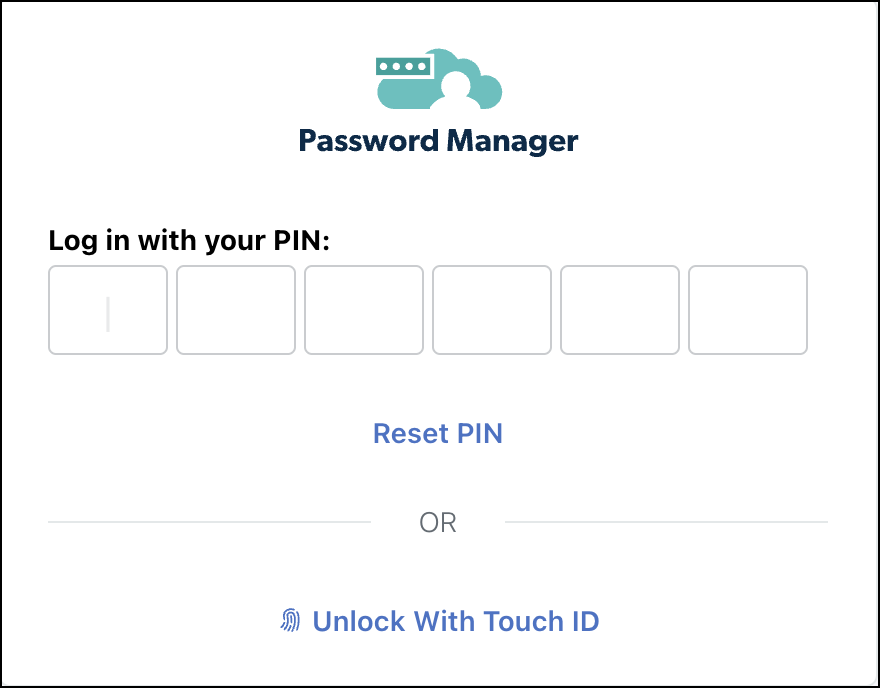
- Logging In: When you open the desktop app, log in using your PIN, or unlock with Touch ID. You can also reset your PIN from this page.
While logging in for the first time, you can now select the region you're in before activating your account.
- In the top navigation bar, the following options are displayed.
- Add Item: Click this button to manually add items in password manager. You can also import items by clicking Import Items. See Password Manager Import Tool to learn more.
- Search Items: Click the search box to search for existing items.
- Bell Icon: In the top right, click this icon to see notifications.
![]()
We don't support dark mode on the user interface.
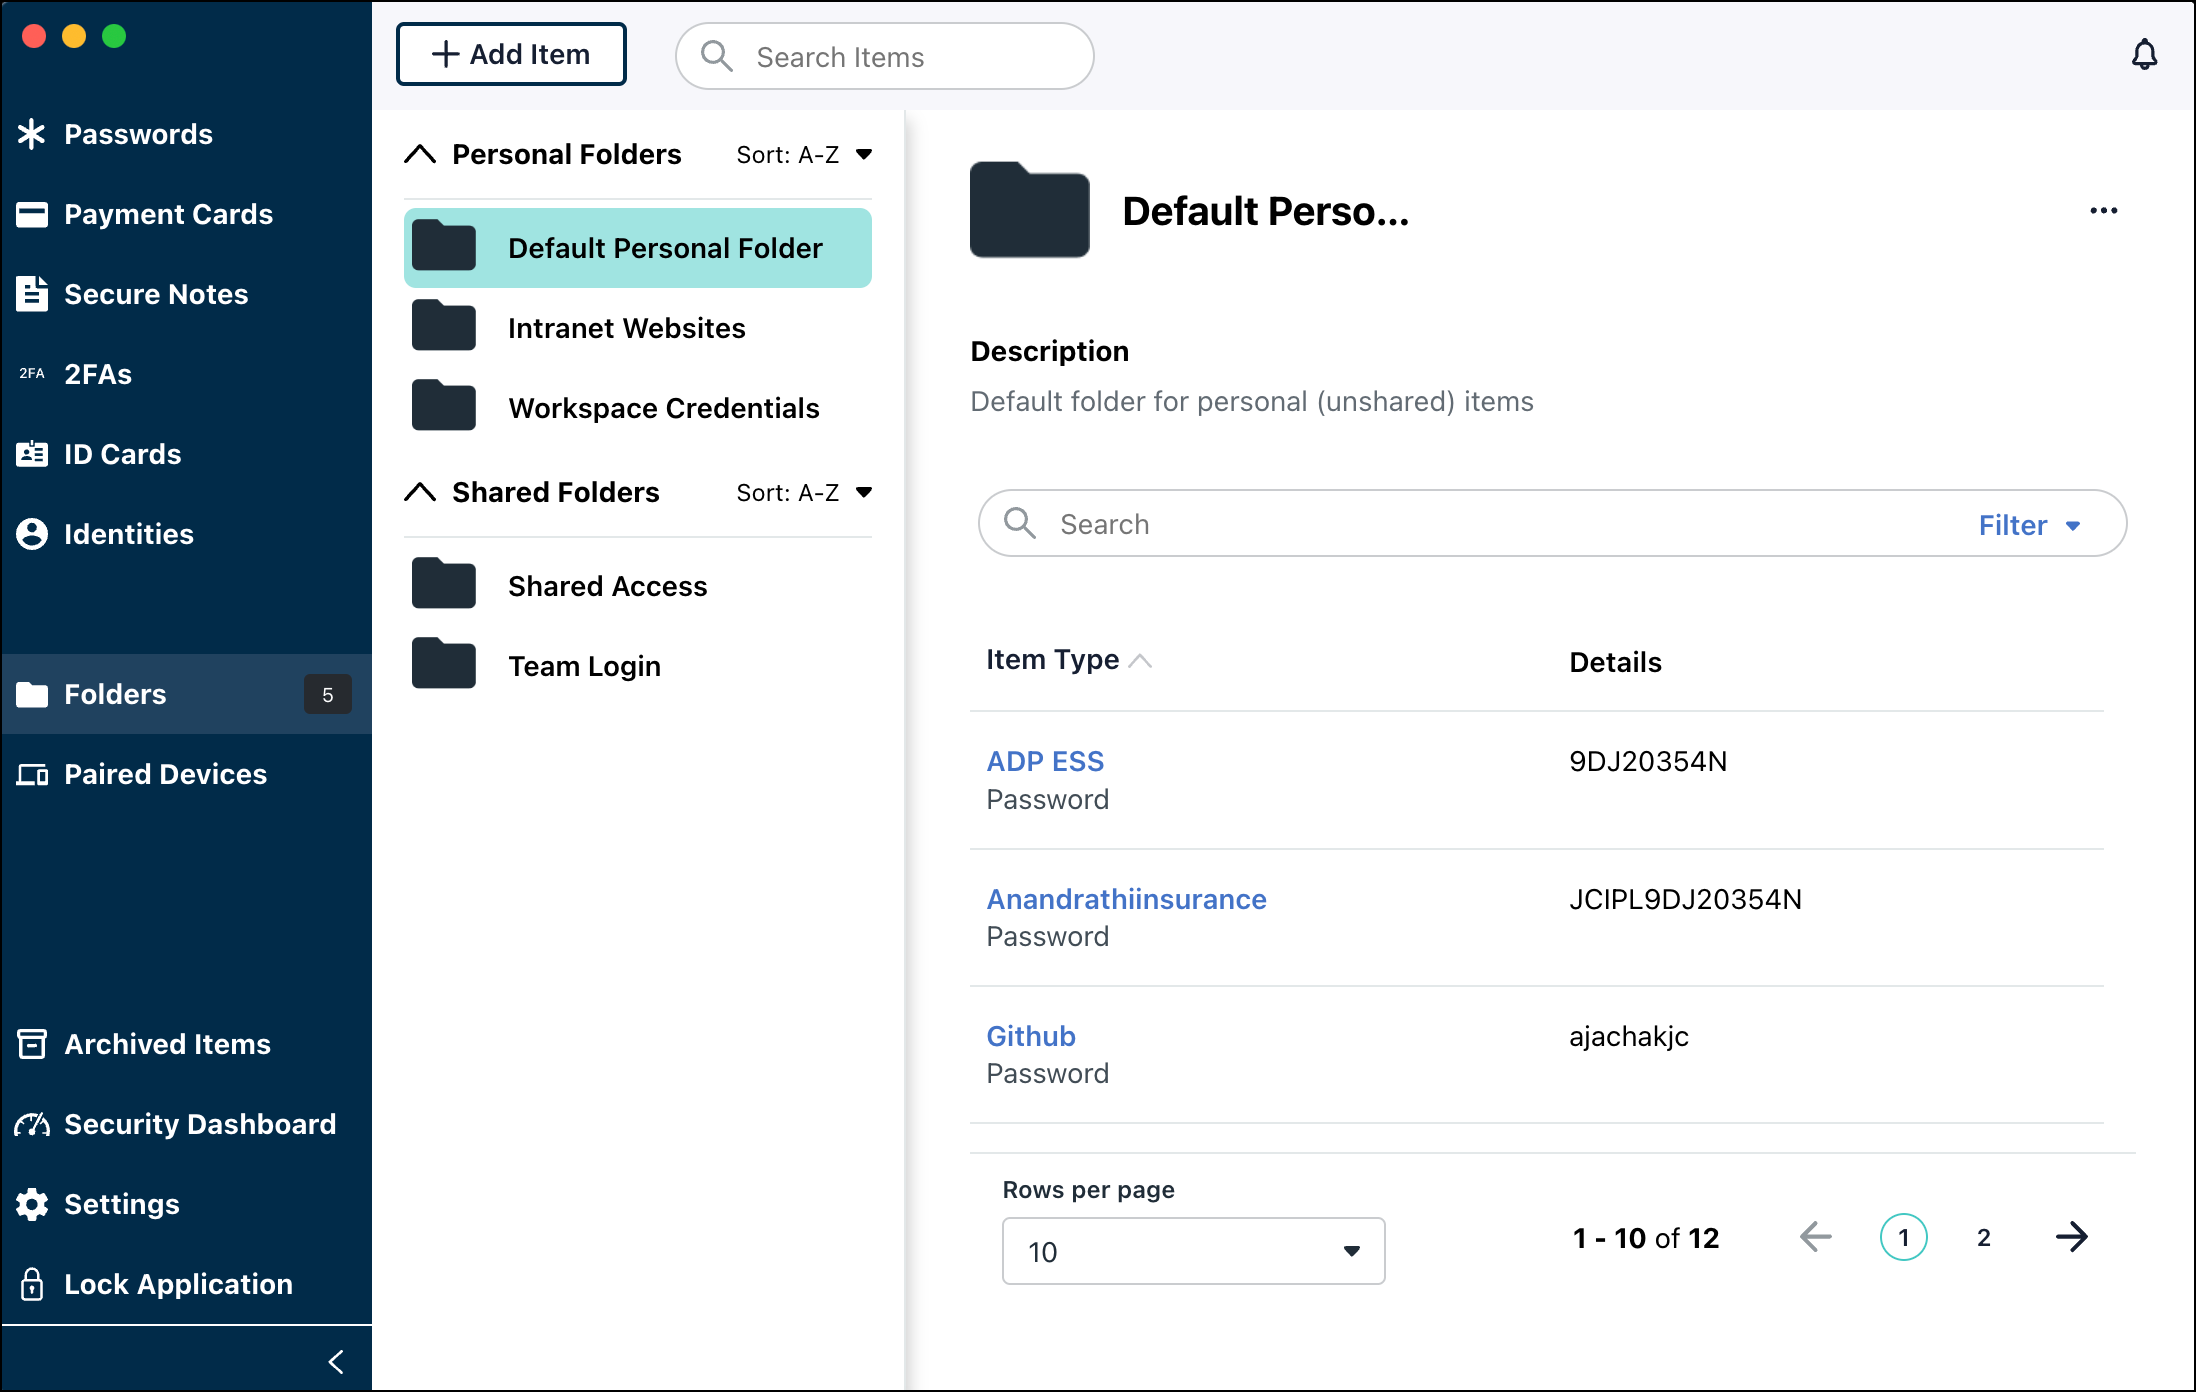
Items
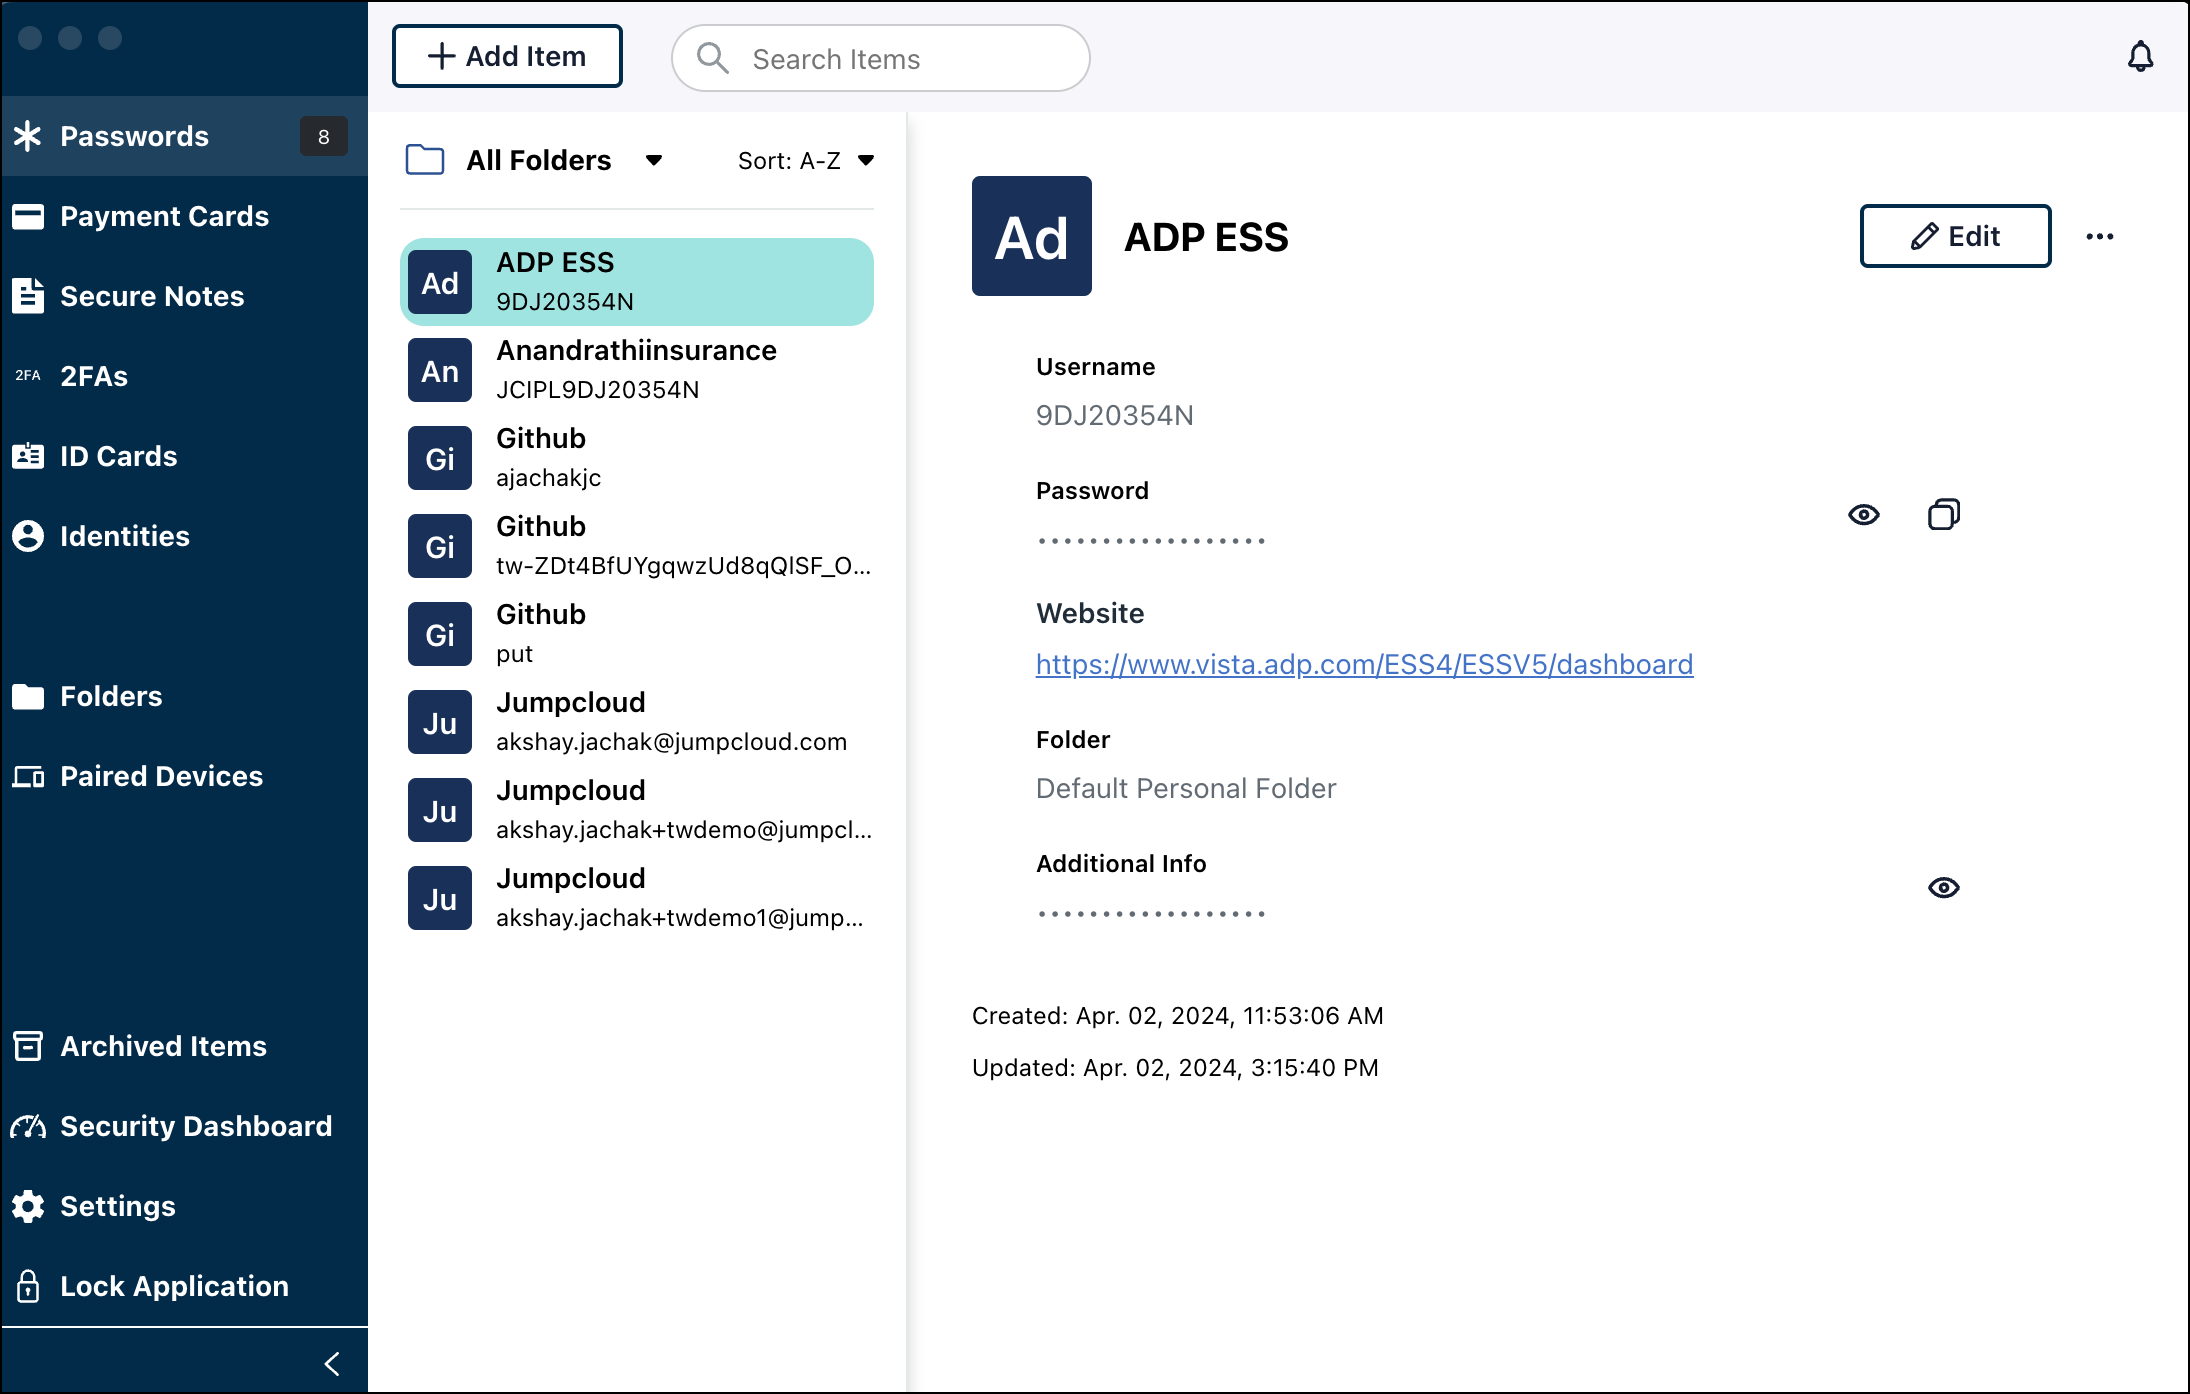
In the left pane, the saved items are visible and listed according to their type. Select any type (for example: Passwords) to see all the items saved under it. The app can store 13,000 items with the autofill feature enabled and 30,000 items without the autofill feature enabled. Click an item to see the details.
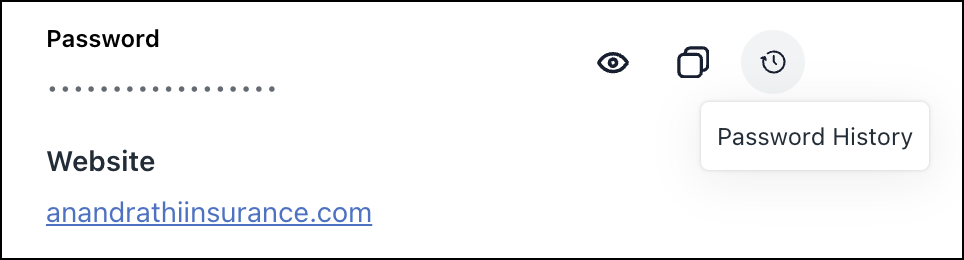
- Passwords: click the icons next to the password field to see the password, copy it, and check the password history if available. Sort the items based on various criteria.
- Password History: the clock icon in the Password field opens Password History. It’s a modal that shows past passwords, sorted by date, and the option to restore any previous password.

- On the right, click the Edit button to edit the item. Click the three dots next to this button to see other options, such as Set Up 2FA, Launch Website, and Delete.
- Multi-select (Ctrl-click and shift-click on Windows; Cmd-click and shift-click on Mac) items to add to another folder from this list. You can also delete them.
- Password History: the clock icon in the Password field opens Password History. It’s a modal that shows past passwords, sorted by date, and the option to restore any previous password.
- Payment Cards: Save your personal debit and credit card information.
- Secure Notes: Save important and confidential keys and content through secure notes.
- 2FAs: Save your MFA credentials. You can link an existing saved password while adding 2FA items.
- ID Cards: Save your personal ID card credentials.
- Identities: Save Personal Identifiable Information (PII) such as name, address, and city in this section.
Adding a 2FA Entry
Time-based one-time password (TOTP) is often used in multi-factor authentication (2FA) as an added security layer. To add a TOTP code in the JumpCloud Password Manager app:
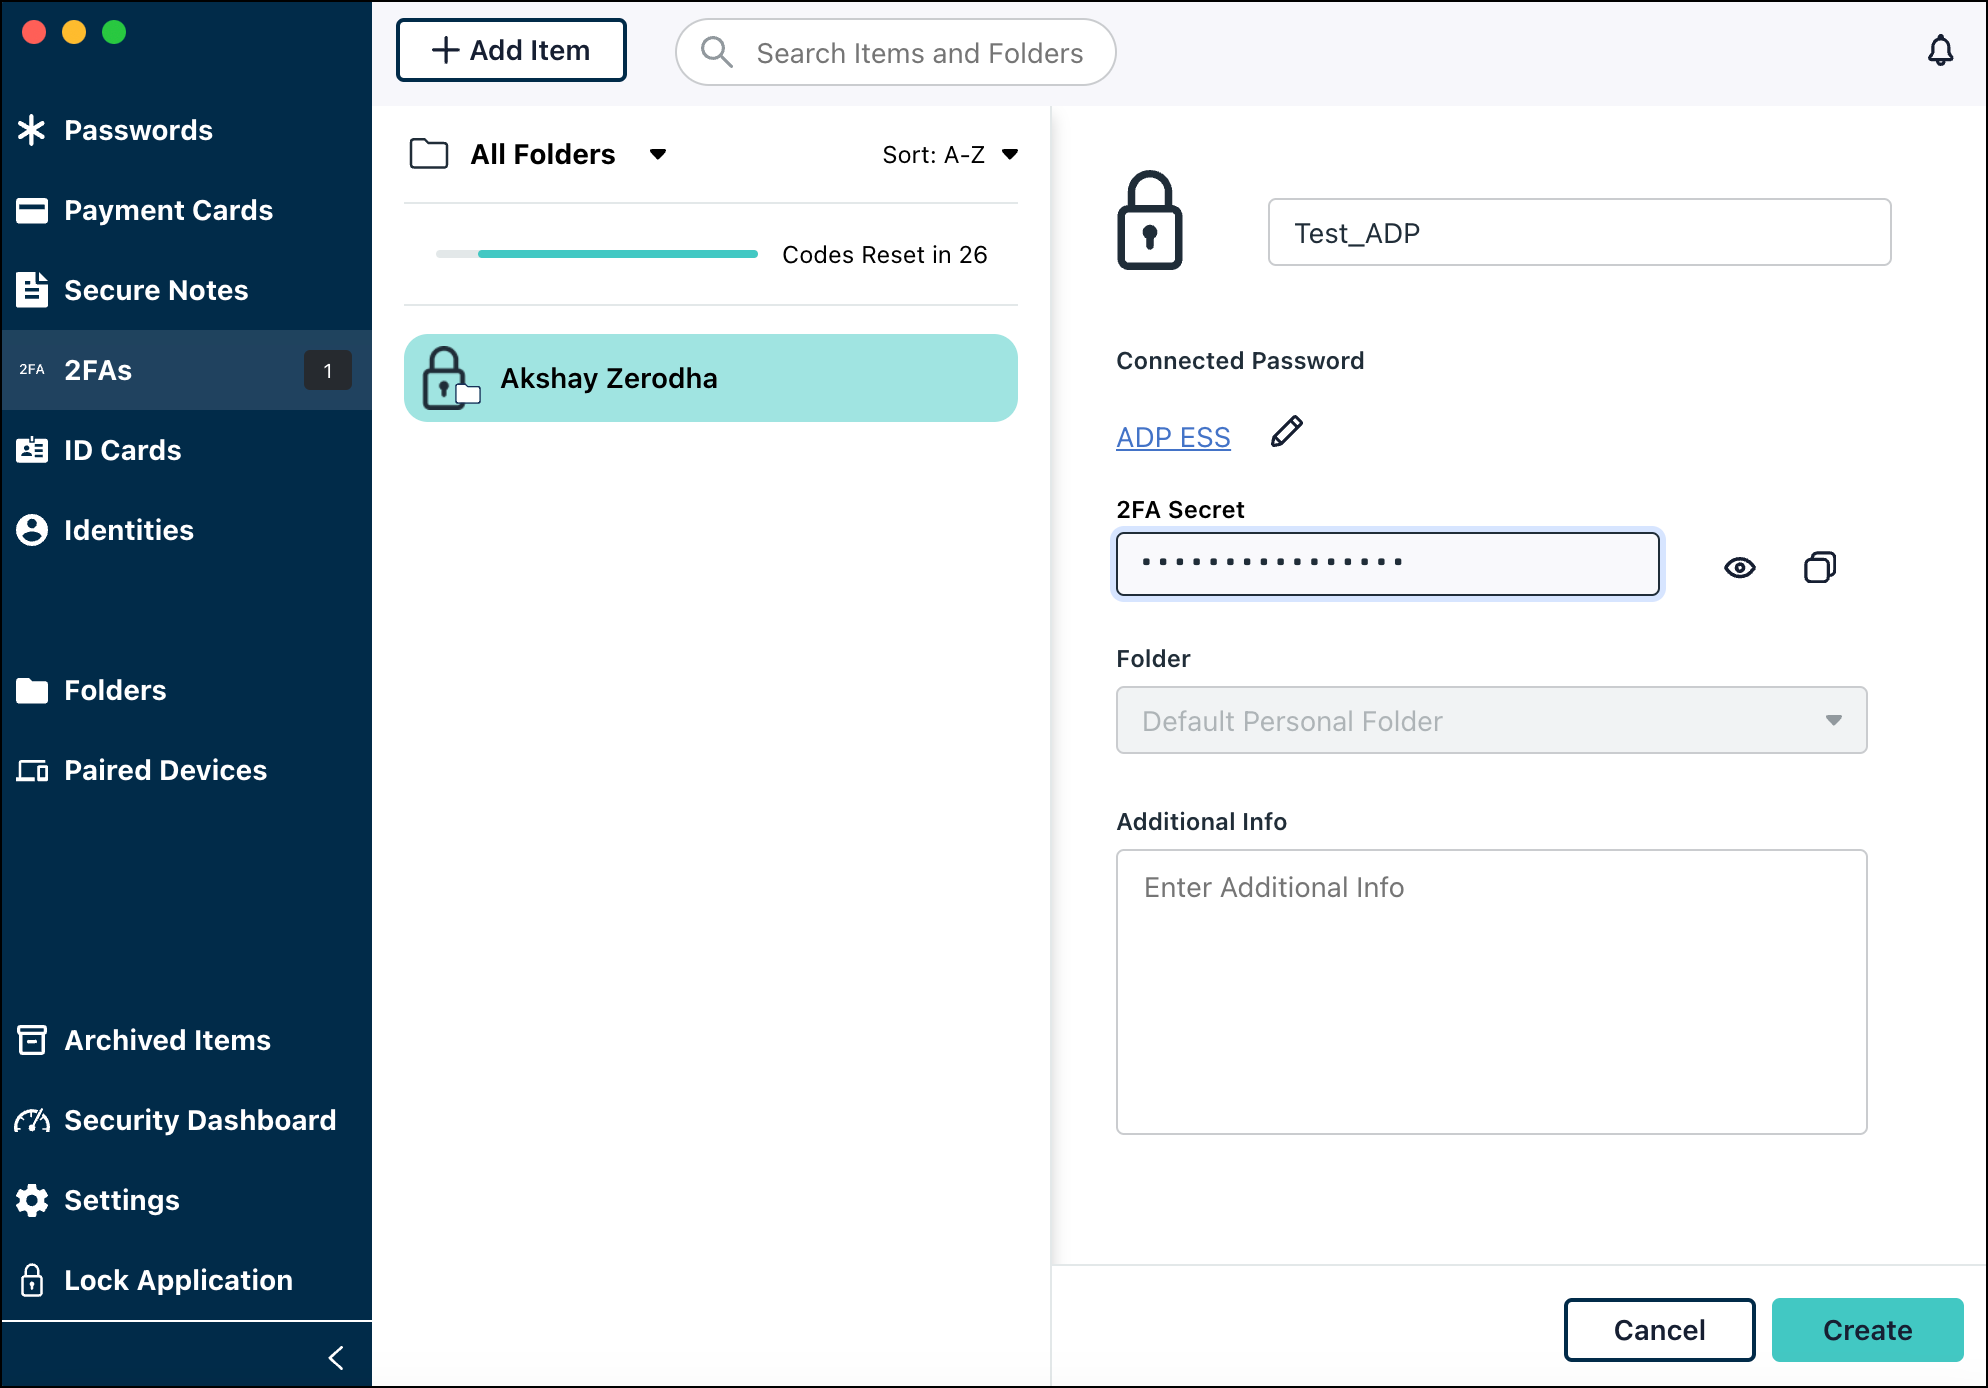
- In the top navigation bar, click Add Item and select 2FA.
- Enter a name for your item.
- (Optional) To add this 2FA to an existing saved password, click Link to an Existing Password and search for the password you want.
- Copy the 2FA secret from the application you are setting up MFA for and paste it in the 2FA Secret field.

- This item is saved to your default personal folder.
- (Optional) Add additional information as required and click Create.
Once created and saved, you'll see a TOTP code present on the top of the screen or next to the name of the item.
Folders
Users can organize their saved items using folders. In a folder, the user can view and filter the items as required.
- Sort the folders by clicking the dropdown.
- To trigger a manual sync, click the three dots in the top right and click Sync Folder.
![]()
If you are experiencing sync issues with shared folders, make sure that all user's Password Manager apps are on the latest version, and that no one is experiencing connectivity issues.
There are two types of folders in password manager.
Personal Folders:
The items saved in these folders are visible to you only. These items can’t be accessed by others.
- All your items are saved in the default personal folder by default.
- When you click a folder, all the items in it are displayed along with their details.
Creating a New Personal Folder
To add a new personal folder, follow these steps:
- In the top navigation bar, click the Add Item button and select Folder.
- Enter the folder name, description and click Continue.
- Add the items you want to share and click Continue.
- Select the radio button for Personal Folder. Click Continue.
- Click Create Folder. A new folder is created and the user gets a notification in the desktop app.
Shared Folders
JumpCloud Password Manager offers a seamless and secure solution for sharing passwords among team members within an organization. When trying to sync items in a shared folder, ensure that all team members are online and their PWM desktop apps are unlocked. If all members cannot be online, at least one member needs to be online so that the items being shared can sync at a later time to the rest of the members.
![]()
If you add a user group to a shared folder, any user added to the group afterwards will also gain access to the folder.
Creating a New Shared Folder
![]()
You only have the option to select Shared if you have appropriate permissions from your admin.
To create a shared folder in password manager, follow these steps:
- Open the JumpCloud Password Manager app on your device.
- Click the (+) button and select Folder.
- Type the name and description (optional) of the folder.
- Under Folder type, select Shared.
Note: A personal folder can be created and converted into a shared folder later, if needed. - In the next section, Select the checkboxes to add users and user groups. You can select the users and user groups with whom you want to share items through this folder. You can also choose which role the user/ group will have:
- Folder Member: They can see the items of the folder.
- Folder Manager: They can edit the folder and manage users and items from the folder.
- Item Manager: They can manage items from the folder.
- Click Save.
![]()
The PWM app must be updated to the latest version for all the team members among whom a folder needs to be shared.
![]()
If items are not showing up in the folder, click the three dot menu of the folder and select Sync Folder.
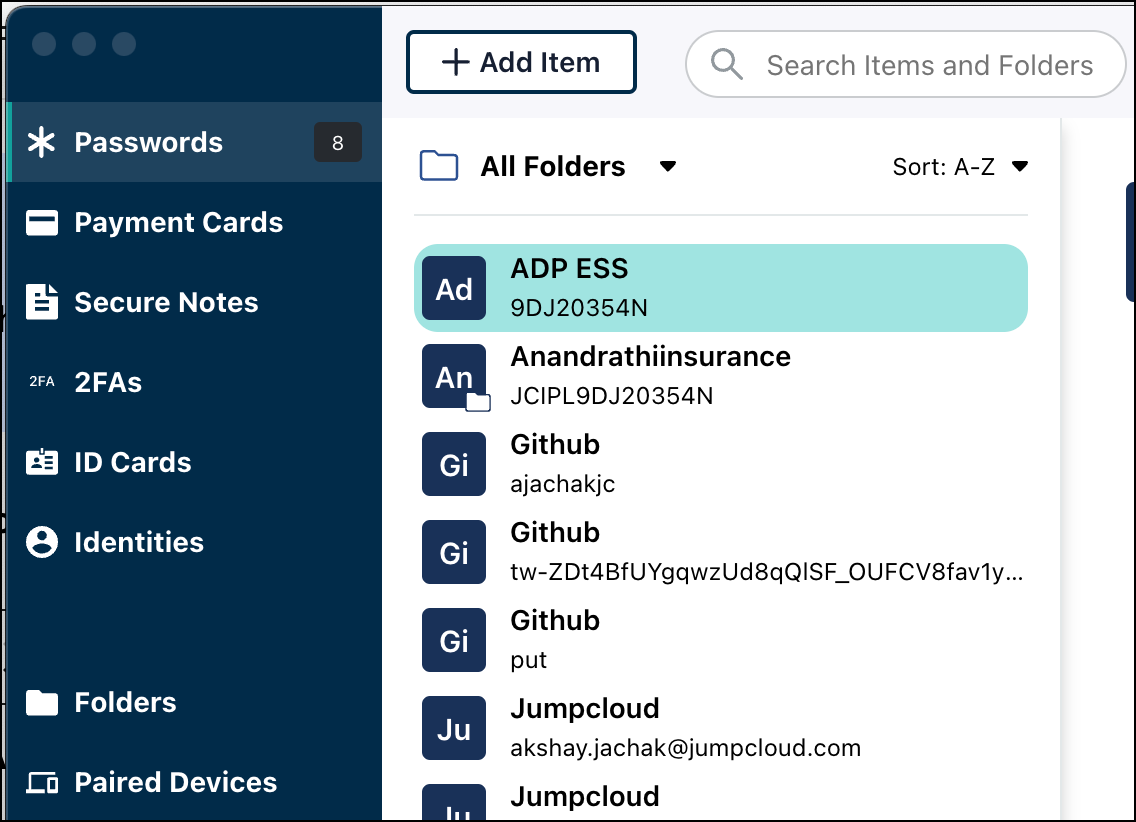
Moving Items Between Folders
To move items from one folder to another:
- Click the All Folders drop-down menu and select the folder you want to move items from.

- Select atleast two or more passwords you want to move. The Move To Folder button appears.
![]()
To select multiple passwords, press:
- CTRL/CMD + A keys (for all passwords) OR
- CTRL/CMD key + each password (multiple Individual passwords) OR
- Shift key + password (multiple consecutive passwords).
- Click Move To Folder.
- Select the folder you want to move the items to and click Move Items To Folder.
![]()
These items will be moved out of their current folder, which may impact access.
Deleting a Folder
To delete a folder, click the three dots next to the folder name and click Delete Folder. You can delete multiple folders as well.
![]()
After deleting a folder, the items in a shared folder are moved to the default personal folder of the user who created the items.
Paired Devices
This section shows the paired devices with which your password manager account is associated.
- Clicking a device shows more information about the device such as the operating system and browser extensions on the device, if any. You can edit the name of the device and connect extensions for different browsers as required.
- To disconnect, select the device from the list then click the three dots next to the Edit button. Click Disconnect and confirm.
Archived Items
Any items you delete are stored in this section until recovered or deleted permanently.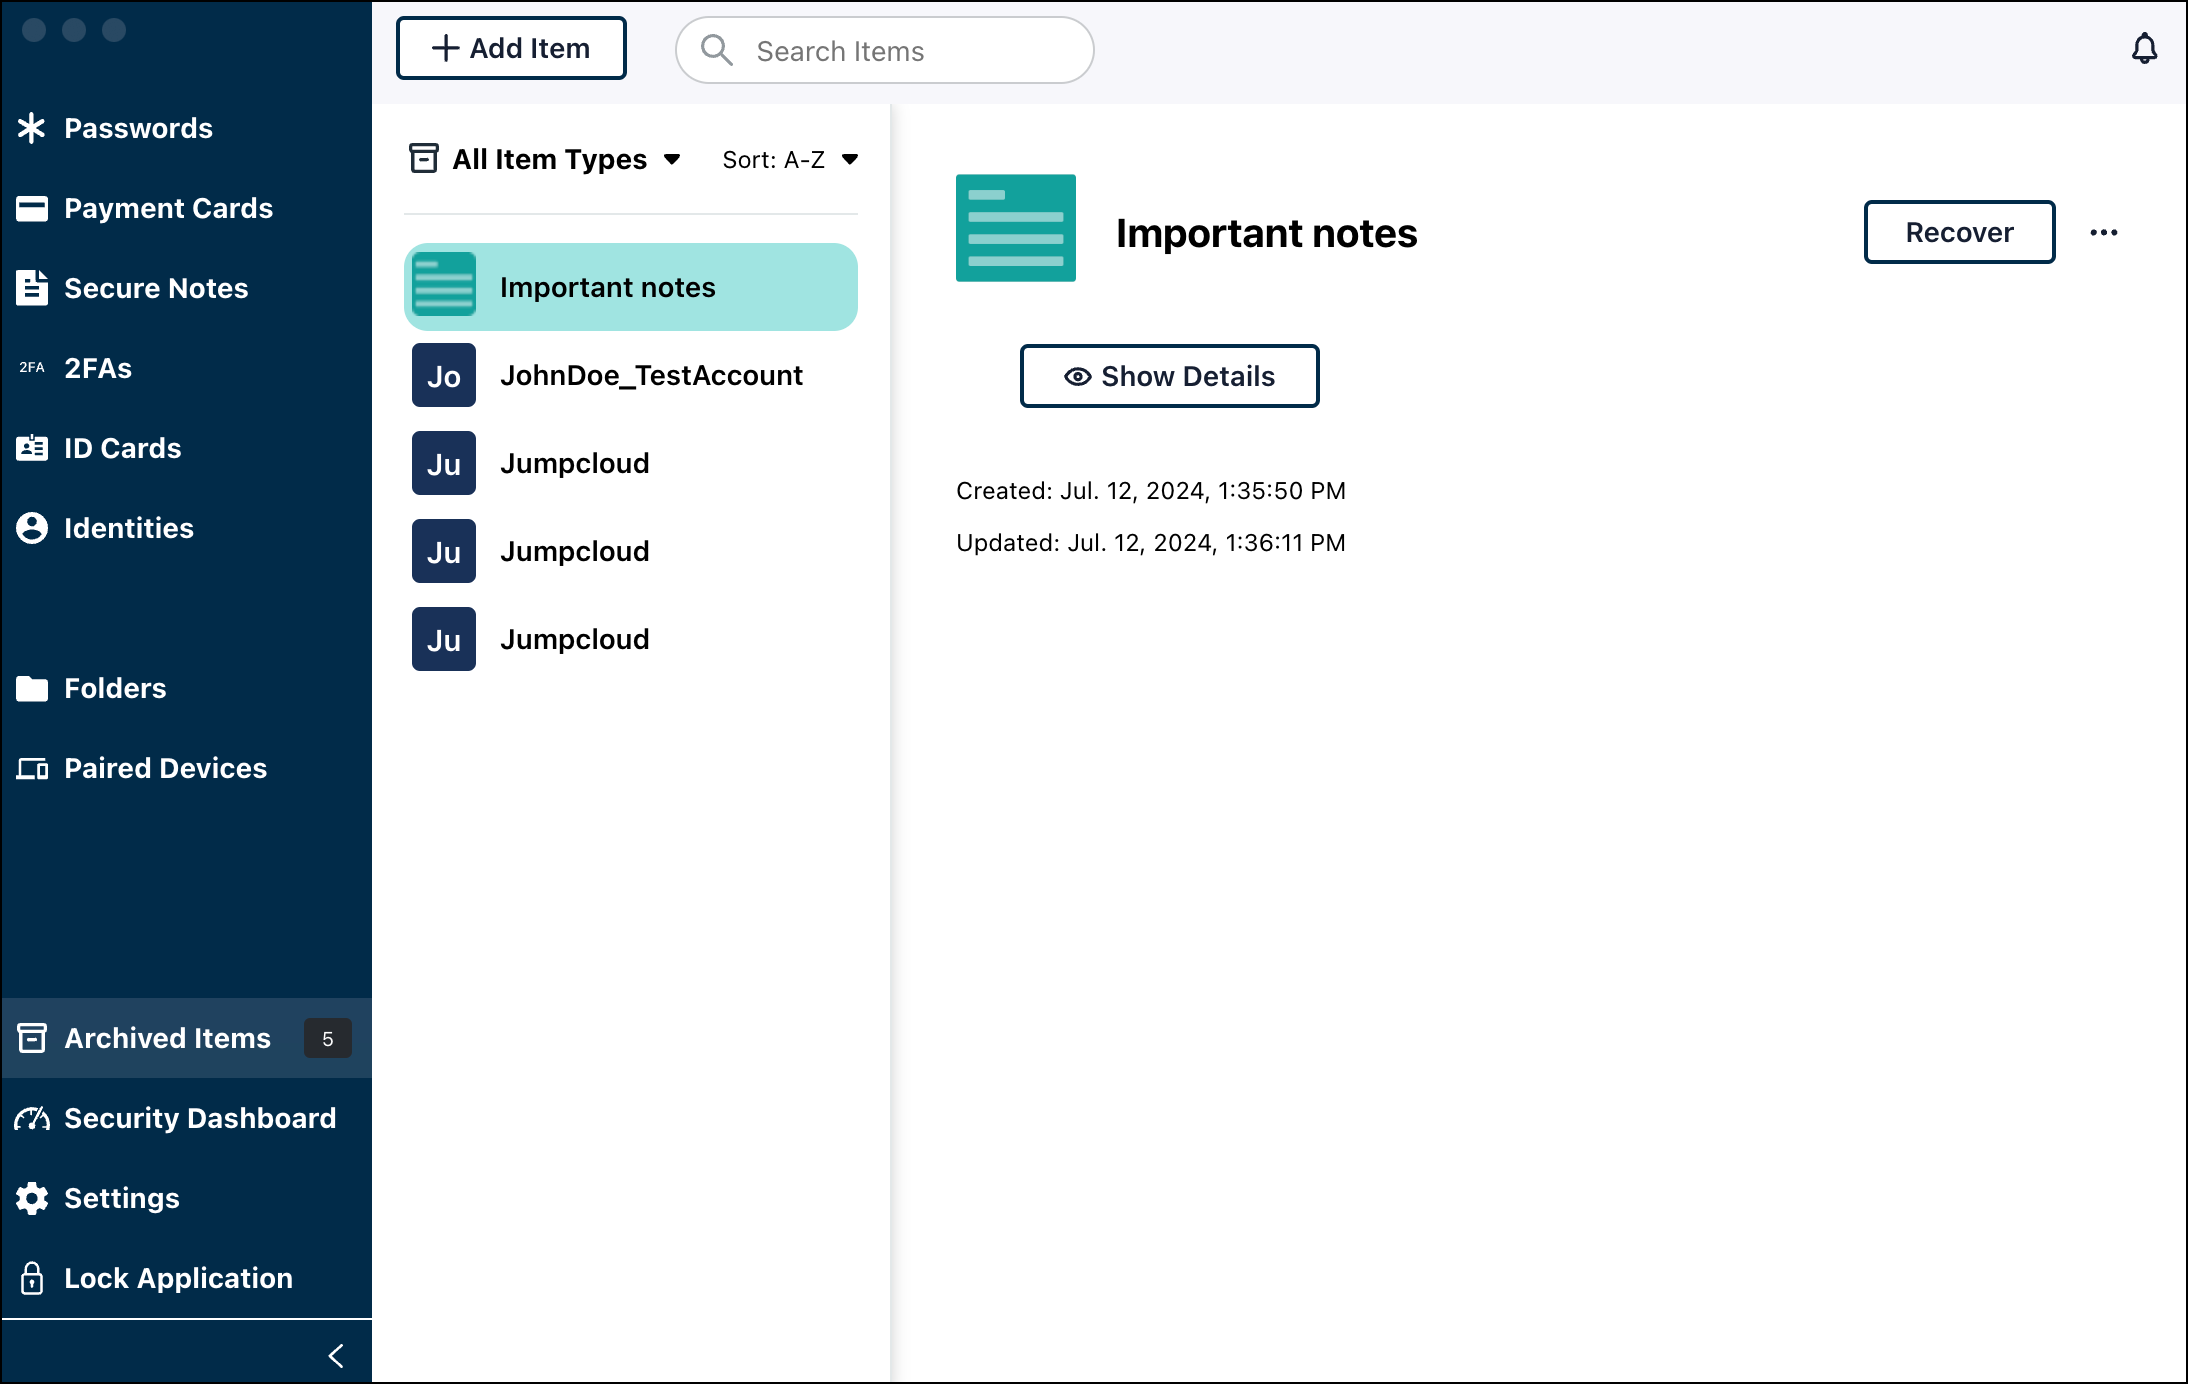
- If an item from a Shared Folder is deleted, it is displayed in a user’s Archived Items, but only a Folder Manager has the ability to recover or delete permanently.
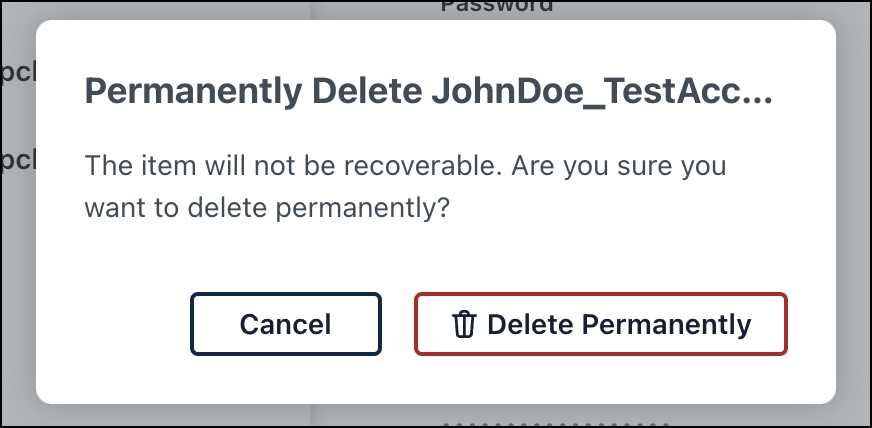
- To recover an item, click the Recover button and the item will move from the Archived Items to the appropriate section. To remove the item permanently, click the three dots next to the Recover button. Click Delete Permanently and confirm the action.

Security Dashboard
This section displays your security score and has all your existing items. Sort the items based on available filters such as Weak, Reused, and Old.
Settings
- Account Info
- Account Details like App version, User ID, email address, and Device ID.
- General
- Debug Logs: off by default; turning on enables verbose logging
- Backup Path: click the path to change
- Backup Schedule: set to 1 day by default.
- Keyboard Shortcuts: Click View Shortcuts to enable/ disable them.
- Browser Extension: click Install to be redirected to a website for downloading available browser extension.
- What’s New: See the latest updates for the password manager desktop app.
- Export Data: Click this to export data as CSV.
- Security
- Update Pin: to update the pin.
- Auto Lock: When this toggle button is enabled, the password manager app will lock when the device is locked. If disabled, the app will not lock after locking the device. It is set to Enabled by default.
- Lock Schedule: You can set the duration after which password manager will lock if the device stays unlocked. It is set to 60 minutes by default.
- Require Authentication On Every Log-In Request: Disabled by default.
- Touch ID for Login: Enabled by default.
- Logs
- Download Logs: click this to download the debug logs.
- Delete Account
- Delete Password Manager Account: click this to delete your account. This action is irreversible.
- Lock Application: clicking this will log you out from the application.
Linux Specific Information
Linux builds do not work on ARM architecture, and do not allow for biometric authentication at this time.
- The Appimage build is no longer supported. If you are using Appimage, delete your .appimage build file, then download RPM or Debian from the PWM download page and install one of those.
- The Debian and RPM builds are more stable than Appimage and will auto-update when new versions of Password Manager are released.
- Debian works on Debian distributions, such as Ubuntu.
- To install on Ubuntu, right-click the downloaded build, open with Ubuntu, and click on the install button.
- To install on all Debian distributions, open the terminal and run the
apt install -ycommand [path-to-debian-build.deb]. - Updates will download automatically, and a notification will prompt the user to restart.
- RPM works on X64 Architecture Red Hat-based distributions, such as Fedora.
- Once the RPM file is downloaded, go to Fedora, and double-click the .rpm file.
- Click on the Install button.
- To migrate from Appimage to Debian or RPM:
- Delete the .appimage file only (NOT the Password Manager account or any Password Manager files).
- Then download the Debian or RPM build from the Password Manager download page and install.
Additional Resources
Enroll: JumpCloud Password Manager