Create Email Channels
You can set up email channels to get alerts delivered to specified email addresses or admin roles. The system ensures the correct recipients receive the appropriate notifications for events as defined within the rule.
To create a notification channel:
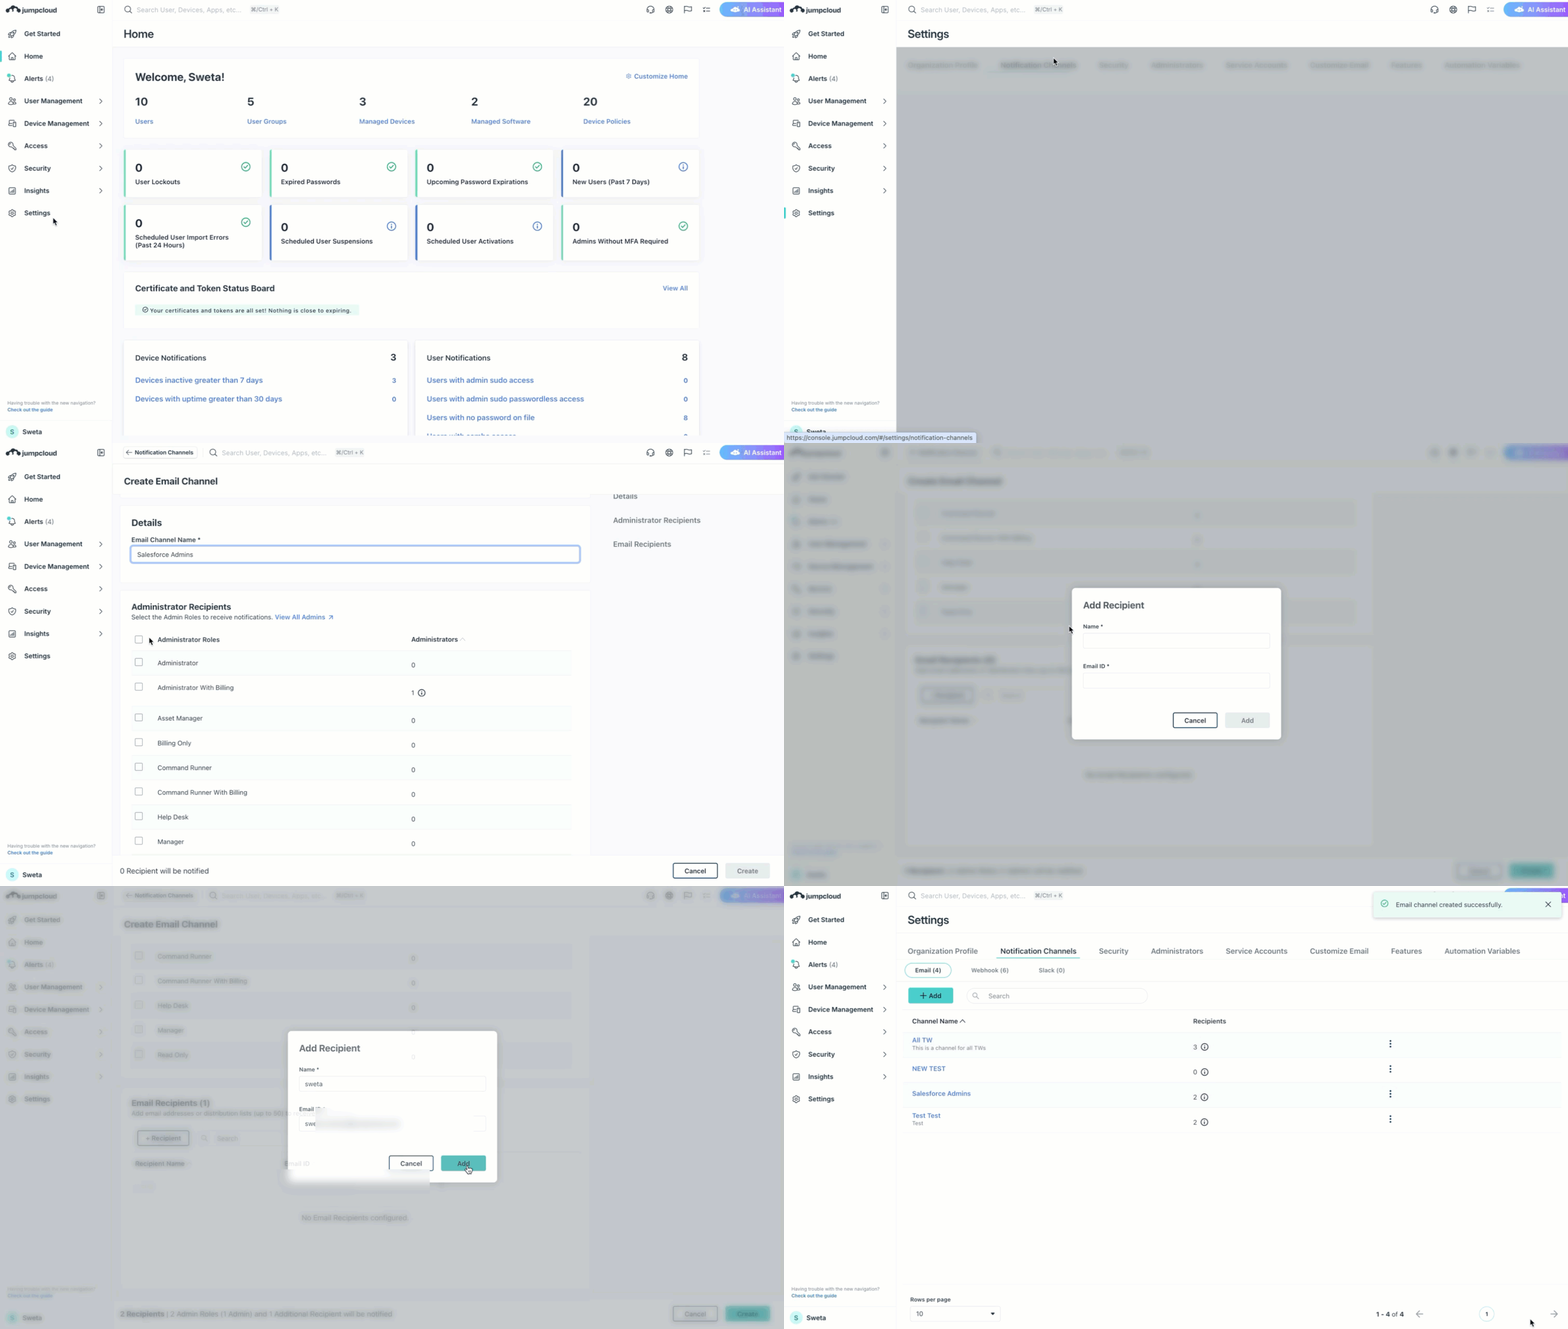
- Login to JumpCloud admin portal.
If your data is stored outside of the US, check which login URL you should be using depending on your region. If your organization uses LDAP, RADIUS, or requires firewall allow list configuration, the Fully Qualified Domain Names (FQDNs) will also be region specific. See JumpCloud Data Centers for the URLs, FQDNs, and IP addresses.
- In the left navigation, click Settings.
- Go to Notification Channels.
- In the Email tab, click +Add to add a notification channel.
- Enter a name for the Email Channel.
Ensure the name is unique, concise, intuitive, and not more than 100 characters.
- In the Administrator Recipients section, you can see Administrator Roles and their administrator counts. Click a role to view assigned administrators. Select roles to enable notifications for them.
- Email Recipients: You can also configure additional recipients in this section.
- Click +Recipients.
- On the Add Recipient window, enter the user’s name and email address.
- Click Add.
- You can click the delete icon to delete recipients.
You can add up to 50 email addresses and distribution lists in one channel. Ensure the email addresses are valid. You cannot enter invalid or duplicate emails.
- Once you’ve entered recipients as required, click Create.
The Channel will be created and added to the Notification Channels page.
Ensure you associate the notification channels and define the stages where you want to receive notifications, while configuring rules using Device Monitoring and Alerting. See Configure Rules with Device Monitoring and Alerting to learn more.
When a rule triggers an alert, the users added to the selected email channels receive an email.
The email includes details such as the User, Priority, Status, Alert ID and so on.
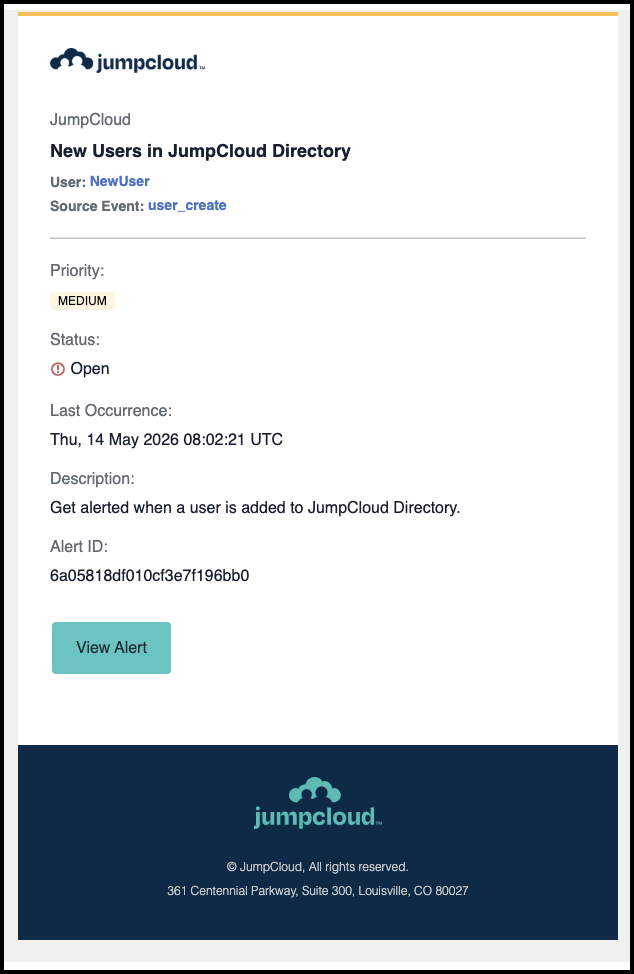
- Click the Source Event link to go directly to the Directory Insights (DI) page for the specific event that triggered the alert.
- Click View Alert to view the alert details in the Alerts section of the admin portal.
The Source Event link appears in the notification only if DI event ID, DI Event Type, and timestamp are present in the alert payload.
When you click the link, the searchQuery and timestamp parameters will be automatically pre-filled, saving you from manual searching and filtering.
Managing Notification Channels
The Notification Channels page displays all your channels.
- Click each notification channel to view details such as the Administrator Roles along with user count and the additional email addresses configured in the channel.
- You can also edit and delete channels as required.
Editing a Notification Channel
To edit a channel:
- On the Notifications Channel page**,** click the specific channel to view the details.
- Modify the details as required.
- You can update the name
- Add or remove administrator roles and email recipients as required.
- Once you’re done, click Save.
Deleting a Notification Channel
To delete a channel you can:
- Click the delete icon next to each channel on the Notification Channel page
- Go to the channel details page and click Delete Channel.
The Channel will be removed from the Notifications Channel page.
Was this information helpful?