Connect


Contents
Docker, a leading containerization platform, has transformed the way developers build, ship, and run applications. Linux is a popular host system for running containers for these applications.
Containerization has revolutionized how software is developed, deployed, and maintained by encapsulating applications within isolated, lightweight, and consistent environments. Containers bundle the application code, libraries, configurations, and runtime, ensuring that the application runs consistently across environments, from development laptops to production servers. Compatibility issues are reduced compared to traditional server environments.
Docker allows faster development cycles, improved collaboration between teams, and simplified deployment workflows. Known for its focus on compatibility and long-term support, Rocky Linux offers a secure and versatile environment for running Docker containers. Docker and Rocky Linux can create a robust and efficient platform for your containerized applications.
Benefits of Containerization with Docker
Using containerization via Docker on Rocky Linux offers several benefits that make it a good choice for your application deployment and management. Here are a few key reasons:
- Portability: Docker containers will encapsulate the application and its dependencies, allowing you to package your application once and run it anywhere, whether it’s on your local development machine, a testing server, or a production environment.
- Isolation and consistency: Docker containers provide a high level of isolation, ensuring that each application and its dependencies run in an isolated environment. This eliminates potential conflicts between applications and ensures consistent behavior across different environments.
- Efficiency: Containers share the host OS kernel, which reduces the overhead compared to traditional virtualization methods. This results in more efficient resource utilization, enabling you to run more containers on the same hardware while having a smaller memory footprint.
- Rapid deployment and scalability: Docker containers can be provisioned or removed quickly, facilitating rapid application deployment. This is especially important when you need to scale applications up or down based on demand. Also, Docker containers can be easily replicated and orchestrated using tools like Docker Compose or Kubernetes. This makes it simple to scale your application horizontally and manage its components efficiently.
- Version control and rollbacks: Docker images can be versioned, allowing you to maintain a history of your application’s configurations and dependencies. If there is an issue with your application or deployment, you can quickly revert to the previous version.
- Dependency management: Docker containers encapsulate all the dependencies required for an application to run. This will eliminate issues with different environments where the application possibly won’t run on one environment while it runs on another.
- Ease of collaboration: Docker provides a standardized environment for development, testing, and production. This simplifies collaboration among developers, testers, and operations teams, as everyone is working in the same environment, adopting DevOps culture and principles.
In this tutorial, we will guide you through the process of implementing Docker on Rocky Linux.
Step 1: Update Rocky Linux Packages
Before installing Docker, it’s essential to update your system’s package repositories to ensure you have the latest software versions.
Once you are logged in to your Rocky Linux terminal, use the root or any sudo user preferably to run the following command:
sudo dnf update
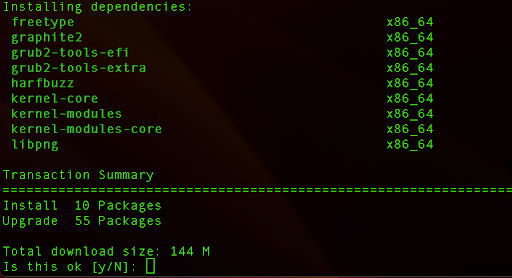
Type “y” and press Enter to start the process of downloading the necessary packages.
Step 2: Install and Start Docker
Next, we need to add the Docker repository via CentOS, which will be compatible.
sudo dnf config-manager –add-repo https://download.docker.com/linux/centos/docker-ce.repo
Now we will install three packages:
sudo dnf install docker-ce docker-ce-cli containerd.io
Let’s break down each of them:
- docker-ce: This is the main Docker package that contains the Docker daemon (the core component responsible for managing containers), client tools, and other necessary components for Docker to function properly.
- docker-ce-cli: This package provides the Docker Command Line Interface (CLI), allowing you to interact with Docker and manage containers and images from the command line.
- containerd.io: Containerd is an industry-standard core container runtime. It manages the execution of containers, handling tasks such as container lifecycle, image transfer, and low-level storage.
Verify that the fingerprint matches if you’re prompted to accept a GPG key.
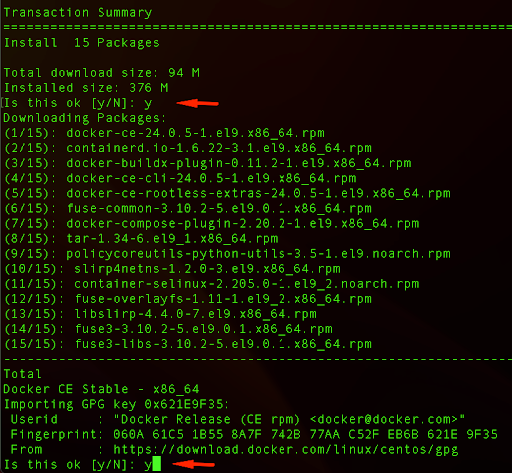
When you run the entire command, DNF will download and install the specified packages along with their dependencies. This will set up the Docker environment on your Rocky Linux system, enabling you to create and manage containers using Docker commands.
You will get two prompts, one for downloading the packages and the second for importing the GPG key. For both prompts, be sure to enter “y” and press Enter.
Next, we will start our Docker service by running the following command:
sudo systemctl start docker
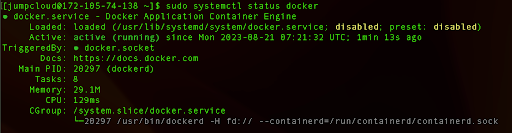
We can verify whether it is running correctly:
sudo systemctl status docker
Finally, we can enable it, so that the Docker service can start each time when we boot our system.
sudo systemctl enable docker
Step 3: Pull Docker Image
Docker images are simply the building blocks of containers. You can pull existing Docker images from the Docker Hub or other container registries. For this tutorial, we’ll use the example of pulling the official nginx image as an example.
![]()
Note: Do not install images that aren’t approved by your organization or unstable. Always opt for minimal images to avoid introducing vulnerabilities. Authentication and authorization through a centralized directory should be used for repositories.
View these steps as an example only. Do not install unnecessary or unapproved software onto your servers.
First, we can search for the nginx image in the official Docker Hub repository.
sudo docker search nginx

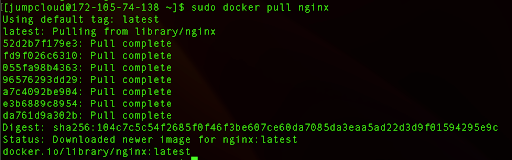
We can see the official build of nginx and we will use this name when pulling the image.
sudo docker pull nginx
Now, we can list the images we have on our system:
sudo docker images

Step 4: Run your container
To continue with our example, now that we have the latest image downloaded to our system we can create a new container using Docker.
sudo docker run -d -p 80:80 nginx
- -d: This flag stands for “detached” mode. It means that the container will run in the background, allowing you to continue using the terminal without being attached to the container’s console.
- -p 80:80: This flag is used to map a port from the host system to a port within the container. In this case, it’s mapping port 80 of the host to port 80 of the container. This allows you to access the nginx web server running in the container through your host’s web browser.
The output will provide a long string of characters that is actually a unique identifier of the newly created container. It’s often referred to as the “container ID” or “container name hash“.
If we type:
sudo docker ps
This command will provide us with all the relevant information for the current running container, including container ID (that corresponds to the long string we got initially), the status, ports that are bound, and so on.

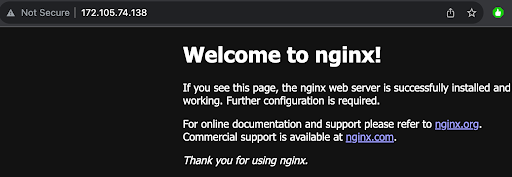
If we visit the IP address of our server, we will get the nginx start page. This confirms that the nginx is running on port 80.
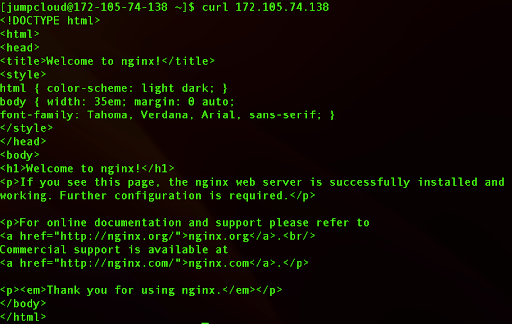
If we don’t have access to a browser, we can simply run the curl command:
curl 172.105.74.138
This will provide the same output for the nginx html file:
Step 5: Access the Containerized Application
Accessing a containerized application allows you to interact with the application running inside a Docker container. Docker provides various ways to access and manage containers, including executing commands, entering an interactive shell (such as bash), and forwarding ports for network access.
To access an interactive shell (like bash) within a running container, you can use the docker exec command. This is especially useful for troubleshooting, inspecting the container’s internals, or performing administrative tasks.
Here’s the basic syntax:
sudo docker exec -it <container_id_or_name> bash
The -it combination of flags allows you to interact with the container’s shell interactively.
sudo docker exec -it d4492ed bash
As an output, we will get the terminal where we can interact with this container directly:

There are a couple of things to keep in mind.
- Not all containers have bash or a similar shell available. Some containers might use a lightweight base image that doesn’t include a full shell environment.
- When you enter a container, you’re operating within its isolated namespace. This means you won’t have direct access to resources outside the container, even though you’re interacting with a shell.
- Changes won’t persist if the container is stopped and removed.
- To exit the shell and return to the host’s terminal, simply type exit.
- If the container doesn’t have bash, you might need to use other shells like sh, ash, or zsh depending on the image and configuration.
- Having utilities like top, ps, and vi can be useful for troubleshooting issues within a container. These tools help you monitor processes, inspect system resource usage, and edit configuration files. But, installing extra packages increases the attack surface of the container. If a container is compromised, the attacker might leverage these tools to escalate privileges or perform malicious actions. A common security principle is the “least privilege” principle. Containers should have only the minimal packages required to run the application. Including unnecessary packages can increase the risk of vulnerabilities and make it harder to secure the container. If changes are needed, they should be made by modifying or rebuilding the image or using some other image with the selected set tools for the job. Scan your images for vulnerabilities if you have that capability.
Step 6: Managing Your Containers
We can also perform other service operations related to Docker and images.
In order to stop the container, we can run the following command:
sudo docker stop <container_id>
Where <container_id> is a unique ID for your container, in our case:
sudo docker stop d4492
If we run docker ps command again, we will see that the container is no longer running.

Next, we can remove the stopped container completely:
sudo docker rm d4492
If we want to clean up and remove the downloaded image, as well, we can first list images on our system:
sudo docker image ls

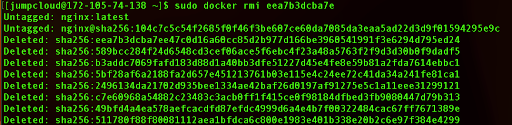
We can use this information and run the following command:
sudo docker rmi eea7b3dcba7e
As the output we will see that our image has been deleted from our system:
Conclusion
That concludes our walkthrough of how to implement containerization with Docker on Rocky Linux. If you’d like to develop more Rocky Linux skills, check out the following tutorials: