
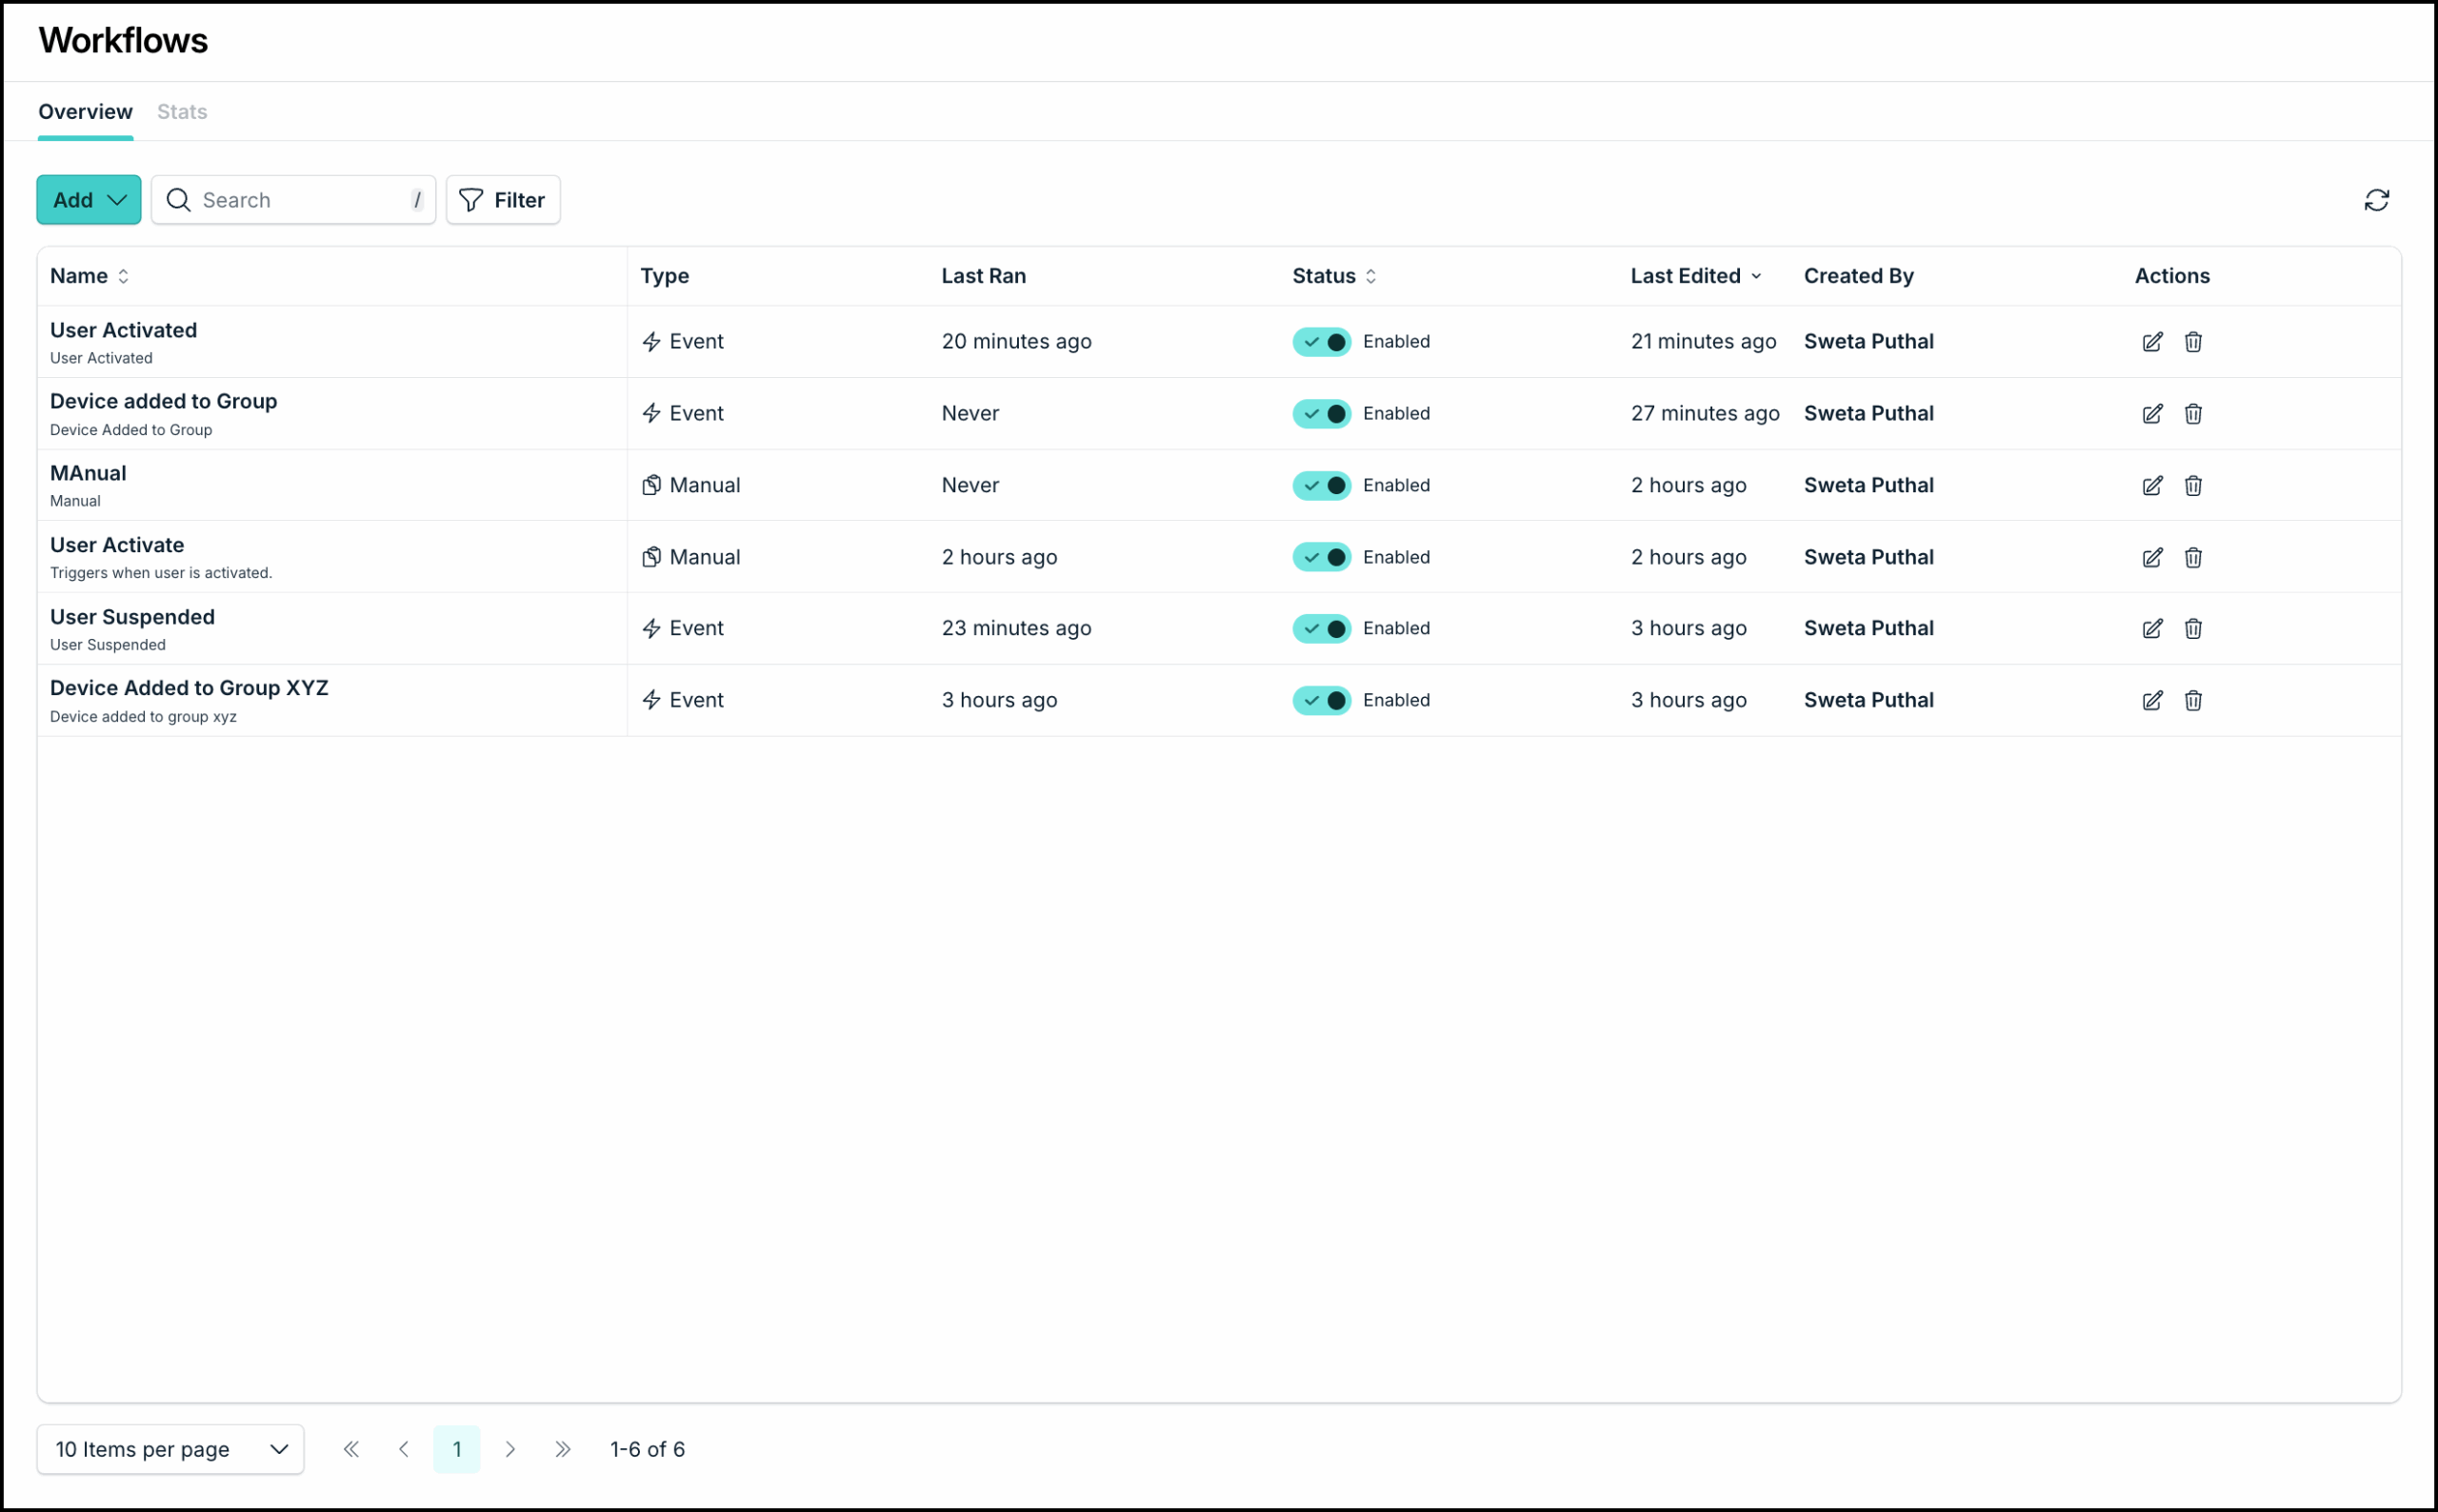
The Workflows Overview page is your centralized hub to view, create, edit, and delete all workflows within your org.
To access the Workflows section:
- Login to the JumpCloud Admin Portal.
- Go to Workflows. You will see the Workflows Overview page.

Viewing Workflow Details
To view the details of specific workflows, on the Workflows Overview page,:
- Click the workflow name.
- Click the Edit icon in the Actions column
Editing a Workflow
You can edit a workflow from the Workflows Overview page:
- On the Workflows Overview page, find the workflow that you want to edit and click the Edit icon in the Actions column. You will see the specific workflow page.
- Click the Edit icon next to the workflow name to update the name and description.
- You can click each action card to view the details and make any updates if needed.
- You can add more action items, delete action items, enable/disable the workflow if needed. See respective sections below to learn more.
- Make required changes and click Save.
- The Workflow details will be updated.
Deleting an Action
To delete an action from a workflow:
- On the Workflow Overview page, click the Edit icon in the Actions column to access the specific workflow.
- Select the Delete icon on the final Action card. Note that the cards must be removed in sequential order.
- When prompted, click Delete again.
- Repeat the process if needed. Once done, click Save.
The action(s) will be removed from the Workflow.
Enabling and Disabling Workflows
To enable or disable a workflow, you can do one of these:
- On the Workflows Overview page, use the Enable/Disable toggle in the Status column for each workflow to quickly update the status.
- Click the Edit icon next to a specific workflow to view the workflow details. Use the toggle button within the workflow to enable/disable it and then click Save.
Run Workflow Manually
To run a workflow manually:
- On the Workflow Overview page, click the Edit icon in the Actions column to access the specific workflow.
- Click the Run Workflow icon next to the Enable/Disable toggle.

- Enter Input JSON details. You must enter JSON details for a valid action to successfully run the workflow.
- Click Run Workflow.
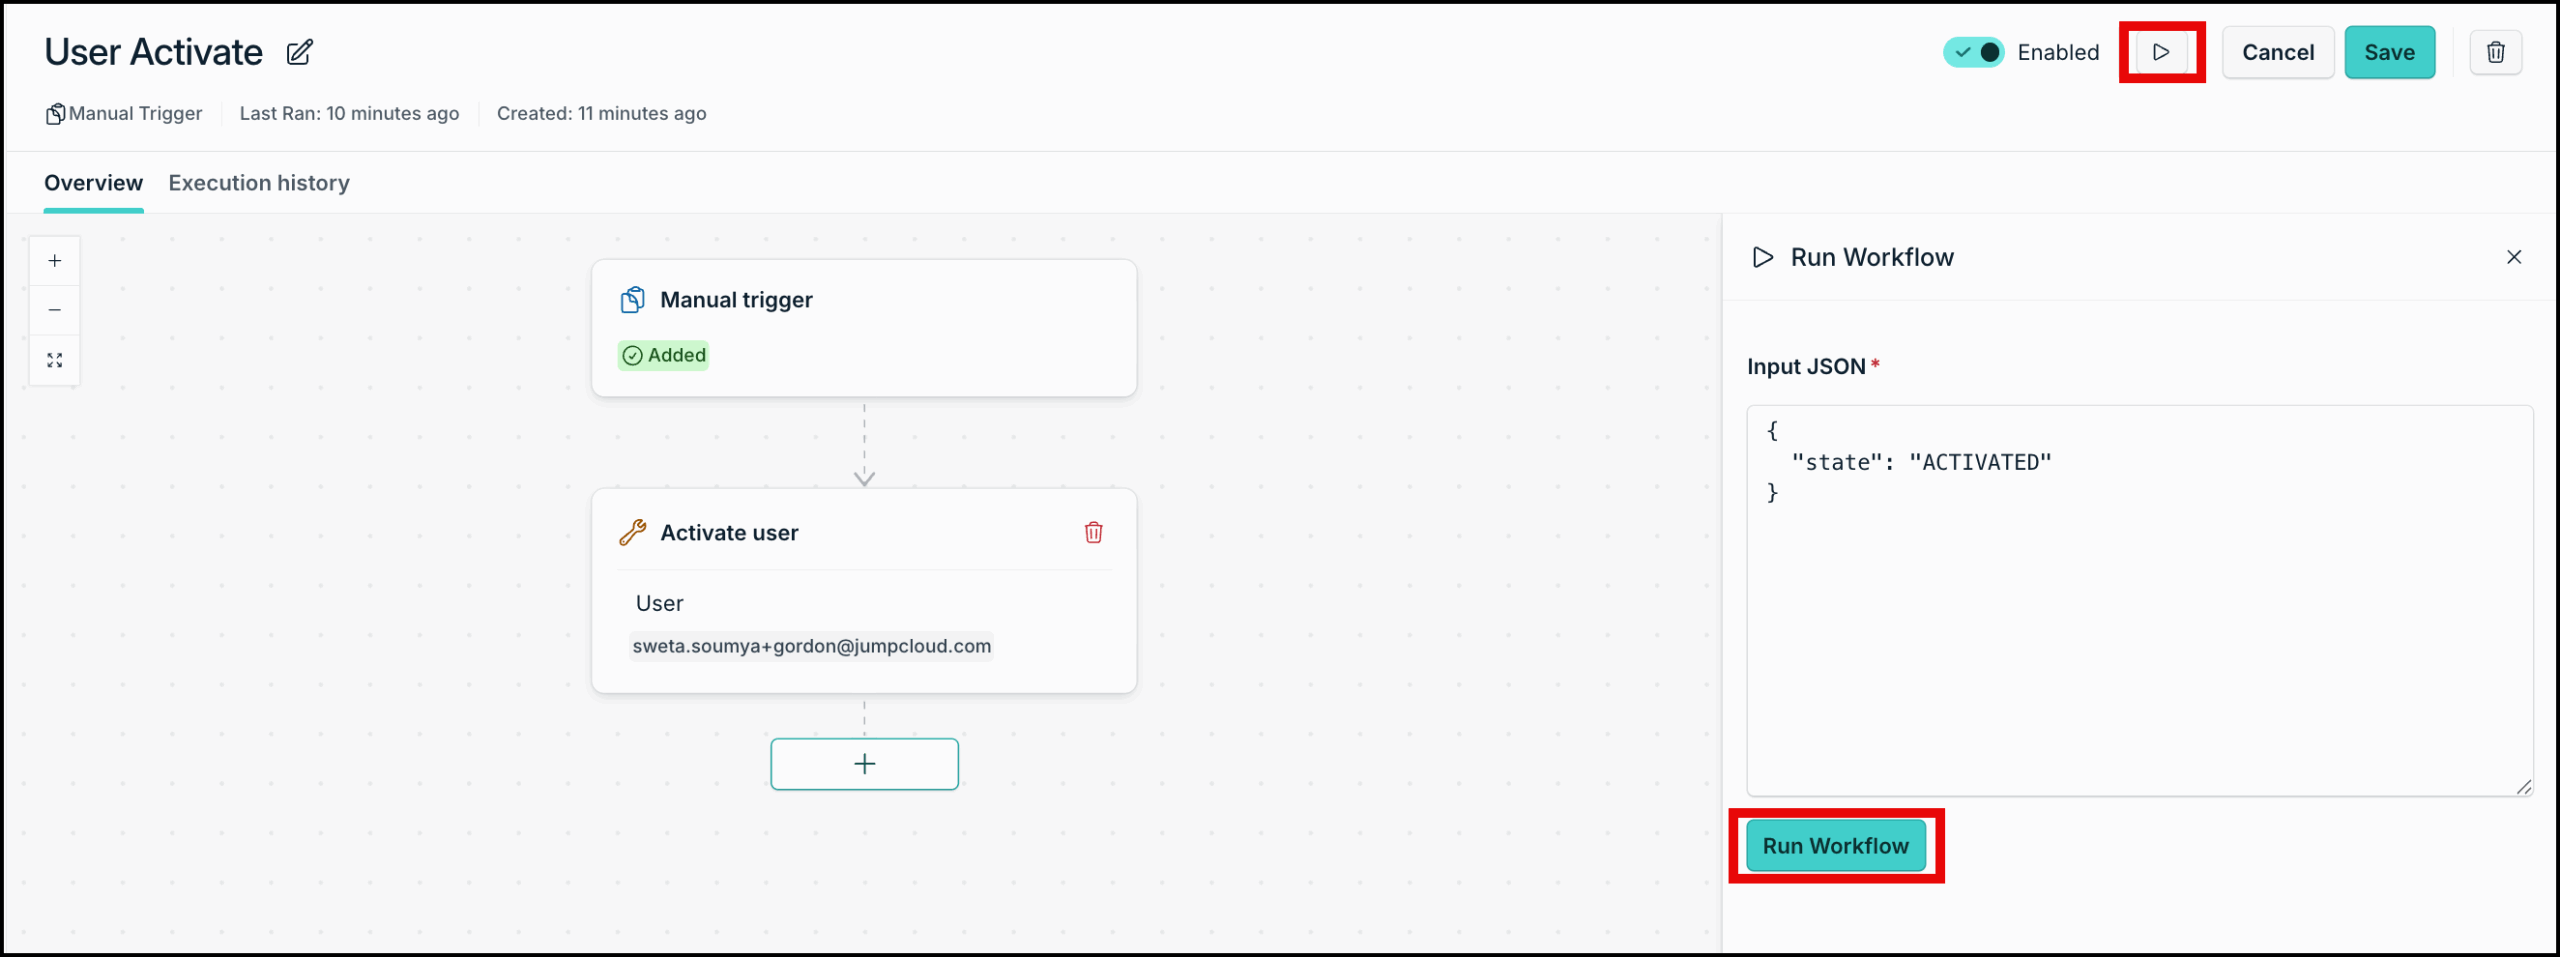
The workflow will be triggered and all associated actions will be completed.
Deleting a Workflow
To delete a workflow:
- On the Workflows Overview page, click the delete icon in the Actions column. You can also click the Edit icon to go to the details page and then click the delete icon.
- When prompted, in the Delete Workflow dialog, click Yes, Delete.
The workflow will be deleted and all associated runs will be terminated.
Back to Top