
JumpCloud Workflows is a centralized automation feature built into the Admin Portal.
Accessing Workflows
You can access the Workflows section in the JumpCloud admin portal from the left navigation pane.
![]()
Only users with Administrator or Administrator with Billing roles can create and manage workflows.
- Login to the JumpCloud Admin Portal.
![]()
If your data is stored outside of the US, check which login URL you should be using depending on your region. If your organization uses LDAP, RADIUS, or requires firewall allow list configuration, the Fully Qualified Domain Names (FQDNs) will also be region specific. See JumpCloud Data Centers for the URLs, FQDNs, and IP addresses.
- Go to Workflows.

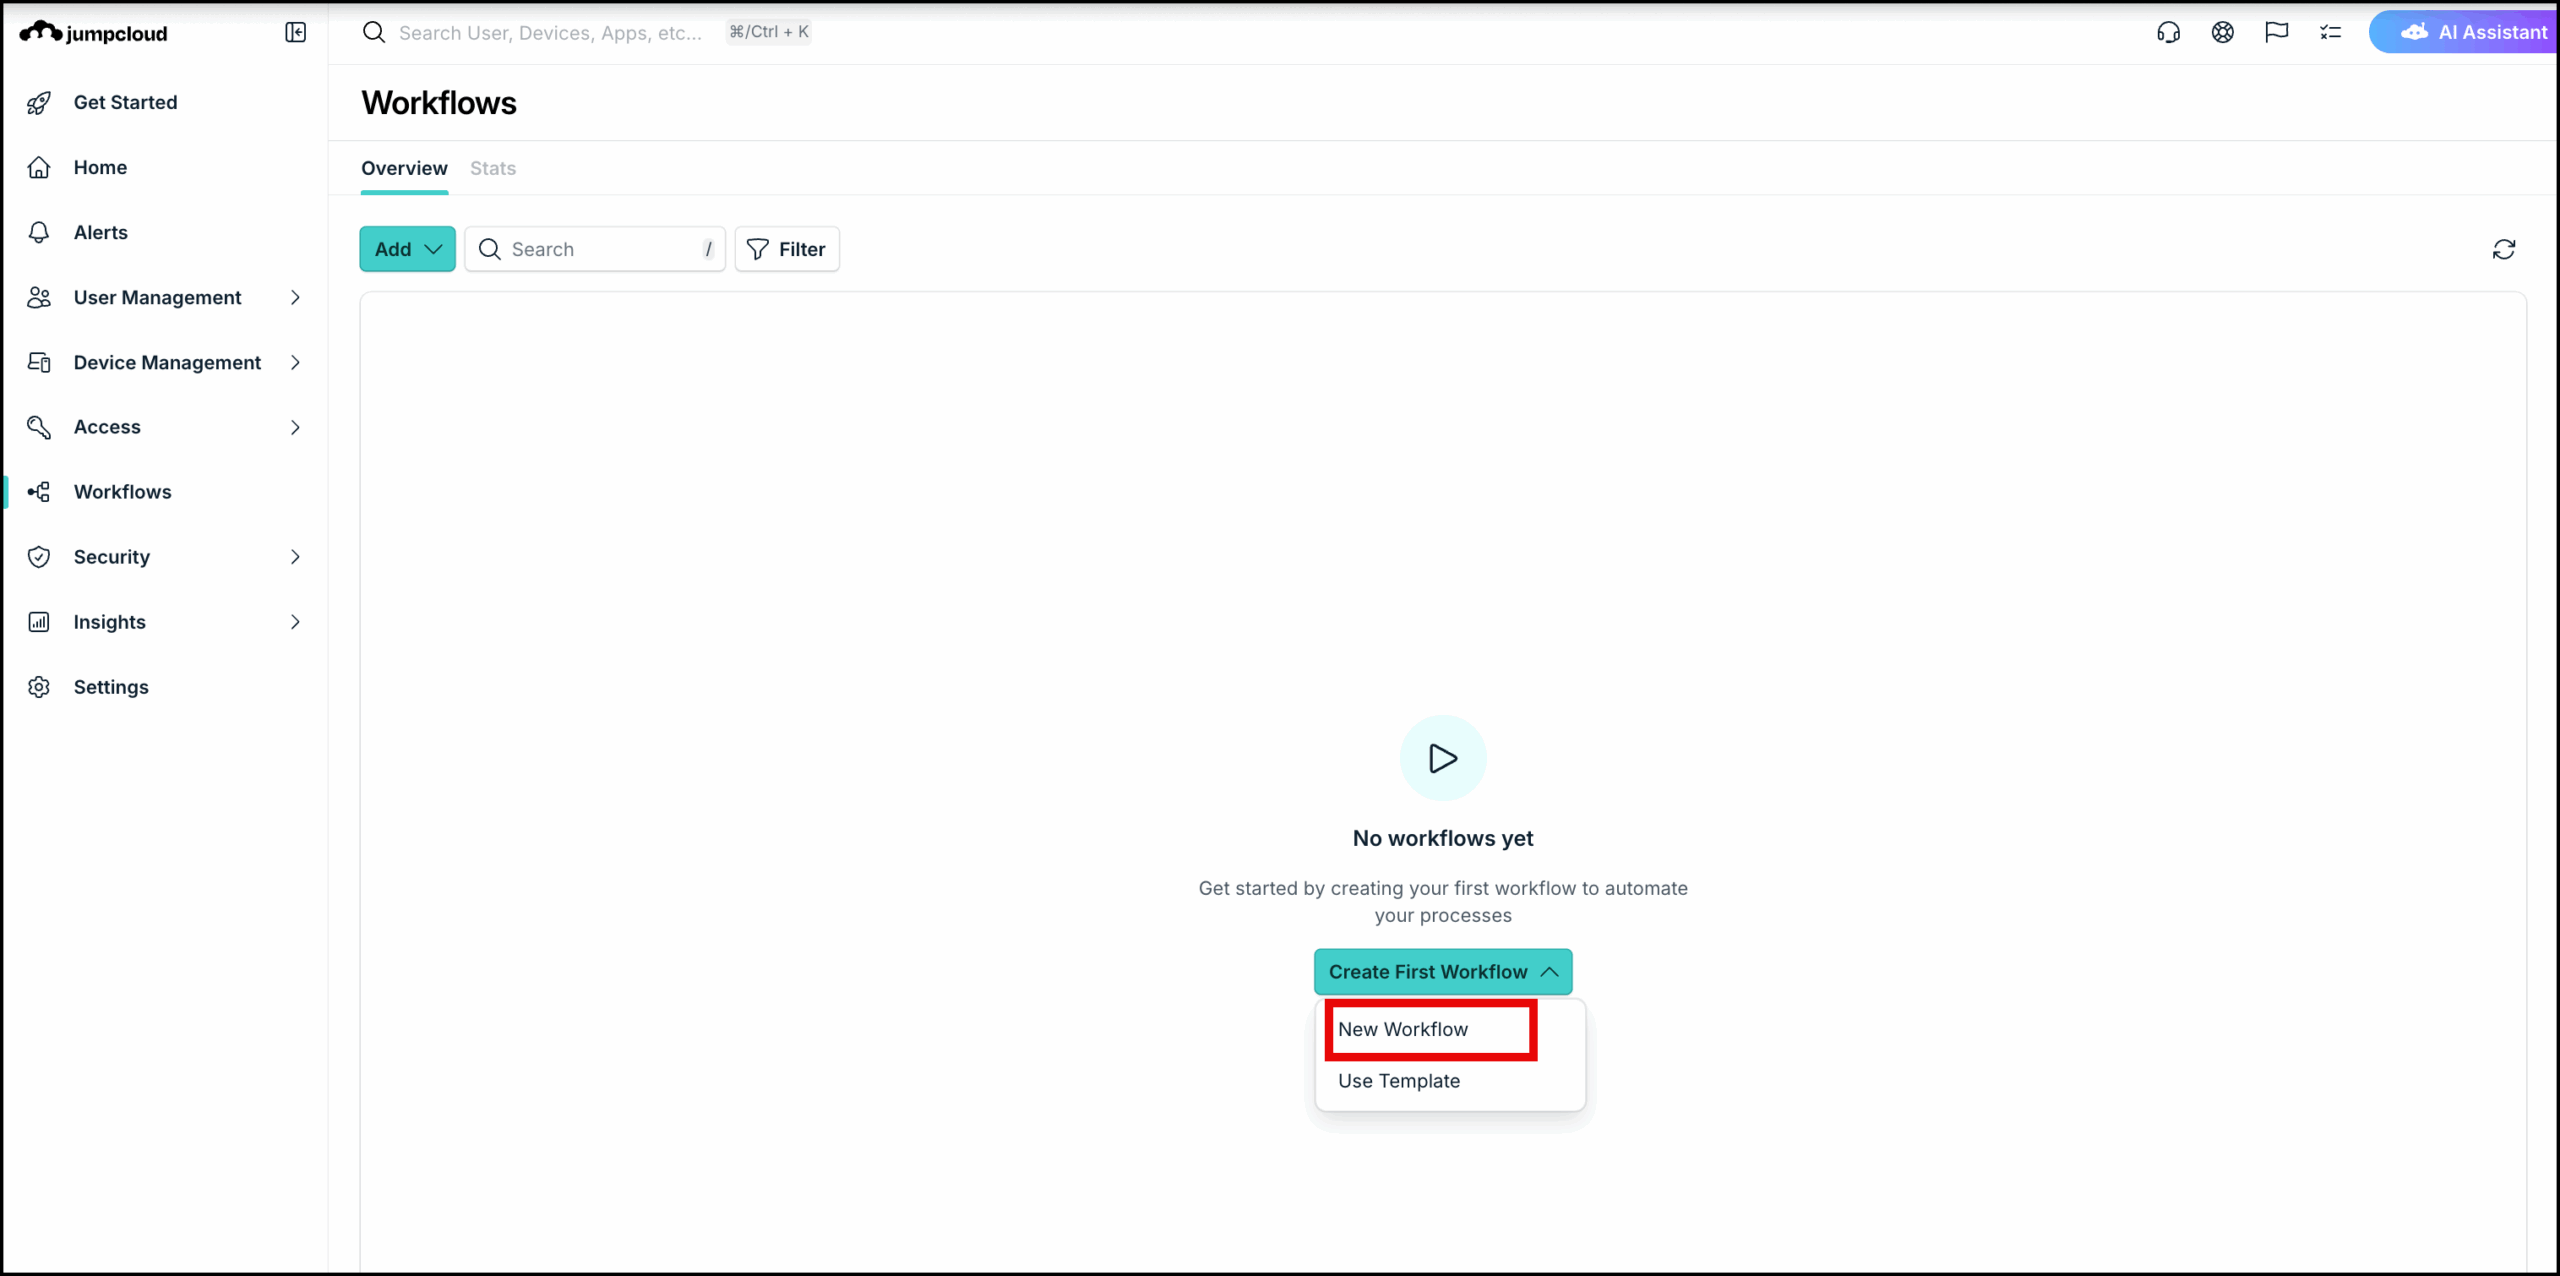
You will see the Overview page of Workflows. This is your centralized hub to create, monitor, and manage all workflows.
If you haven’t created any workflows yet, this will be empty.
Creating Workflows
To start creating workflows:
- Click Create First Workflow.
- Next, you can either:
- Click New Workflow and build your own workflow from scratch
- Click Use Template to find and select templates for common tasks and use them to build your workflow
To create a workflow from scratch:
- Select New Workflow from the dropdown.
- In the Create Workflow dialog, select the workflow type.

The following options are available:- Manual: Best for critical tasks that require human oversight or unique inputs every time they run. These workflows run only when an admin manually initiates them, allowing for customized data entry at the time of the run.
- Event: Best for real-time responses to changes in the directory. These workflows will be triggered automatically by Directory Insights (DI) events, such as a user joining a group, a password change, or a device being added to device group.
- Schedule: Best for recurring IT tasks and routine maintenance. You can set these workflows to run automatically at specific intervals without manual intervention.
- In the Create Workflow dialog, select the workflow type.
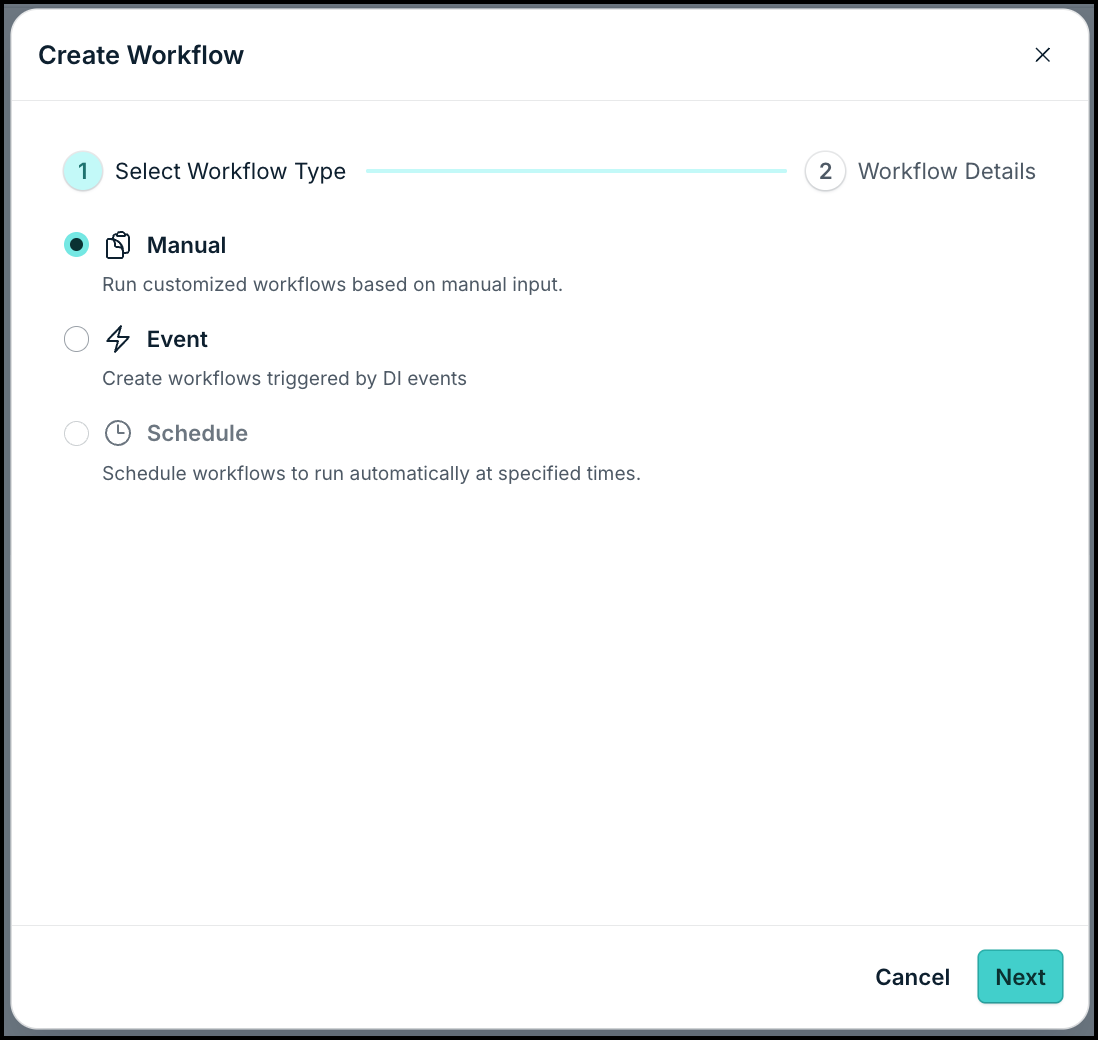
- Click Next and then enter the workflow details such as name and description and click Done.
This will take you to the workflow builder. You will see two tabs:
- Overview: The workflow builder canvas where basic data such as workflow name and type is already populated along with the first trigger card. Your first trigger depends on the type of workflow you selected. You can design the different blocks (triggers, conditions, and actions) here.
- Execution History: This is where you view and audit workflow execution data.
To create a workflow using a template:
- Select Use Template from the dropdown.
You will view the workflow templates page with all the templates available for you to work with and configure. The templates are organized by functionality - Device management, Security and User Management. Click each tab to find the templates quicker.
- Search and Select the template that you want to use. Click Use Template.
This will take you to the workflow canvas with pre-configured actions and conditions. The condition nodes may interact with external APIs. You must configure the security keys for each endpoint node as needed.
Defining Workflow Trigger Conditions
In the Workflow Overview tab, click the trigger card to enter the input trigger condition details. This depends on the type of workflow you selected in the previous step. Refer to each section to learn more.
Defining Workflow Actions
Once the trigger condition is added, click + to add an action node. You can select the Action type and define the actions (the specific tasks to execute) for the workflow.
You can choose to define actions or use flows.
- Actions are individual operations performed on your directory or resources. These are typically linear and execute a single specific task. Use an Action when you have a definitive task to perform once a trigger or condition is met.
You can either use:- Custom Actions: Displays a curated list of common admin tasks such as user and user group activation, binding applications and policies to devices and device groups, email actions and so on.
- JumpCloud API Actions: Displays a list of direct API calls that you can utilize to achieve more advanced or granular directory operations. See JumpCloud Workflows Public API & DSL Guide to learn more.
- Custom Actions: Displays a curated list of common admin tasks such as user and user group activation, binding applications and policies to devices and device groups, email actions and so on.
- Flows allow you to move beyond simple linear automation. You can use them to add complex decision-making logic and efficiency into your workflow.
You can either use:- If Else (Conditional Branching): An If-else flow acts as a gatekeeper. It evaluates a specific condition and splits the workflow into two paths:
- Loops (Iteration): A Loop (specifically a for loop) allows you to handle repetitive tasks without manual duplication.
See Understand Action Types to learn more.
![]()
By nesting Actions inside Flows, you can create powerful, self-managing systems that handle hundreds of variables with a single configuration.
Choosing The Execution Role
Next, you must identify the role that has the permission to perform the actions you’ve added in the Workflow.
- On the top pane, click Select next to Run As.
- On the Choose Execution Role dialog, select the narrowest role from the dropdown.
- Click Action.
![]()
To maintain security best practices and reduce organizational risk, follow the Principle of Least Privilege. Never use the Administrator or Administrator with Billing role for simple tasks. Instead, select the lowest role that encompasses all required actions.
- Review all the actions you have added in the workflow, compare your action list against the standard JumpCloud Roles, and then select the appropriate role. See Admin Portal Roles to learn more.
Saving the Workflow
Once you start making changes in the workflow Canvas, you will see a floating panel at the bottom of the page alerting you regarding unsaved changes. Once you’ve defined the triggers and actions as needed, click Save changes to save the configurations. If any nodes or fields contain errors or missing configuration details, the workflow cannot be saved and an error message will display. Resolve all flagged issues before attempting to save again.
Your workflow will be saved and enabled by default. You can use the toggle to disable it if needed.
Running the Workflow Manually
You can run the workflow manually to confirm everything works fine.
- Click the Run workflow icon next to the Enable/Disable toggle to enter Input JSON details. You must enter JSON details for a valid action to successfully run the workflow.
- Click Run Workflow.
The workflow will be triggered. You can check the status and execution details in the Execution history section.