
Self-Service Account Provisioning lets users bind their account to a JumpCloud-managed macOS or Windows device directly from the login window. This streamlines the user onboarding experience and allows for light-touch device configuration for admins.
When enabled, users see Sign in with JumpCloud at the device login window and enter their existing JumpCloud user credentials to begin the user-led provisioning process.
![]()
By default, Sign in with JumpCloud only appears on devices that have no existing JumpCloud user associations. On Windows devices, you can customize the behavior by configuring a policy. See Create a Windows Self-Service Account Provisioning Policy to learn more.
Understanding the Benefits:
- Save time and IT resources by eliminating manual user-to-device association, providing a light-touch device onboarding for admins.
- Simplify the onboarding experience and let users start working quickly from their JumpCloud-managed account on their JumpCloud-managed device.
- Enable federated user identity login to JumpCloud-managed devices. See Get Started: Federated Authentication.
Prerequisites:
- macOS and Windows devices must meet JumpCloud’s Agent Compatibility and System Requirements.
- Windows Home editions aren't supported.
- Windows Server editions aren't supported.
- Active Directory (AD) and Entra ID joined devices aren't supported.
- The JumpCloud agent must be installed and running on macOS and Windows devices. See Install the Mac Agent and Install the Windows Agent.
- By default, the device must not have an existing JumpCloud-bound user account.
Considerations:
- On macOS devices, Self-Service Account Provisioning can only add an existing JumpCloud user to a device that doesn't have any existing JumpCloud user associations.
- On Windows devices, you can customize the behavior by configuring a policy. See Create a Windows Self-Service Account Provisioning Policy to learn more.
- Takeover of an existing local account on a device isn't supported. Device association will fail if the user signing in has a JumpCloud username that matches an existing local account.
- This feature doesn't support creating a new JumpCloud user at the device login window. The JumpCloud user must exist in the org and have credentials assigned.
Enabling Self-Service Account Provisioning (Admin)
To enable Self-Service Account Provisioning for your org:
- Log in to the JumpCloud Admin Portal.
![]()
If your data is stored outside of the US, check which login URL you should be using depending on your region. If your organization uses LDAP, RADIUS, or requires firewall allow list configuration, the Fully Qualified Domain Names (FQDNs) will also be region specific. See JumpCloud Data Centers for the URLs, FQDNs, and IP addresses.
- Go to Device Management > Devices and click Settings.
- Under Self-Service Account Provisioning:
- Click to toggle macOS to On to enable Self-Service Account Provisioning on macOS devices.
- Click to toggle Windows to On to enable Self-Service Account Provisioning on Windows devices.
- Under User Permission-level, choose the permissions assigned to a user when they’re provisioned on the device:
- Choose Administrator to assign administrator/sudo privileges to the user.
- Choose Standard to assign non-administrative or non-sudo privileges to the user.
- (Optional) Under Custom Self-Service Account Provisioning Policy, click Create Policy to customize behavior on Windows devices. See Create a Windows Self-Service Account Provisioning Policy to learn more.
![]()
- See Set Admin/Sudo Permissions to learn more about administrator/sudo privileges on devices.
- By default, new users added to devices have their JumpCloud password synced to their device. You can disable Password Synchronization to have users enter a local password to log into their device instead. See Device Password Sync to learn more.

Exploring the macOS Login Window
![]()
JumpCloud has deprecated the macOS legacy login window and decoupled the modern login window from the Self-Service Account Provisioning (SSAP) feature toggle. macOS devices now default to the modern login window, and SSAP no longer enables or disables it. See Modernized macOS Login Window to learn more.
Using Self-Service Account Provisioning (User)
When your admin enables the feature, the Sign in with JumpCloud button appears on your macOS or Windows device login window. The login process will differ slightly depending on your device's operating system.
![]()
- During account creation, user and device MFA requirements are ignored. On your next login, you'll be prompted for MFA if your admin enforces it.
- The user workflow differs slightly depending on your organization's identity provider (IdP) and password settings.
- Admins should see Get Started: Federated Authentication and Device Password Sync to learn more.
Signing in on a macOS Device
To use Sign In with JumpCloud on a macOS device:
- In the top right of the macOS menu bar, ensure the device is connected to the internet and displays Online status before continuing.
- On the macOS login window, click Sign in with JumpCloud.

- In the User Login window, enter your email address and click Continue.
- The following step differs depending on your organization's Identity Provider (IdP):
- If JumpCloud is your IdP: Enter your JumpCloud password and click Login.
- If you have an external IdP:
- You're redirected to your IdP login (for example, Google). Enter your external IdP credentials to authenticate.
- You're prompted to create a local password.
- If JumpCloud is your IdP: Enter your JumpCloud password and click Login.
- After successful authentication, the account is created on the device and redirects you back to the login window.
- Click the newly added icon for your account and then enter your password.
- Follow the on-screen prompts to complete the macOS account configuration.
- Once completed, you’ll be logged in.


Signing in on a Windows Device
To use Sign In with JumpCloud on a Windows device:
- Ensure the device is connected to the internet before continuing.
- At the bottom left of the Windows login window, click Sign In with JumpCloud.
- Under JumpCloud, select Click here to sign in.

- In the User Login window, enter your email address and click Continue.
- The following step differs depending on your organization's Identity Provider (IdP):
- If JumpCloud is your IdP:
- In the User Login window, enter your JumpCloud password and click Login.
- After Setting up local account, enter your JumpCloud password and create a PIN (if required by your admin) to complete the setup. If PIN is required, use it as an alternative to your password to sign in to the device.

- If you have an external IdP:
- You're redirected to your IdP login (for example Google). Enter your external IdP credentials to authenticate.

- You're prompted to create a local password and PIN (if required by your admin).

- You're redirected to your IdP login (for example Google). Enter your external IdP credentials to authenticate.
- If JumpCloud is your IdP:


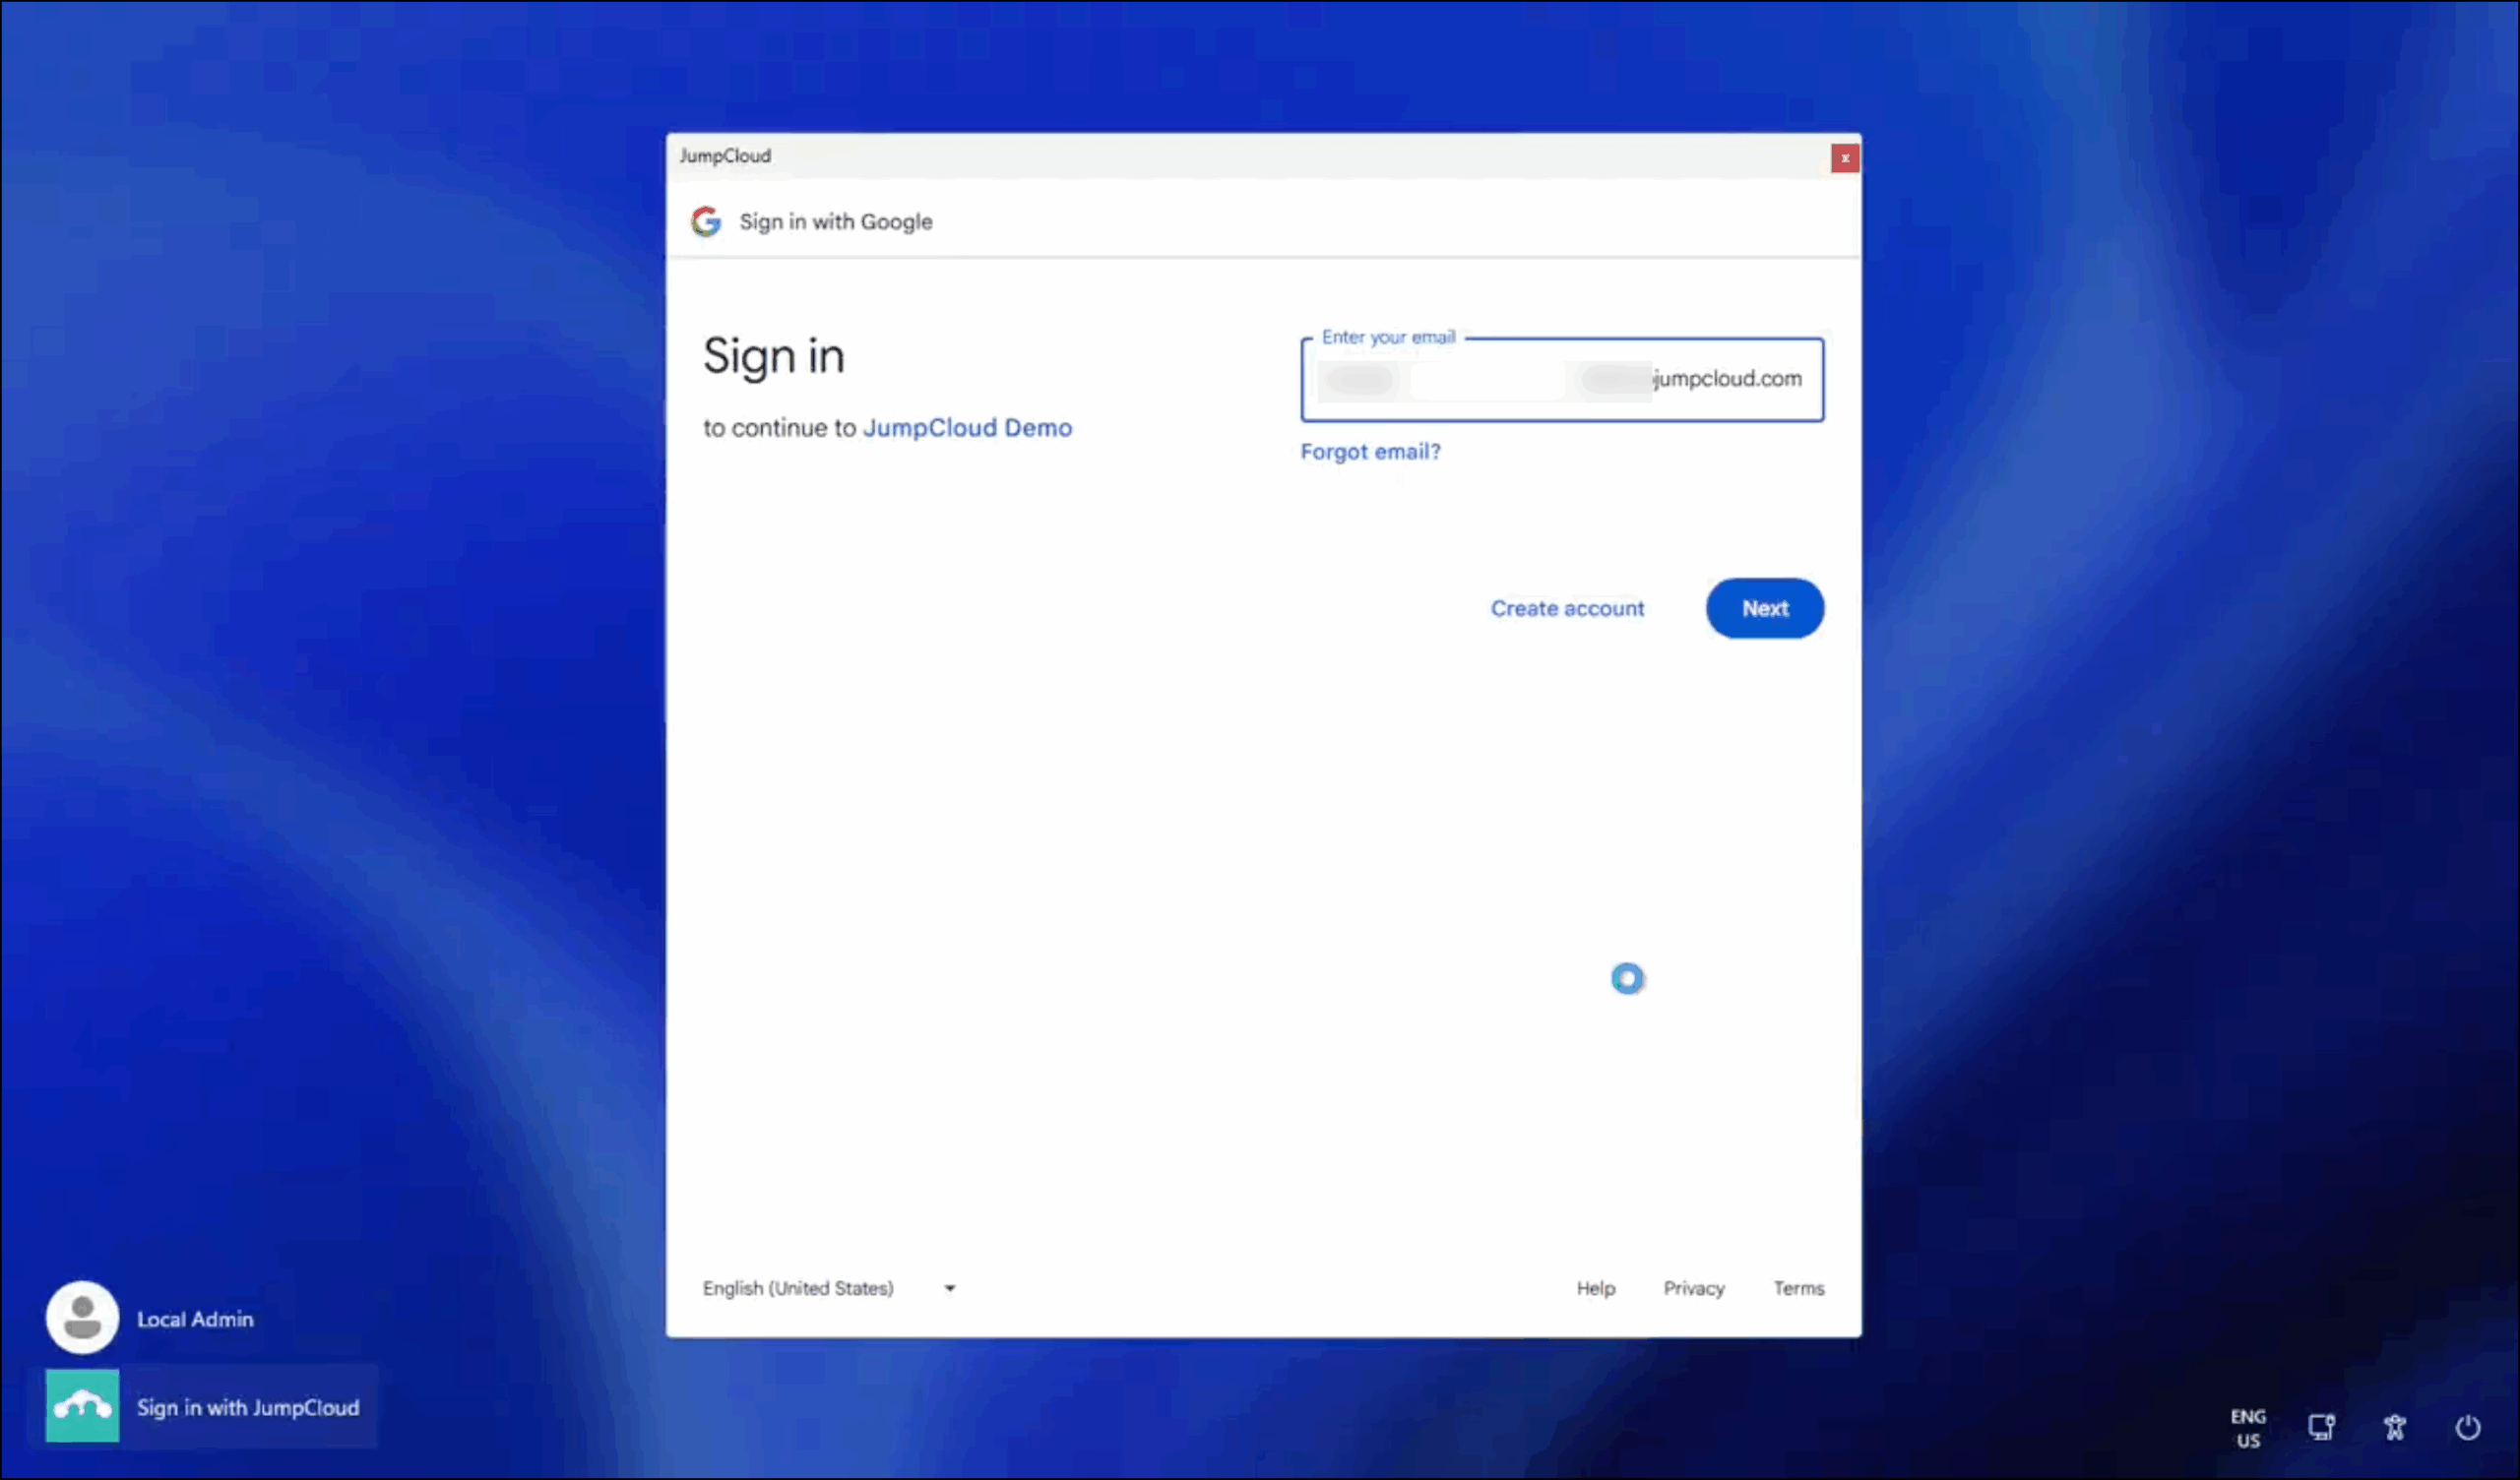
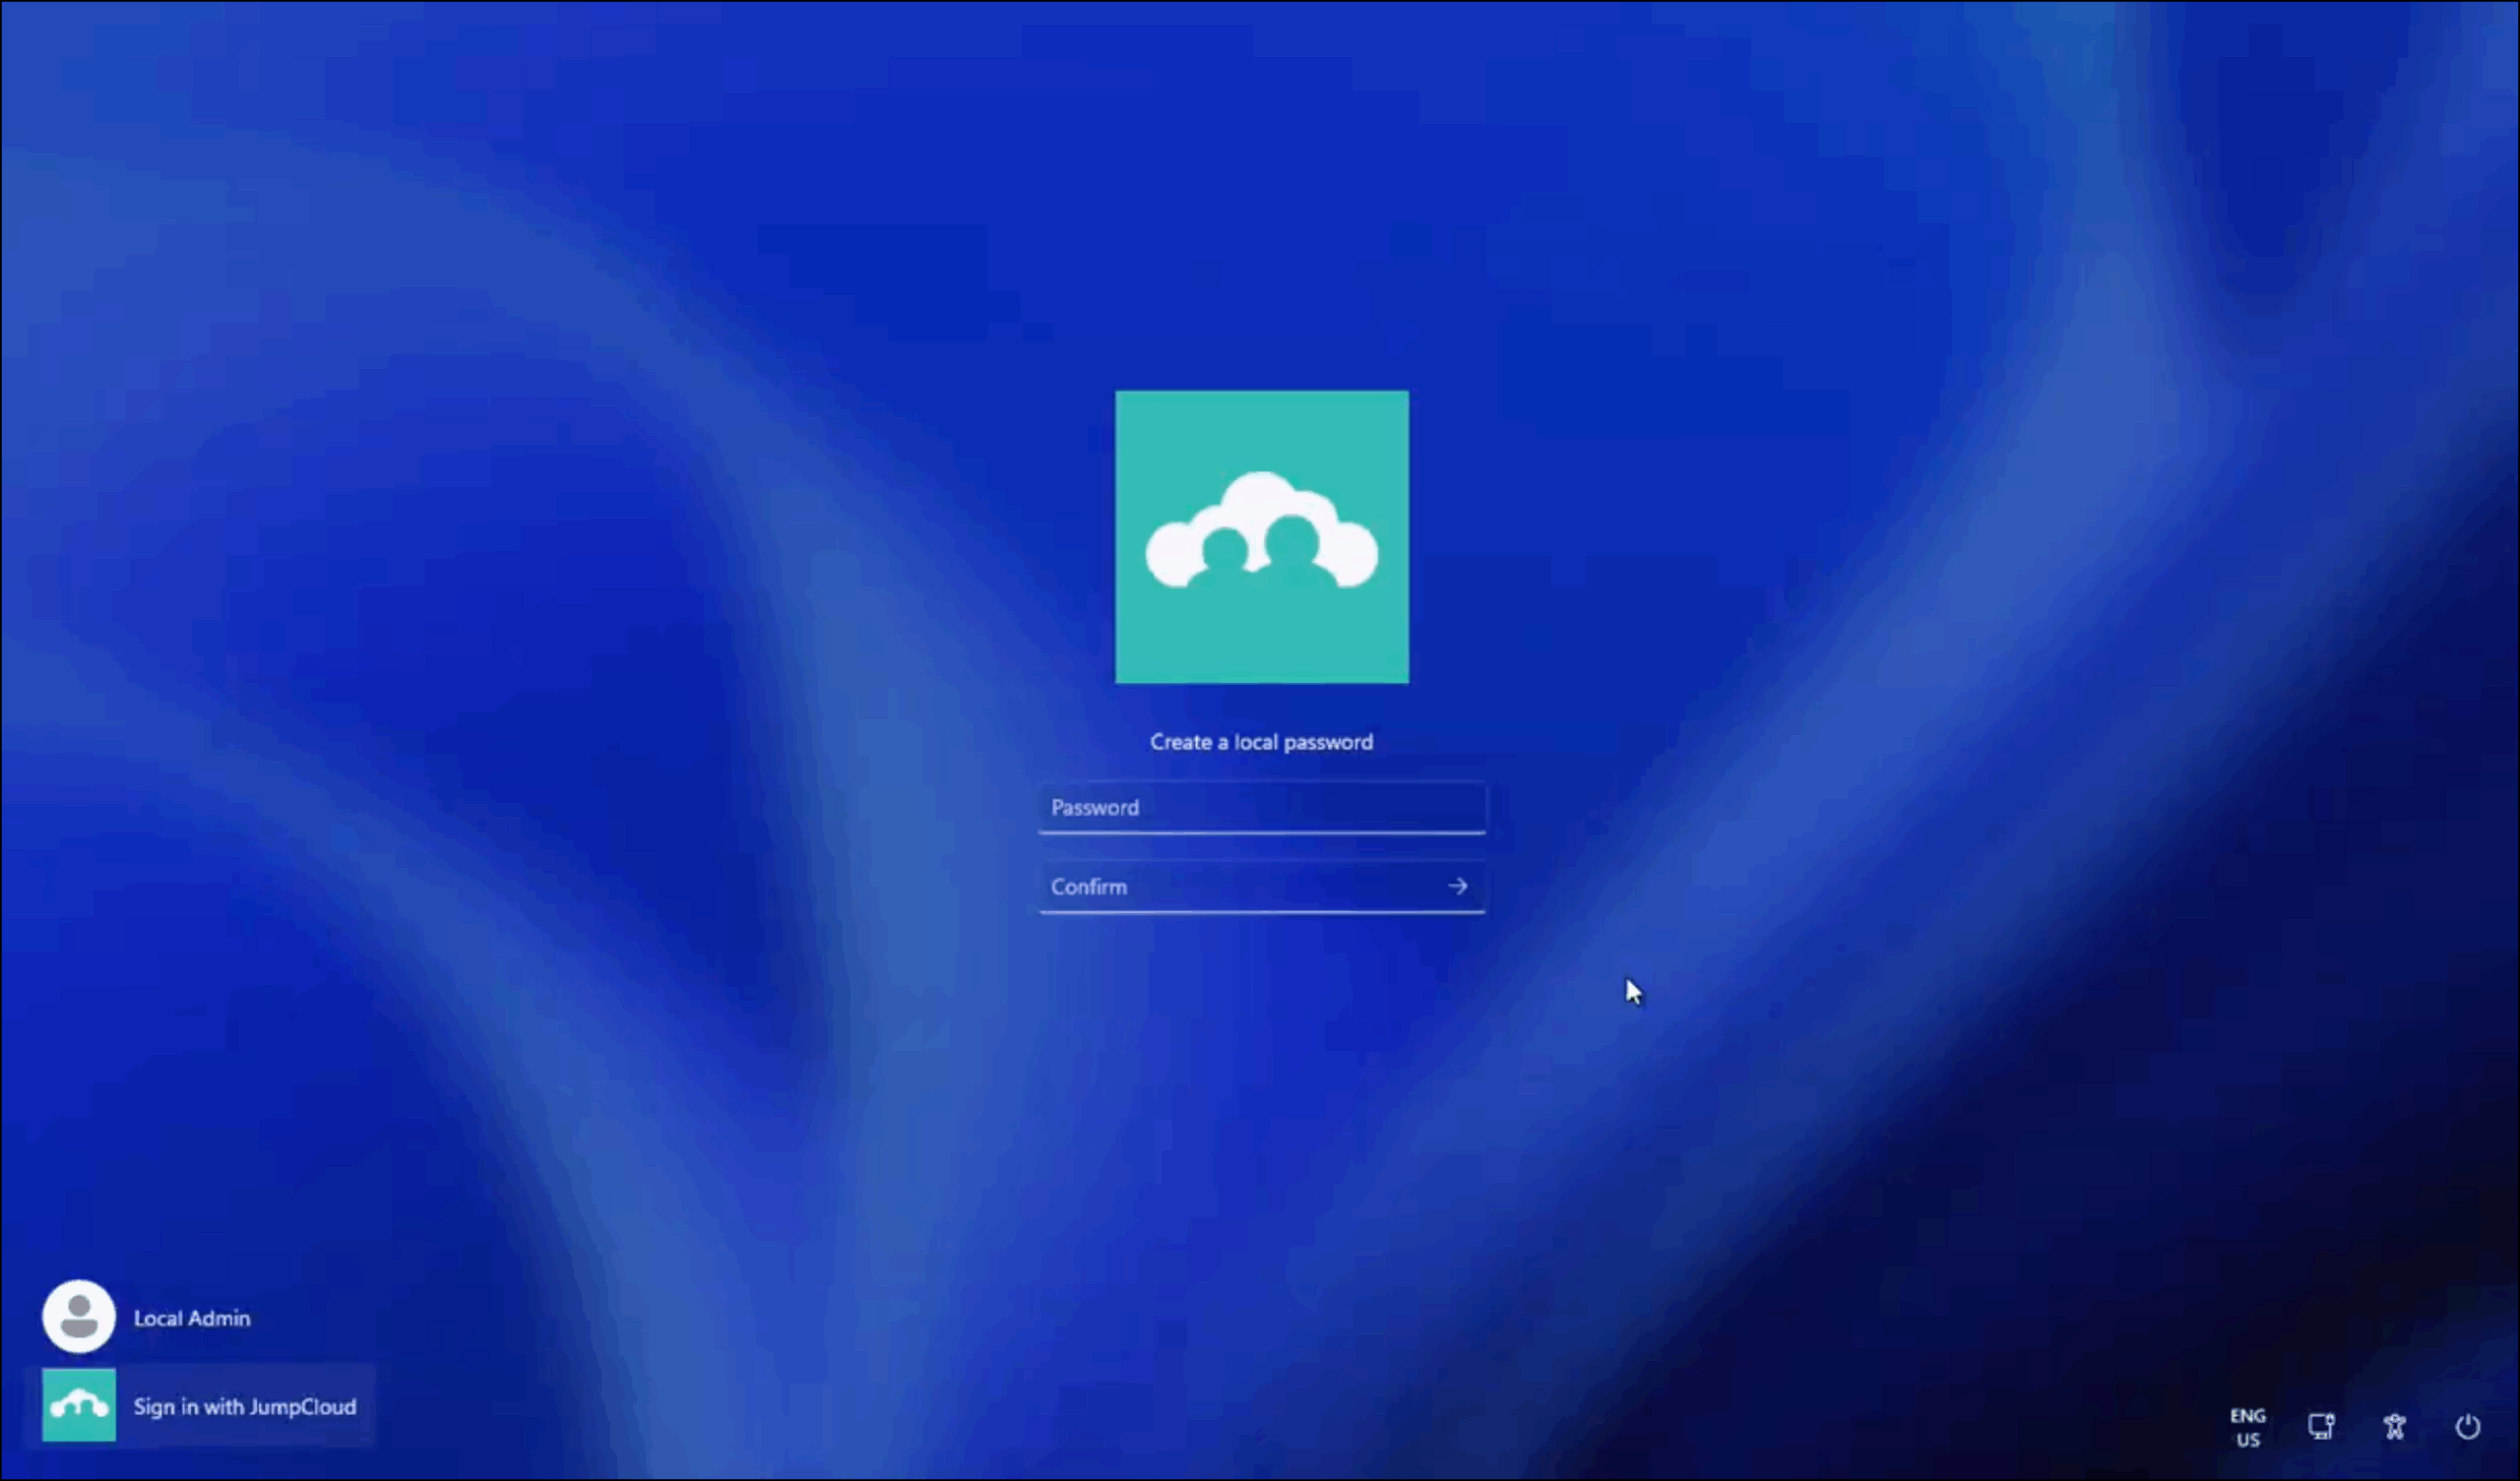
![]()
- By default, creating a PIN is required. Your admin can disable this requirement by configuring a Self-Service Account Provisioning (SSAP) Policy.
- If required, the PIN must be at least 6 characters.
- If PIN sign in is blocked on the device by a Group Policy Object (GPO), accounts are provisioned but may not automatically sign in. You may have to restart your device to sign in to the new account. See Troubleshoot: Provision New Users on Device Login.
- When the Windows account provision process completes, you’ll be logged in.
Disabling Self-Service Account Provisioning (Admin)
To disable Self-Service Account Provisioning for your org:
- In the device Settings page, under Self-Service Account Provisioning:
- Click to toggle macOS to Off to disable on macOS devices.
- Click to toggle Windows to Off to disable on Windows devices.
![]()
Disabling Self-Service Account Provisioning won't remove any existing JumpCloud users on devices. You can manage user to device associations in the Admin Portal. See Bind Users to Devices.
FAQ
You can enable Self-Service Account Provisioning for macOS devices to take advantage of the updated login window. If JumpCloud users are already bound to devices via Admin action, the Sign in with JumpCloud button won't appear.
Yes, you can still associate users to devices via the Devices list in the Admin Portal. However, the Sign in with JumpCloud option will not be present on device login to add additional user accounts.
No, only the creation of a new JumpCloud account on a device is supported. Device association will fail if the JumpCloud username matches an existing local account on the device.
When users Sign in with JumpCloud on a device, MFA requirements are temporarily ignored for provisioning. Users will need to enroll in MFA in a JumpCloud User Portal browser session. See MFA for Users.
Troubleshooting
See Troubleshoot: Provision New Users on Device Login.
Additional Resources
Show Me: Self-Service Account Provisioning