
Integrate an existing Identity Provider (IdP) with JumpCloud to allow users to securely authenticate using their IdP credentials to gain access to their managed resources.
Prerequisites:
- You need to have a Google Cloud account with the permission to create new Google Cloud Projects .
- You need to have Admin with Billing permissions to configure an IdP.
Considerations:
- Federated authentication will be applied to only specific user groups. See Routing Policies for Identity Providers to learn more.
- Creating the IdP won't automatically result in users logging in with that IdP.
- User Portal access will be available with a federated login. If you don’t want User Portal access, you can create a policy to deny this, see Get Started: Conditional Access Policies to learn more.
- In order to provision users from your Google Workspace directory to JumpCloud, see Configure the Google Cloud Directory Sync to learn more.
- If you have third party SSO for your organization turned on in Google Workspace, you'll need to turn it off for it to work with JumpCloud. See Configuring an Organization-wide Third Party SSO Profile to learn more.
Impact of Federation on existing users, device logins and local passwords
Enabling Google Workspace as an Identity Provider does not disrupt existing users or device profiles.
What stays the same:
- Existing Windows and macOS user profiles remain intact
- Users continue to log into devices using their existing local passwords
- No device wipe or re-enrollment is required
What changes:
- Web-based authentication (JumpCloud User Portal and SSO apps) uses Google credentials
- JumpCloud passwords are no longer required for portal access
Device login behavior:
- Local device passwords remain separate from Google passwords
- Users can reset their device password by authenticating through Google, if needed
- Offline device access continues to work normally
This setup allows centralized user management in Google while preserving local device access and profiles.
Preparing your IdP to Configure with JumpCloud
To prepare your connection:
- Log in to your Google Cloud Console.
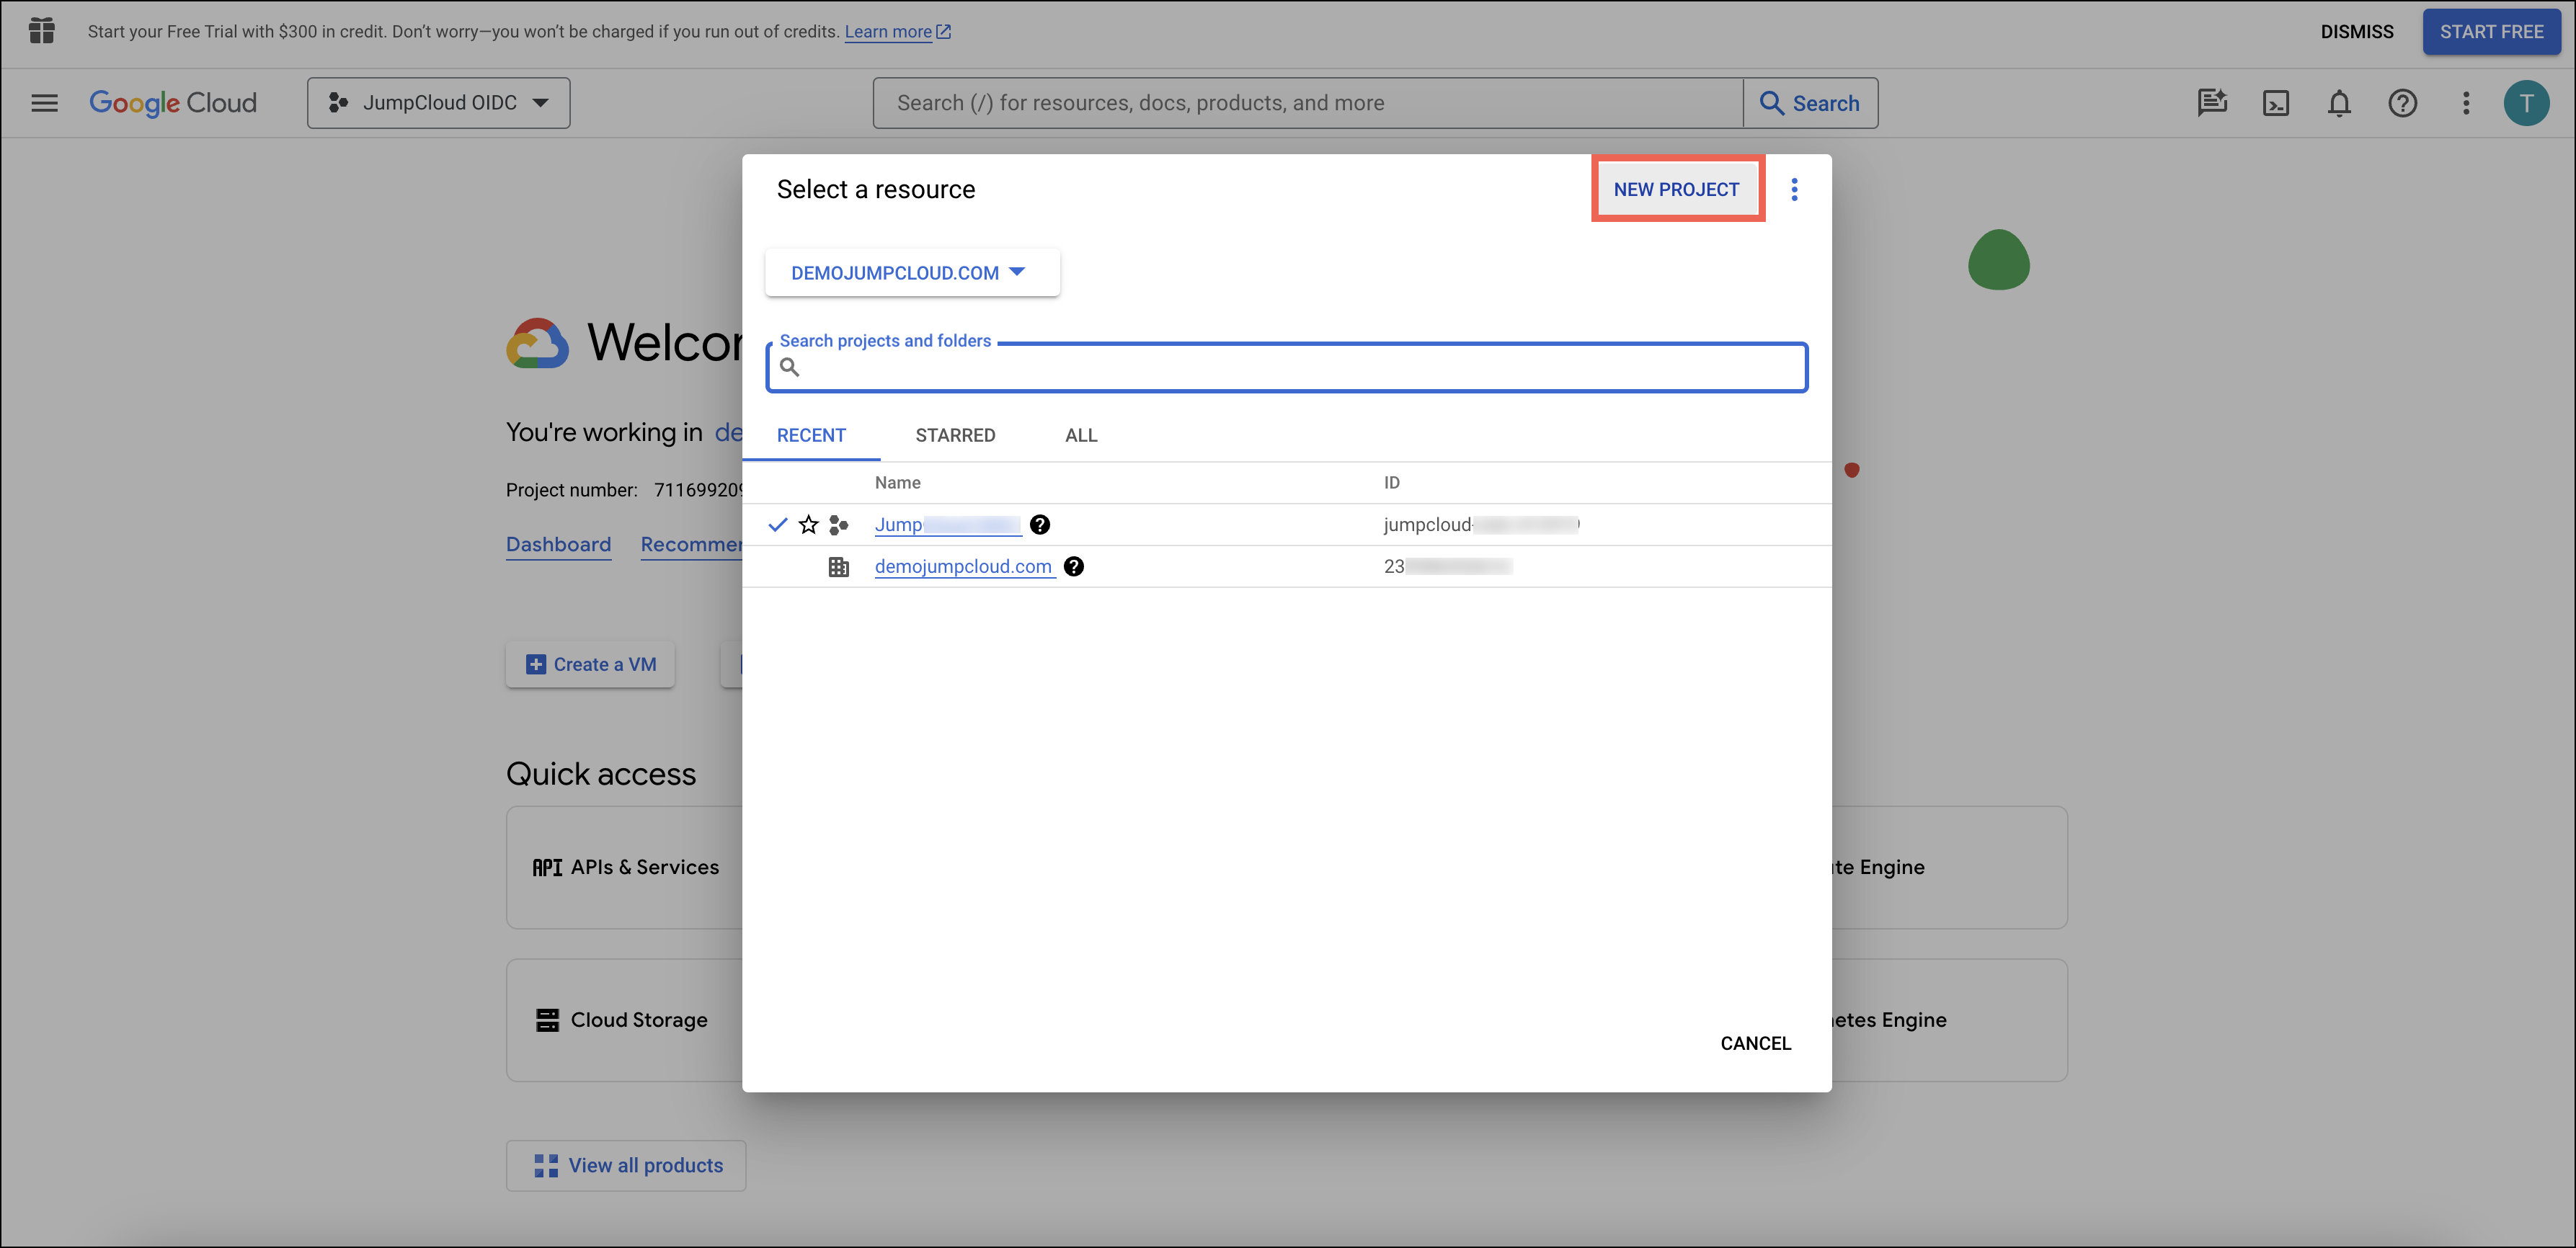
- Next to the logo in the top left corner, click the dropdown menu, then in the top right corner of the modal, click NEW PROJECT. Name it something associated with JumpCloud, like ‘JumpCloud OIDC’ and click CREATE.

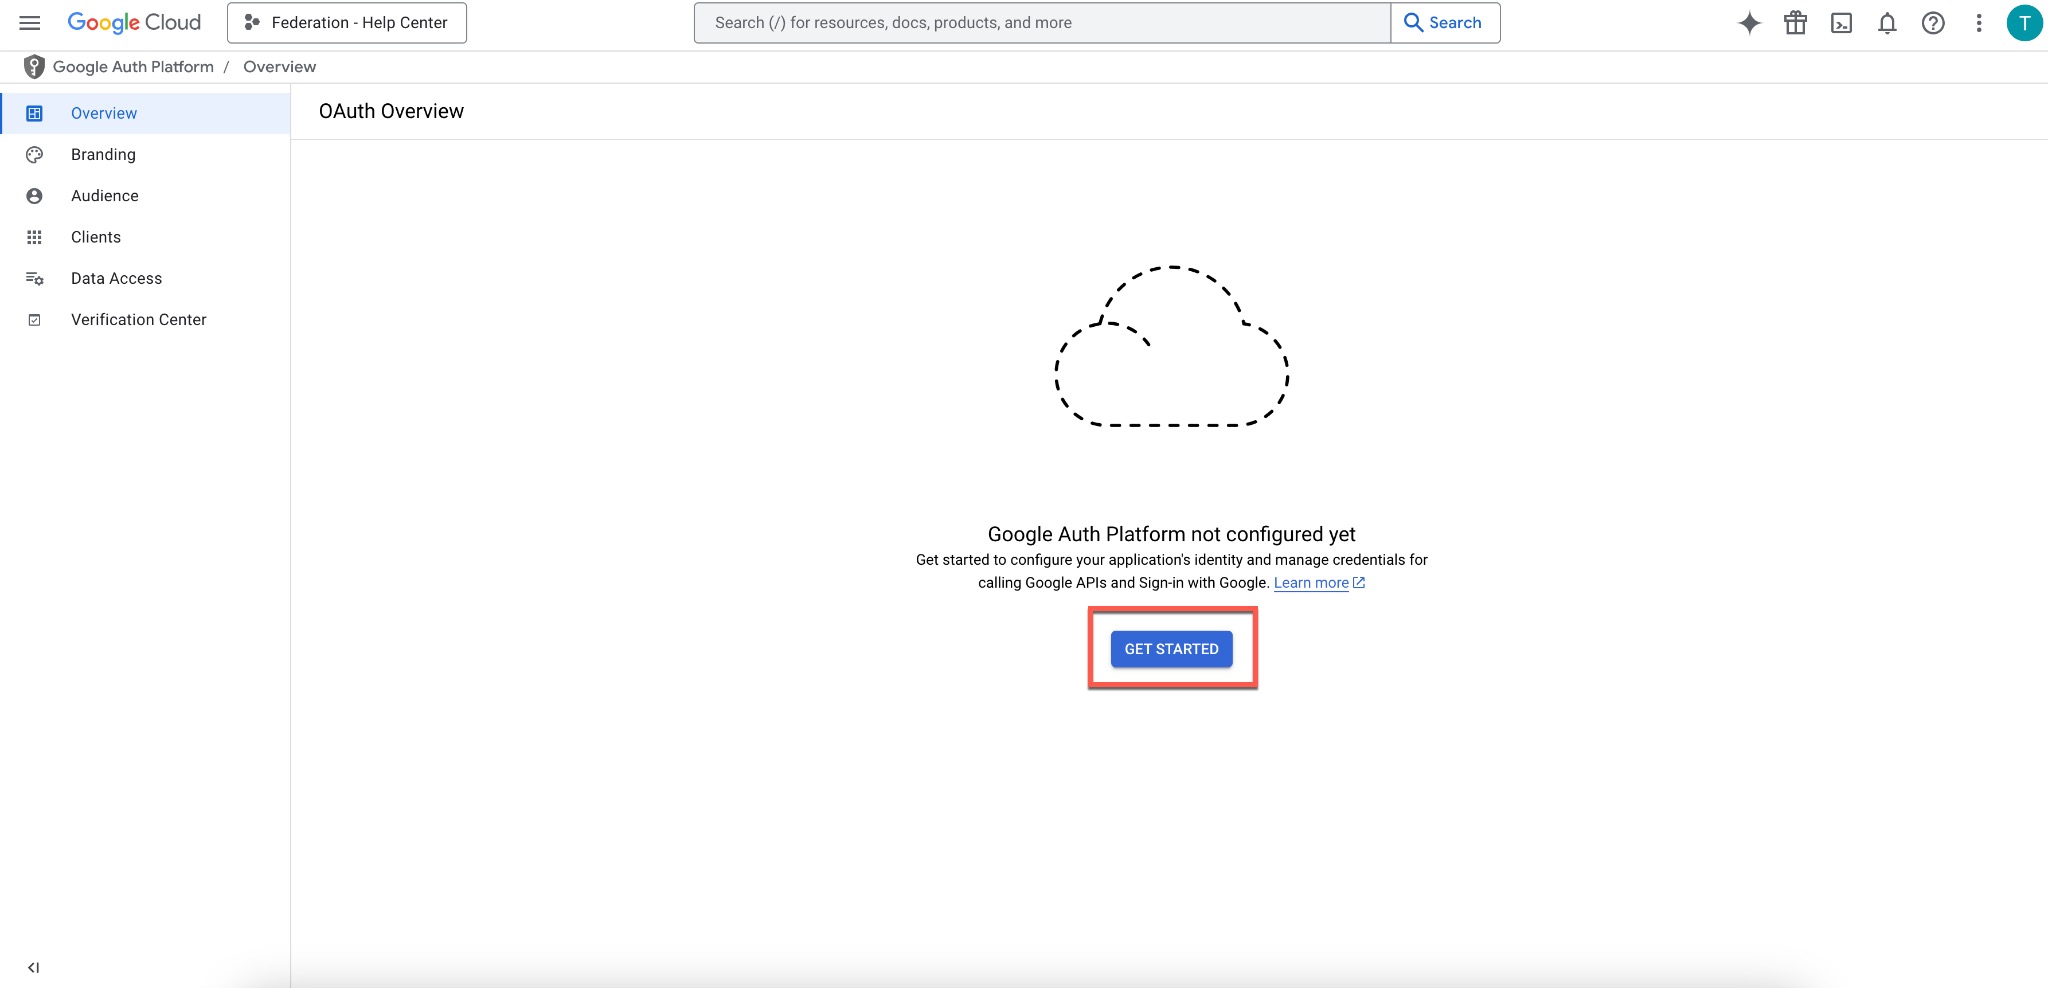
- In the left menu, go to APIs & Services > OAuth consent screen.
- Click Get Started to configure Google Auth Platform.

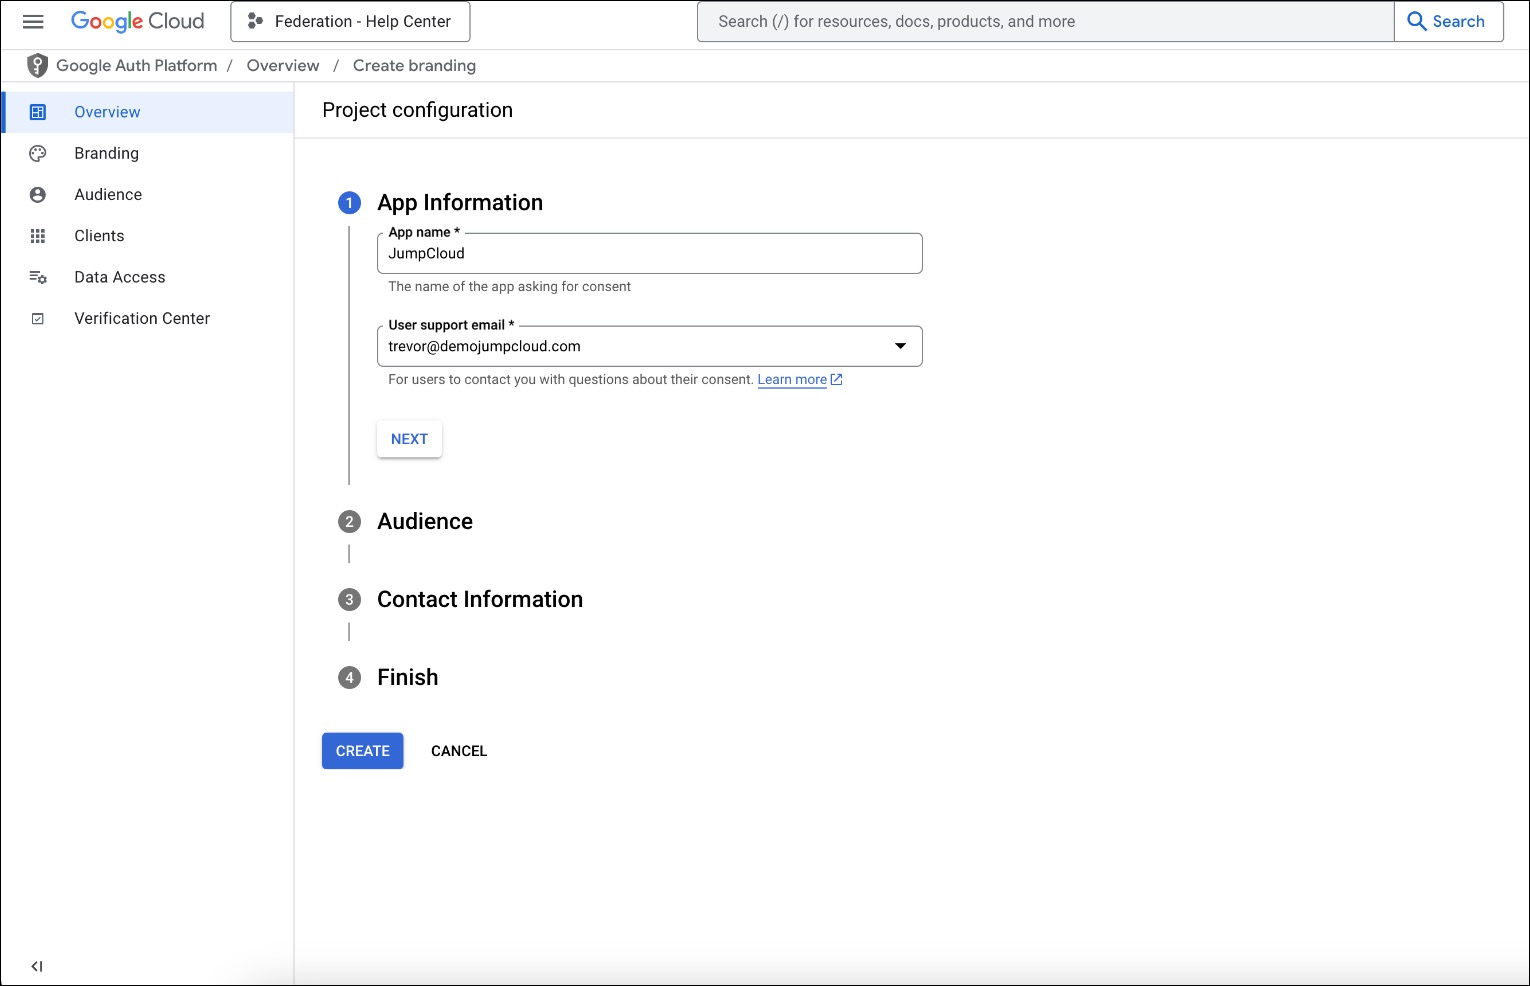
- On the App Information page, enter an App name*, something associated with JumpCloud, like ‘JumpCloud’.
- In the next dropdown menu, select a User support email*.
- Click NEXT.

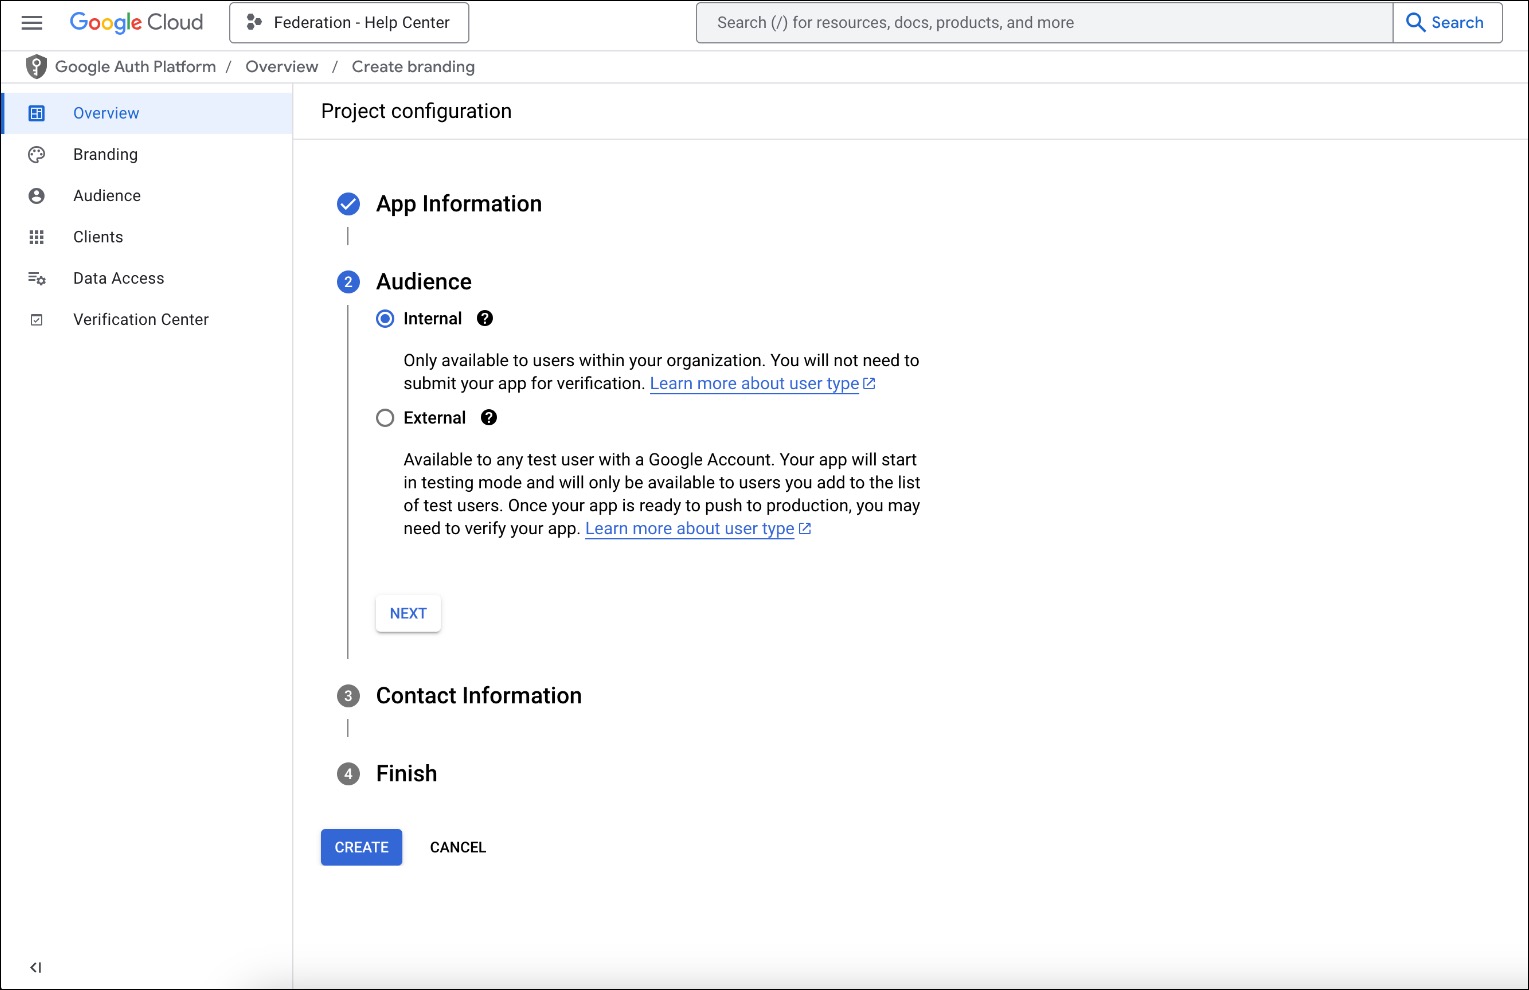
- Under Audience, select Internal, then click NEXT.

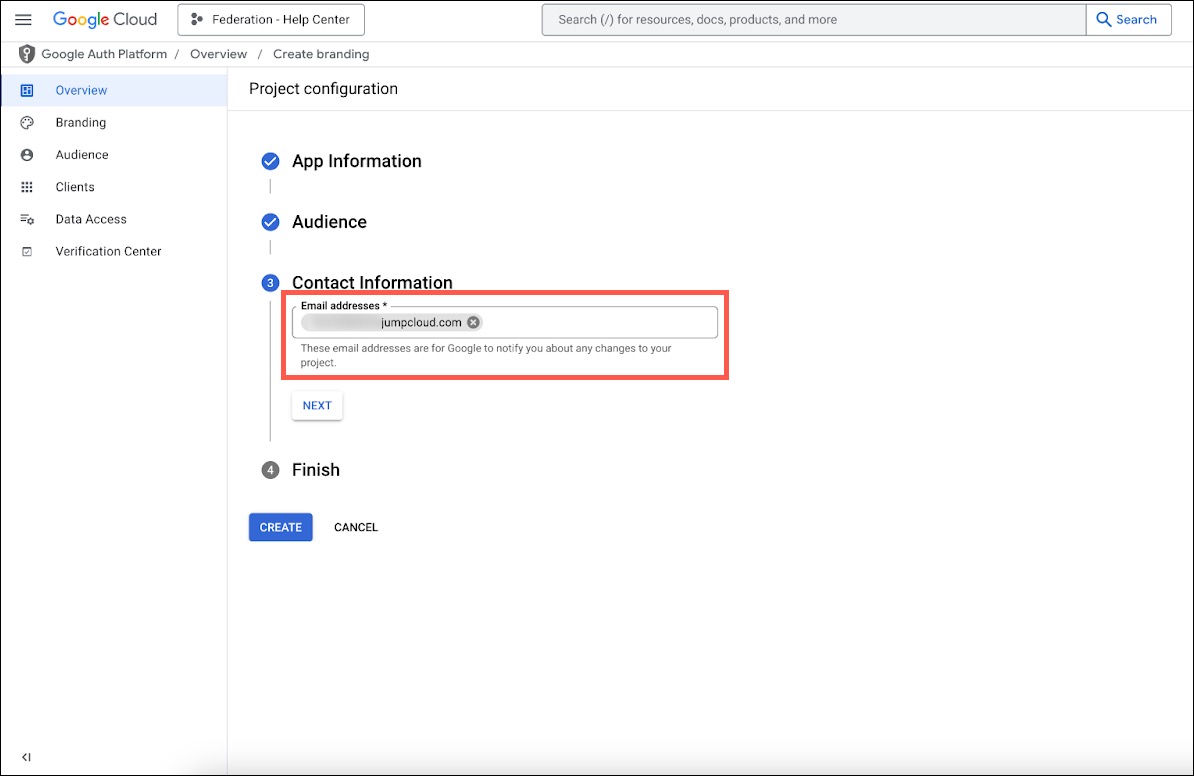
- Under Contact Information, enter a contact email address, then click NEXT.

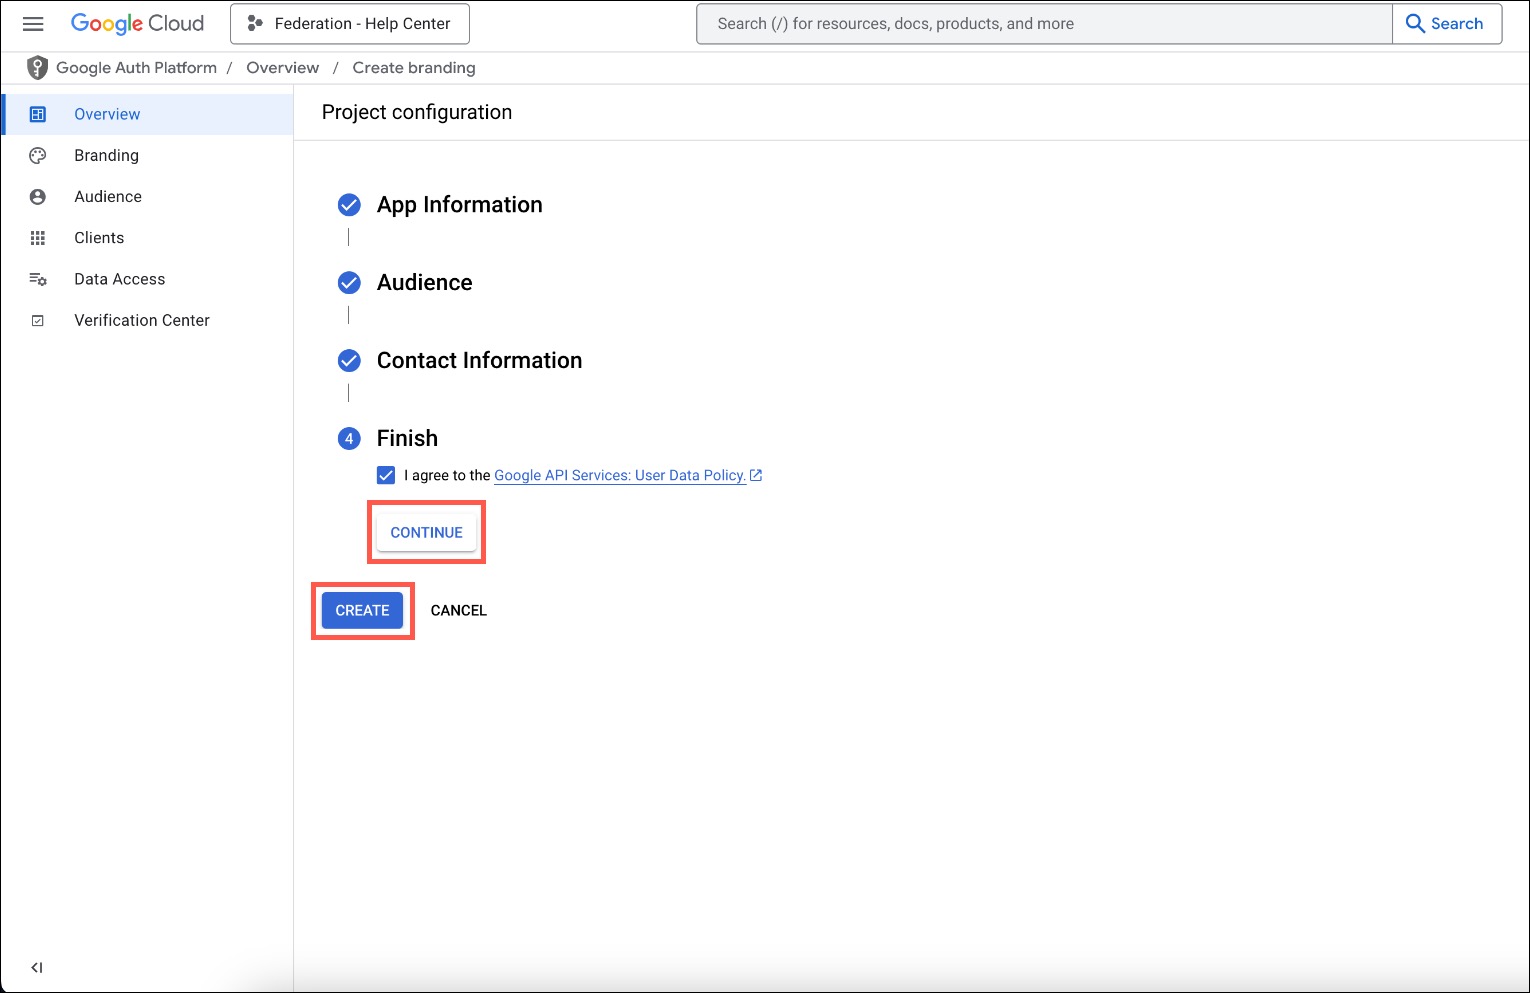
- Under Finish, select to agree to the policy and click CONTINUE, then CREATE.

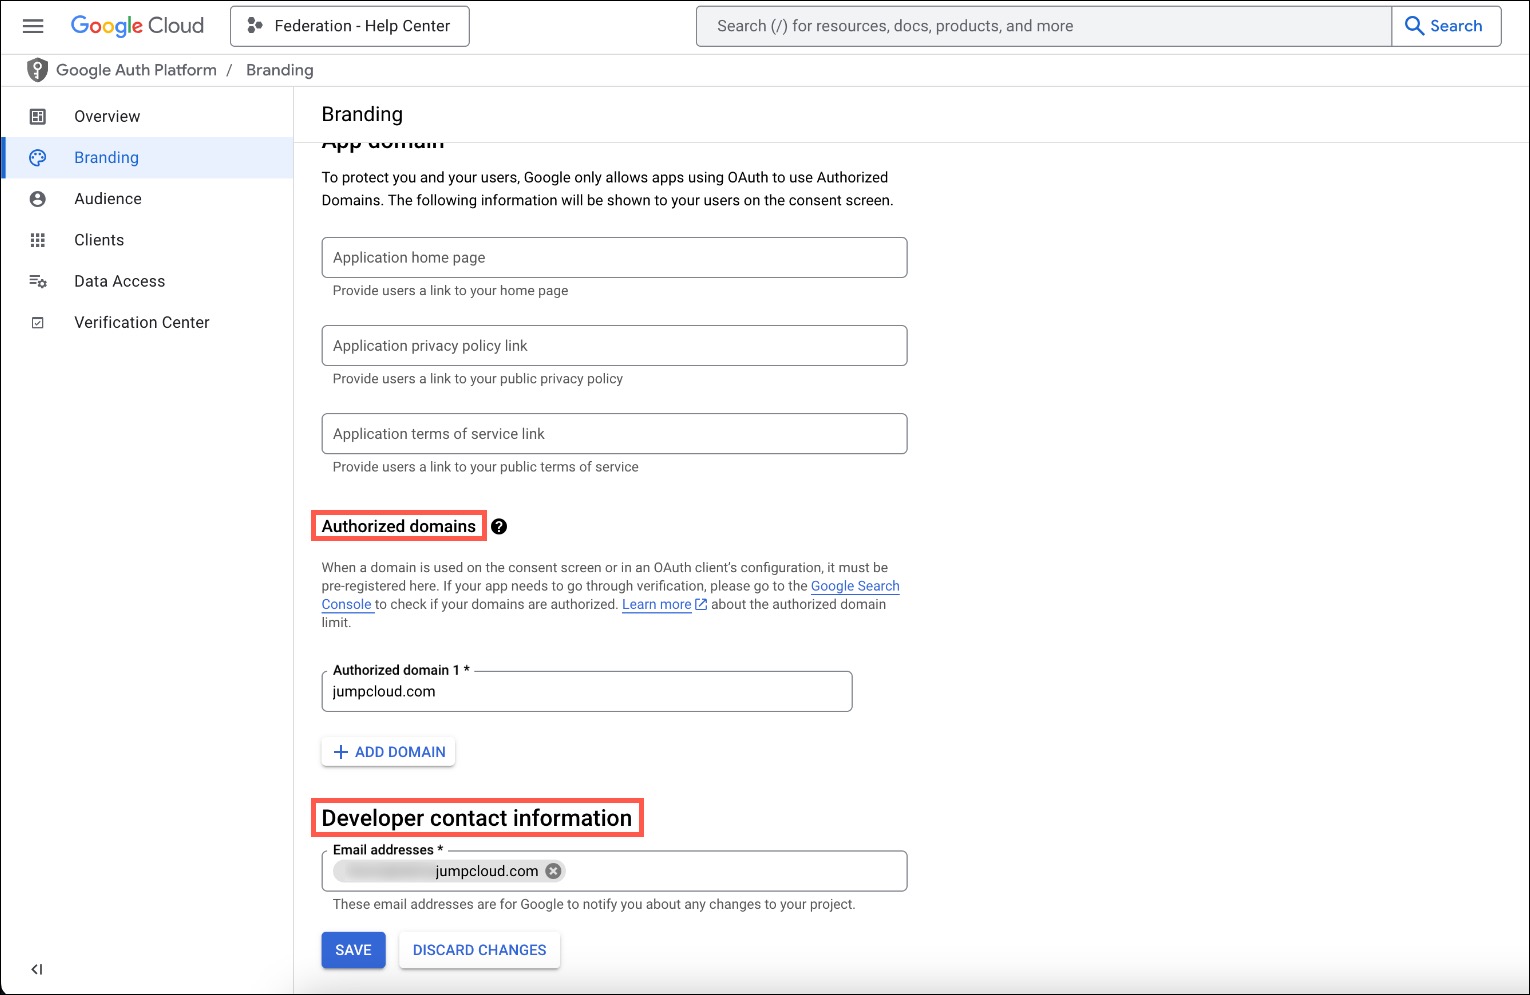
- In the left menu, go to Branding. Scroll down to Authorized domains, under Authorized domain 1*, enter
jumpcloud.com - Under Developer contact information, enter an Email address*.
- Click SAVE.

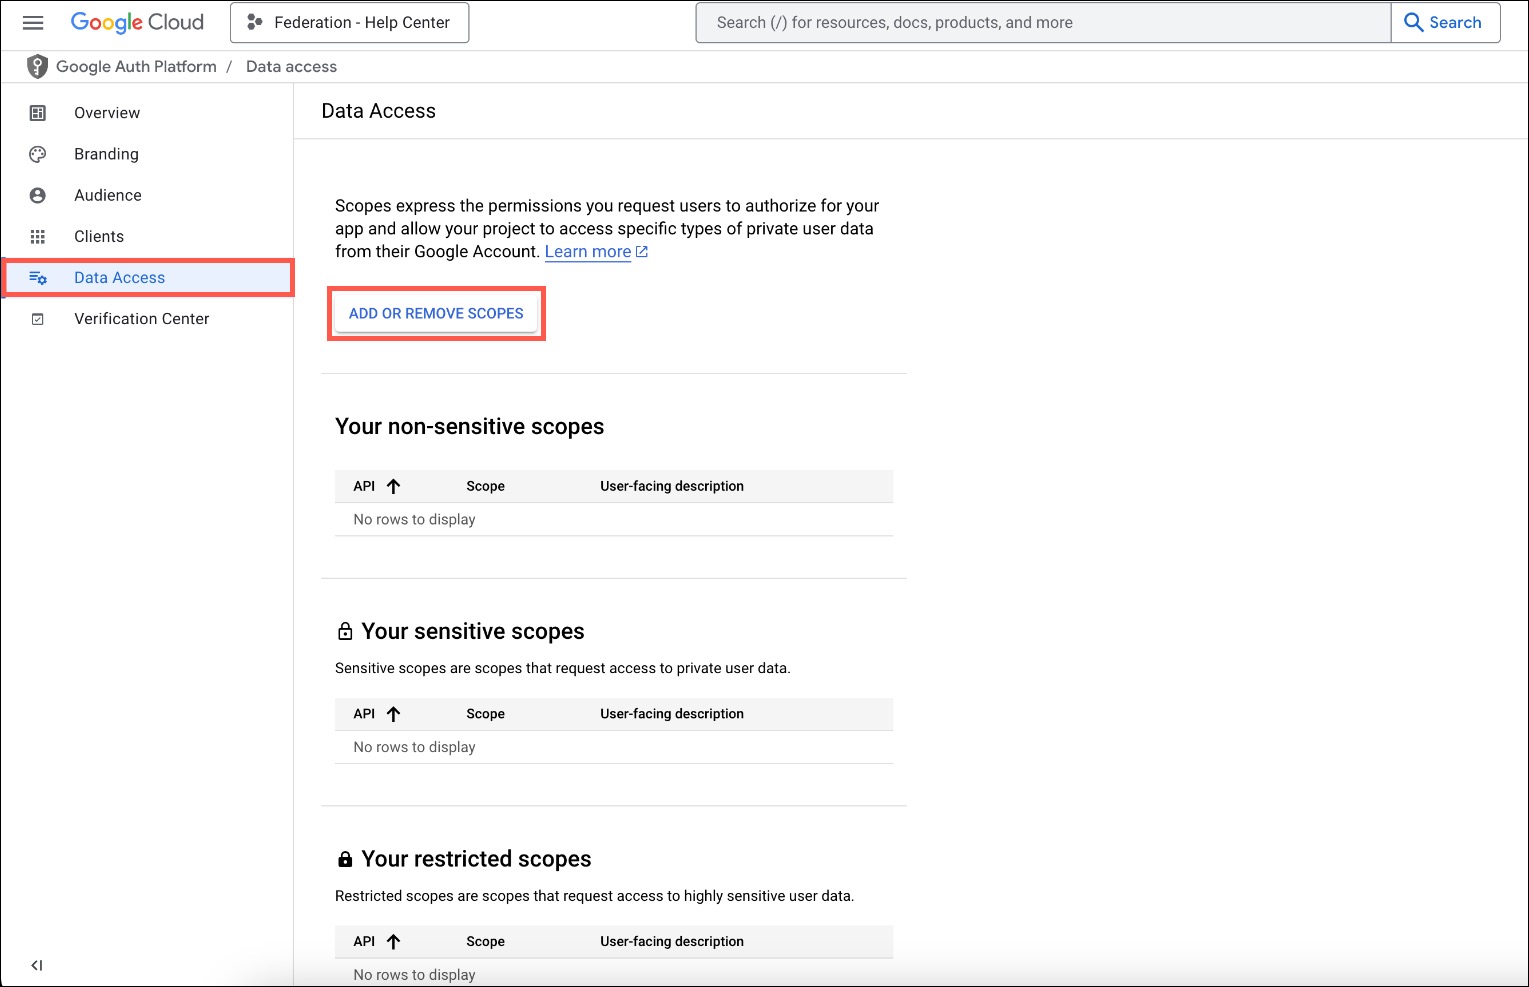
- In the left menu, go to Data Access to manage the scopes. Click ADD OR REMOVE SCOPES.
- Select the first three scopes; email, openID, and profile.
- Click UPDATE then SAVE.

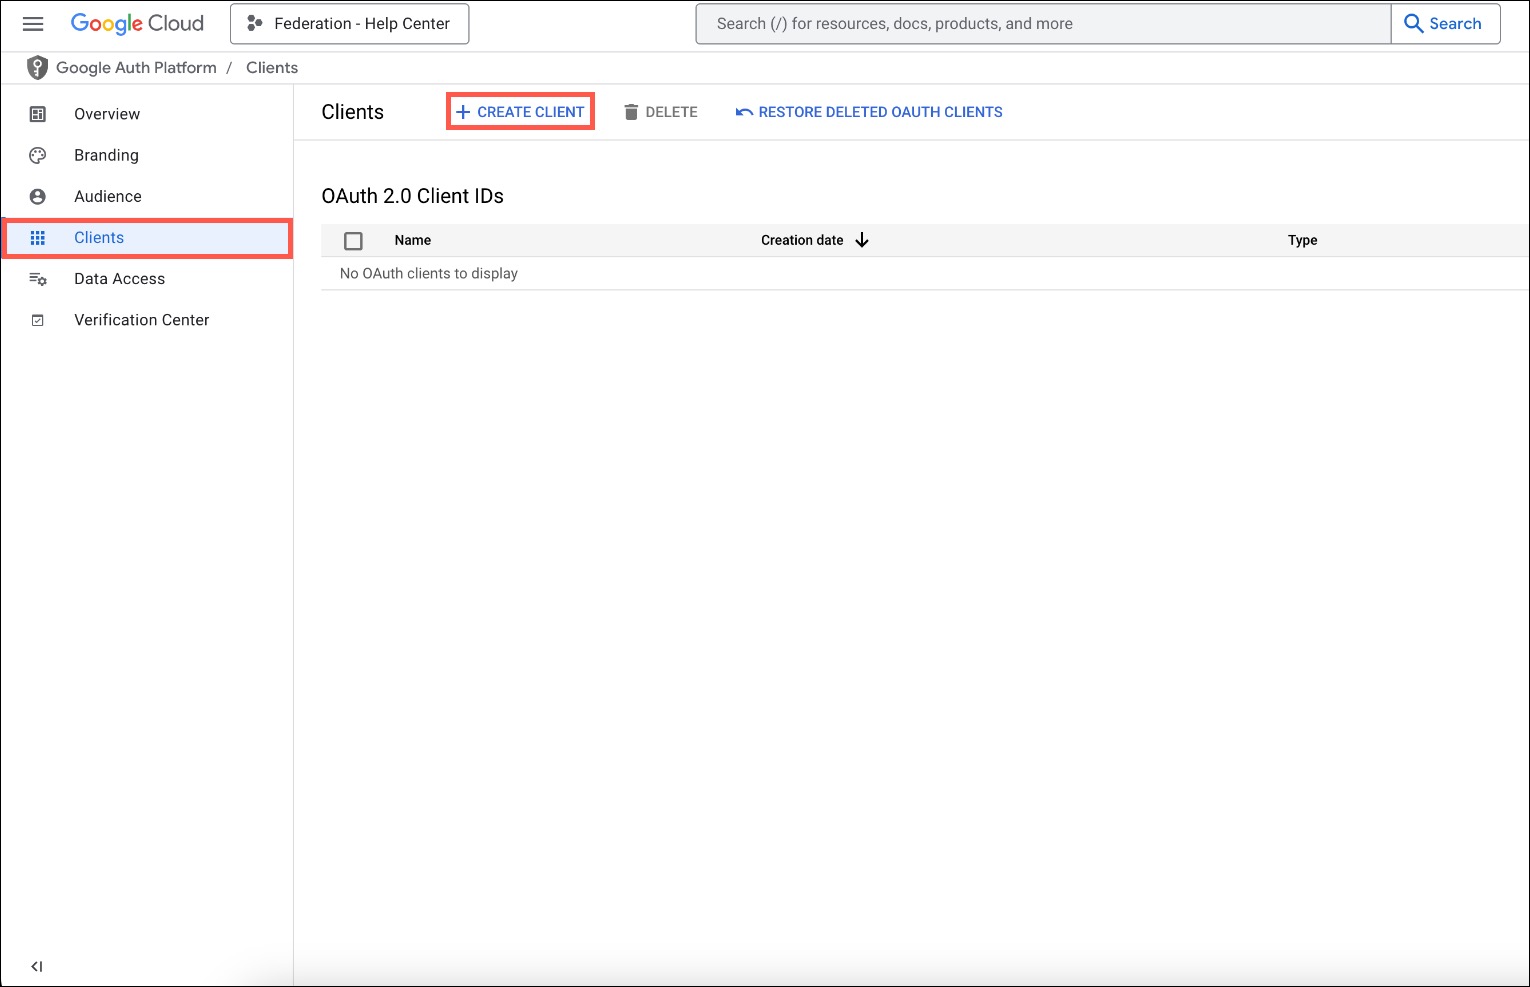
- In the left menu, go to Clients. In the top menu, click + CREATE CLIENT.

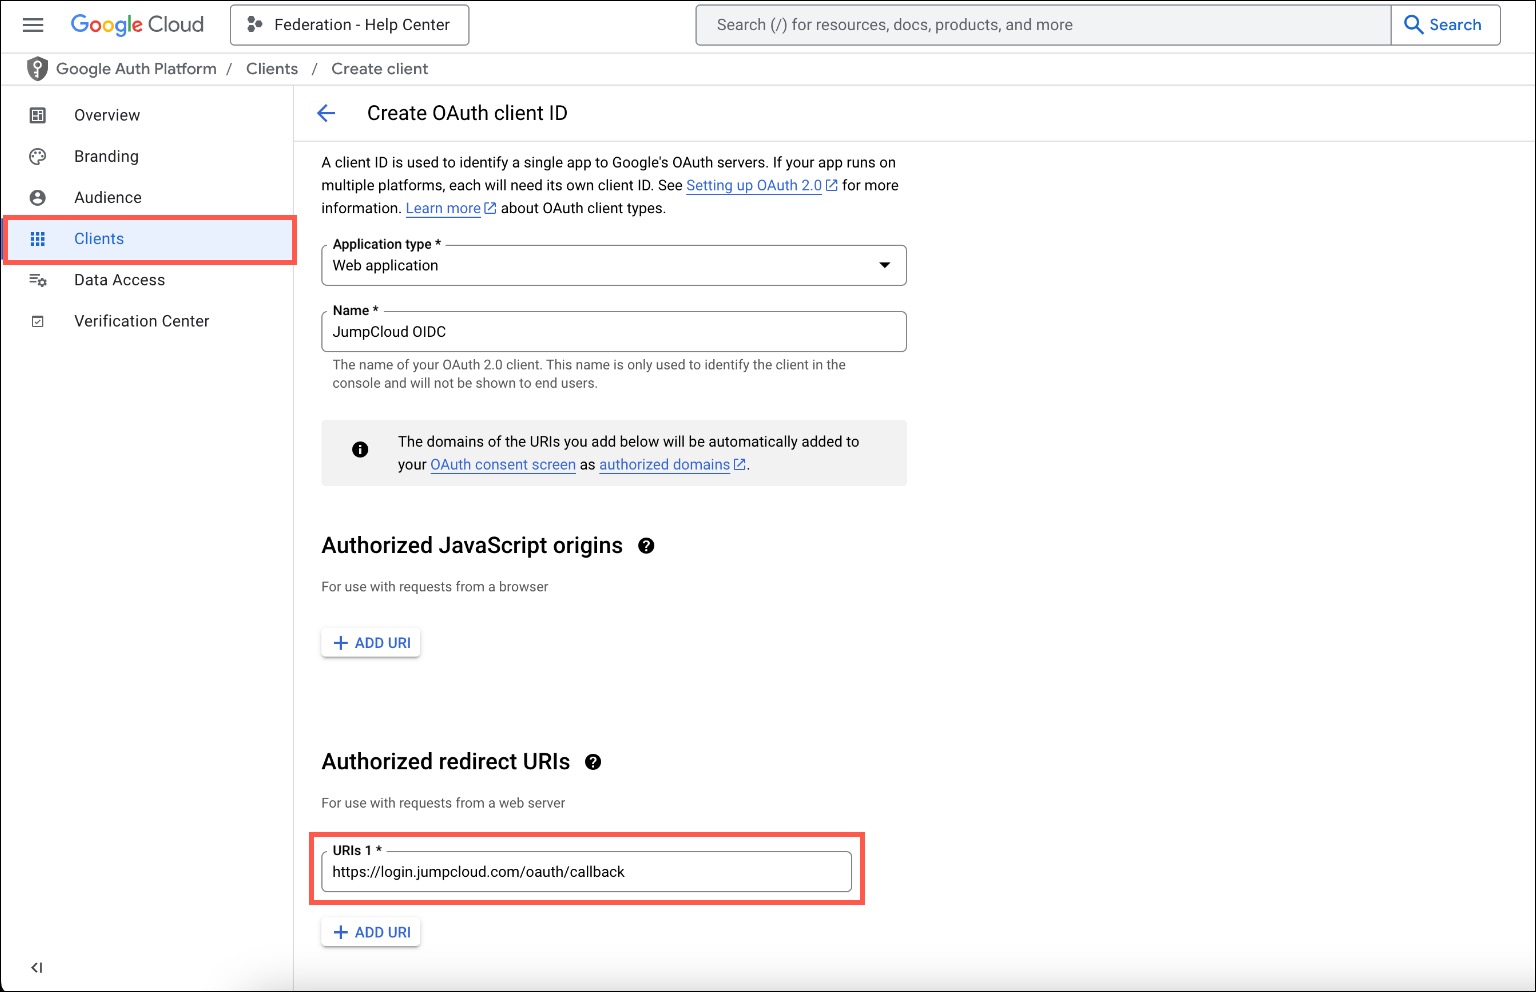
- On the next page, click the Application type* dropdown menu and select Web application.
- Then, enter a Name*, something associated with JumpCloud, like ‘JumpCloud OIDC’.
- Under Authorized redirect URIs, enter
https://login.jumpcloud.com/oauth/callback- For organizations using the EU data center, enter
https://login.eu.jumpcloud.com/oauth/callback
- For organizations using the EU data center, enter
- Click CREATE.

- You’ll get a successful OAuth client created modal with the Client ID, Client secret, Creation date, and Status.
- Copy the Client ID and Client secret to your clipboard. You’ll need these to configure Google Cloud in JumpCloud. Then click OK to exit out of the modal.
Now, you have a connection to JumpCloud in Google Cloud. Next, you’ll want to configure the connection in JumpCloud.
Configuring Google Cloud as an IdP in JumpCloud
To configure Google Cloud:
- Log in to your JumpCloud Admin Portal.
![]()
If your data is stored outside of the US, check which login URL you should be using depending on your region. If your organization uses LDAP, RADIUS, or requires firewall allow list configuration, the Fully Qualified Domain Names (FQDNs) will also be region specific. See JumpCloud Data Centers for the URLs, FQDNs, and IP addresses.
- Click Identity Management > Identity Providers.
- Click the Add Identity Provider dropdown menu, and select Google.
- Enter an Identity Provider Name* as a display name (i.e. Google OIDC).
- Under Google IdP URL*, enter https://accounts.google.com.
- For Client ID*, paste in the first URL that you copied into your clipboard.
- For Client Secret, paste in the secret that you copied into your clipboard.
- Click Save.
Managing the IdP
To manage the IdP:
- From the JumpCloud Admin Portal, click Identity Management > Identity Providers.
- You can update the name, Google IdP URL, Client ID, and Client Secret.
- Under Authentication, you’ll see that Federation is applied to your users, allowing them to authenticate with an IdP.
- Under Device Account Provisioning, you can configure either Self Service Account Provisioning or Automated Device Enrollment for whichever OS you’re provisioning. The Status displays either Enabled or Disabled accordingly, click Configure to edit.
- See Provision New Users on Device Login and Automated Device Enrollment to learn more.
Deleting the IdP
To delete the IdP:
- From the JumpCloud Admin Portal, click Identity Management > Identity Providers.
- At the bottom of the IdP Configuration page, under Delete Identity Provider, click Delete IdP.
- You’ll be prompted to confirm your deletion, then click Yes, Delete.
Device Login with Google (Private Preview)
This feature is in Private Preview. If you don’t see it, contact your Account Manager to enable it. Features in Preview are continuing to evolve with the help of feedback directly from our users. If you have suggestions, let us know at the bottom of this article.
Understanding Device Login
See Get Started: Google Device Login for an overview of this feature.
You can configure JumpCloud to delegate device authentication directly to Google Workspace. This ensures your users only need to remember a single password managed in Google to access their Mac computers and Windows devices.
When Device Login is configured, JumpCloud uses a Google LDAP integration to verify the user's credentials.
- Successful login: If the password matches the Google directory, the user is logged in to the device.
- Failed login: If the delegated password check fails, the user is prompted to set a new local device password that matches their current Google password.
- Offline login: If the device is offline, the delegated password check is skipped, and the user can log in using their most recently cached local device password.
![]()
JumpCloud routing policies prioritize Federation (OIDC) for web-based access, and automatically fall back to delegation (LDAP) for device logins where OIDC is not supported.
Preparing the Google Cloud Connection
To use device login, you'll first need to configure the Google Cloud Connection. Jump to Preparing Your IdP to Configure with JumpCloud for steps on configuring Google Cloud, then proceed to the following section to complete the rest of the configuration.
Preparing the Google Workspace LDAP Client (Device Login)
To enable device login using Google credentials, you must configure a new LDAP client in Google Workspace.
- Log in to the Google Workspace Admin console.
- Go to Apps > LDAP.
- In the top right, click ADD CLIENT.
- Under Client details, enter a name in the LDAP client name field, then click CONTINUE.
- On the Access permissions page, configure the following:
- Under Verify user credentials, select Entire domain.
- Under Read user information, select Entire domain.
- Ensure the System Attributes checkbox is selected.
- Click ADD LDAP CLIENT.
- Click Download certificate to save the generated certificate .zip file to your computer.
- Click CONTINUE TO CLIENT DETAILS to view configuration details.
![]()
If you need to download your certificate or access credentials again in the future, go to your LDAP client in Google Workspace, click the Authentication card, and click the download icon under Certificates.
Configuring Google Cloud as an IdP in JumpCloud
To configure JumpCloud:
- Log in to your JumpCloud Admin Portal.
- Click User Management > Identity Providers.
- Click the Add Identity Provider.
- Select Google then click Next.
- Under Configure Web Login, enter an Identity Provider Name* as a display name (for example Google OIDC).
- Under Google IdP URL*, enter https://accounts.google.com.
- For Client ID*, paste in the first URL that you copied into your clipboard.
- For Client Secret, paste in the secret that you copied into your clipboard.
- Click Next.
- Under Device Login, select Allow users to authenticate with their IdP password to configure device login.
- Under Google LDAP Client Certificate, click Choose A File and upload the .crt file from your computer.
- Under Google LDAP Client Certificate Key, click Choose A File and upload the .key file from your computer.
- Click Next.
- Under Assign User Groups, define a group of users who will log in with their IdP credentials by selecting an existing user group or creating a new one.
- Click Next.
- Review your configuration, then click Save.
When you enable Device Login, the following changes will occur to existing users that are bound to the user group selected in step 14:
- In the Device Details > Users tab, the user’s Password Sync value changes from No to Yes with IdP.
- The User Highlights > Security Status shows Delegated Authentication as enabled.
Logging in with Google on Devices
When you enable Device Login, users will log in to their Mac computers or Windows devices directly using their Google Workspace passwords. This removes the need for users to set and remember separate local device passwords.
Considerations:
- If a user’s Google password changes, they’ll have to perform a password sync flow on their device. If the current and previous passwords aren’t synced during this flow, stored credentials on the device will be lost (macOS Keychain or Windows credential data).
macOS
To log in with Google on a Mac:
- On the JumpCloud login window, select your account.
- Enter your Google Workspace password, then press Enter.
To sync your password in the Menu Bar App:
- Log in to your Mac using your updated Google password.
- The Mac Menu Bar app will prompt you to sync your password: Your Google password changed and must be re-entered to continue using your Mac.
- Under Confirm your Google password, enter your current Google password, then click Next.
- Under Almost done! Sync your keychain, enter your previous Google password, then click Next. This step ensures you don’t lose the contents of your macOS keychain.
- Your passwords are synchronized.
Windows
To log in with Google on a Windows device:
- On the Windows login screen, select your account.
- Enter your Google Workspace password, then press Enter.
- If prompted, enter your Previous Password (your local device password) followed by your Current Password (your Google password), then press Enter.
To sync your password on a Windows device:
- Sign out of or lock your device.
- On the login screen, click your user account, enter your updated Google password, then press Enter.
- Under Your password recently changed, enter your Previous Password (the password you used before your Google password changed) followed by your Current Password, then press Enter.
- If you don’t know your old password, you can select I don’t know my old password to continue, but you will lose all previously stored credentials on your device.
- Your passwords are synchronized.
Additional Resources:
Walk through a guided simulation for Configuring Google Workspace as an Identity Provider