Connect


Contents
Amazon Simple Storage Service (Amazon S3) is a scalable, high-speed, web-based cloud storage service designed for online backup and archiving of data and applications on Amazon Web Services (AWS). It is designed to make web-scale computing easier for developers and allows you to store and retrieve any amount of data, at any time, from anywhere on the web.
Amazon Linux, on the other hand, is a Linux server operating system from AWS, which is engineered for high performance and stability. It provides a secure, stable, and high-performance execution environment to develop and run various cloud applications and enterprise workloads.
Integrating Amazon S3 with Amazon Linux instances is a common practice, allowing users to leverage the power of AWS’s robust cloud storage solutions directly from their virtual servers. In this tutorial, we will explore how to work with Amazon S3 on Amazon Linux. We’ll go through installing the necessary tools, configuring them, and using them to perform various operations on S3 buckets.
For this tutorial, we need an AWS account, a running Amazon Linux instance, and appropriate permissions to manage S3 buckets and objects within the AWS account.
Step 1: Connect to Your Amazon Linux Instance
Once we are logged into our AWS account, we will search for and select the EC2 service.

Next, we can select Instances from the menu list:
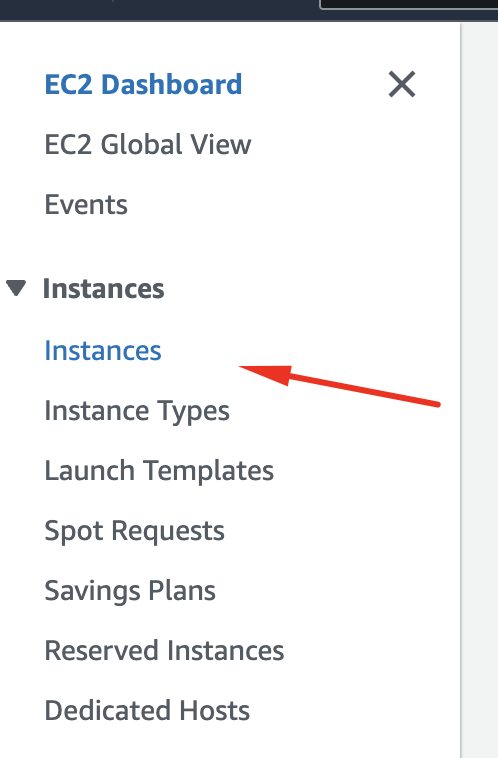
Now, we can select our running EC2 instance and click on the Connect option.

Here we can use the SSH client card from the menu:
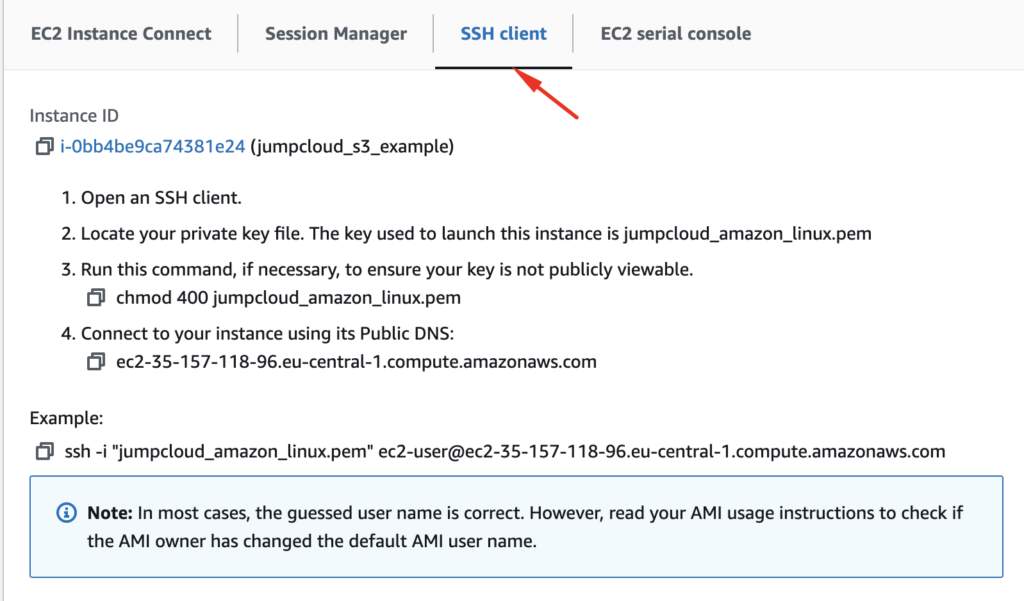
You have different options to log in to your AWS EC2 instance; in our case we will use the terminal:
ssh -i “jumpcloud_amazon_linux.pem” [email protected]
Step 2: Set Up and Configure AWS CLI
The AWS command line interface (CLI) is an open-source tool that enables you to interact with AWS services using commands in your command-line shell. To work with Amazon S3, we must verify that the AWS CLI is available on our Amazon Linux instance.
By default, AWS CLI is installed on Amazon Linux and we can verify the current version:
aws –version

It is already implied that you have an access key, a secret key, and the region where you will deploy the new S3 bucket.
Next, we need to configure our CLI:
aws configure
Here we can enter our Access Key ID, Secret Key, Default region name, and Default output format.

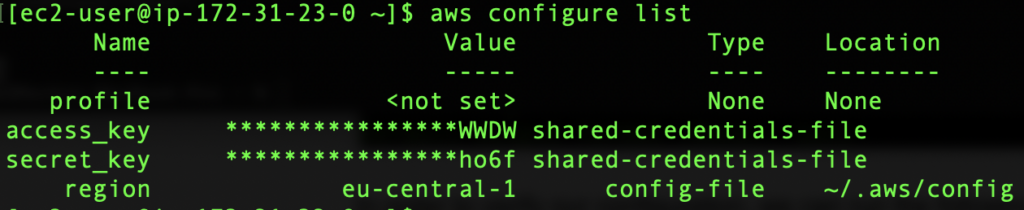
To verify our configuration, we can run the following command:
aws configure list
Step 3: Perform Basic AWS S3 Operations
We can perform various AWS S3 operations through CLI such as making new buckets, adding new files, syncing, removing, or copying to our local directory.
To create a new bucket we can use the following command:
aws s3 mb s3://your-bucket-name

If we want to list our buckets we can use the command:
aws s3 ls

To upload a file into your bucket, run the following command:
aws s3 cp your-local-file.txt s3://your-bucket-name/

A very useful feature is when you have certain files on your S3 bucket and you need to download them to your local system, in our case we can use our Amazon Linux instance.
The syntax you can use for this example is the following:
aws s3 cp s3://your-bucket-name/your-remote-file.txt /your-local-directory/
Here is the screenshot for our example:

We can also easily remove any file from our S3 by using AWS CLI.
aws s3 rm s3://your-bucket-name/your-file.txt

Step 4: Perform Advanced AWS S3 Operations
Here we will explore additional use cases for AWS S3 on your Amazon Linux instance.
We will show an example where you can sync the contents of your local directory to your S3 bucket.
First, we can create a new directory for our ec2-user:
mkdir ~/s3_content
Next, we can create a new file in that directory and place some simple content in that file:
touch ~/s3_content/file_1.txt
echo “Hello S3” > ~/s3_content/file_1.txt
Now, we can sync the content of our local directory to our S3 bucket:
aws s3 sync ~/s3_content/ s3://jumpcloud-test-bucket-1/

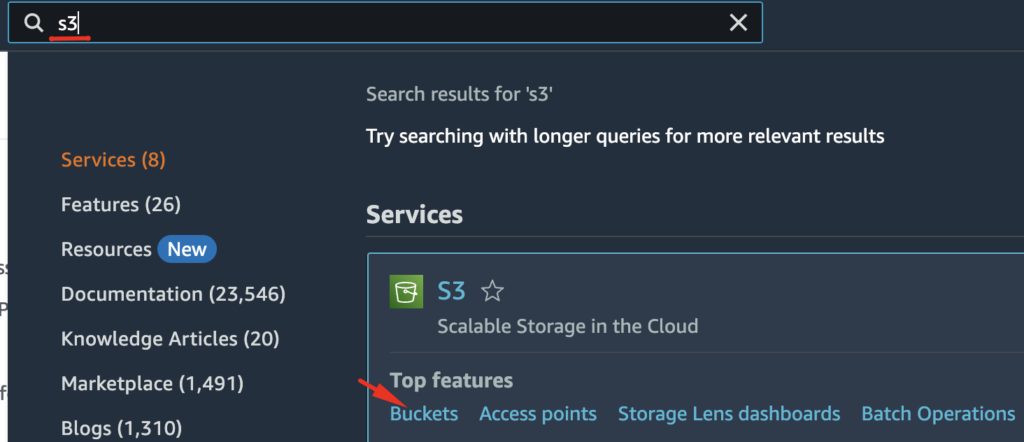
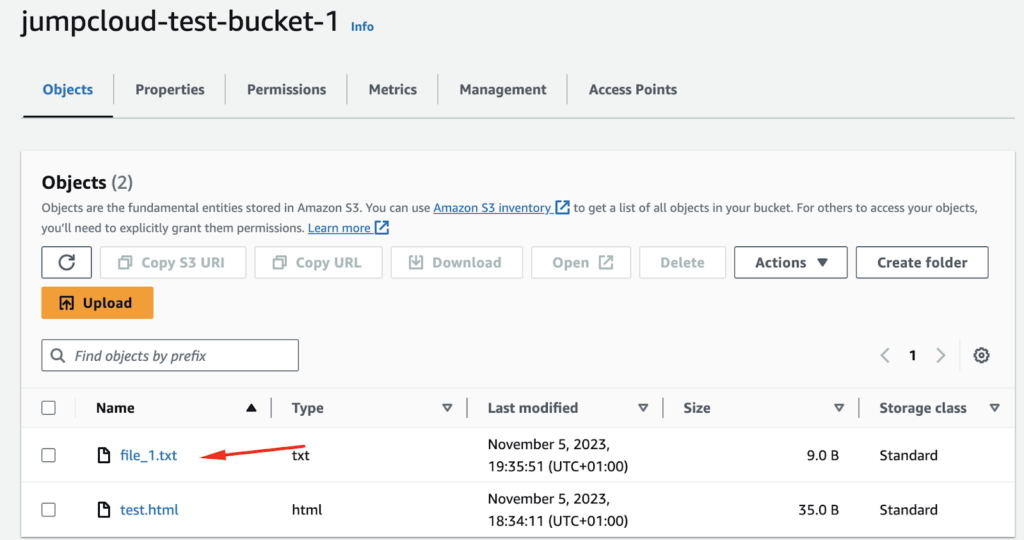
We can also verify that the file is uploaded on our S3 bucket by checking in our AWS account, and here we can search for the S3 and Buckets section:
Here we can see our S3 bucket and the uploaded file:
Now, we can create a new local file inside of our s3_content directory but remove the first file named file_1.txt.
touch ~/s3_content/file_2.txt
echo “Hello again S3” > ~/s3_content/file_2.txt
rm ~/s3_content/file_1.txt

We will add the –delete flag option, which will cause the sync process to delete objects in the destination bucket if they do not exist in the source directory, so use it with caution.
aws s3 sync ~/s3_content/ s3://jumpcloud-test-bucket-1/ –delete

We can verify that the changes are reflected properly by running the CLI command:
aws s3 ls s3://jumpcloud-test-bucket-1/ –recursive

The same thing will appear in the UI of our AWS account for the designated bucket:

Further, we can create a bucket policy JSON file that grants read-only permissions to any public user. This policy is useful for hosting public content, such as assets for a website or public downloads.
First, we can create a new file called policy.json.
nano ~/policy.json
Here you can paste the following code:
{
“Version”: “2012-10-17”,
“Statement”: [
{
“Sid”: “PublicReadForGetBucketObjects”,
“Effect”: “Allow”,
“Principal”: “*”,
“Action”: “s3:GetObject”,
“Resource”: “arn:aws:s3:::jumpcloud-test-bucket-1/*”
}
]
}
Instead of jumpcloud-test-bucket-1 value, you can place the name of your bucket.
- Sid: An identifier for the policy statement (optional).
- Effect: Whether the statement allows or denies access (Allow or Deny).
- Principal: The user, account, service, or other entity that is allowed or denied access. The “*” indicates that the policy applies to all users. In your own setup, depending how many users you have in your IAM, you can restrict to certain users for a granular approach.
- Action: Describes the type of access that is allowed or denied; in this case, s3:GetObject allows users to read objects from the bucket.
- Resource: Specifies the bucket and objects to which the policy applies. The “arn:aws:s3:::jumpcloud-test-bucket-1/*” ARN refers to all objects within the specified bucket as we placed the wild card there.
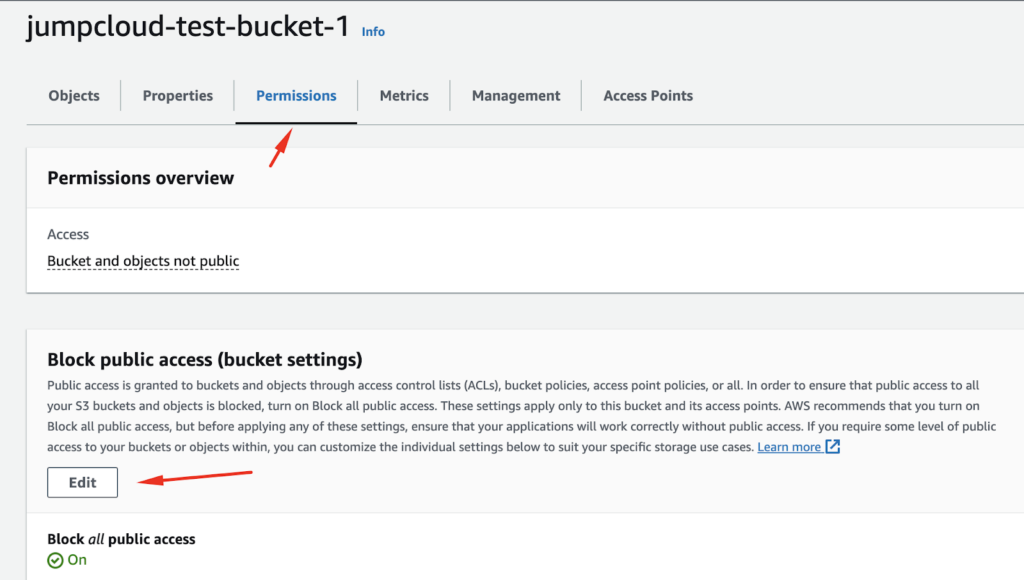
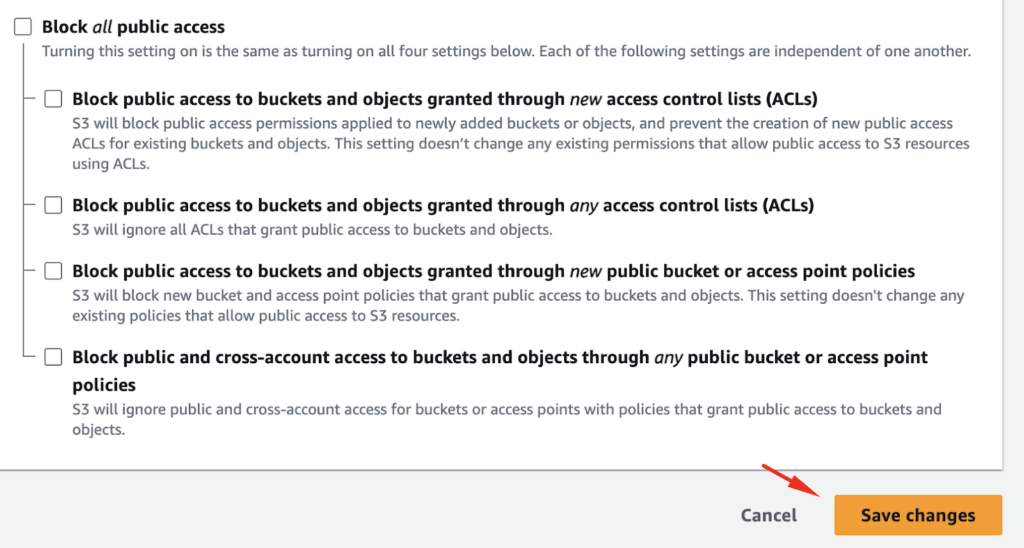
We need to enable public access for our bucket in the UI:
We also need to save the changes, so that the policy will allow public access:
You can apply this bucket policy via the AWS Management Console, CLI, or S3 API. In our case, since we are using the AWS CLI, we can apply the policy to a bucket with the following command:
aws s3api put-bucket-policy –bucket jumpcloud-test-bucket-1 –policy file://policy.json
Make sure you are in the correct directory where your policy.json file is located.
After this, the content of our bucket will be public and we can run the curl command to make sure we can fetch specific files:
curl https://jumpcloud-test-bucket-1.s3.eu-central-1.amazonaws.com/file_2.txt

There are some considerations for this example:
- Be cautious when making a bucket public, as this allows anyone on the internet to access the content.
- If you’re using this policy to host a static website, you might also need to set permissions to list the bucket contents if you want to allow directory browsing.
- Always validate your JSON policy to ensure there are no syntax errors before applying it.
- Use the AWS Policy Generator if you need assistance crafting specific policies for your use case.
Step 5: Automating Amazon S3 on Amazon Linux
We can create a new bucket that will serve for backup purposes.
aws s3 mb s3://jumpcloud-backup-test
We will create a new file called backup.sh.
nano ~/backup.sh
Here, we can paste the following code:
#!/bin/bash
# Variables
BUCKET=”s3://jumpcloud-backup-test”
DIRECTORY=”/home/ec2-user/s3_content”
# Sync directory to S3
/usr/bin/aws s3 sync $DIRECTORY $BUCKET –delete
You can change to any directory you would like to back up in your bucket.
We need to add execute permissions to our backup.sh file:
chmod +x ~/backup.sh
Now, Crontab is not available on Amazon Linux by default, so we need to install and enable it:
sudo dnf install cronie -y
sudo systemctl enable crond.service
Now we can add our cron command that will run our backup script every day at 2 AM:
(crontab -l 2>/dev/null; echo “0 2 * * * /home/ec2-user/backup.sh”) | crontab –
So the entire command sequence updates the crontab for the user, adding a new job that will run /home/ec2-user/backup.sh at 2 AM every day without disturbing any existing jobs. If there are any issues with listing the current cron jobs, they are ignored, and only the new job is added.
We can confirm our cron job by running the crontab command:
crontab -l

Final Thoughts
In this tutorial, we’ve covered how to set up and use Amazon S3 on Amazon Linux. We’ve gone through the steps of installing and configuring the AWS CLI, performing basic S3 bucket operations, and even automating tasks using cron jobs. Amazon S3’s versatility combined with Amazon Linux’s stability creates a powerful combination for managing data in the cloud.
To learn more useful skills for Amazon Linux management, check out one of the following tutorials: