
Connect


Contents
Amazon Elastic Compute Cloud (EC2) is a powerful and flexible cloud computing service that allows you to launch and manage virtual servers, known as instances, in the Amazon Web Services (AWS) cloud. Amazon Linux is a secure and stable Linux distribution specifically designed for use on EC2 instances.
In this tutorial, you’ll learn how to set up Amazon Linux on EC2 instances, step by step. By the end of this guide, you’ll have a running Amazon Linux instance ready for your applications or services.
Here will we focus on a couple of important tasks for this process:
- Access: Sign in to your AWS account or create a new one.
- Launch an EC2 instance: Choose the instance type, configure instance details, add storage, and specify security groups and key pairs.
- Connect to your EC2 instance: Use SSH to access your EC2 instance securely.
- Update and configure Amazon Linux: Update the operating system packages and configure basic settings.
Step 1: Sign in to your AWS account
Before you can set up an EC2 instance with Amazon Linux, you need an AWS account.
First, go to the URL https://aws.amazon.com and click on the button that says “Sign in to the console.”

Here you can select whether you want to log in as a Root user or an IAM user:
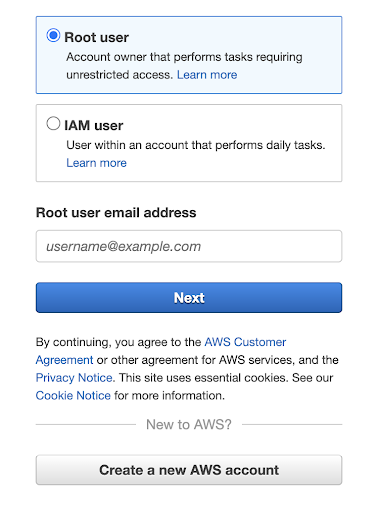
Your choice of user login should consider your account’s configuration and the existing user permissions. However, it is recommended to log in as a user with the lowest level of access privileges for best security practices.
If you don’t have an AWS account, you can create one as you are often entitled to free tier benefits that you can use.
![]()
Amazon’s best practices for EC2 state, “Manage access to AWS resources and APIs using identity federation with an identity provider and IAM roles whenever possible.” JumpCloud is an Amazon partner and identity provider.
Step 2: Launch an EC2 instance
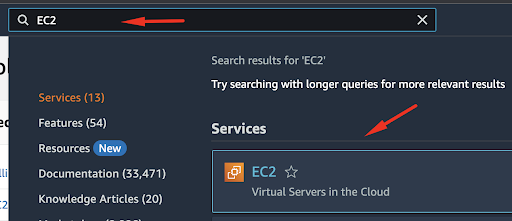
Once you have logged into your AWS account, in the search bar you can type EC2 in order to access the main page for provisioning and management.
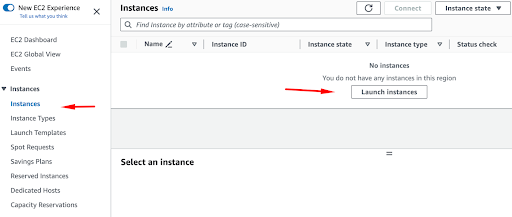
Next, under Instances, you can select the option “Launch Instances.”
We will land on the new page where we can select additional options, such as the Name of our instance, Application, and OS Images for our instance and we will select the default option — Amazon Linux.
![]()
Nitro Trusted Platform Module (NitroTPM) is a free AWS service that provides integrity for the instance’s boot software.
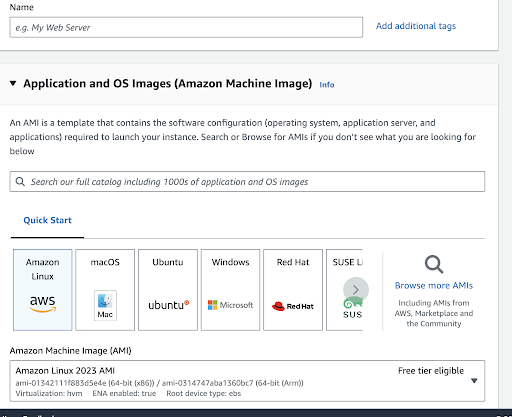
An Amazon Machine Image or AMI is a pre-configured virtual machine image that contains all the information needed to launch a fully functioning instance in the AWS cloud. It serves as a blueprint for creating virtual servers, also known as EC2 instances, and allows you to replicate server configurations easily.
The “Free tier eligible” means that AWS offers a limited amount of its services at no cost for a specified period or up to certain usage limits. It’s a valuable opportunity for users to get started with AWS, but it’s crucial to be aware of the limitations and to monitor your usage to avoid unexpected charges once you exceed the free tier limits or duration.
When we scroll below we can choose the type of our instance. Amazon Linux has a minimum requirement of 512MB of RAM and 1 CPU core, so if we are testing things, we can select the t2.micro instance which fits into the free tier in AWS.
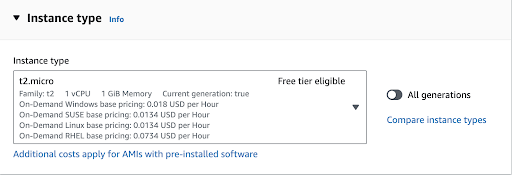
When you have a project and instance that should be production-ready, you can select instances with more RAM and CPU power, by choosing from the dropdown list.
Next, we will make sure to create a new security group for our instance.
Creating a new security group for your new EC2 instance is a fundamental security best practice in AWS. It allows you to define and enforce customized network access controls, adhere to the least privilege principle, and maintain better isolation and security for your EC2 instances.
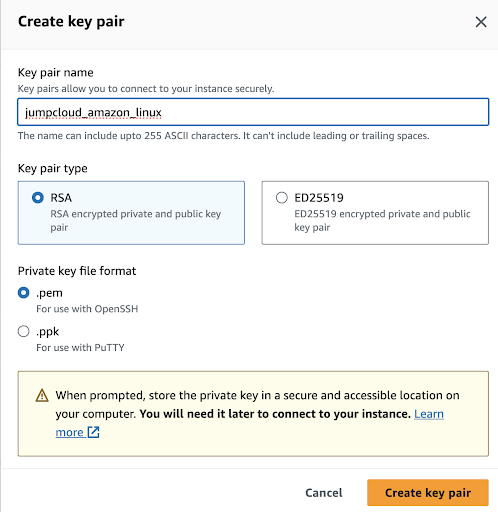
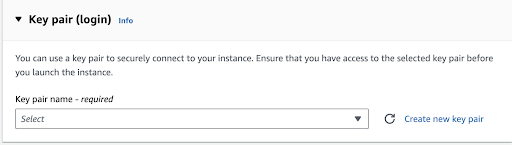
You should add the Key pair name and also the Key pair type which can be RSA or ED25519.
![]()
Consider using an AWS Bastion Host (jump box) on AWS to add an additional layer of security for SSH connections.
In general, both RSA and ED25519 are strong choices for SSH key authentication. The decision between them should consider your security requirements, compatibility needs, and the level of trust you place in modern cryptographic algorithms. For most use cases, either option will provide secure authentication when used correctly. RSA is one of the oldest and most widely supported SSH key algorithms, making it compatible with a wide range of SSH servers and clients while ED25519 keys are a good choice when security is a top priority and compatibility with older systems is not a concern.
We can select Private key file format which can be either in .pem format or .ppk in case you use a Windows SSH client such as PuTTy.
In our case, we will select the .pem format since we will be using the terminal.
Finally, click on the “Create key pair” option in order to generate the SSH key and this will prompt the download in your browser. Also, there is a warning from AWS that we should store our private keys in a secure and accessible location on our computers.
Further in our setup process, we would need to select our Network Settings.
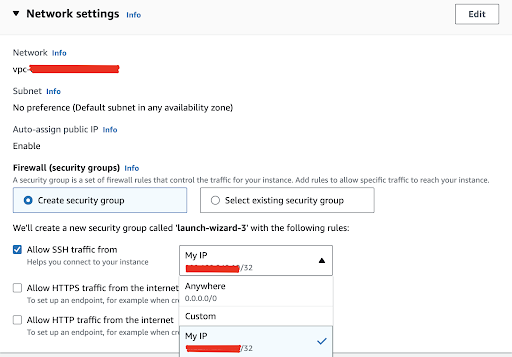
For the first option, we need to access our EC2 instance through SSH but instead of allowing SSH traffic from “0.0.0.0/0” (which means from anywhere), restrict it to only allow connections from specific trusted IP addresses or ranges. This limits the exposure of your SSH port to the internet and reduces the risk of unauthorized access. You can also use CIDR notation to specify the IP ranges (e.g., 10.100.0.0/16,).
Since we would like to install the nginx web server as a proof of concept later, we will check the “Allow HTTP traffic from the internet” option.

Next, we will select our storage options from the menu:
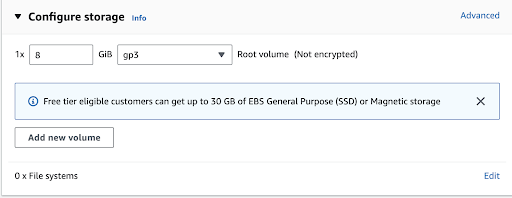
In this case, we have selected a new volume with 8 GB of storage with the general purpose, gp3 type of volume. For production purposes, make sure to increase the size of the volume based on your needs. In general, gp3 EBS volumes offer more flexibility, burst performance, and often a lower cost per gigabyte compared to gp2 volumes. When selecting between them, consider your application’s specific I/O and performance needs, as well as your budget constraints.
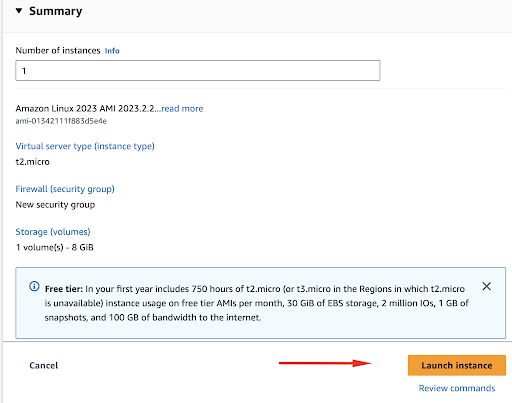
Our final step is confirming the selected options in the summary and we can proceed to launch the instance. Encrypt EBS snapshots and volumes.
You will get the notification that the instance is successfully launched and you’ll return to your Instances list.
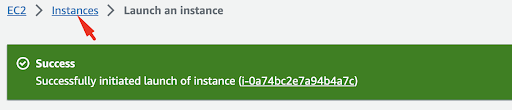
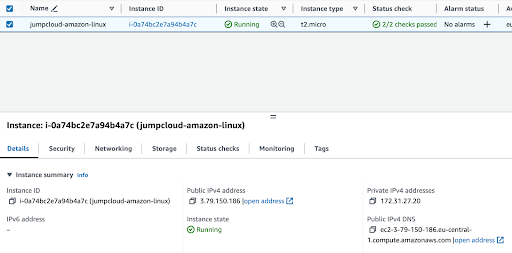
After a short wait, typically with a fast provisioning time, you’ll be able to locate your instance in the list.
Step 3: Connect to your Amazon Linux instance
Now the next step is to connect to the instance via SSH. We can do so by using our Instances menu and clicking Connect:

Here we will see a new menu where we will select the SSH client menu item:
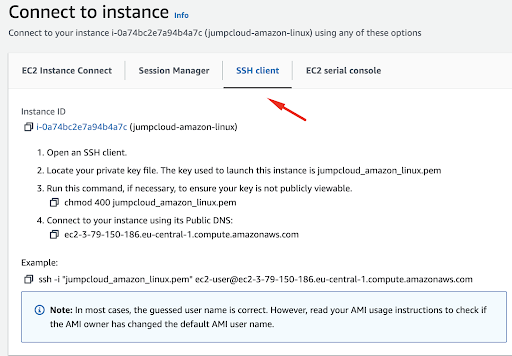
We will now follow the instructions provided by AWS in order to connect to our instance.
After opening your terminal and finding where you have downloaded the .pem key, it is important to change permissions to it, for security reasons, so that the key is not publicly viewable, and in our case, we will run the following command:
chmod 400 jumpcloud_amazon_limux.pem
Next, we will use the SSH key to connect to our instance:
ssh -i “jumpcloud_amazon_linux.pem” ec2-user@ec2-3-79-150-186.eu-central-1.compute.amazonaws.com
Here, the -i flag in SSH is used to specify the path to the private key file to be used for authentication when connecting to a remote server. It allows you to choose a specific key file when you have multiple key pairs or non-standard key file names and locations.
When we log into our Amazon Linux instance for the first time, we need to confirm the authenticity of the host. Here you can type yes and press Enter.

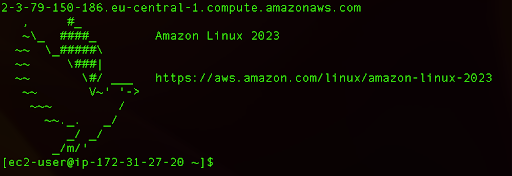
After this action, we will be logged into our instance:
Step 4: Check updates for your Amazon Linux
![]()
Amazon Inspector can scan Amazon EC2 instances to discover software vulnerabilities and accidental network exposure. The AWS Security Hub can benchmark your instances against security standards.
We can always check if there are new updates for our system packages for several important reasons:
- Security patches: Regular updates include security patches that fix known vulnerabilities, making your EC2 instance much more secure.
- Bug fixes: Updates often include bug fixes and improvements that enhance the stability and performance of your instance.
- Compatibility: Updating your instance helps ensure that all installed software remains compatible and functions correctly.
- Compliance: If your EC2 instance is subject to compliance requirements (e.g., for handling sensitive data or meeting industry standards), keeping it up to date is often a compliance mandate.
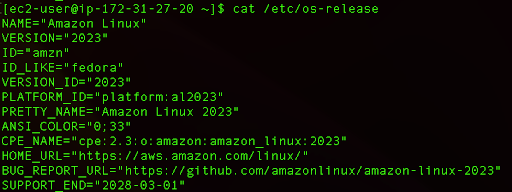
When it comes to package management, previous versions of Amazon Linux mainly used Yum as the package manager but in Amazon Linux 2023, the main package management tool is DNF.
You can always verify the version of your Amazon Linux by typing:
cat /etc/os-release
We can list updates to our system by running the following command:
sudo dnf update
This command requires higher system privileges so make sure you use the sudo.
Often the repositories are up to date once the instance has been provisioned, but it is always a good idea to check, mainly for security and compatibility reasons.

Step 5: Install nginx on Amazon Linux
Now we can install nginx on our Amazon Linux instance by running the following command:
sudo dnf install nginx
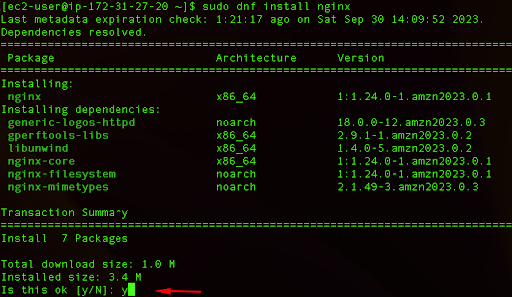
We can type y and press Enter in order to continue with the nginx installation.
Once the installation is complete we need to start and enable the service so it starts each time we boot our system.
sudo systemctl start nginx
sudo systemctl enable nginx
Since SELinux is present and enabled on Amazon Linux by default we can add a new rule that will allow http connections.
First, we can verify if SELinux is enabled and running on our system:
sestatus
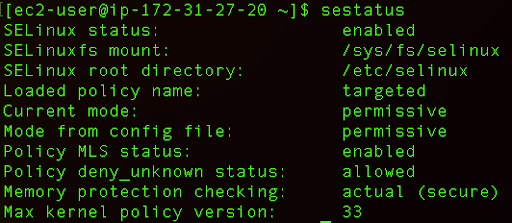
Next, we need to adjust the SELinux policy:
sudo setsebool -P httpd_can_network_connect 1
Now, we can restart our nginx service so that the configuration is applied:
sudo systemctl restart nginx
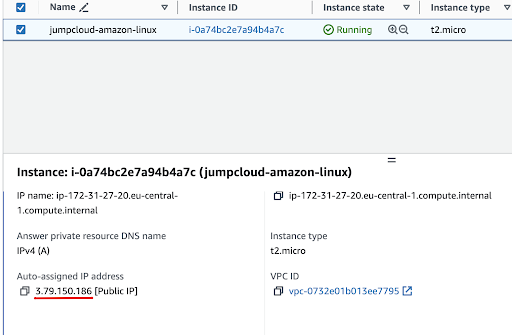
In order to check whether we are getting the nginx start page in our browser, we first need to find our public IP address.
There are two quick options for this. You can run the curl command that will provide you with the public IP for your instance:
curl ifconfig.me
The output will provide you with your public IP address:

The second option is to check directly in your AWS account, Instances page:
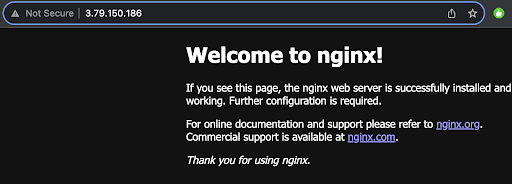
Now, if we want to check whether our nginx is correctly configured and also if our access rules across the Amazon Linux system and AWS are working, we can type in the browser:
http://3.79.150.186/
As the output we get the welcome page from nginx.
With your Amazon Linux instance up and running, you can now deploy and run applications, host websites, or perform various computing tasks on the AWS cloud infrastructure. Consider using an elastic network interface, or Elastic IP address, to handle failover if your workloads are missions critical. Enjoy the flexibility and scalability that EC2 instances provide for your projects and workloads.
AWS Workshop for Using JumpCloud as an External Identity Provider