
Connect


Contents
In the age of cloud computing, understanding the environment in which your applications run has become as crucial as the coding process itself. One of the pioneers of this cloud revolution is Amazon Web Services (AWS) — a suite of cloud services offering everything from basic computing power to sophisticated machine learning capabilities. Among AWS’s offerings, Elastic Compute Cloud (EC2) provides scalable computing capacity in the cloud, making web-scale cloud computing easier for developers.
When launching an EC2 instance, one of the options available is Amazon Linux. Here are two key benefits of using Amazon Linux:
- Optimization for the AWS ecosystem: Amazon Linux is tailored for AWS. It integrates very well with AWS services and offers a lightweight, secure, and highly performant environment for applications.
- Security and reliability: Amazon Web Services maintains and supports Amazon Linux, ensuring it receives necessary patches and updates, especially focusing on security and performance.
Now, after you’ve chosen our distribution, the next step is deployment. Deployment is a crucial phase in the software development lifecycle. By deploying on a trusted platform like Amazon Linux on AWS, developers can ensure scalability, reliability, and performance.
For this tutorial, we dive deep into deploying a Node.js application on Amazon Linux using Nginx as a reverse proxy.
Step 1: Sign in to your AWS account
Before we proceed with our Amazon Linux setup, we need an AWS account.
The first step, go to the URL https://aws.amazon.com and click to sign in to the console.

Here you have two options whether you want to log in as a Root user or an IAM user:

Consider selecting a user login that aligns with your account settings and optimal security; it’s advisable to use an account with minimal access rights.
If you’re not yet an AWS account holder, feel free to sign up; many new users qualify for complimentary access to select services under the AWS free tier.
Step 2: Create a new AWS EC2 instance
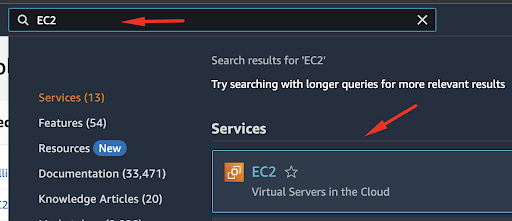
After signing in to your AWS account, use the search bar to type “EC2.” This will take you to the main page where you can set up and manage your resources.
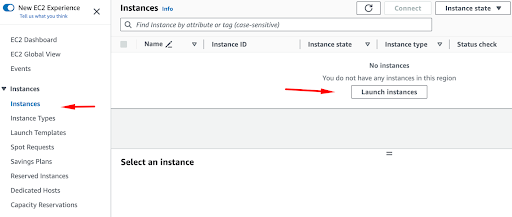
Next, under Instances, you can select the option “Launch instances.”
On the next page, you have the opportunity to choose extra settings, including the instance’s Name, Application, and OS Images. For our instance, we will go with the standard choice, which is Amazon Linux.
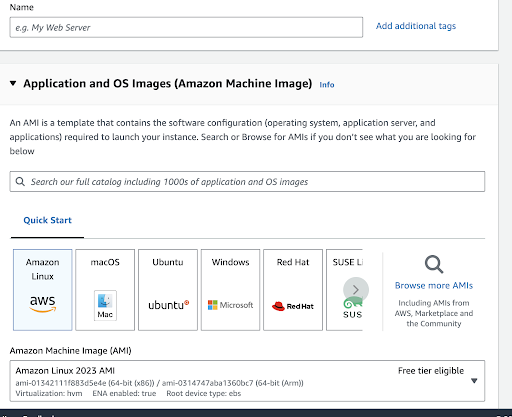
An Amazon Machine Image, or AMI, is a preset virtual machine image with everything needed to launch a working AWS cloud instance. Think of it as a template for creating virtual servers, also known as EC2 (Elastic Compute Cloud) instances, making it simpler to duplicate server setups.
“Free Tier eligible” implies that AWS permits users to access a certain amount of its services for free, either for a limited time or until you hit specific usage caps. This is a great way for new users to explore AWS, but it’s important to keep an eye on your use and understand the limits to prevent any surprise costs when the free offerings are surpassed.
As we continue to scroll down, we can choose our instance type. Amazon Linux requires a minimum of 512MB RAM and 1 CPU core. For test purposes, selecting the t2.micro instance would be a good fit since it falls under AWS’s Free Tier.
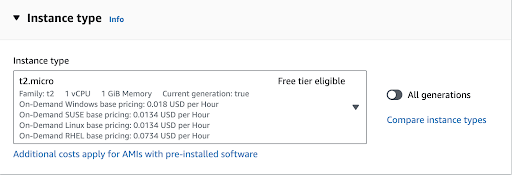
If your project and instance need to be ready for production use, you should opt for instances that offer more RAM and CPU capacity. You can do this by selecting from the available options in the dropdown menu.
Step 3: Configure your EC2 instance
We will continue with our setup process by configuring the security group for our instance.

Establishing a new security group for your EC2 instance is a critical step toward ensuring optimal security within AWS. This practice enables you to set up and apply tailored network access rules, stick to the least privilege principle, and enhance the isolation and overall security of your EC2 instances.
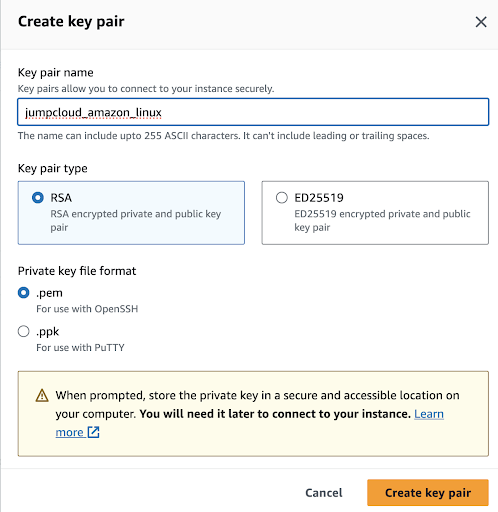
Make sure to enter both the Key pair name and select the Key pair type, which could be RSA or ED25519.
Both RSA and ED25519 are reliable choices for SSH key authentication. Your choice between them should be based on your security needs, compatibility requirements, and how much you trust newer cryptographic algorithms. Both options provide secure authentication for most situations when used properly. RSA is older, well-established, and works with a broad range of SSH servers and clients. ED25519, on the other hand, is an excellent option when security is paramount, and you don’t need compatibility with older systems.
Next, choose the Private key file format. You can pick between .pem format or .ppk if you’re using a Windows SSH client like PuTTy.
For our purposes, we will go with the .pem format since we are using a terminal.
Once everything is set, click “Create key pair” to generate your SSH key, and this will start a download through your browser. Note, AWS warns you to keep your private keys in a secure but reachable location on your computer.
As we move forward with our setup, the next step is to configure our Network settings.
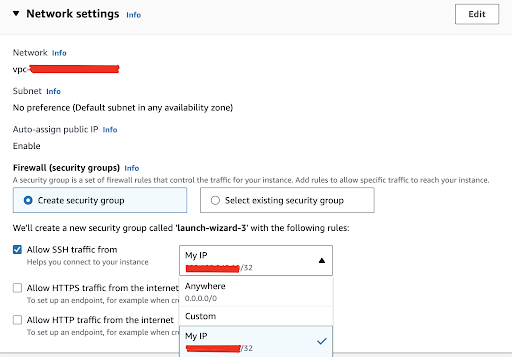
For the initial setting, we aim to connect to our EC2 instance via SSH. However, instead of setting it to accept SSH traffic from “0.0.0.0/0” (which opens the connection to any location), we should narrow it down to accept connections solely from trusted, specific IP addresses or ranges. This precaution minimizes the potential exposure of your SSH port on the internet, diminishing the chances of unauthorized access. You can specify the allowed IP ranges using CIDR notation, such as “192.168.1.0/24.”
Additionally, since our plan includes setting up an Nginx web server as a practical demonstration, be sure to select the option to “Allow HTTP traffic from the internet.”

Next, we can select our storage options from the menu:
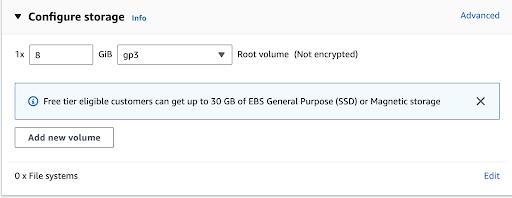
Here, we’ve opted for a new storage volume of 8GB, classified as a general-purpose gp3 type. It’s crucial to scale up the volume size to align with your needs for production use. Generally, gp3 EBS volumes stand out for their versatility, enhanced burst performance, and potential for cost-effectiveness per gigabyte when compared to gp2 volumes. Your choice between them should hinge on the particular I/O requirements and performance expectations of your application, as well as any budgetary limits.
Concluding our setup, we’ll review all the chosen settings in the summary section and then move forward to initiate the instance launch.
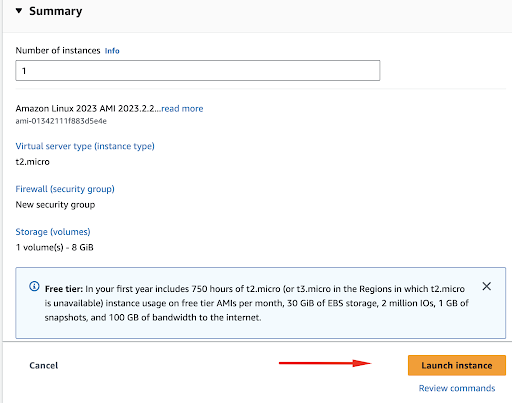
You will get the notification that the instance is successfully launched and you can return to your Instances list.
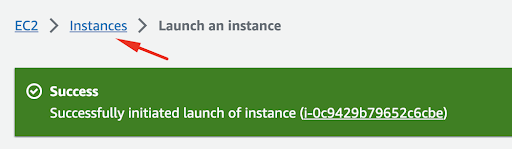
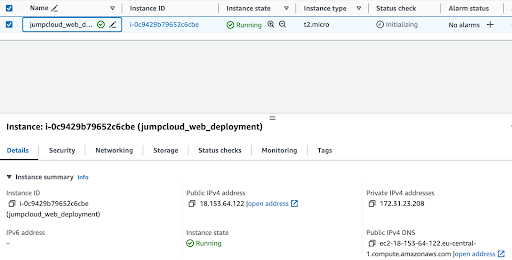
After a short wait, typically with a fast provisioning time, you’ll be able to locate your instance in the list.
The next step is to connect to the instance via SSH. We can do so by using our Instances menu and clicking Connect:

Here we can select the SSH client menu item:
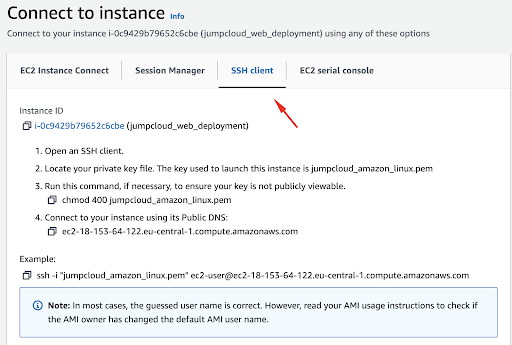
Now, we’ll proceed by following the guidance given by AWS to establish a connection with our instance.
Open your terminal and navigate to the directory where your .pem key file is saved. For security purposes, you need to modify the key’s permissions to ensure it’s not accessible to the public. In this situation, execute the following command:
chmod 400 jumpcloud_amazon_limux.pem
Next, we will use the SSH key to connect to our instance:
ssh -i “jumpcloud_amazon_linux.pem” [email protected]
The -i option in SSH lets you define the path to the private key file for authenticating your connection to a remote server. This is especially useful when managing multiple key pairs or when your key files are stored with non-standard names or in different locations.
Upon your initial login to the Amazon Linux instance, you’ll be prompted to verify the host’s authenticity. In this case, simply type “yes” and hit Enter to proceed.

After this action, we will be logged into our instance:

Step 4: Install Nginx
First, it is a good idea to fetch the latest updates for our system and we can do so by running the following command:
sudo dnf update

As we can see from the output, there are no new updates since we provisioned a new Amazon Linux instance, but it is always advisable to search for the latest updates.
Next, we need a Nginx web server for our static website and also for the purposes of reverse proxy for our Node.js application.
sudo dnf install nginx -y

Now, we need to start and enable our Nginx web server so it starts every time we boot our instance.
sudo systemctl start nginx
sudo systemctl enable nginx
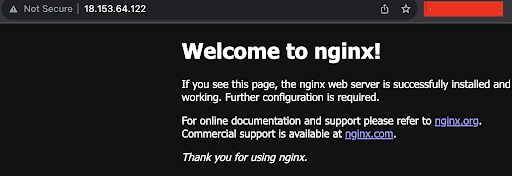
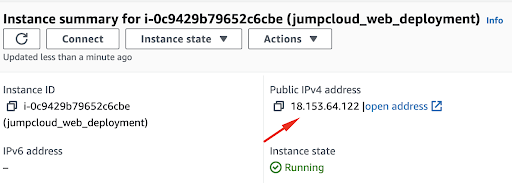
We can test our Nginx website by visiting the public IP address in the browser:
You can find your public IP by visiting the Instance section:
Step 5: Deploying a Node.js application
For this process, we need to install Node.js on our system.
sudo dnf install -y nodejs

We can verify our Node.js and npm by running the following commands:
node –version
npm –version

If you receive similar outputs, this means that Node.js has been installed properly.
Now, we can create a directory where we will store our app.js file:
sudo mkdir -p /home/nodeapp
Next, we can change the ownership, so that the owner is our ec2-user.
sudo chown ec2-user:ec2-user /home/nodeapp
We create a new file called app.js where will place the code:
vi /home/nodeapp/app.js
Press i to enter the Edit mode and paste the following code:
const express = require(‘express’);
const app = express();
app.get(‘/’, (req, res) => {
res.send(‘Hello from our Node.js app behind Nginx!’);
});
app.listen(3000, () => {
console.log(‘Node app is running on port 3000’);
});
module.exports = app; // for testing purposes
Now we can save the file, by pressing Esc and :wq.
Next, in the /home/nodeapp directory we can proceed by running the npm init command that will create the required package for our script:
npm init -y
From here we can install Express for our project.
npm install express
This command installs the Express framework in your Node.js project. This adds the node_modules directory in your project (if it doesn’t exist already), where the Express package and its dependencies are installed. Additionally, this command adds an entry for Express in the dependencies section of your package.json file, recording the version that was installed.
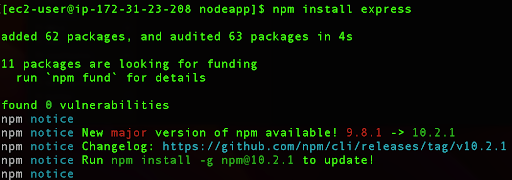
The output after the installation should look like the screenshot above.
Next, we want to configure our app in such a way that it uses Nginx as a reverse proxy.
First, we will create a new configuration file for our app:
sudo vi /etc/nginx/conf.d/nodeapp.conf
Here we will paste following content:
server {
listen 80;
server_name 18.153.64.122;
location / {
proxy_pass http://localhost:3000;
proxy_http_version 1.1;
proxy_set_header Upgrade $http_upgrade;
proxy_set_header Connection ‘upgrade’;
proxy_set_header Host $host;
proxy_cache_bypass $http_upgrade;
}
}
This Nginx configuration creates a reverse proxy that listens on port 80 and forwards all HTTP requests to “http://localhost:3000“. This is useful for serving Node.js applications (or other types of applications) that are running on the same server but on a different port, allowing them to be accessible via the standard HTTP port. It also includes specific configurations needed for handling upgraded connections like WebSockets. Make sure to change the IP address in the config so it reflects your own instance IP address.
Next, we want to test our Nginx syntax, to make sure that everything is good:
sudo nginx -t

Now we want to restart Nginx:
sudo systemctl restart nginx
After the Nginx restart, we can run our application, but first make sure that you are in /home/nodeapp directory:
cd /home/nodeapp/
We can run our application by running the following command:
node app.js

We can confirm if our application is running on port 80 when we place the IP address of our instance in the browser:
http://18.153.64.122/
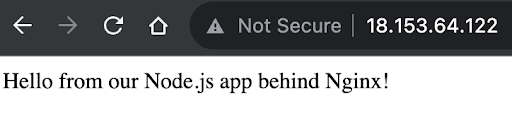
This shows that we have successfully deployed our Node.js application that uses Nginx as a reverse proxy.
Whether you are hosting a simple static website or a complex web application, the combination of Amazon Linux and AWS provides a powerful platform to ensure your applications are secure, scalable, and highly available. This tutorial offers the knowledge and skills to help you confidently deploy your web applications on Amazon Linux, unlocking the full potential of AWS for your web hosting needs.
If you’d like to practice additional Amazon Linux skills, check out the following tutorials: