
Connect


LAMP is a term used to describe a set of open source software that, when combined, are used to support high-performance web applications, and its arguably one of the most widely used stacks for this purpose. It’s an acronym for Linux, Apache, MariaDB/MySQL, and PHP. It comprises three components (the Apache web server, MariaDB or MySQL relational database, and the PHP scripting language) residing on an operating system (Linux). Learn more about MySQL LDAP integration (and other databases) with Jumpcloud.
In this guide, we will demonstrate how to install the LAMP stack server on Amazon Linux 2.
Prerequisites
Before getting started, here is what you need:
- An Amazon Linux 2 EC instance already launched and running.
- A security group configured to allow ports 22 and 80.
- SSH access to the EC2 instance from the terminal or using PuTTY SSH client.
Step 1: Install Apache Web Server
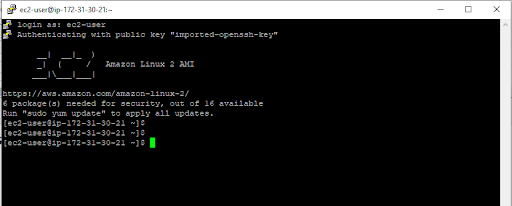
When you are connected to the EC2 instance using SSH, you should see the prompt shown below.
To get started with the installation of Apache, be sure to update all the packages to their latest versions as follows:
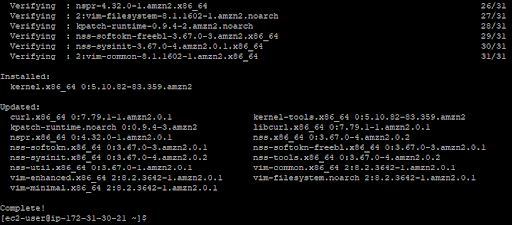
$ sudo yum update
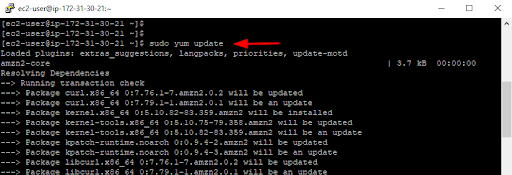
The output displayed shows all the packages that were updated, including the Linux kernel.
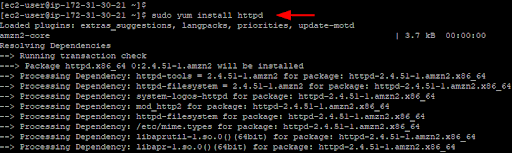
To install Apache web server, run the command:
$ sudo yum install httpd
By default, the Apache service does not automatically start upon installation. To start the service, run the following command:
$ sudo systemctl start httpd
In addition, consider enabling the Apache web server to automatically start on reboot or system startup.
$ sudo systemctl enable httpd

Next, verify that Apache is running:
$ sudo systemctl status httpd
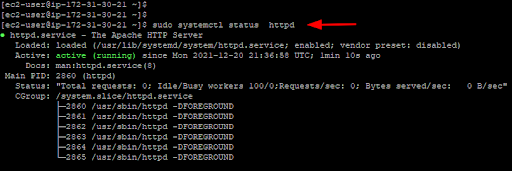
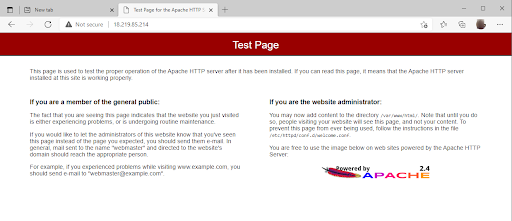
The output above confirms that, indeed, Apache is running. If you’d like, you can take additional steps to harden the security of Apache. You can also confirm that Apache is working as expected by browsing the public IP of the Amazon Linux 2 EC2 instance as follows:
http://ec2-instance-public-ip
Please note that AWS walks you through additional steps, prompting you to restrict admin access to specific IP addresses (among other potential security configurations) to secure EC2 instances. It is recommended that you read through their access control options carefully and understand their intention and impact on your specific use case before moving on.
With the installation of Apache out of the way, let’s head over to the next step.
Step 2: Install MariaDB Database Server
MariaDB is a hugely popular open source relational database that is a fork of MySQL. It was developed by the original developers of MySQL right after Oracle expressed its interest in acquiring MySQL — which it did in 2010. Although MySQL does remain a popular choice by many, this tutorial has opted to follow the MariaDB route.
The MariaDB database is built to provide stability, reliability, and the latest security features required in production workloads. Some of the cool features that ship with MariaDB include advanced clustering with Galera Cluster 4, high-performance storage engines such as InnoDB, seamless scaling, and support for big data analytics.
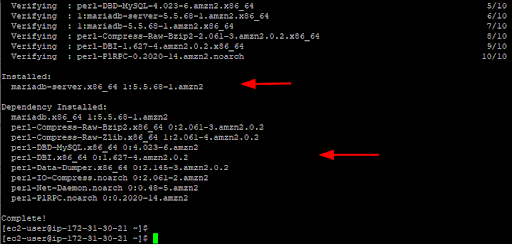
To install MariaDB, run the command:
$ sudo yum install mariadb-server
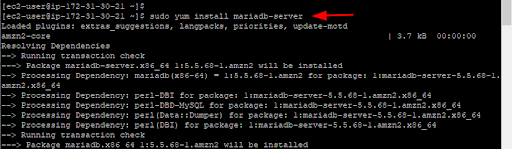
The command installs the MariaDB server alongside other Perl dependencies that are required for it to function as expected.
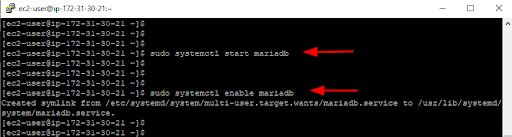
Once installed, start the MariaDB service.
$ sudo systemctl start mariadb
And like the Apache web server, enable it to start on boot.
$ sudo systemctl enable mariadb
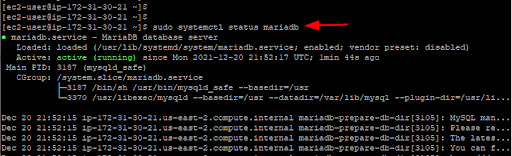
Now, check to confirm that MariaDB is running.
$ sudo systemctl status mariadb
The default settings that come with MariaDB are not secure and the database engine is prone to breaches. As such, you need to take an extra step to harden it.
To harden MariaDB and tighten its security, run the following script:
$ sudo mysql_secure_installation
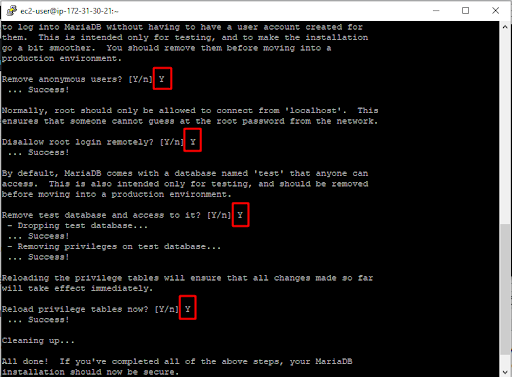
By default, MariaDB allows you to log in as root without providing a password — which is risky for obvious reasons. To remediate this, be sure to set a root password for MariaDB.

For the remaining prompts, press “Y” to remove anonymous users, drop remote root login requests, and remove the test database which makes the database server prone to cyberattacks. Finally, reload the privilege tables to apply the changes.
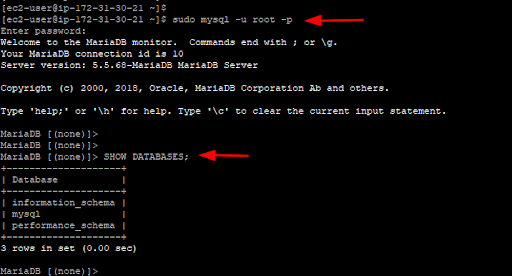
Once that is finalized, now try logging into MariaDB and provide the root user password you just configured.
$ sudo mysql -u root -p
This ushers you to the MariaDB shell. From here, you can perform database operations such as running queries and updating tables.
Step 3: Install PHP 8.1 and PHP Extensions
At the time of writing this guide, PHP 8.1 is the latest version of PHP. We will install it from the amazon-linux-extras repository.
To get started, add the EPEL repository as follows:
$ sudo yum install https://dl.fedoraproject.org/pub/epel/epel-release-latest-7.noarch.rpm -y
Next, add the REMI repository.
$ sudo yum install https://rpms.remirepo.net/enterprise/remi-release-7.rpm -y
Be sure to update the yum cache.
$ sudo yum makecache
Once the cache is updated, install the yum-utils package.
$ sudo yum install yum-utils
Next, confirm the availability of PHP 8.x from the amazon-linux-extras repository.
$ sudo amazon-linux-extras | grep php
You should get the following output which confirms the availability of PHP 8.0 and PHP 8.1 in the repository.

The next step is to enable PHP 8.1 from the amazon-linux-extras repository.
$ sudo yum-config-manager --disable 'remi-php*'
$ sudo amazon-linux-extras enable php8.1
Once enabled, now you can install PHP 8.1 with associated extensions.
$ sudo yum clean
$ sudo yum install php-{curl,pear,gd,mbstring,bcmath,pdo,mbstring,mysqlnd,json,xml,zip,common,cgi,intl}
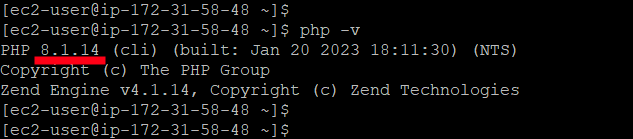
Now confirm the version of PHP installed.
$ php –v
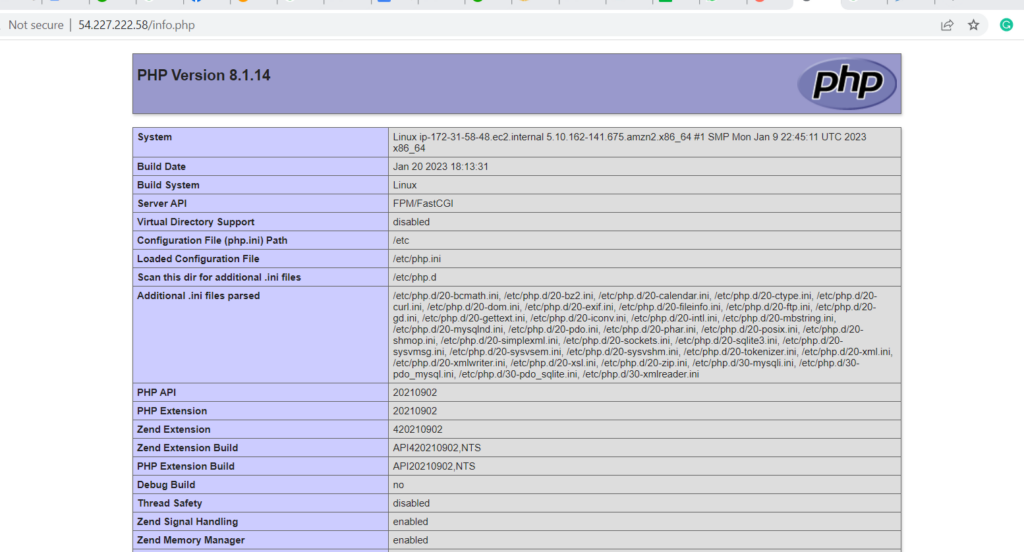
In addition, you can verify the PHP version installed by creating a sample PHP info file in the document root directory as shown.
$ sudo nano /var/www/html/info.php
Paste the following lines:
<?php
phpinfo();
?>
Save the changes. Then restart the Apache web server.
$ sudo systemcl restart httpd
Now open your browser and go to the following address:
You should get the following webpage displaying your PHP version and a host of other PHP-related information. Note that PHP should always be kept current to ensure security and performance.
Conclusion
Now that you have the LAMP stack installed on your Amazon Linux 2 instance, how do you go about managing your system? Fortunately, the JumpCloud Directory Platform enables simplified server access management from a single cloud-based console.
With our cloud directory platform in place, IT admins can secure and manage:
- LTS Amazon Linux, RHEL, CentOS, Debian, and Ubuntu instances
- Cloud RADIUS and LDAP servers
- AWS, GCP, Azure, and other providers
- Automated API processes, commands, and policies
- User provisioning plus 2FA auth and SSH keys
- And much more
Whether you’re interested in exploring JumpCloud’s integration with AWS Single Sign-On (SSO) or the ability to manage Windows, Mac, and Linux systems with a single platform, the best way to test out our capabilities is to use the platform for yourself by signing up for a trial of JumpCloud.