
Connect


For seasoned system and database administrators, the command line is a comfortable and efficient way to run and administer various services and applications straight from the terminal.
However, if you are still developing database administration skills, you may prefer a more intuitive and visual platform for creating and managing databases. This is where phpMyAdmin comes in.
Developed in PHP, phpMyAdmin is a free and open source tool that simplifies the administration of MySQL or MariaDB over a web interface such as cPanel.
It’s a feature-rich graphical tool that supports a wide selection of operations including creating and managing databases and tables, relationships, users, permissions, and more. For those who still prefer running commands, phpMyAdmin also includes a SQL editor for running SQL queries.
In this guide, we will demonstrate how to install phpMyAdmin on Amazon Linux 2.
Prerequisites
Before you get started, you will need:
- LAMP installed. We have already covered how to install the LAMP stack on Amazon Linux 2.
- A sudo user configured on your Amazon Linux 2 instance.
Note that we do not recommend using phpMyAdmin to access a LAMP server unless you have enabled SSL/TLS in Apache. Otherwise, your database administrator password and other data are transmitted insecurely across the internet.
For security recommendations from the developers, see “Securing your phpMyAdmin installation.”
Step 1: Update the system
To get started, ensure your system packages are updated as follows:
$ sudo yum update
Step 2: Create a directory for phpMyAdmin
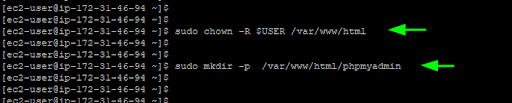
Next, create a custom directory for phpMyAdmin in the webroot directory. But first, you need to set ownership of the directory to the logged-in ec2-user as follows:
$ sudo chown -R $USER /var/www/html
Then, create a custom phpmyadmin directory in the webroot directory as follows:
$ sudo mkdir -p /var/www/html/phpmyadmin
Step 3: Download and configure phpMyAdmin
With the directories and permissions in place, the next step is to download the phpMyAdmin installation file.
At the time of writing this guide, the latest version is phpMyAdmin 5.1.1. By the time you download the file, chances are your version will be different. You can confirm the latest versions available for download by heading over to the official download page.
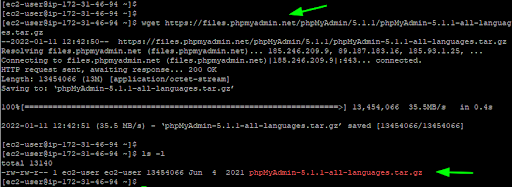
Now, download the phpMyAdmin binary file as follows:
$ wget https://files.phpmyadmin.net/phpMyAdmin/5.1.1/phpMyAdmin-5.1.1-all-languages.tar.gz
Next, extract the tarball file to the/var/www/html/phpmyadmin path.
$ sudo tar -xvf phpMyAdmin-5.1.1-all-languages.tar.gz -C /var/www/html/phpmyadmin —-strip-components 1
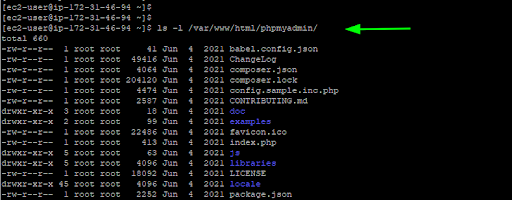
To ensure everything went well, verify the contents of the directory.
$ ls -l /var/www/html/phpmyadmin
Next, restart Apache and MariaDB server services.
$ sudo systemctl restart httpd
$ sudo systemctl restart mariadb
At this point, you are ready to access and enjoy the benefits phpMyAdmin provides.
Step 4: Access phpMyAdmin
Finally, to access phpMyAdmin, launch your browser and browse the URL below. This is the public DNS or elastic IP of your EC2 instance.
http://server-ip/phpmyadmin/
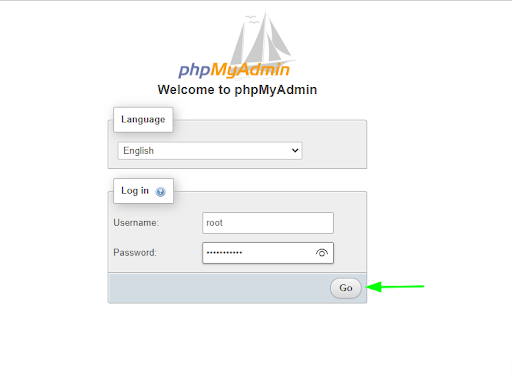
The phpMyAdmin login page should come into view as shown.
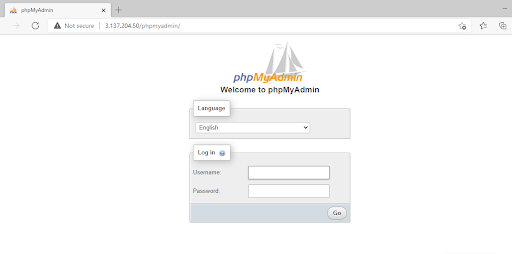
Provide MariaDB’s root user’s credentials (i.e., the root username and password) and hit ENTER or click on the “Go” button.
This ushers you to the phpMyAdmin dashboard (see figure below).
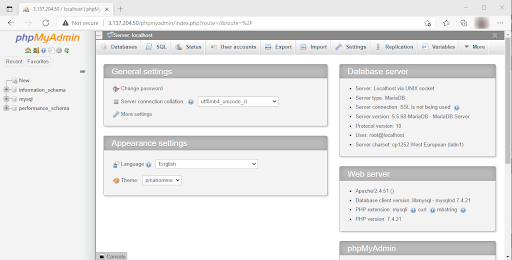
Default databases that ship with the MariaDB or MySQL database server are listed on the left sidebar. You can click on the [+] sign to collapse and view the tables associated with individual databases.
At the far right you will find information about the database server, web server, and phpMyAdmin.
The top bar provides you with options you can use to manage your databases and tables, user accounts, and other settings.
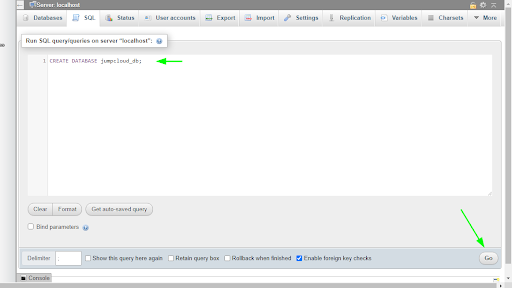
To run an SQL query, click on the “SQL” tab. On the editor provided, run your preferred SQL query. For example, we will create a new database called jumpcloud_db as follows:
CREATE DATABASE jumpcloud_db;
Then click the “Go” button to execute the query.
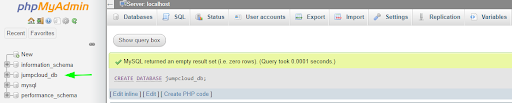
The query runs successfully, and the new database is listed among the default databases as shown here:
Conclusion
phpMyAdmin is a lightweight and user-friendly graphical tool that simplifies the management of databases in MySQL and MariaDB. It provides all the tools you need to seamlessly manage your databases and tables, and configure other database-related settings.
For users who prefer a graphical environment for managing their databases, phpMyAdmin is a great choice.
For IT admins who are looking for additional ways to simplify their cloud infrastructure management as a whole and secure access to databases and other servers, JumpCloud can help.
Learn more about how our cloud directory platform can be leveraged to automate server management.