
Connect


Contents
Cloud computing has revolutionized the way organizations deploy and manage resources, and provides numerous benefits to businesses of all sizes. These benefits include:
- Enhanced security
- Business continuity and better disaster recovery
- Scalability of resources to meet rising demands
- Flexibility in work practices
- Reduction of overhead costs
- And more
The advancement of cloud computing has gone hand in hand with transformational technologies that aim to boost the efficiency and speed of deploying and managing resources. One of these technologies is Infrastructure as Code (IaC).
IaC is the practice of deploying, managing, and provisioning resources using configuration files instead of using interactive graphical tools or manual hardware configuration. Simply put, it is the management of your infrastructure using code that provides a blueprint for the desired state of the resources.
Before IaC, operation teams would manually make configuration changes to their infrastructure, which was a tedious and time-consuming task often peppered with inconsistencies and errors.
IaC provides consistency and error reduction in the deployment and management of resources. In addition, it increases the speed of deployment, eliminates configuration drift, and reduces the costs that come with manual deployment.
One of the most popular IaC utilities is Terraform. Developed by HashiCorp, Terraform is an open source IaC utility that uses a declarative configuration language known as HashiCorp Configuration Language (HCL) to manage or deploy hundreds of cloud resources.
Terraform takes away a huge chunk of deploying resources from developers who only need to run a few commands to have their resources ready. It also forms a critical part of DevOps and CI/CD implementation.
In this guide, you will learn how to deploy an EC2 instance using Terraform.
Step 1: Install Terraform on Linux
To realize the power of Terraform in deploying resources, the first step is to install it. Follow the steps outlined below for your operating system.
For Debian/Ubuntu
Note that although the apt-key is deprecated, as of the publishing of this tutorial, these instructions are provided by HashiCorp and will still work.
First, add the HashiCorp GPG key.
$ curl -fsSL https://apt.releases.hashicorp.com/gpg | sudo apt-key add -
Next, add the HashiCorp repository.
$ sudo apt-add-repository "deb [arch=amd64] https://apt.releases.hashicorp.com $(lsb_release -cs) main"
Once the repository is added, update the package lists to notify your system about the newly added repository and then install Terraform using the APT package manager.
$ sudo apt-get update && sudo apt-get install terraform -y
For CentOS and RHEL 8/Rocky Linux and AlmaLinux
If you are running a modern Red Hat distribution such as RHEL 8, CentOS 8 and 9, Rocky Linux, or AlmaLinux, follow the steps shown.
Install the prerequisite packages:
$ sudo yum clean all
$ sudo yum update
$ sudo yum install -y yum-utils
Next, add the HashiCorp repository
$ sudo yum-config-manager --add-repo https://rpm.releases.hashicorp.com/RHEL/hashicorp.repo
Lastly, install Terraform using the DNF package manager.
$ sudo dnf install terraform -y
For Fedora
Install the prerequisite packages first.
$ sudo dnf install -y dnf-plugins-core
Next, add the HashiCorp repository.
$ sudo dnf config-manager --add-repo https://rpm.releases.hashicorp.com/fedora/hashicorp.repo
And finally, install Terraform using the DNF package manager.
$ sudo dnf install terraform -y
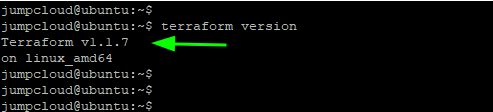
When the installation of Terraform is complete, verify the version installed as follows.
$ terraform version
From the output, you can clearly see the latest version of Terraform is installed.
Step 2: Create a Terraform configuration file for provisioning the EC2 instance
As discussed earlier in the introduction, Terraform is an IaC utility. As such, you will create a configuration file, which you will then leverage to deploy an EC2 instance.
First, you will create a Terraform directory and navigate to it.
$ mkdir terraform && cd terraform
Next, you will create a configuration file with the .tf file extension. In this example, it is called config.tf. This is an arbitrary name, so feel free to name it whatever you like.
$ sudo vim config.tf
In the first block, specify your cloud provider, in this case "aws" followed by your Access keys (Access key ID and Secret access key). These are keys used to sign programmatic requests made to AWS.
If you don’t have these keys, you can create them by following the steps below:
- Sign in to the AWS IAM console.
- On the left navigation menu, select ‘Users’.
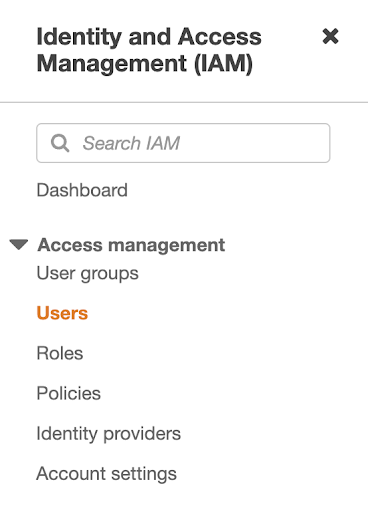
- Next, click on your IAM user name (not the check box).
- Head over to the ‘Security credentials’ tab and click on the ‘Create access key’ button.
- To view the new Access key, click on ‘Show’. Your credentials should resemble the following:
Access key ID: AXKDUNTIEDSEXAMPLE
Secret access key: wLulrXUtnY/8KNED/pYkjKYEXAMPLEKEY
- To download the key pair for future reference, click on ‘Download .csv’. Be sure to store the CSV file in a safe location.
With the Access keys in hand, specify them in the configuration block below.
#Access & secret keys
provider "aws" {
access_key = "AKXXXXXXXXXXXGI"
secret_key = "acXXXXXXXXXXXXXXXXXXXXXXXXXXXXXXXXXXXXXXm"
region = "us-east-2"
}
In the second block, specify the EC2 instance details such as the resource type, AMI, instance type, and tags.
#EC2 instance details
resource "aws_instance" "instance1" {
ami = "ami-0ba62214afa52bec7"
instance_type = "t2.micro"
tags = {
Name = "RHEL-8"
}
}
The complete configuration file should resemble the following:

Some important points to note:
- Always keep the keys confidential and stored in a secure location. Never share them with anyone including Amazon as this can compromise the security of your AWS account.
- You can only retrieve the Secret access keys when you initially create the key pair. In case you forget the keys or lose the CSV file, you must create a new key pair once again.
Step 3: Launch the EC2 instance using Terraform
With the configuration file in place, initialize the configuration as follows:
$ terraform init
The command initializes the working directory containing the Terraform configuration file. This is the first command that should be executed right after writing a new Terraform configuration file.

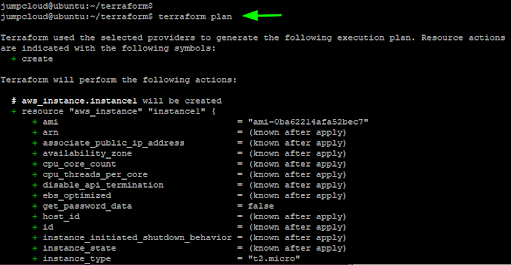
Thereafter, run the terraform plan command. The command runs a simulation of the expected outcome after running the configuration file. It determines the desired state of all the resources defined in the configuration file.
$ terraform plan
Simply put, the terraform plan command performs a dry run and no resources are provisioned.
If everything goes well, you should get some output that resembles the screenshot below. If you get an error, head back to the Terraform configuration file and check for any syntax errors or invalid Access keys.
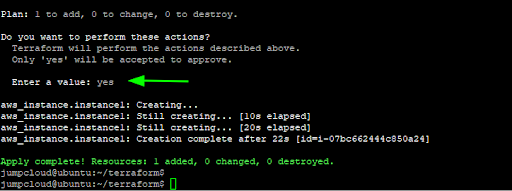
To deploy the EC2 instance, run the terraform apply command. The command carries out the changes specified in the configuration file. In this example, it launches an EC2 instance of the t2.micro instance type in the us-east-2 region using the specified ami image and the RHEL-8 tag,
$ terraform apply
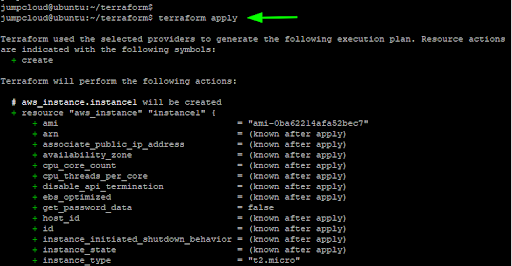
When prompted to perform the actions specified in the configuration file, type ‘yes’. Right after, Terraform will provision the EC2 instance and you will get a confirmation message on the terminal printed in green.
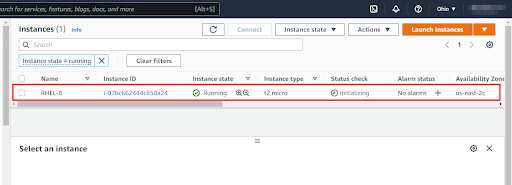
To confirm that the EC2 instance was created, head back to your AWS account and navigate to the EC2 section. You should see your EC2 instance up and running.
Since this is a test, you can destroy your instance by running the command:
$ terraform destroy
This is the opposite of terraform apply and it terminates all the resources specified in your Terraform configuration file.
Conclusion
And there you have it! This article demonstrated how you can provision an EC2 instance on AWS using Terraform. As you may have noticed, it’s an easy and efficient way to provision resources in the cloud.
Once resources have been provisioned, the next question is: how do you easily and securely provision user access to those resources? If you’re an IT admin, the answer is simple: Use JumpCloud.
Our cloud directory platform is an official identity provider (IdP) for AWS Single Sign-On (SSO), which means you can simplify onboarding and secure group management from a unified cloud-based admin console.
Learn more about the benefits of the JumpCloud and AWS SSO integration here.