
Kiosk Mode for Windows lets IT administrators restrict Windows devices to run only a specific set of applications. This article shows you how to leverage JumpCloud users and commands to configure Kiosk Mode on managed Windows devices and device groups. When the designated user signs in, the device automatically launches into the configured Kiosk Mode, and prevents the user from navigating away from the approved applications.
Prerequisites:
- User account control (UAC) must be turned on to enable kiosk mode. See UAC to learn more.
- A Kiosk compatible app such as UWP app or a desktop application such as Slack, must be installed on the target devices.
- Target devices must be running Windows 10 or later, or any version of Windows 11. This policy is supported on the following Windows editions:
- Windows Pro
- Windows Enterprise
- Windows Education
Considerations:
- The Kiosk user must be logged in at least once to the device.
Configuring the JumpCloud Kiosk User and Groups
First, we’ll create a designated JumpCloud kiosk user and then configure user and device group bindings.
To setup the kiosk users and groups in JumpCloud:
- Log in to the JumpCloud Admin Portal.
![]()
If your data is stored outside of the US, check which login URL you should be using depending on your region. If your organization uses LDAP, RADIUS, or requires firewall allow list configuration, the Fully Qualified Domain Names (FQDNs) will also be region specific. See JumpCloud Data Centers for the URLs, FQDNs, and IP addresses.
- Go to Identity Management > Users and create a user. See Add Users to the Admin Portal to learn more.
- Add the user to the Kiosk user group. See Get Started: User Groups to learn more.
- Create a device group, add the designated Kiosk devices into it. See Create a Device Group to learn more.
- Bind the device group to the Kiosk user group. See Add a User Group to a Device Group to learn more.
![]()
This kiosk user needs to log in at least once on the device to proceed.
Deploying Kiosk Mode to Devices
After completing the previous steps, you can deploy Kiosk Mode to devices using one of the following options:
Option 1
To use a UWP app downloaded from Microsoft Store:
- Once you installed the app from the store, run following command to get the Application User Model ID (AUMID):
Get-StartApps
- Create a JumpCloud Command and enter the following code in the command section. See Creating a Command Manually to learn more.
# An example to set Calculator as the Kiosk App.
$KioskUser = "kiosk.johnny" # Use your Kiosk username here.
$KioskApp = "Microsoft.WindowsCalculator_8wekyb3d8bbwe!App"
Set-AssignedAcces -AppUserModelId $KioskApp -UserName $KioskUser
- Run the command against the Kiosk device group.
- (Optional) You can use the following command to remove the Kiosk setting:
Clear-AssignedAccess
Option 2
To use Windows IDC and a desktop app:
- Use a Windows device to download and install Windows IDC. See Microsoft’s Install Windows Configuration Designer.
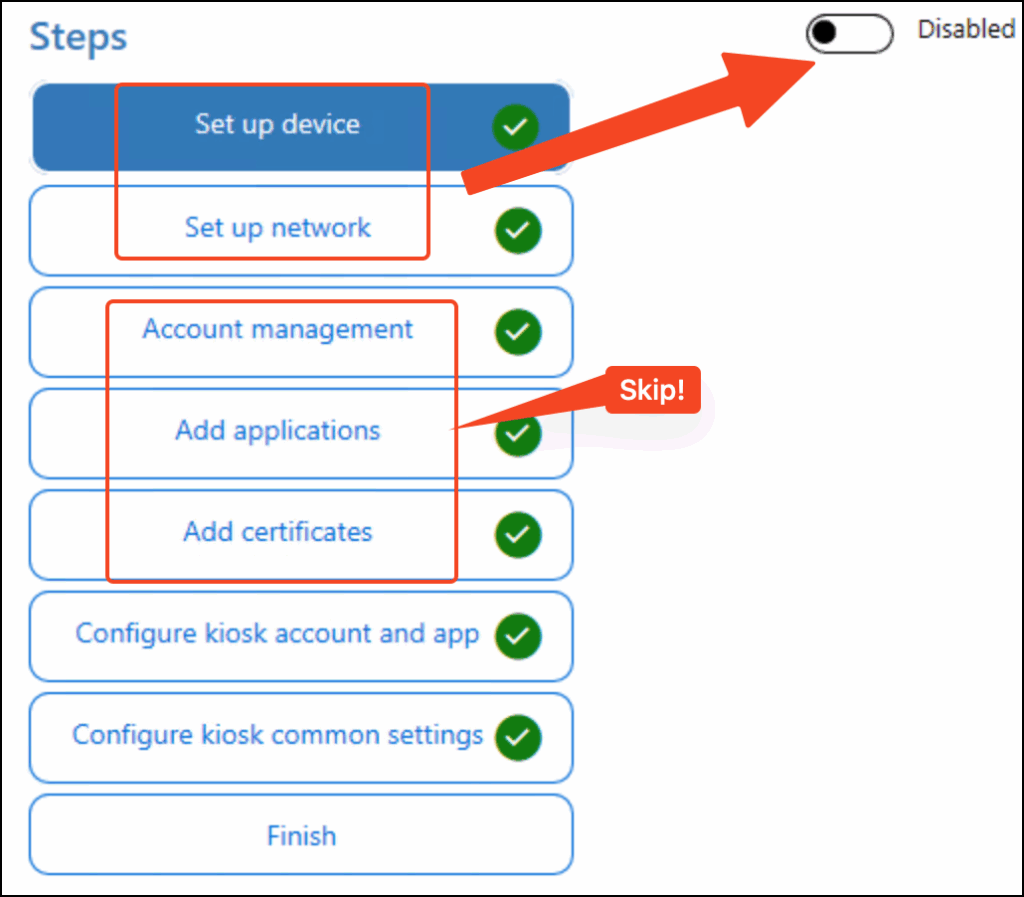
- Choose the Kiosk wizard.
- Configure the Kiosk account. Skip the sections as shown in the image below:
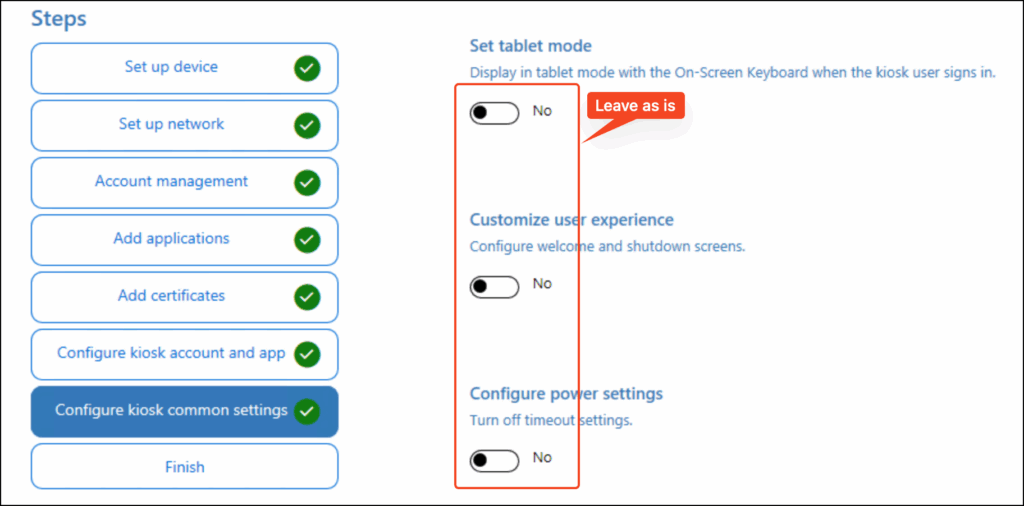
- The common settings can be left unchanged as shown in the image:
- Click Finish to create the package.
- Create a JumpCloud command, and upload the package as a file by using the following command:
Install-ProvisioningPackage -QuietInstall -ForceInstall -PackagePath "C:\Windows\Temp\Slack.ppkg"
- Run the command against the Kiosk device group to set up Kiosk.
- From the cmd result you can get the package ID.
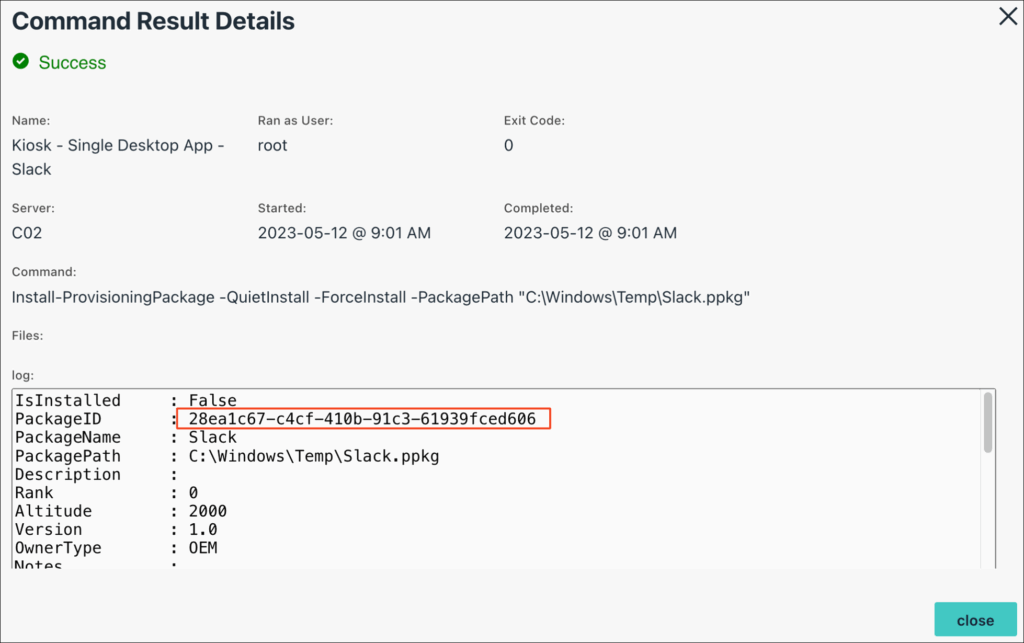
- (Optional) You can remove this setting by executing the following command:
Remove-ProvisioningPackage 28ea1c67-c4cf-410b-91c3-61939fced606