
This policy manages the text present on the login window. The text entered into the text field will be shown at the login window on selected machines. Due to the reduced size of the login window space on macOS Monterey, displays under 900 pixels in vertical height might experience display overlap between the login area and policy text that is displayed on the screen.
To create a Login Window Text Policy for Mac:
- Log in to the JumpCloud Admin Portal: https://console.jumpcloud.com/login.
- Go to DEVICE MANAGEMENT > Policy Management.
- In the All tab, click (+).
- On the New Policy panel, select the Mac tab.
- Select the Login Window Text policy from the list, then click configure.
- (Optional) In the Policy Name field, enter a new name for the policy or keep the default. Policy names must be unique.
- (Optional) In the Policy Notes field, enter details like when you created the policy, where you tested it, and where you deployed it.
- Under Settings, in the Set Text Displayed at Login Window field, enter the text you want to display on the login window.

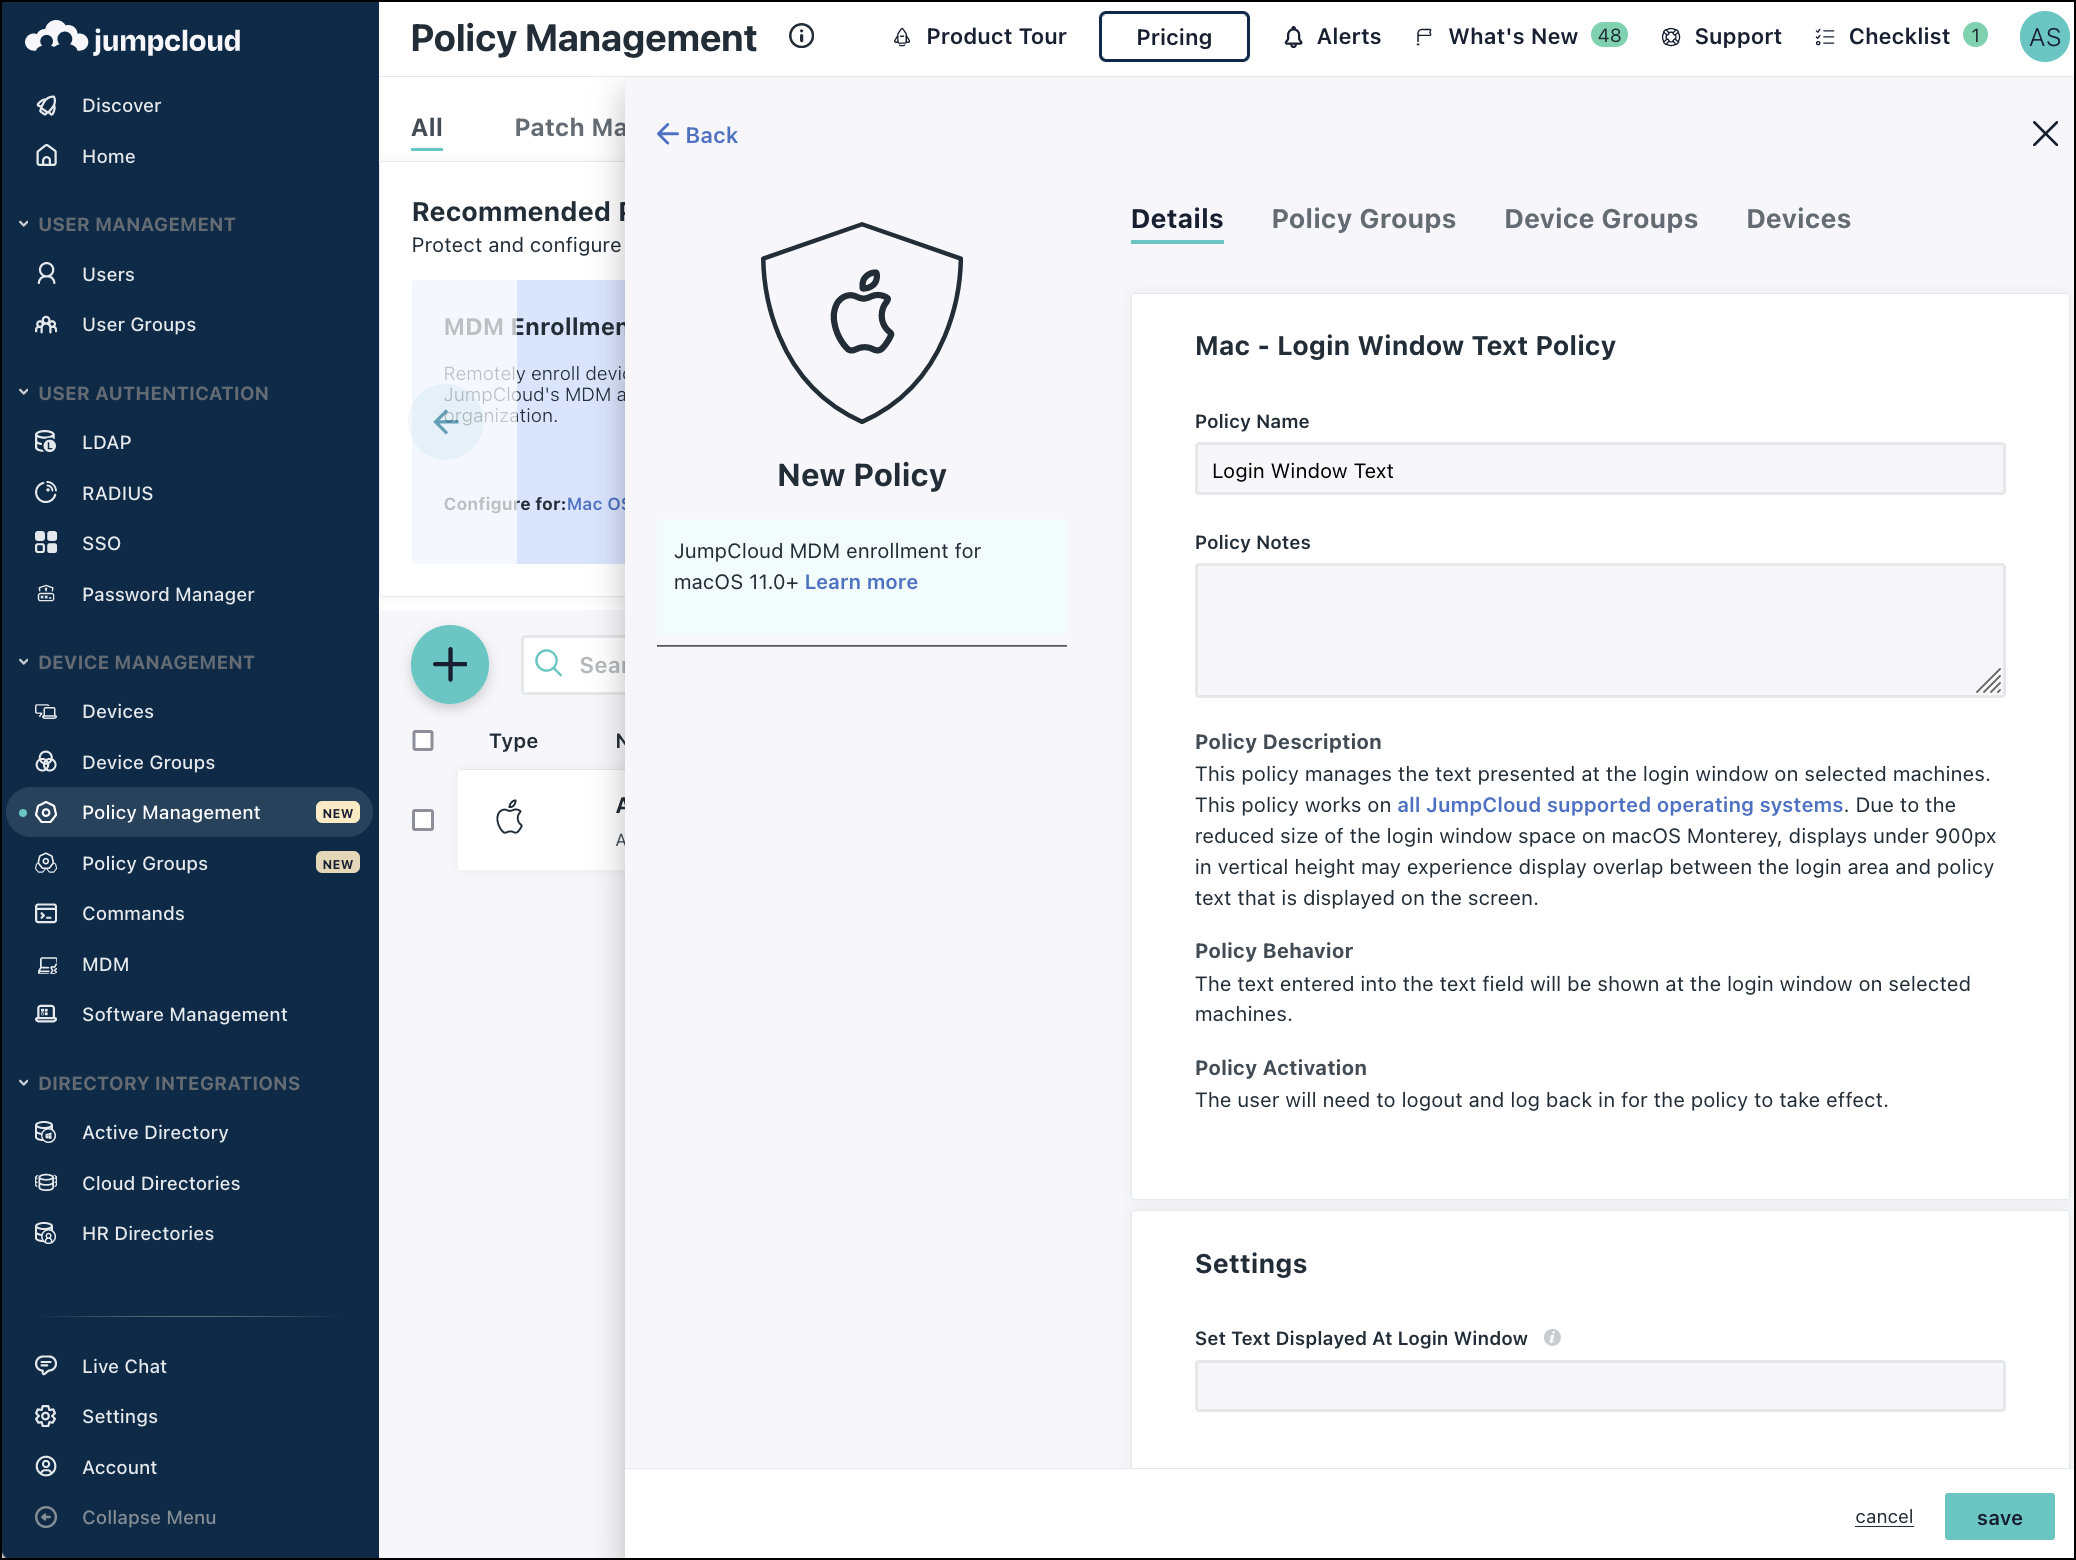
- (Optional) Select the Device Groups tab. Select one or more device groups where you'll apply this policy. For device groups with multiple OS member types, the policy is applied only to the supported OS.
- (Optional) Select the Devices tab. Select one or more devices where you'll apply this policy.
- Click save.
- For changes to take effect, log out and then log back in to the JumpCloud Admin Portal.
Back to Top