
The Windows taskbar enables multitasking and quick access to applications and system notifications. This policy lets you manage key aspects of the taskbar, ensuring a consistent and controlled user experience across your devices. Once deployed to managed Windows devices, the policy enforces your configured settings, preventing users from overriding them.
![]()
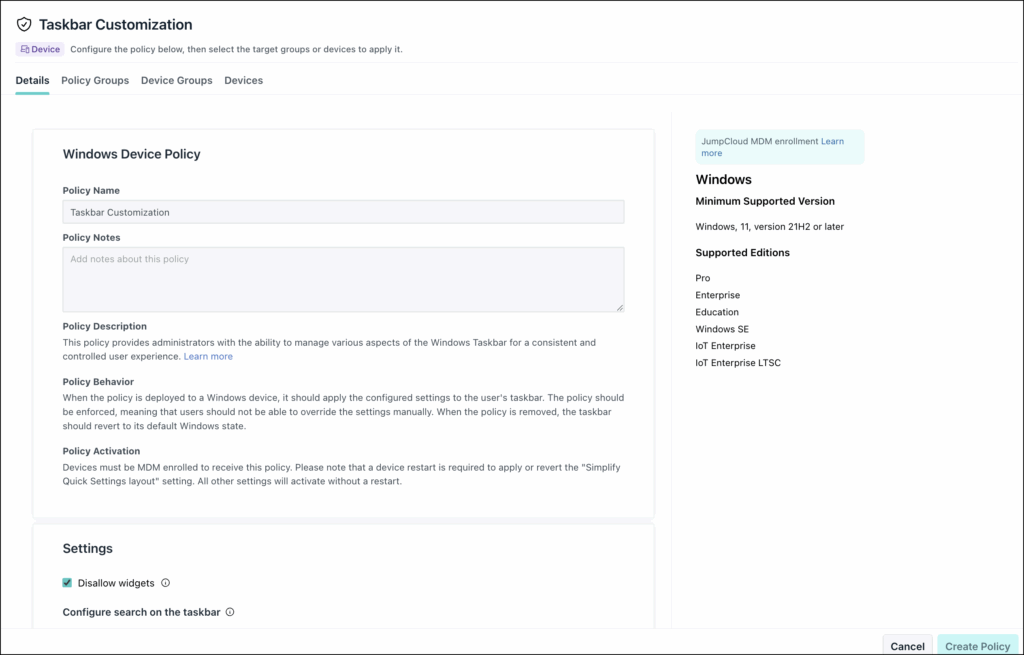
This is a device level policy that applies system-wide to the device and all of its users. You can bind this policy to individual devices or device groups. For policies that apply to a specific user's profile across devices, see Get Started: Policies and Learn More section of this article.
Prerequisites:
- Devices must be enrolled in Windows MDM (Mobile Device Management).
- Target devices must be running Windows 11 (21H2 and later). This policy is supported on the following Windows editions:
- Windows Pro
- Windows Enterprise
- Windows Education
- Windows SE
- IoT Enterprise
- IoT Enterprise LTSC
- For more information on device compatibility, see Agent Compatibility, System Requirements, and Impacts.
Considerations:
- Users must log out and back in to all devices where this policy was applied for it to take effect.
- A device restart is required only if you select the Simplify Quick Settings layout option.
Creating the Policy
To create a Taskbar Customization policy for Windows devices, do the following:
Selecting the Policy Template
- Log in to the JumpCloud Admin portal.
![]()
If your data is stored outside of the US, check which login URL you should be using depending on your region. If your organization uses LDAP, RADIUS, or requires firewall allow list configuration, the Fully Qualified Domain Names (FQDNs) will also be region specific. See JumpCloud Data Centers for the URLs, FQDNs, and IP addresses.
- Go to Device Management > Policy Management. The Policy Management page is displayed.
- On the Policy Management page, click +Add New.
- Select Device Policy to assign the policy to devices and device groups. On the New Device Policy page:
- Select the Windows tab.
- Search and select the policy name and click Configure. The Details tab of the policy is displayed.
- On the Details tab, configure the required policy configuration settings.
- (Optional) In the Policy Name field, enter a new name for the policy or keep the default. Policy names must be unique.
- (Optional) In the Policy Notes field, enter details such as creation date of the policy, and information on testing and deployment of the policy.
Configuring the Policy
In the Settings section, configure the following policy options:
- Disallow widgets: Prevents the Widgets button and the Widgets board from appearing on the taskbar. Widgets are enabled by default.
- Configure search on the taskbar: Controls the appearance of the search feature on the taskbar. Once enforced, this setting cannot be changed by the user. Select from one of the following options:
- Hide Search: Hides the search feature entirely.
- Show Search Icon Only: Displays only the search icon.
- Show Search Icon and Label: Displays the search icon and the word “Search.”
- Default: Displays the full search box. If you disable or don't configure this policy, the search setting will revert to its Windows default, and users will be able to change it.
- Hide recent jumplists: Prevents recently or frequently used files, folders, and websites from appearing in the Start Menu and taskbar's Jump Lists. By default, this setting is not enabled. This setting does not prevent users from pinning items to Jump Lists.
- Hide the Task View button: Hides the Task View button and disables its toggle in the device’s Settings.. This option is disabled by default.
- Simplify Quick Settings layout: Reduces Quick Settings to a fixed layout that includes only the Wi-Fi, Bluetooth, Accessibility, and VPN buttons, along with brightness and volume sliders, battery indicator, and a link to the Settings app. By default, this setting is disabled. A device restart is only required if you enable this setting.
- Disable editing Quick Settings: Prevents users from adding, removing, and reordering buttons in the Quick Settings flyout. By default, users can edit these settings.
- Do not allow pinning programs to the taskbar: Prevents users from pinning new programs or shortcuts to the taskbar. By default, this option is disabled.
- Apply custom Start layout: Allows you to specify a custom Start menu layout by providing a JSON file. Enabling this setting applies the uploaded JSON layout, overriding the default Windows Start menu taskbar on the managed device. By default, this option is disabled. If the JSON file contains a value with an environment variable, use the variable's value instead of the variable name itself.
![]()
Removing this policy will not automatically revert the Start layout to default settings. The policy does not save the default layout. You can save the initial file with the default layout in a JSON format. Later, you can use this policy again to deploy and restore the saved layout. See Customize the Start layout to learn more.
Applying the Policy
- (Optional) Select the Policy Groups tab. Select one or more policy groups where you want to add this policy.
- Select the Device Groups tab. Select one or more device groups where you want to apply this policy to. For device groups with multiple OS member types, the policy only applies when a user logs into a supported Windows device that is enrolled in MDM.
- Or, select the Devices tab. Select one or more devices where you want to apply this policy.
- Click Create Policy. A success message is displayed indicating the completion of policy creation.
Viewing Policy Status
- Select the Status tab.
- To see the last Result Log for a device where this policy is applied, click view.
![]()
- If any errors occur, they're listed in Exit Status. If you have an Exit Status of 0, no errors occurred when applying or enforcing this policy.
Using a Custom Start Layout
Since the policy does not save the default layout, you must manually export it as a backup before making any changes. After you've modified the layout, you'll need to update any environment variables in the file to ensure the policy functions correctly.
- On a reference Windows 11 device, run the following PowerShell command to export the current Start menu layout to a JSON file.
Export-StartLayout -Path "C:\Layouts\LayoutModification.json"
![]()
We recommend saving the default layout and keeping the file unmodified as a backup.
- Open the exported JSON file in a text editor and make your desired changes.
- (Optional) If your layout includes a desktop link with an environment variable (for example
%ALLUSERSPROFILE%), you must replace it with the variable's value before you can apply the policy. Use PowerShell to find the value of the environment variable.$env:ALLUSERSPROFILE
Example:- Original JSON:
{"desktopAppLink":"%ALLUSERSPROFILE%\\Microsoft\\Windows\\Start Menu\\Programs\\Microsoft Edge.lnk"} - Final JSON:
{"desktopAppLink":"C:\\ProgramData\\Microsoft\\Windows\\Start Menu\\Programs\\Microsoft Edge.lnk"}
- Original JSON:
- Upload the final, modified JSON file to the Apply custom Start layout policy setting to apply your changes to managed devices.