
Connect


Contents
There are three main basic user accounts in Linux: the root user, also known as the administrative account, the regular user, and service user accounts.
- Root user: The most powerful and privileged user account on a Linux system. This user can perform virtually any task on the system, such as installing and removing software, updating packages, creating and deleting files, automating tasks, and configuring services.
- Regular user: The “normal” user’s login, created by the root user or during the installation of the system. This user has a login shell and home directory that contains their personal files such as documents, music, videos, etc.
- Service accounts: Special accounts that package managers typically create during the installation of a software package. Unlike standard regular accounts, service accounts do not have a login shell and are typically only used to run installed applications and automated services.
The sudo user account is another type that has elevated privileges to execute commands without a root password. Commands are defined in the sudoers file for necessary authorization.
Root users (id 0) have full control over the system, and have unlimited privileges. This level of access enables them to execute dangerous commands that can break the system or put data at risk. Sudo users were created to include the necessary privileges of a root user account with less risk. It’s also more convenient than using the “sudo” command for administrative tasks.
In essence, a sudo user account is simply a regular user account with specified elevated root user-level privileges. To run commands as a sudo user, prepend the sudo directive to a command to be executed. For example, to refresh the package index, you’d run the command:
$ sudo apt update
This tutorial will show you how you can create sudo user accounts on Linux Mint.
Step 1: Create a Regular Standard User
To begin the sudo user account creation process, you’ll create a regular user, and thereafter add the user to the sudo group.
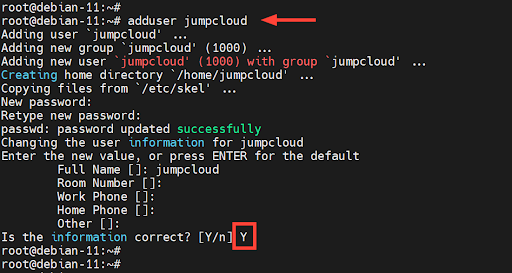
Log into your Linux Mint instance as the root user and run the ‘adduser’ command, followed by the username as the command argument. In this case, we are creating a user called ‘jumpcloud’.
# adduser jumpcloud
The command performs several tasks. First, it adds a new user and group called ‘jumpcloud’. It then adds the user to the group, creates a home directory for the user, and copies all the critical configuration files to the directory.
Next, you will be prompted to provide and confirm a password for the user, followed by a full name and other information where applicable.
Once you’ve entered the relevant details, type ‘Y’ to confirm, and hit ‘ENTER’ to save the changes.
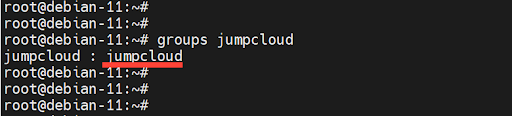
When a user is created, they are automatically added to a primary group with the same name as the user account’s name. In this case, the ‘jumpcloud’ user is placed in a group called ‘jumpcloud’.
To confirm the groups that a user belongs in, run the ‘groups’ command followed by the user account’s name. From the output, you can see that the user belongs to only one group.
$ groups jumpcloud
We’ll now switch to the new user and attempt to run an elevated task. To switch to the user, run the command:
$ su – jumpcloud
Next, we will attempt to install the Nginx web server as a sudo user. To do this, we will prepend the sudo directive to the command.
$ sudo apt install nginx -y
Upon providing the password, you will get a notification that the user is not in the sudoers file, and the incident will be noted and reported to the systems administrator.
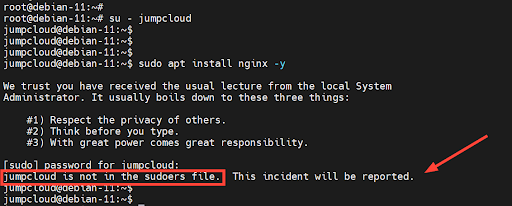
This means the user ‘jumpcloud’ does not currently have the required sudo permissions.
Step 2: Add the Regular User to the Sudo Group
As you’ve seen, you need to add the user to the sudoers file, located in
/etc/sudoers.
WARNING: Modifying this file manually is discouraged. One small mistake might cause all users to be locked out of their accounts. Instead of manually editing, you can reduce risks by elevating user privileges via a unified endpoint management (UEM) tool.
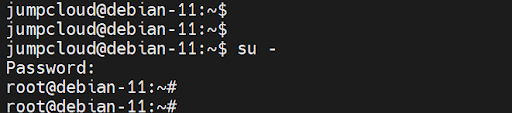
The ‘usermod’ command is used for modifying users and adding them to groups. Switch back to the root user to add the regular user to the sudoers file.
$ su –
Then, add the user to the sudo group as shown.
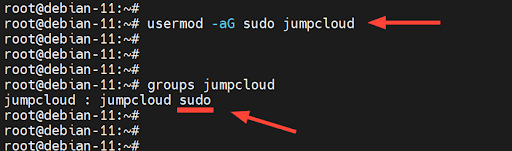
# usermod -aG sudo jumpcloud
Once again, verify the groups associated with the user.
# groups jumpcloud
This time around, you will notice that the user belongs to two groups: ‘jumpcloud,’ the primary group, and ‘sudo,’ which now becomes the secondary group.
The user has successfully been added to the sudo group, and can now execute privileged tasks. Now, let’s test it out.
Step 3: Confirm the Sudo User Can Run Privileged Tasks
In this step, we will test and verify if the user can run commands as a sudo user. Switch back to the user:
$ su – jumpcloud
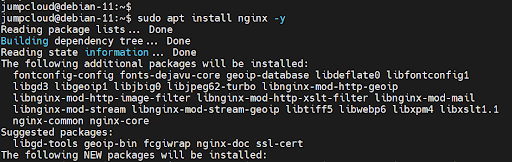
Then, try again to install the Nginx web server.
$ sudo apt install nginx -y
After providing the password, and hitting ‘ENTER’, the installation starts and completes successfully. This is proof that the user was properly configured as a sudo user.
Create Sudo Users for Better Account Security
This tutorial demonstrated how to create a sudo user on Linux Mint. These steps can be applied to other Linux distributions and it’s always recommended you create sudo users instead of using root user accounts. Want to see the steps for creating sudo users in other Linux distros? Check out the tutorials below.
How to Create Sudo Users on Rocky Linux