
You can run JumpCloud commands to execute scripts on fleets of machines through JumpCloud's agent. You can deploy files, schedule maintenance activity, or install software on endpoints in PowerShell, Bash, Shell, and more. Commands can run across one or more devices in parallel and retrieve command results, including stdout, stderr, and exit codes.
Commands let you quickly and easily automate tasks across multiple servers, launch those tasks based on a number of different types of events, and get full auditing of all command results. Several standard commands are already available to you. You can also create new commands manually or from a command template. Using an existing command template to create a command helps you quickly and efficiently update your devices.
Considerations:
- On Windows, JumpCloud uses the Windows NT\Authority System account to run commands on remote systems, preventing the use of commands that require a user context to run.
- To run a command with user context, such as making changes to the HKEY_CURRENT_USER registry hive to implement a custom group policy, use one of the custom command templates titled, “Windows - Run As Signed In User Template | v1.1 JCCG".
- The execution time for scheduled and repeating launch events corresponds with the target system's time zone.
- Some antivirus and endpoint protection may block scheduled commands, like those set to Run on Every Login. To prevent this, you may need to add the JumpCloud Agent and its services to an allow list. See Add the JumpCloud Agent to an Allow List and Create an Allow List for JumpCloud Services to learn more.
- The timestamps in the Command Results window display the current time on the device where the command ran. If you wish to view the time in UTC, select the Display Timestamps in UTC checkbox. Your time preference is saved across sessions until you change it.
- When running commands for macOS, you might get a result code of 1 with a log message of Operation Not Permitted. This might indicate that the JumpCloud agent needs Full Disk Access permissions to successfully run the command. See Grant Full Disk Access Permissions to the JumpCloud Agent for MacOS.
Prerequisites:
- You need a managed device running on a supported OS to create a command.
- You need to create device groups before you create a command. See Create a Device Group.
To access the Commands section:
- Log in to the JumpCloud Admin Portal.
![]()
If your data is stored outside of the US, check which login URL you should be using depending on your region. If your organization uses LDAP, RADIUS, or requires firewall allow list configuration, the Fully Qualified Domain Names (FQDNs) will also be region specific. See JumpCloud Data Centers for the URLs, FQDNs, and IP addresses.
- Go to Device Management > Commands.
From the Commands page, you can quickly create, run, or delete a command.
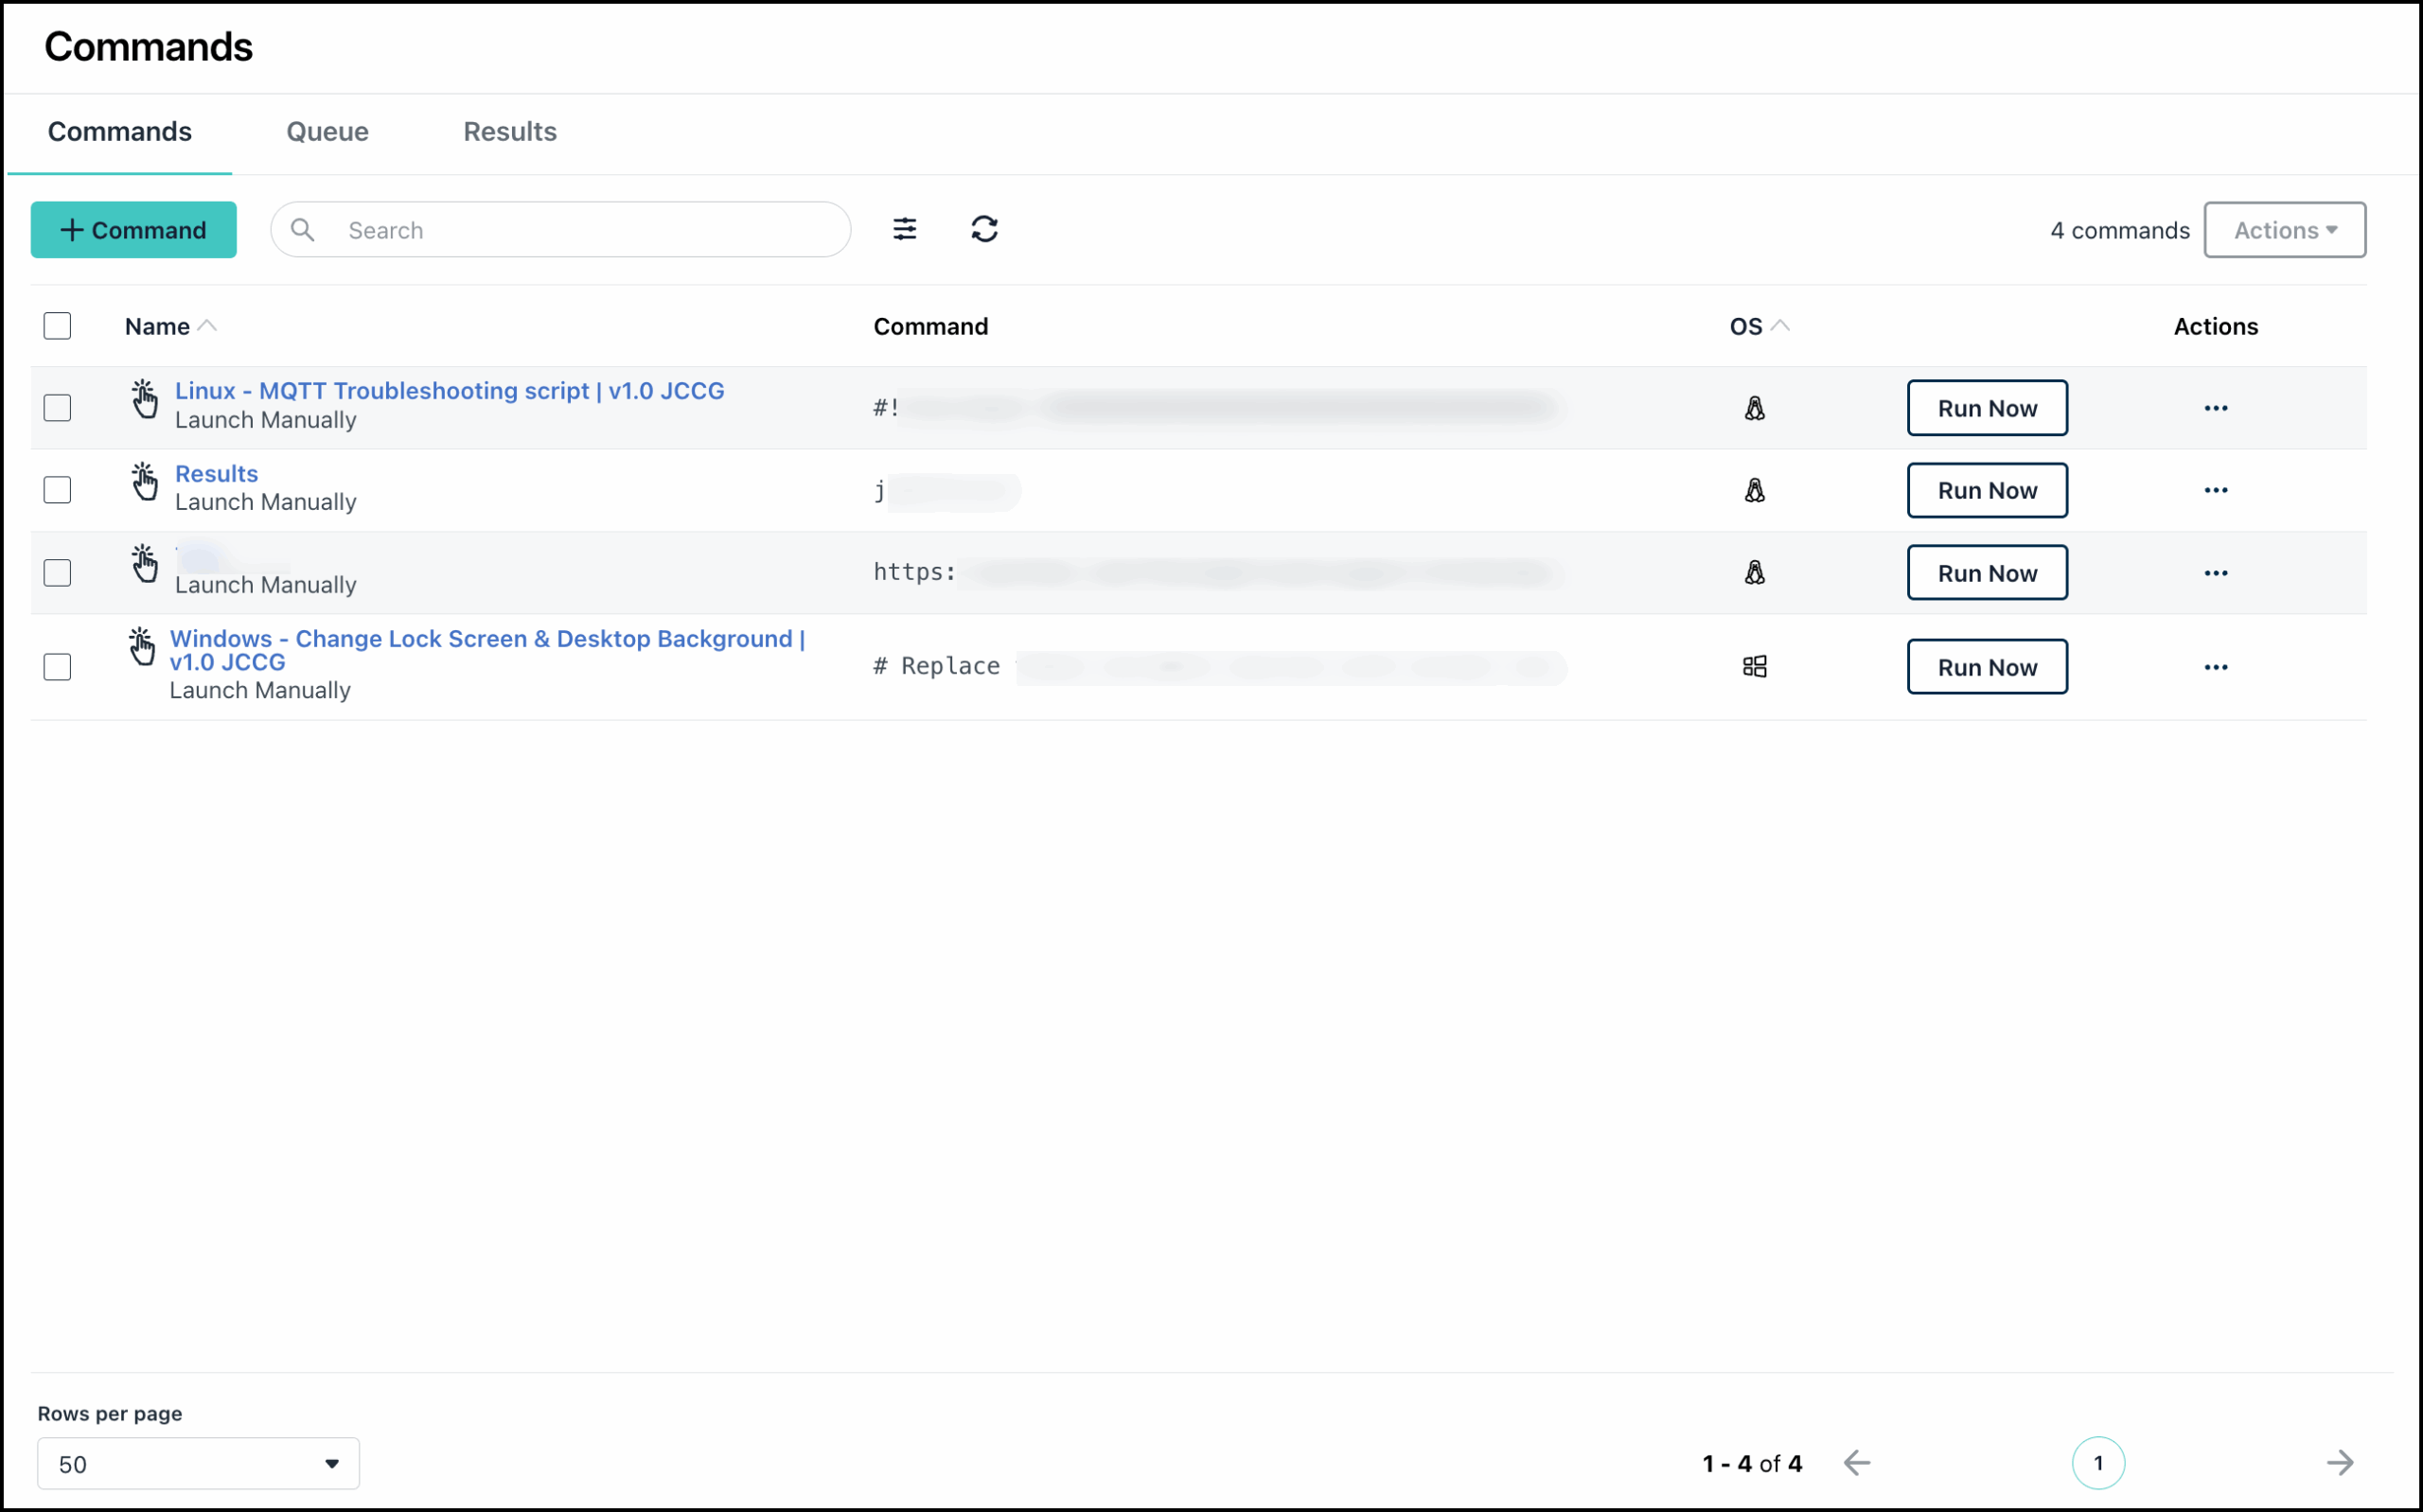
- In the Commands page, click + Command to view the different options to create a command.

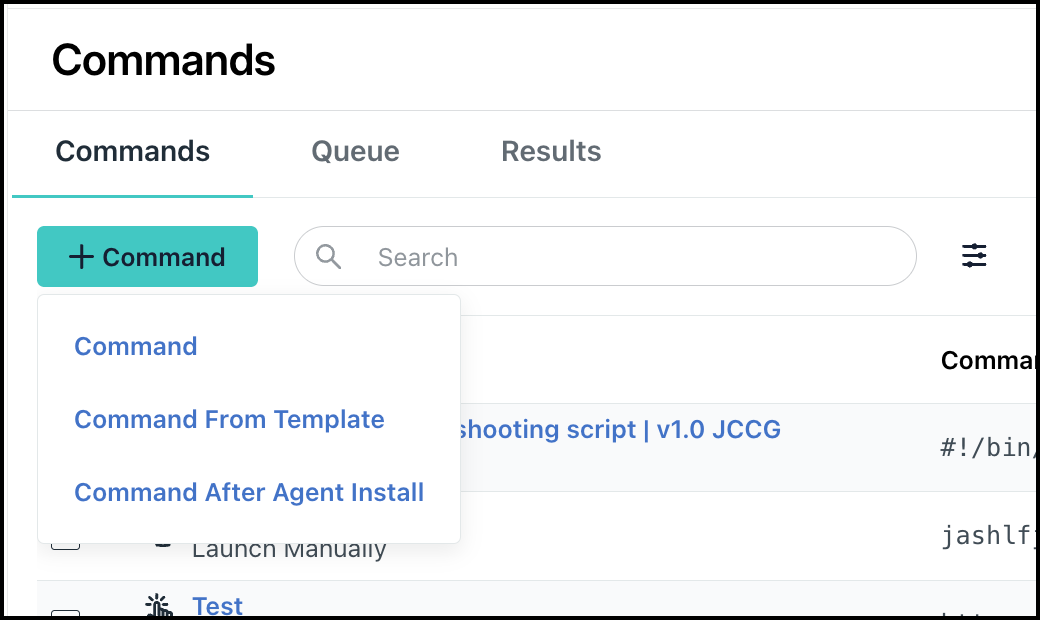
The following options are available:
- Command: Use this option to manually create commands. See Create a Command Manually to learn more.
- Command From Template: Use this option to create a command from a predefined template. See Create a Command from a Template to learn more.
- Command After Agent Install: Use this option to create commands that run after the JumpCloud agent is installed on the device. See Create a Command after Agent Install to learn more.
The JumpCloud Commands Gallery
The JumpCloud Commands Gallery contains curated Mac, Windows, and Linux commands that are available for import using the JumpCloud PowerShell module. This library of JumpCloud commands is hosted on GitHub and maintained by the JumpCloud solutions architecture and success teams.
Find quick links to navigate to sections of the JumpCloud Command Gallery below:
To import these commands, see Install the JumpCloud PowerShell Module first.
Once the Module has been installed, find at the bottom of each command a code block under the header Import This Command. Simply copy and paste the code from this section and run it in the PowerShell terminal to import the command into your JumpCloud tenant. Imported commands will be located within the Commands section of the JumpCloud Admin Portal. Alternatively, each command in the gallery can be created manually in the JumpCloud Admin Portal by copying and pasting the code block under the Command header into a new command within the JumpCloud Admin Portal.
To see the status of all commands run on Devices:
- Click Device Management > Commands > Results to see all of the commands run, then click view to pull up the results details.