
JumpCloud Vault enables secure SSH access to registered Linux servers via two methods: browser-based sessions (Connect) and native terminal-based sessions (Direct Access). Direct Access allows users to connect to a Linux server via an SSH session using their local terminal (for example, Terminal on macOS) instead of the browser-based viewer. By configuring an SSH key, you can establish a trust relationship that bypasses the need for repeated manual authentication for seven days.
Requirements and Considerations
- The user must have a configured Linux server with SSH enabled
- The server must already be registered in JumpCloud Vault and the user must have access to it.
Initiating a Direct Access Session
- Log in to the Vault platform.
- Go to Servers. A list of available servers is displayed.,
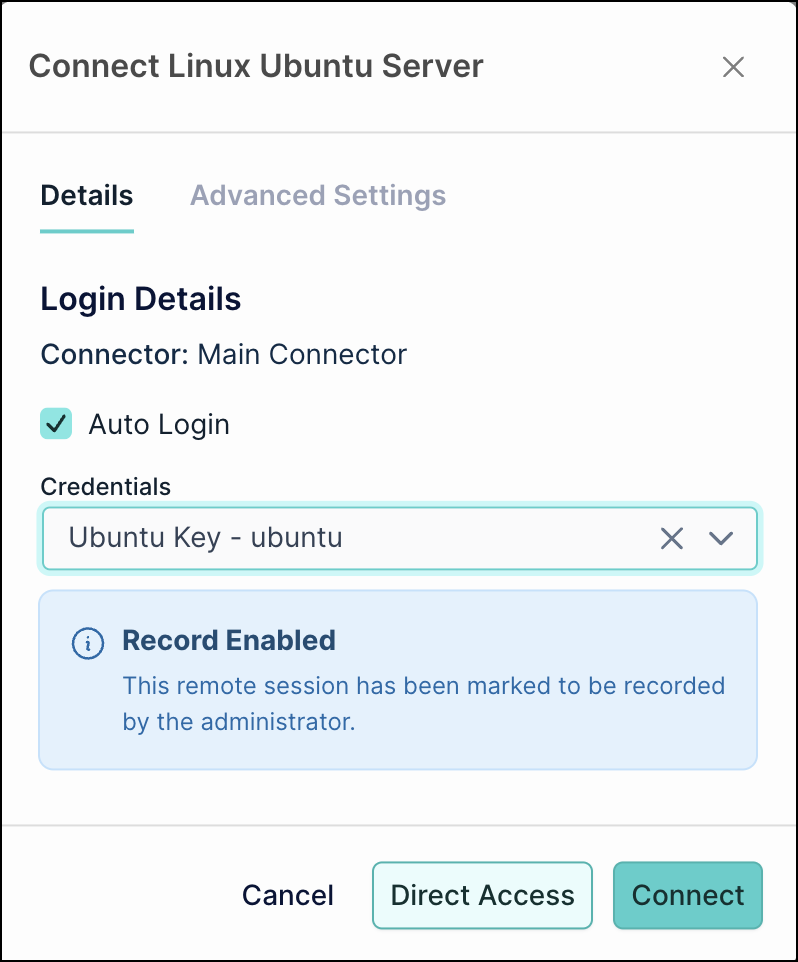
- On this list, search and select the specific Linux server and click Connect. A modal window is displayed.
- In the Connect modal window, click Direct Access. A notification banner will appear in the platform.
- On this notification banner, click Open Terminal. The user's local SSH handler for example, Terminal on macOS, will open automatically.
Device Authorization Flow
On the user's default SSH client, do the following:
- A message is displayed asking the user to open a URL in the web browser to authenticate. For example:
Please open the following link in your browser to authenticate: https://<tenant>.vault.jumpcloud.com/account/device-login?code=XXXX-XXXX Waiting for authentication... - Click the displayed URL. The JumpCloud Vault Authorization page is displayed.
- On this page, click Approve to confirm the displayed authorization code for verification.
- The user should confirm the code matches and click Approve. Once approved, the terminal or the user's default SSH client, will complete the connection and the user will be logged into the server.
![]()
Device authorization is required every time the user connects via Direct Access unless a trusted SSH key has been configured.
Reducing Authentication Prompts with an SSH Key (7-Day Trust)
Register your computer's SSH public key in the JumpCloud Vault platform to establish a trust relationship. After your initial device authorization, subsequent Direct Access sessions will remain authenticated without further prompts for seven days.
To streamline your workflow, the initial Direct Access session following key registration requires a one-time device authorization to establish a secure connection. Once this first approval is complete, a seven-day trust relationship is formed, allowing subsequent sessions to bypass browser prompts and open the terminal fully authenticated. This trusted status remains active for one week, after which a single re-authorization is required to renew the trust and maintain seamless access.
Generating an SSH Key Pair
You must have an SSH key pair on their machine. If you do not have one, you can generate it using the standard ssh-keygen command in the terminal.
Registering the SSH Public Key in JumpCloud Vault
- Log in to the Vault platform.
- Click the user's name in the bottom-left corner.
- Click My Settings. The My Settings window is displayed.
- On the My Settings window, go to SSH Access.
- On the SSH Access tab, paste the contents of the SSH public key in the Public Key field.
- Click Save.