Webhooks are automated messages sent from applications when an event occurs. When a specific event happens—like a new user being created, a password reset, or a suspicious login attempt—JumpCloud can automatically send a notification to an external application or service like JIRA. You can set up webhook notification channels to get alerts delivered to specified URLs.
To create a webhook:
- Log in to your JumpCloud Admin Portal.
If your data is stored outside of the US, check which login URL you should be using depending on your region, see JumpCloud Data Centers to learn more.
- Go to Settings > Notification Channels.
- Click Webhooks.
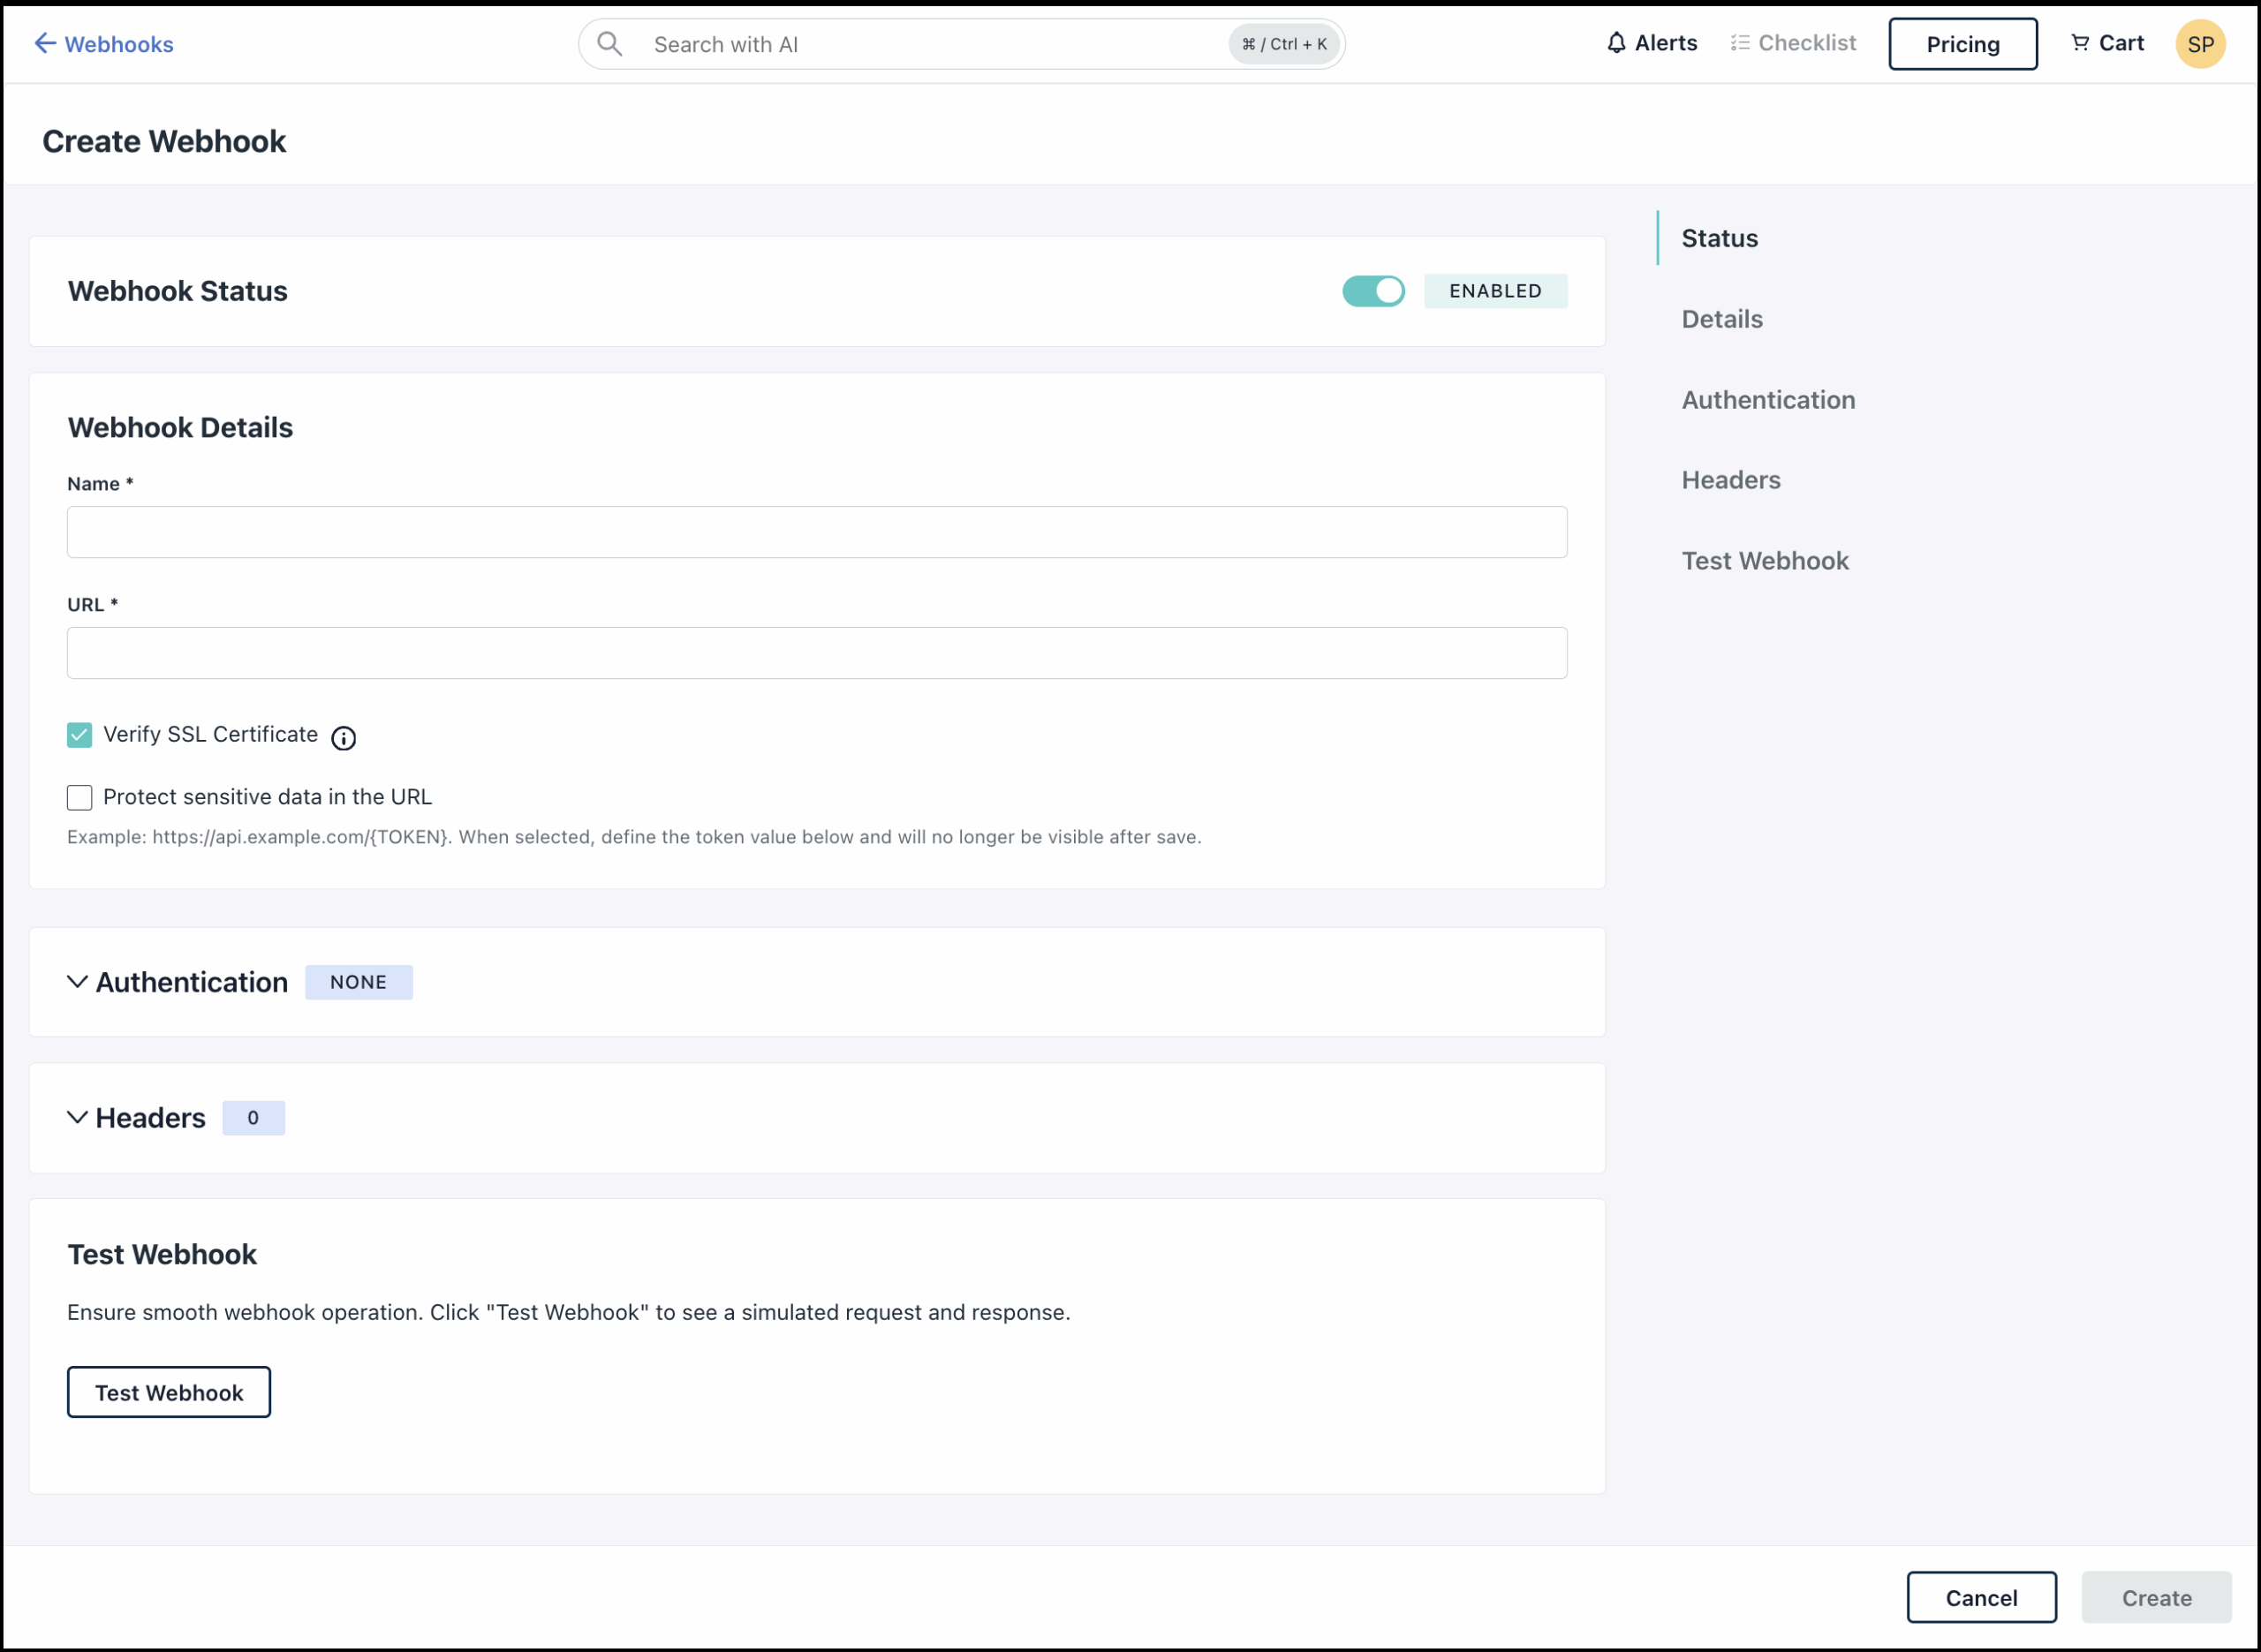
- Click +Add to add a webhook channel. The Create Webhooks page displays the Details tab.
- For Webhook Status, the Enabled button is selected by default. Leave it as is to activate the channel immediately after saving. You can switch the button to Disabled if you prefer to enable the channel later.
- Enter a name for the webhook channel.
Ensure the name is unique, concise, intuitive, and not more than 100 characters.
- In the URL field, copy and paste the URL that you want to send notifications to.
- The Verify SSL Certificate checkbox is selected by default.
- When enabled, self-signed certificates are allowed during webhook delivery.
- When disabled, self-signed certificates are not allowed, and the webhook delivery will fail if one is used.
- If you have specific data in the URL that you want to protect, select the Protect sensitive data in the URL checkbox.
- In the Replacement Value field, enter the text you want to appear in the URL in place of the sensitive information. For instance, you could use a generic term like Token.
- In the Sensitive Value column, enter the sensitive data that you want to be masked in the URL. Click the eye icon to view the sensitive value.
- Click Add to add more sensitive data. You can add up to 10 rows of data.
Once the channel is saved, you will not be able to view or modify the data. You can use the Delete icon to delete saved data and add new data.
- Add Authentication as required. Select None if you don’t want to add any.
- Basic Authentication: Authenticate using a username and password.
- Enter the Username and Password in the respective fields. Use the eye icon to show or hide the password.
- Token Authentication: Authenticate by providing a generated token.
- Copy and paste the token in the Auth Token field.
- Basic Authentication: Authenticate using a username and password.
- Click Add Header to add headers as required.
- Copy and paste the API key and Value in the respective fields.
- You can use the Sensitive Value toggle to hide the value.
- If you choose to hide the value here, this preference will be saved with the channel and you won't be able to change it later.
- You can use the Delete icon to delete the header and create a new one.
- Click Add Header to add more rows. You can add up to 25 headers.
- Click Test Webhook to test the webhook channel configurations. A simulated request and response is displayed in a modal. Click Close.
- Once you’ve verified the configurations, click Save.
The webhook channel is now created and visible on the Webhook page. If you Disabled the webhook channel during configuration, simply click the ellipsis icon next to it and click Enable to activate it.
Webhook Payloads
The following is a list of the payload fields that you receive as part of the webhook notification.
Webhook Payload Fields
| Field Name | Description |
|---|---|
| alert_id | ID of the alert |
| alert_title | Title of the alert |
| category | Category of the alert |
| description | Detailed description of the alert |
| di_event | DI event associated with the alert |
| event_description | Description of the event that triggered the alert |
| in_console_alert | Alert generated in JumpCloud console |
| initiated_by | User who initiated the change |
| occurred_at | Timestamp when the alert occurred |
| organization_name | Name of the organization |
| previous_alert_status | Previous status of the alert |
| priority | Priority of the alert (Critical, High, Medium, Low) |
| rule_id | ID of the rule that triggered the alert |
| source_id | ID of the alert source |
| source_name | Name of the alert source |
| source_type | Type of the alert source |
| source_url | URL of the alert source |
| status | Current status of the alert (Open, Acknowledged, Resolved, Auto-Resolved) |
| update_at | Timestamp of the most recent update |
Using Webhooks Channels
Next, you must create a rule and add the webhook channel within the rule to generate alert notifications. See Configure Rules for JumpCloud Alerts to learn more.
For Access Requests, you do not need to create a separate rule to set up webhooks. Simply create a webhook channel, then navigate to Access > Access Requests to select the specific events for which you wish to receive notifications via webhooks. See Configuring Access Requests Settings to learn more.
If you want to associate the webhook with a rule to receive notifications for specific events, you must create an Insights Rule. See Create an Insights Rule to learn more.

