
When you run a Windows command in JumpCloud, the command runs as a privileged user. You can use our Windows - Run As Signed In User Template command to run as the user on a Windows device to add a printer.
Considerations:
- Make sure that the users that use the printer are bound to the print server in JumpCloud. See Bind Users to Devices.
- When you use this template, you will not get a command output. Instead, you get a PID (process identifier) of the process that ran.
To add a printer:
- Log in to the JumpCloud Admin Portal.
![]()
If your data is stored outside of the US, check which login URL you should be using depending on your region. If your organization uses LDAP, RADIUS, or requires firewall allow list configuration, the Fully Qualified Domain Names (FQDNs) will also be region specific. See JumpCloud Data Centers for the URLs, FQDNs, and IP addresses.
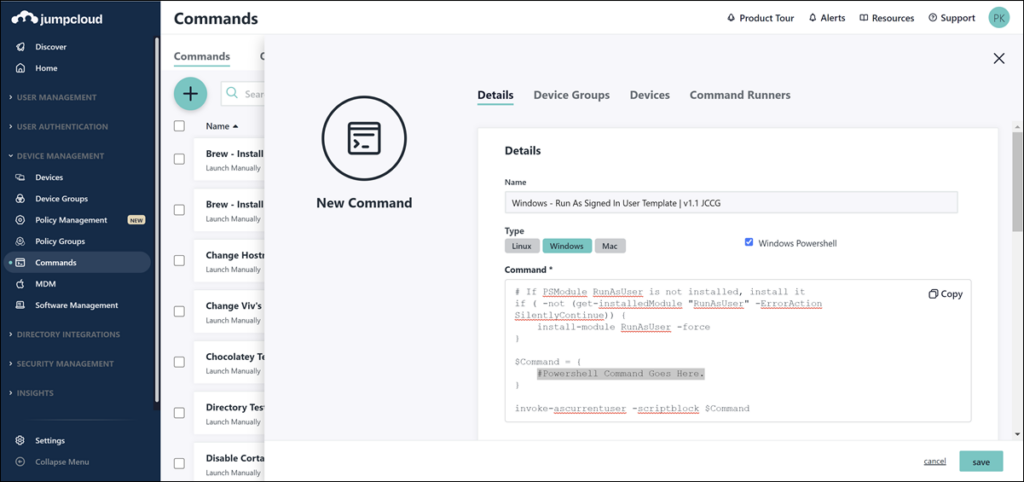
- Go to Device Management > Commands.
- Click ( + ), then choose Command from Template.
- Search for the Windows - Run As Signed In User Template.
- Click configure.
- In the Command section, replace the #Powershell Command Goes Here. text with the following, updated to reflect your printer information:
Add-Printer -ConnectionName \\printServer\printerName
For example, if your print server IP address is 192.168.1.23 and your printer's name is Lexmark, the command would be:
Add-Printer -ConnectionName \\192.168.1.23\Lexmark
- (Optional) Update the Name of the command to something more recognizable to you.
- Click Save.
- Proceed to run the command on the print server to add the printer to the server.