
JumpCloud's RADIUS-as-a-Service offers Certificate-based methods for desktops, laptops, and mobile devices to verify that they are authenticating to the correct RADIUS server (so that no one else can pretend to be JumpCloud's RADIUS server). This will prevent clients from trusting RADIUS servers without the Private Key that matches this Certificate. JumpCloud strongly recommends that you leverage a certificate authentication method for this reason.
This help article explains how to update and deploy the new JumpCloud RADIUS certificate to both Mac computers and Windows devices.
![]()
The certificate is required for EAP-TTLS/PAP authentication methods, and for some PEAP clients as well.
Most clients using PEAP do not need to manually add the RADIUS certificate because it is automatically acquired during the device authentication process.
![]()
The required RADIUS certificate depends on your organization's data center region. See JumpCloud Data Centers Login URLs and Service Endpoints to learn more.
- For US customers, the new certificate will be installed on JumpCloud’s RADIUS servers on June 8, 2026 and is valid until Oct 25, 2026.
- For EU customers, the new certificate will be installed on July 6, 2026 and is valid until Dec 20, 2026.
- To avoid a service disruption, update your certificate before the installation date for your region.
Considerations:
- If you have the current JumpCloud RADIUS certificate installed, you only need to update where it was manually installed.
- You can install the new certificate side-by-side with the current (expired) certificate. The system will select the correct certificate.
- To avoid service disruptions, do not remove the current (expired) certificate until it is replaced.
- The EAP-PEAP protocol is not affected by the RADIUS certificate expiration. However, users may be prompted to grant trust to the new certificate when they connect to JumpCloud managed EAP-PEAP RADIUS servers.
- If this is your first time configuring a client system for EAP-TTLS/PAP, please instead refer to the following documents for guidance on initial setup:
Understanding Regional Differences
Use the table to identify the correct endpoint and certificate for your org's region.
| Region | Endpoint URL | Certificate Duration |
|---|---|---|
| US / Global | radius.jumpcloud.com | June 8, 2026 - October 25, 2026 |
| EU | radius.eu.jumpcloud.com | July 6, 2026 - December 20, 2026 |
Mac Setup
![]()
Make sure you have a current RADIUS certificate installed. For more information, see Configure EAP-TTLS/PAP on Mac & iOS for RADIUS.
To update the JumpCloud RADIUS certificate in macOS:
- Download the appropriate
.mobileconfigfile for your region and open it in a text editor. See the Attached Files section on the right side of the article.
![]()
- The
.mobileconfigfile contains the updated certificate. - This
.mobileconfigfile is not compatible with iOS/iPadOS. Users on these devices should reconnect to the RADIUS network SSID manually, which will cause a prompt for the user to download and trust the new RADIUS certificate.
- Add the Service Set Identifier (SSID) in between the <string> and </string> text on Line 43.
- Log in to the JumpCloud Admin Portal.
![]()
If your data is stored outside of the US, check which login URL you should be using depending on your region. If your organization uses LDAP, RADIUS, or requires firewall allow list configuration, the Fully Qualified Domain Names (FQDNs) will also be region specific. See JumpCloud Data Centers for the URLs, FQDNs, and IP addresses.
- Go to Device Management > Policy Management
- In the All tab, click the plus icon.
- On the New Policy panel, select the Mac tab.
- Select MDM Custom Configuration Profile policy from the list, then click configure.
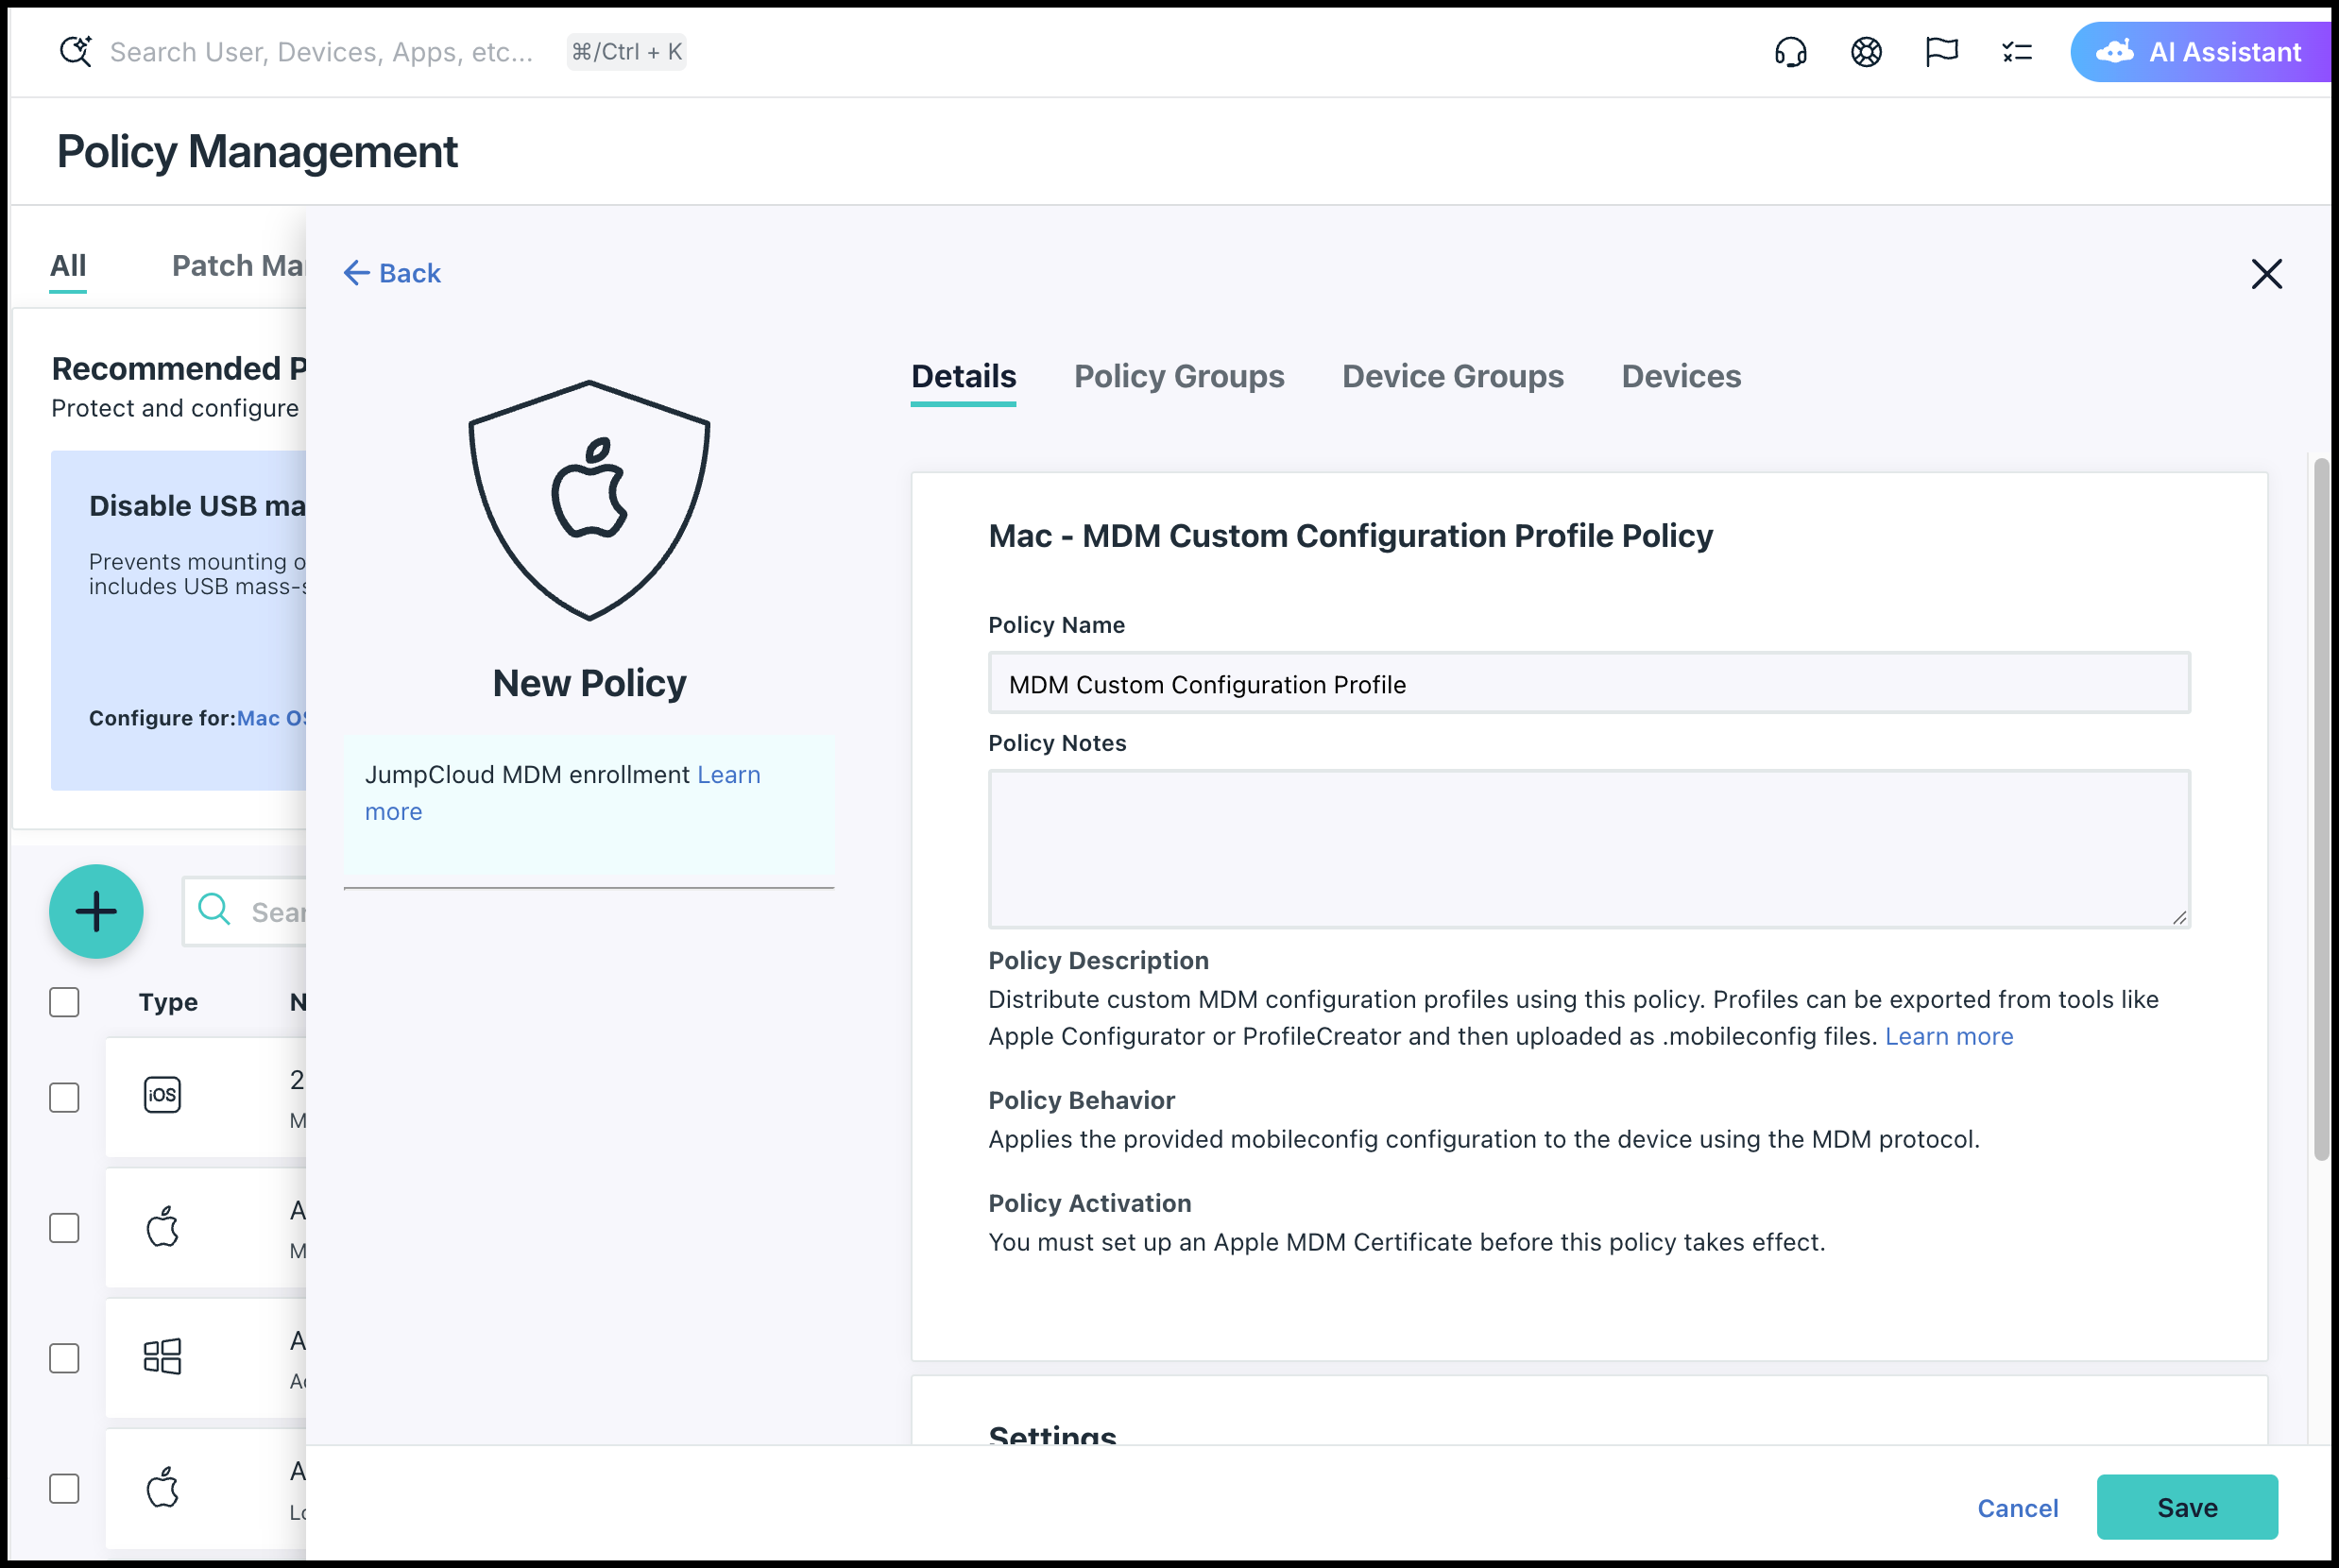
- (Optional) In the Policy Name field, enter a new name for the policy or keep the default. Policy names must be unique.
- In the Settings field, click upload file to upload the modified
.mobileconfigfile. - (Optional) Select the Device Groups tab. Select one or more device groups where you want to apply this policy. For device groups with multiple OS member types, the policy is applied only to the supported OS.
- (Optional) Select the Devices tab. Select one or more devices where you want to apply this policy.
- Click Save. If prompted, click Save again.
![]()
- The profile can be uploaded to the MDM of your choice, JumpCloud or otherwise.
- For organizations without an MDM, the profile can be manually installed. Refer to this Apple support article about using configuration profiles for additional details.
Windows Setup
![]()
Make sure you have a current RADIUS certificate installed. For more information, see EAP-TTLS/PAP Initial Configuration on Windows for JumpCloud RADIUS clients.
To update the JumpCloud RADIUS certificate in Windows 10:
- Log in to the JumpCloud Admin Portal.
- Go to Device Management > Commands.
- In the Commands tab, click the plus icon to create a new command.
- In the Details tab, enter a name in the Name field.
- In the Name field, enter a name for your command.
- In the Type field, select Windows, then select the Windows Powershell checkbox.
- In the Command* field, copy and paste the contents of the appropriate attached
.ps1script for your region. See the Attached Files section on the right side of the article.
![]()
The new certificate will be downloaded as part of the Powershell process.
- In the Event field, select an event type. The standard default is Run Manually.
![]()
- If using Run Manually, you can click Run Now to immediately execute the command on the device(s), or wait to execute the command.
- The results of the command execution can be viewed in the Commands > Results tab.
- (Optional) Select the Device Groups tab. Select one or more device groups where you want to apply this policy. For device groups with multiple OS member types, the policy is applied only to the supported OS.
- (Optional) Select the Devices tab. Select one or more devices where you want to apply this policy.
- Click Save. If prompted, click Save again.
Alternatively, you can download and import the new certificate manually from the command line, as shown in the following example:
Import-Certificate -FilePath
"C:\Windows\Temp\radius.jumpcloud.com-2026.crt"
-CertStoreLocation Cert:\LocalMachine\Root
Wireless Network Configuration
To configure your wireless network:
- Right-click the wireless network that was previously configured using EAP-TTLS/PAP configuration on Windows for JumpCloud RADIUS clients, then select Properties.
- Click the Security tab.
- Next to the authentication method, click Settings.
- From the Trusted Root Certification Authorities, ensure that both the existing certificate and the newly imported certificate (for example
radius.jumpcloud.comorradius.eu.jumpcloud.com) are selected. - Click OK.
Reference Files
As a reference, the Mac and Windows commands, as well as the new certificate and its signature can be obtained here:
- US
- EU