
Managed Service Provider (MSP) Admins can get interactive support directly from their Multi-Tenant Portal (MTP) in a variety of ways. Learn more about how JumpCloud supports you and your users below.
Prerequisites:
- Prior to contacting JumpCloud Support, customers and partners are encouraged to review our Help Center articles.
Considerations:
- If you don’t find a solution in our Help Center, support requests can only be submitted by active Admins associated with your account. Further authentication of your identity may be required for security reasons.
- All customers, regardless of support tier, will be able to use self-service features, and see the status of the platform with the help of Live Chat. Premium customers have access to both self-service and live chat help from one of our experts.
- See Best Practices for Submitting Support Tickets for tips on what you can include in your support ticket that can help us, help you, faster. If there is an extraordinary circumstance and you can’t access your MTP to submit a support ticket, refer to the JumpCloud Employee/Customer Communication and Extraordinary Access Policy.
Support Includes:
- Product defect and issue triaging, analysis and resolution.
- Product integration assistance with resources through JumpCloud-supported protocols.
Support Request Guidelines
In order to gain a mutual understanding on the relative impact of a technical issue for an organization, the purpose of this section is to define severity levels, target response times, and an escalation path. JumpCloud support is available to eligible organizations as defined by JumpCloud Support Policies.
Support Tiers and Eligibility
- Premium Support – Customers and partners can opt for 24 x 7 x 365 priority support access via phone, email, and chat through JumpCloud’s Premium Support offering. This support level is ideal for all customers and especially those interested in efficiency, security, and maximizing their IAM investments.
- Standard Support – Our customers and partners who are currently engaged in month-to-month or annual contract billing plans with JumpCloud receive the benefit of JumpCloud’s support assistance.
- Free Account Customers – Help Center access is available to free account customers. If free account customers are interested in purchasing JumpCloud, they can enter a sales cycle through our sales team, or sign-up for our JumpStart program to become eligible for support.
| Free | Standard | Premium | |
|---|---|---|---|
| Pricing | N/A | Included |
Contact Sales to enroll |
| Priority Access | N/A | Standard | Priority Access |
| Support Method and Time | Online | 9am-5pm MT Weekdays | 24 x 7 x 365 |
| Knowledge Base | x | x | x |
| Email Support | x | x | |
| Live Chat | x | ||
| Phone | x | ||
| Eligible for Early Access functionality | x | ||
| Response Time SLA | |||
|
Sererity 1 Entire loss of functionality; severe operational impact. Majority of users impacted. |
4 hours | 1 hour | |
|
Severity 2 Major loss of functionality; operations / user impact high. |
8 hours | 2 hours | |
|
Severity 3 Partial; non-critical issue; operations not severely impacted; user impact is low. |
Next business day | 4 hours |
Help Center
Prior to contacting JumpCloud Support, customers and partners are encouraged to review our Help Center articles.
To get to our Help Center from the MTP:
- In the top right corner, click Support > Go to Help Center.
- You can either search our Help Center or click on the tiles to bring you to a specific category to explore what articles might be helpful.
Using Self-Service Live Chat
![]()
- New JumpCloud Free Accounts will have access to Premium Support Live Chat for 10 days.
- Chat can be accessed from the bottom left corner on the Homepage.
To use the Chat:
- From your MTP, click the support icon on the top right.
- Click Live Chat With Us. A chat box will appear to the right with links to the following resources:
- Any recent messages will be displayed at the top, or you can click Messages at the bottom to navigate to any active or past threads.
- You can click Send us a message which will take you to a chat interface. If you have Live Chat enabled, you can click Live Chat with a Support Engineer or Help me troubleshoot an issue.
You can also simply type your question and send it. If you don’t have Live Chat enabled, click Upgrade to Premium Support to get access. - Click the ‘X’ in the top right corner to exit out of the chat.
Creating a Support Ticket
To create a Support ticket:
- Log in to your MTP.
- Click the support icon on the top right.
- Go to Case Portal > View Case Portal.
- This will launch JumpCloud’s Customer Portal in a new tab.
You'll see a list of all your org's cases on the main page. You can switch to a different org from the Accounts tab.
![]()
The newest cases will always be at the top.
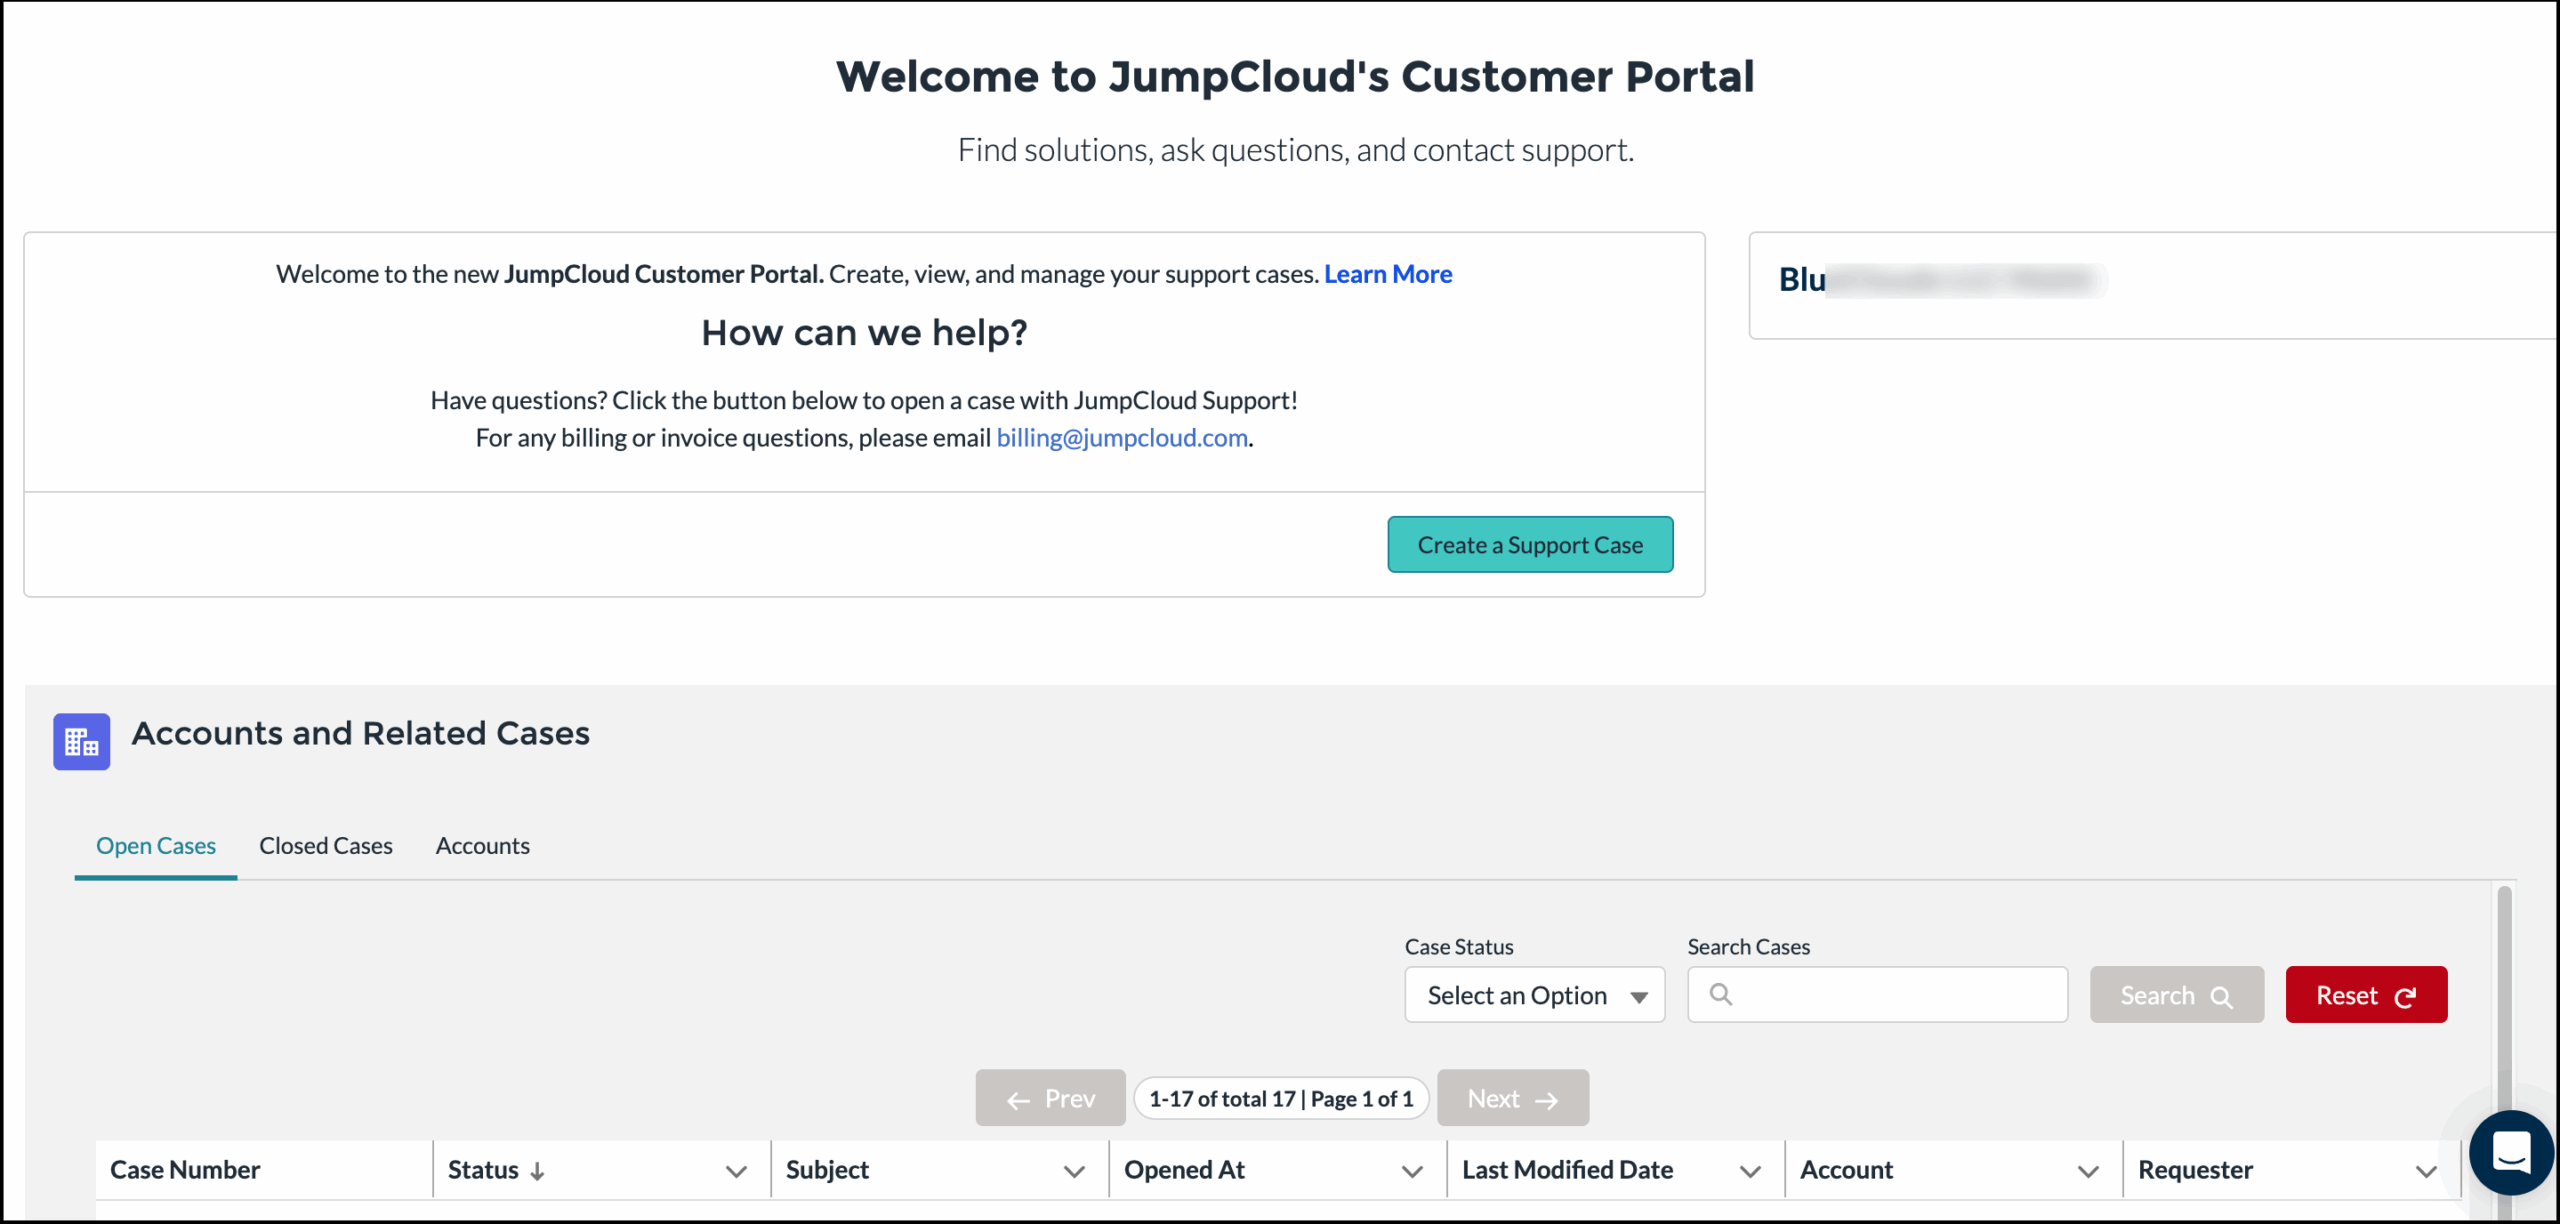
- On the main page, click Create a Support Case.
- Fill in the following fields:
- Accounts: Select the org associated with the issue.
- Severity: Choose the level that matches the operational impact.
- My Working Hours Time Zone: Select your time zone.
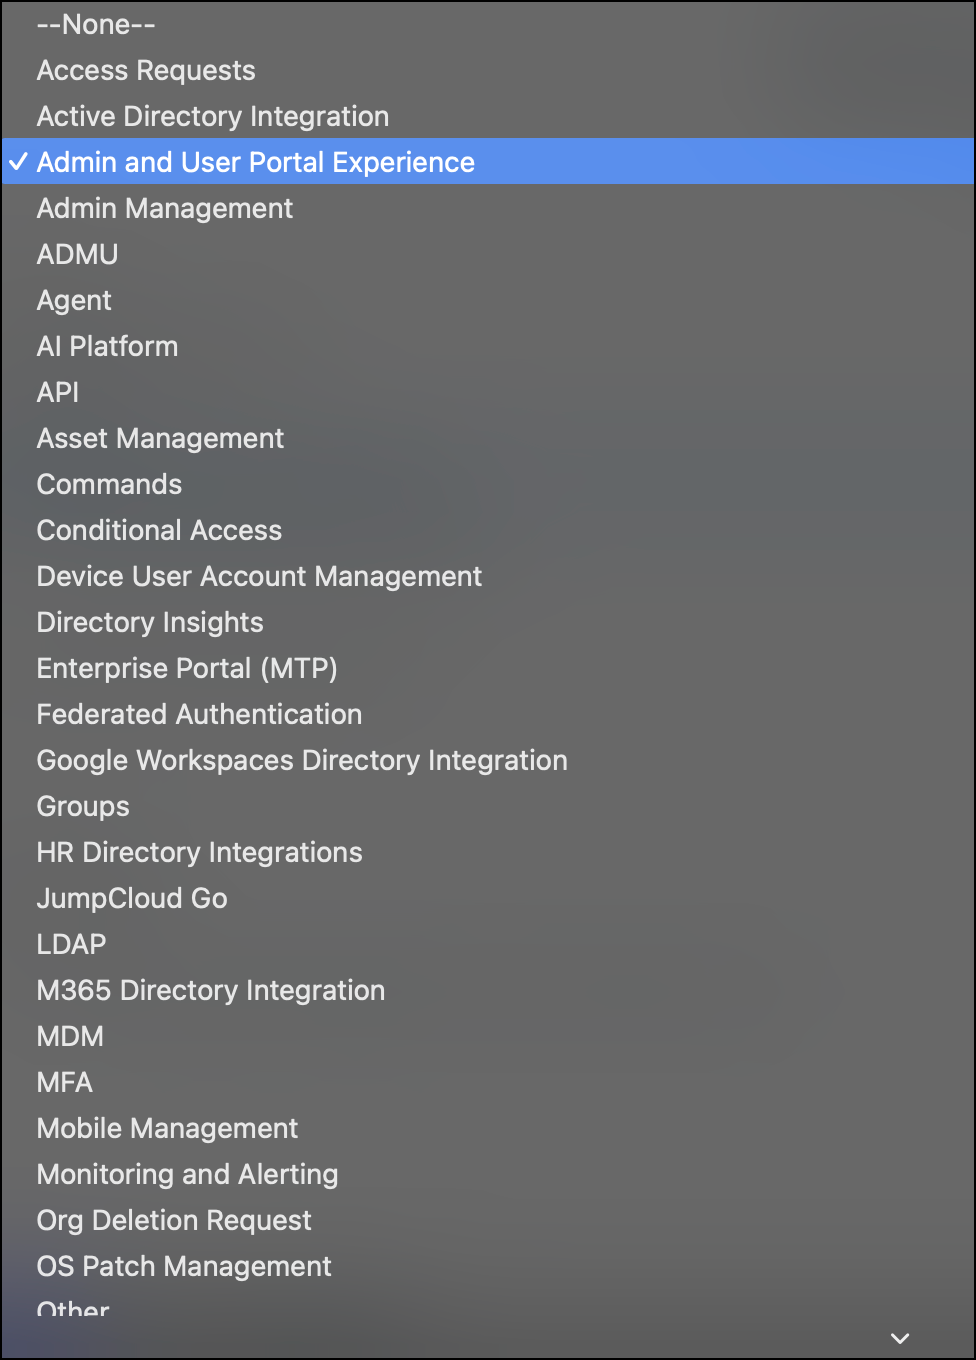
- Product: Select the impacted product area and operating system.
- AI Assist: Check the box to activate AI support for this case.
AI Assist provides an instant response within minutes by analyzing thousands of proven solutions, reducing your manual troubleshooting time. A human agent is always ready to take over if the issue requires further escalation. - OS: Select the operating system. Go to the impacted device's Highlights page and scroll down to Device Overview.
- Subject: Enter a brief, descriptive title for the issue.
- Description: Provide a thorough explanation of the problem and the outcome you need.
- Steps to Reproduce the Issue: List the primary steps needed to trigger the error.
- System ID of Impacted Device: Enter the unique ID found in the Device Overview section of your Admin Portal.
![]()
Some orgs have settings that change Device ID to JumpCloud System ID. They both refer to the same thing. To find the System ID on the device locally, open the configuration file found in the JumpCloud installation folder, and locate "systemKey":
- macOS/Linux:
/opt/jc/jcagent.conf - Windows:
C:\Program Files\JumpCloud\Plugins\Contri\jcagent.config
- Click Next.
- A file upload section is displayed. Optionally, attach your files to the ticket. Accepted file types are: .log, .txt, .png, and .jpg.
- Click Finish. The new case appears in the Open Cases table after a few moments. You will receive a confirmation email for your submitted ticket.
What to Expect After Submitting a Ticket
- After you submit a support ticket, you’ll receive a confirmation email of your submitted ticket. You can reply to this email to add additional information regarding your ticket.
- Easily view and track submitted ideas and support cases in the Customer Portal. Jump to Managing support cases in the Customer Portal.
- See JumpCloud Support Request Guidelines to learn about our response times and issue escalation policies.
To share your ideas on new features or enhancements from the Admin Portal, use the Feature Requests Portal. Jump to Submitting an Idea using the Feature Requests Portal.
Managing support cases in the Customer Portal
JumpCloud’s Customer Portal is a centralized platform to view and track all support cases.
![]()
As an MTP Admin, you can access, view, and create support cases for all tenant orgs managed by your MTP account.
Viewing Your Cases
To view and track all support cases within the Customer Portal:
- The customer portal’s main page shows a list of all cases for the selected tenant org.
- You can see both Open Cases and Closed Cases tabs. The cases are listed in the following sortable columns:
- Case Number
- Status
- Subject
- Opened At
- Last Modified Date
- Account
- Requester
You can click the caret (⋀) next to a column's name to sort it in ascending or descending order.
- You can see both Open Cases and Closed Cases tabs. The cases are listed in the following sortable columns:
- You can use the search field to look up a case number, or keywords associated with a case subject, account, or reporter.
- To filter by Case Status, select one of the options from the dropdown:

- New: The case hasn't been reviewed by an Admin.
- Waiting on Support: A JumpCloud support engineer is actively working on resolving the issue with the reporter via email.
- Waiting on Customer: The ticket requires further information from the customer.
- On Hold: The case is temporarily on hold.
- To view case details, click the case number.

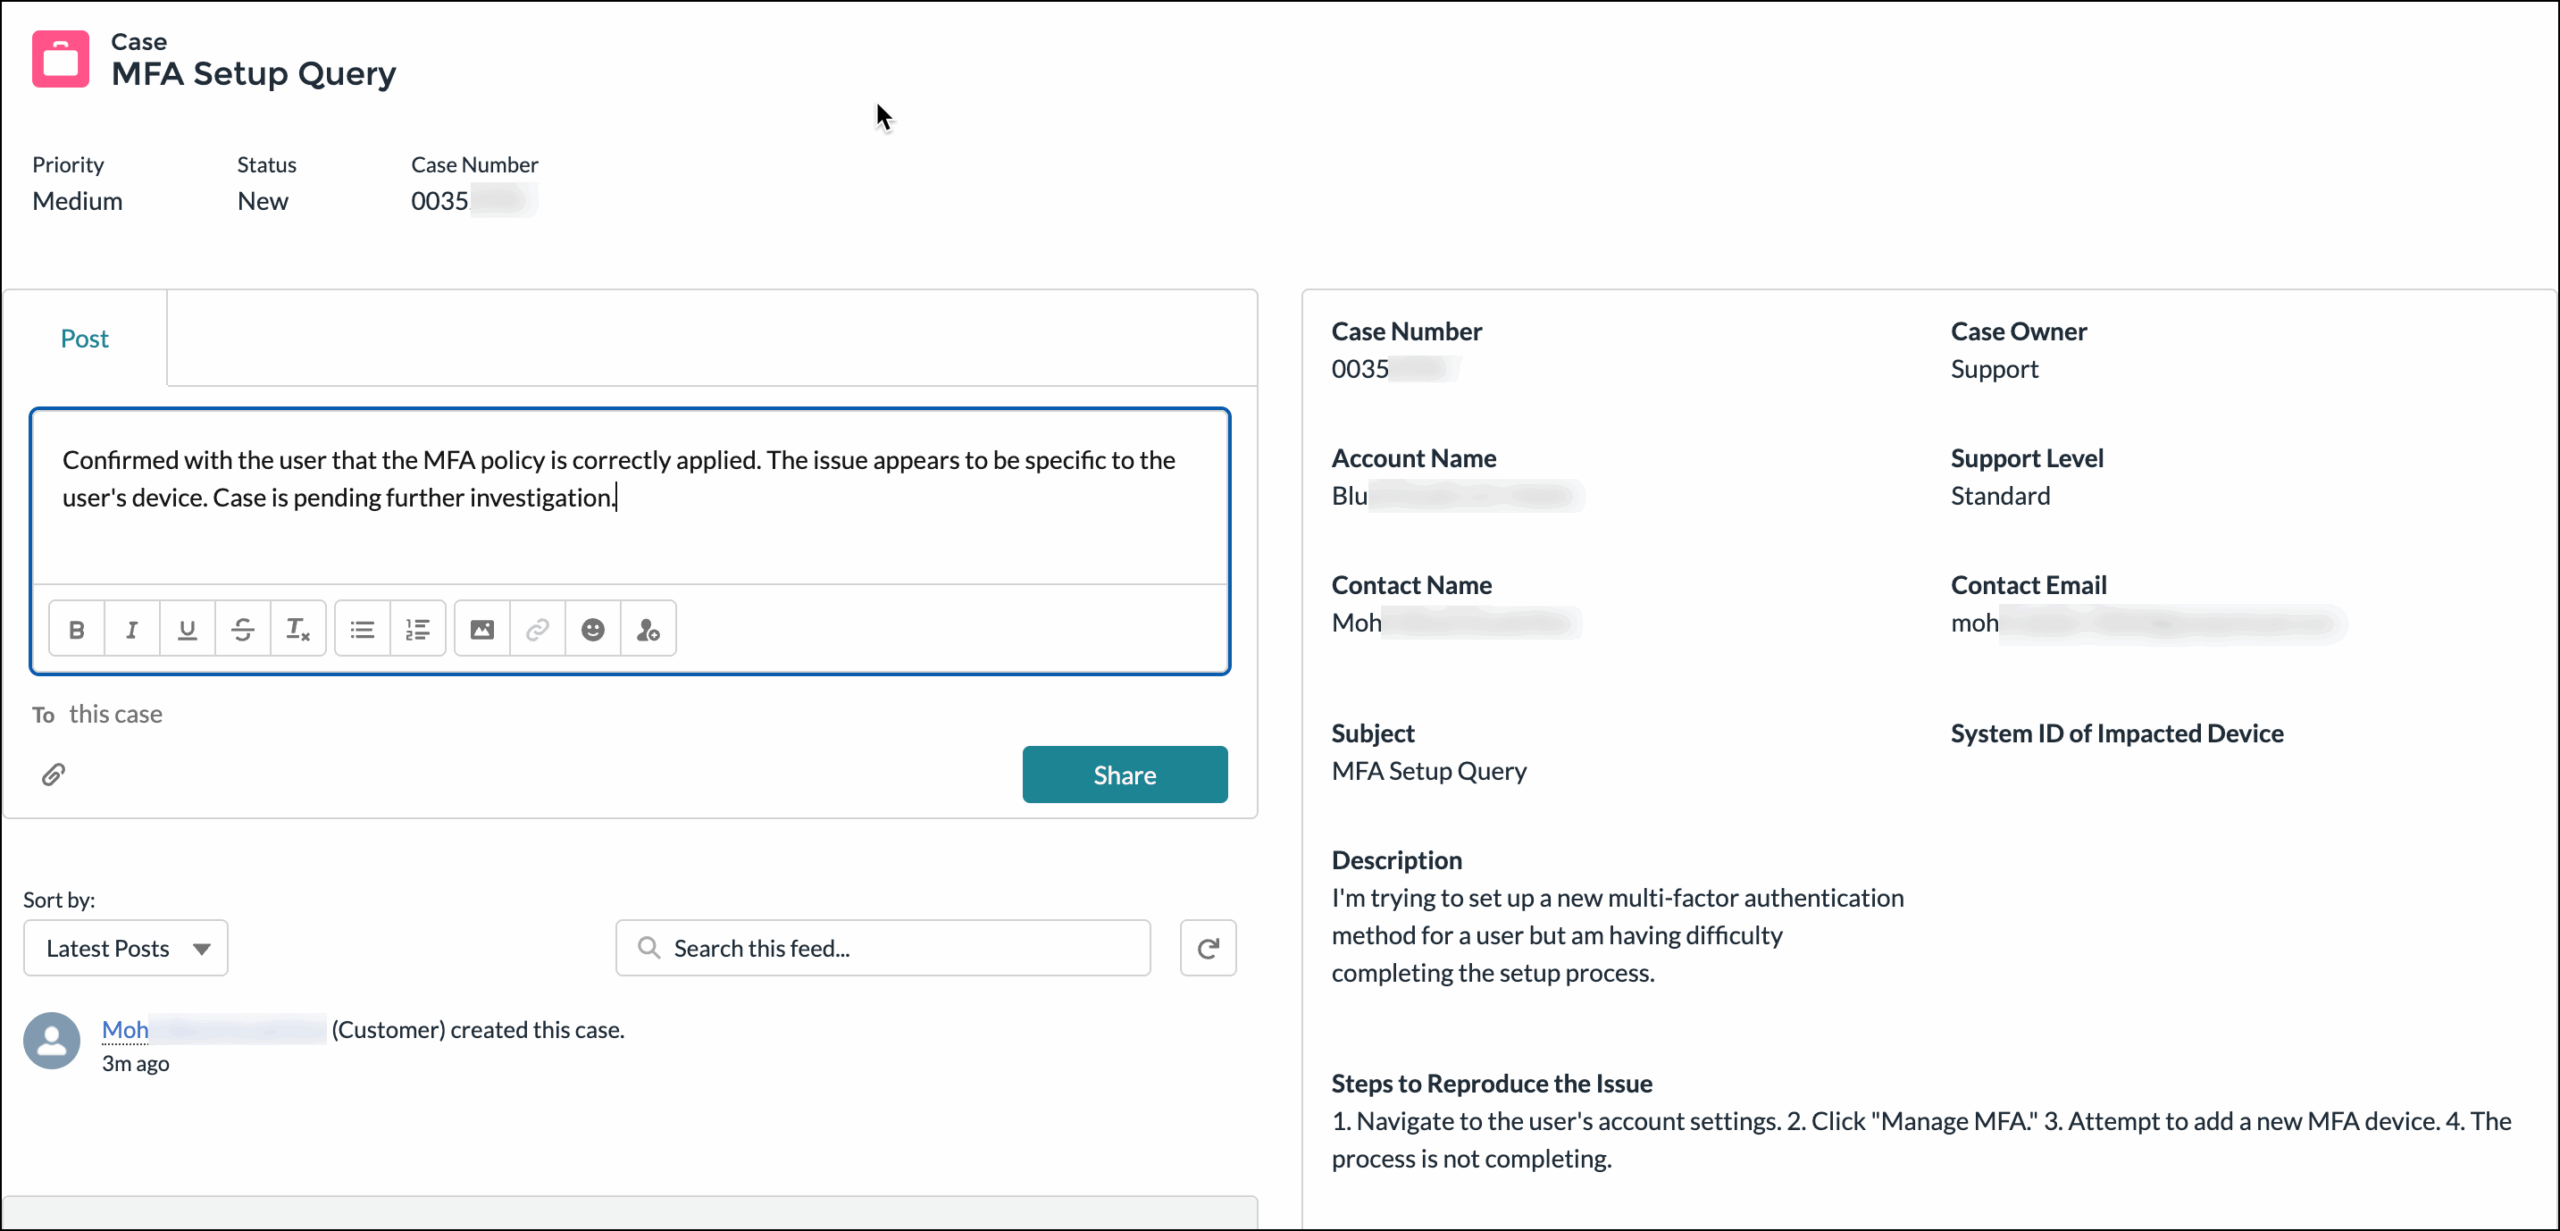
Updating and Editing a Case
You can post updates for a case as you progress with the communication and resolution steps, and update certain fields for a ticket.
To share updates for a case:
- From the customer support portal’s main page, click the required case. The case details will appear in a new tab.
- Click the Share an update… field, and enter the details.

- Click the ‘attachment’ icon to upload supporting files for the case.
- Click Share.
To edit details for a case:
- From the customer portal's main page, click the required case. The case details will appear in a new tab.
- Scroll down and click Edit in the right hand corner.
- You can update the OS, Steps to Reproduce the Issue, and System ID of Impacted Device.
- Click Save.
Submitting an Idea using the Feature Requests Portal
To submit an idea:
- From your MTP, click the support icon on the top right.
- Click Submit An Idea. This opens JumpCloud’s Feature Request Portal in a new tab.

You'll see a list of all your org's cases on the main page. You can switch to a different org from the Accounts tab. - Click Submit Request to open the support form.
- Provide as much detail as possible to help our team understand your request.
- Account: Select the relevant organization for this request.
- Category: Select the category that most closely relates to your idea.

- Provide a short description of your suggestion: Enter a brief, descriptive summary of your idea.
- What problem are you trying to solve?: Describe the current challenge you are experiencing and how it impacts your work.
- Priority level: Select the business impact of this feature.

- Click Next to continue. You will see a confirmation message with the Request Number.
- Click Finish.


When you request a feature, it goes directly to our Product Management team for review. While we cannot respond to every submission, we look at all requested features to help define our future product roadmap.
A member of our team might contact you via email if they have initial questions. If you need an immediate response or help with a technical issue, please contact JumpCloud Support. Jump to Creating a Support Ticket.