
Connect


Contents
If you’re running your organization’s technical infrastructure, you’ll likely need to make adjustments at some point in response to growing demands.
In the traditional on-premise computing model, this was a tedious and time-consuming task with additional overhead costs. Thankfully, with cloud technology, scaling your resources has never been easier. You can easily add or remove resources on your cloud infrastructure with just a few clicks.
On AWS for example, you can easily adjust the size of your EBS volumes as you deem fit. In this guide, you will learn how to extend an EBS volume without the need for an EC2 instance reboot.
Step 1: Verify the Block Volume Size
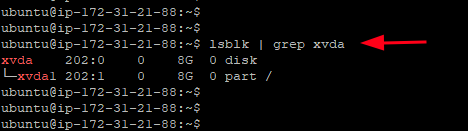
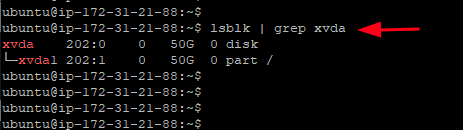
The first step is to check the size of your EC2 instance’s current block volume.
$ lsblk | grep xvda
A block size of 8G is included in AWS Free Tier if you followed the default options when creating your EC2 instance.
Step 2: Modify the Block Volume Size
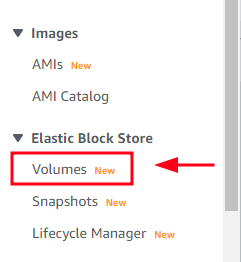
Let’s say you want to scale up your block size to 50G. To achieve this, head over to the “Elastic Block Store” section on the left sidebar and click on Volumes.
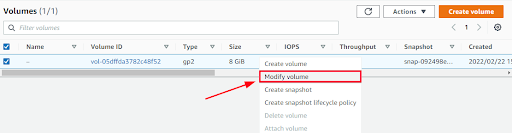
This populates the EBS block volume associated with your EC2 instance. To modify the block size, right-click and select the “Modify Volume” size.
A pop-up window appears displaying information about the volume ID, volume type, and size. To increase the size of the EBS volume, specify a block size of 50GB and then click the Modify button.
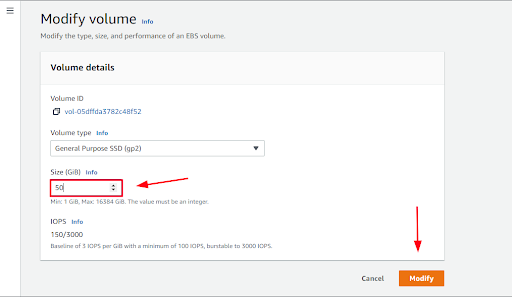
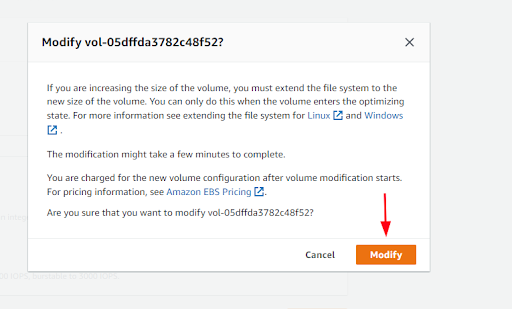
On the next pop-up, click on Modify and confirm your changes when prompted. This takes a few minutes to complete. You’ll receive a notification that indicates whether the change was successful.
Note that additional charges may apply for the new volume size modification. Check out the Amazon EBS pricing list for a comprehensive breakdown of the charges.
Step 3: Extend Filesystem to Match the New Block Size
At this point, the block size has been scaled up to 50GB. However, to use the additional space, you need to extend the filesystem to correspond to the new block size.
To do so, use the growpart command to extend the partition to fill the available space as follows:
$ sudo growpart /dev/xvda 1

Next, run the resize2fs command to resize the filesystem.
$ sudo resize2fs /dev/xvda 1
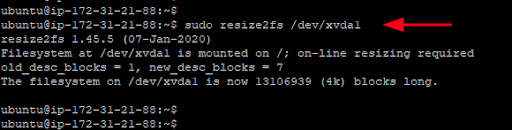
At this point, you can now use the additional space of the new block size without a problem. To confirm the new block size, run the command:
$ lsblk | grep xvda
Conclusion
You can now extend EBS volume on an Amazon EC2 instance without a reboot. As you can see, getting more storage space on your EC2 instance is a simple and straightforward process.
An administrative process that is less straightforward, however, is securing access to your Infrastructure-as-a-Service (IaaS) resources and ensuring only the right people have access to the right resources at the right time.
Enter JumpCloud. Instead of managing your IaaS deployment as a separate network — and dealing with the costs, security risks, and additional complexity that come along for the ride — you can unify the identity and access management (IAM) needs of your IT environment into a single cloud-based directory platform.
Learn more about how to streamline the way you manage and provision access to your organization’s servers.