
Connect


Contents
If you’re planning to sell or give away your Mac, you should absolutely prepare for a new owner by erasing the hard drive. In this tutorial, we’ll cover how to erase a Mac hard drive in macOS Monterey for both Apple silicon and Intel-based devices.
Note: Since erasing your Mac will completely destroy all the files on the drive, you must make a backup of any files you wish to keep before following the steps below.
Erasing Your Mac Hard Drive
There are two different methods for erasing your hard drive in macOS Monterey. The appropriate method for you depends on the type of processor:
- If you’re using a Mac with either Apple silicon or an Intel-based Mac with the Apple T2 Security Chip, use Method 1.
- If you’re using an Intel-based Mac, use Method 2.
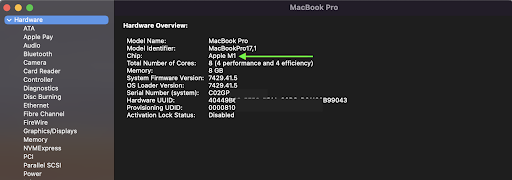
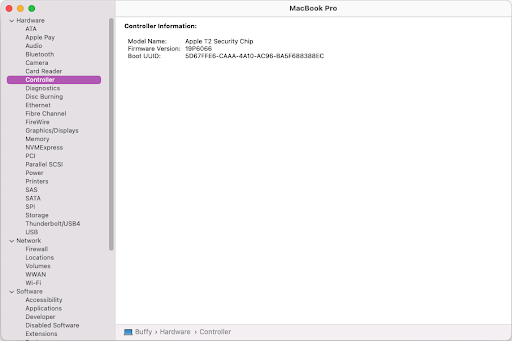
To check the kind of chip in your Mac, hold the option key while you navigate to Apple menu > About This Mac. Click on the Hardware heading in the sidebar. In the right window you will see the type of chip (Figure 1). If your device has an Intel processor, you will need to click Controller in the sidebar to see if it has a T2 security chip installed. If you do, it will appear in the right side window (Figure 2).
Method 1: When Using macOS Monterey on a Mac with Apple Silicon or Apple T2 Security Chip
In macOS Monterey, there’s a feature called Erase All Content and Settings. This feature empowers you to erase your settings, data, and apps in a quick and secure way.
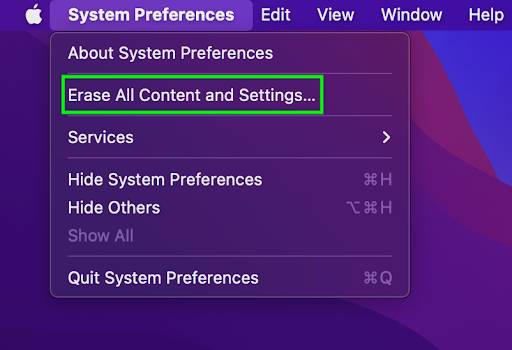
- To access the feature, go to Apple menu > System Preferences. Then, from the menu bar item, select Erase All Content and Settings as shown in Figure 2. Note: If you can’t see this feature, then use Method 2 to erase your Mac.
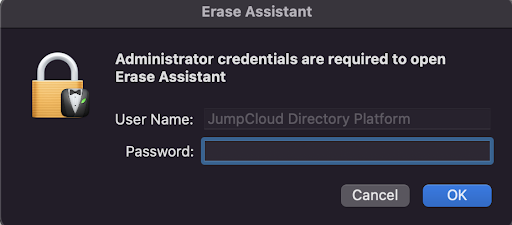
- The Erase Assistant opens; you will be asked to approve with an admin username and password. Enter the information and click OK. (Figure 3).
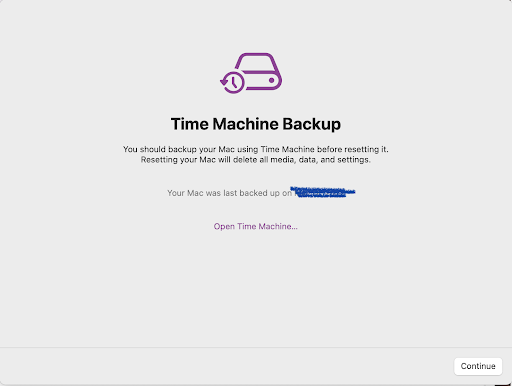
- You may see a reminder to back up your Mac; in this case, the page that appears is titled Time Machine Backup (Figure 5). To preserve your data, click on Open Time Machine… to back up to an external storage device.
If you don’t need a backup, you may simply click Continue. As stated earlier in this article, it is critical to backup important files you’d like to keep before starting the process of erasing your Mac in the first place.
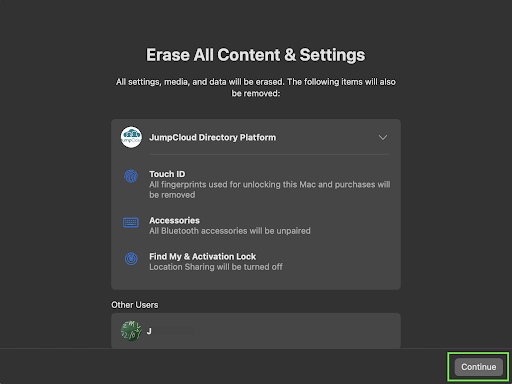
- The next page shows you all the additional items that will be removed aside from settings, media, and data (Figure 6). If you have multiple users on your Mac, this screen will also list all the users. At this point, if you are okay with having everything removed and erased, click Continue.
- If you’re asked to sign out from Apple ID, provide your Apple ID password and click Continue.
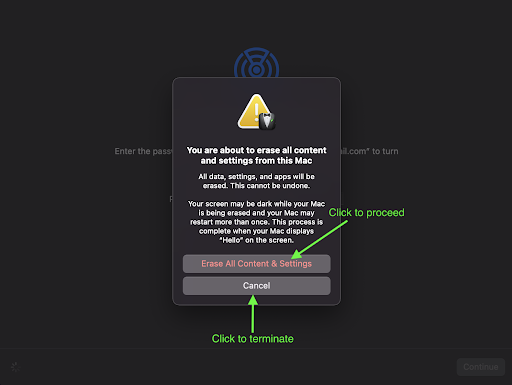
- Next, you will get a warning that “You are about to erase all content and settings from this Mac” (Figure 7). If you’re not ready to erase your Mac, this is your last opportunity to stop the process by clicking Cancel. However, if you are truly ready to erase your Mac, click Erase All Content & Settings to proceed.
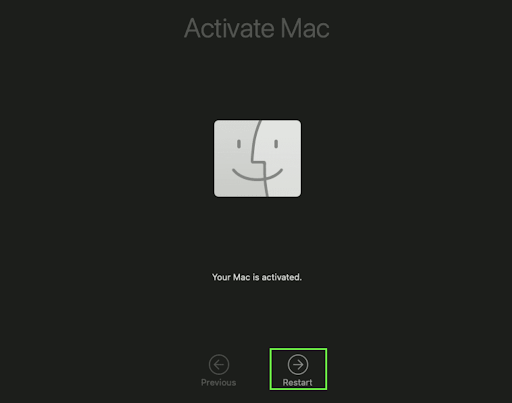
- Your Mac will restart and display a black screen or progress bar. Note that you may be asked to attach a network cable or select a Wi-Fi network. To select a Wi-Fi network, hover to the upper-right hand corner of the screen and use the Wi-Fi menu. Once you have joined a network, your Mac activates. Finally, click Restart (Figure 8).
- Once erased, a setup assistant will guide you through the setup process as if you are setting up your Mac for the very first time.
Method 2: When Using macOS Monterey on an Intel-Based Mac
If you’re using macOS Monterey on an Intel-based Mac, Method 1 will not work for you. Instead, you need to use Disk Utility to erase your Mac. The steps to take are as follows:
- Make sure to back up any important files you’d like to keep on an external drive.
- Start up from macOS recovery: Turn on or restart your Mac and hold down the Command (⌘) and the R keys until the Apple logo appears.
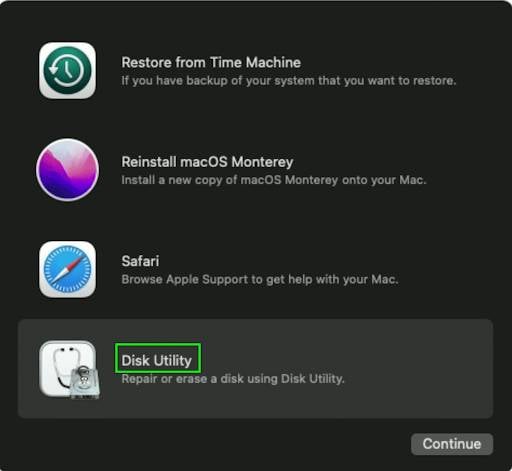
- From the Recovery window, select Disk Utility and click Continue (Figure 9).
- In the sidebar, select Macintosh HD.
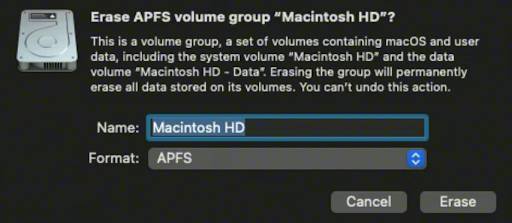
- Click the Erase button in the toolbar. Then, provide the requested details. In the name field, you can use the default “Macintosh HD” or any name you choose for the hard drive. For the format, choose APFS. Finally, click Erase. (Figure 10).
- Once finished, quit Disk Utility and return to the Utilities window. Now you can choose to shut down the computer with the drive empty. Or, you can choose to reinstall macOS by selecting Reinstall macOS in the Utilities window, clicking Continue, and following the onscreen instructions.
Wrap Up
In this article, you learned two methods to erase your Mac’s hard drive in macOS Monterey. The appropriate method to choose depends on whether you are using an Apple silicon-based Mac (follow Method 1) or an Intel-based Mac (follow Method 2).
If you’d like to learn how to do even more on macOS, check out one of our other tutorials: