
Connect


Looking to change your macOS admin name?
Whether you want to give the device to a new user or add a nickname that makes you smile, the good news is that changing the admin name of your macOS is definitely possible.
The bad news is that making the change incorrectly can cause damage to your account or prevent you from logging in. Don’t worry though, we have you covered!
In this tutorial, we’ll detail the best way to change the admin name on your Mac.
Changing Your macOS Admin Name
To rename your macOS admin name, there are a few things to keep in mind. First of all, it is mandatory to log out of the admin account you want to rename and log in to another admin account. This means that if you do not have another admin account aside from the account you want to rename, you need to create one. Second, to reduce confusion, your admin account’s short name and the admin’s home folder name should match.
The process of changing your admin name can be divided into three general steps:
- Create a second admin user. Note that you can skip this step if you already have more than one admin user on your MacBook. But if you have only one admin user, you must create another one to move forward.
- Rename the original home folder.
- Rename your original admin account.
1. Create a new macOS admin user
First, access “Users & Groups” on your Mac by navigating through Apple menu > System Preferences > Users & Groups. Note that this will be different in Ventura. System Preferences will be called System Settings in the next OS release.
Afterwards, take the following steps:
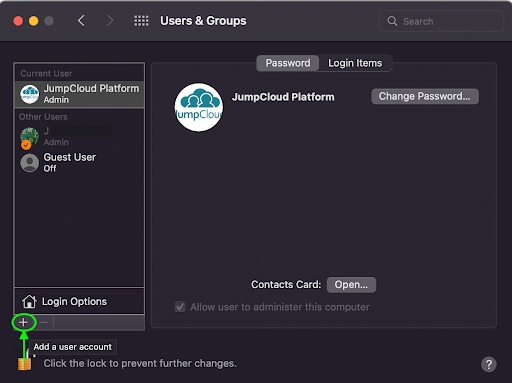
- Click the lock icon at the bottom left corner of the preference pane window and enter your password to unlock the pane.
- Then, click the Add button (+), which can also be found at the bottom left corner of the pane (Figure 1).
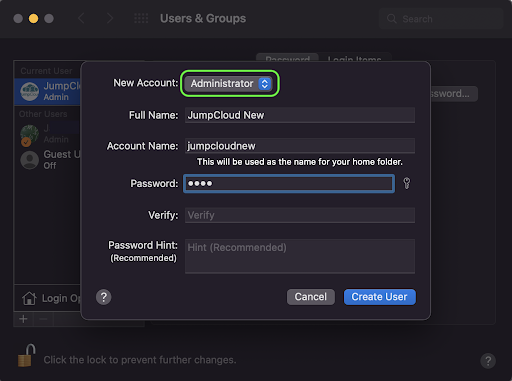
- A New User sheet will open as shown in Figure 2. Choose your preferred account type from the options: Administrator, Standard, or Sharing Only. For this case, you need to choose Administrator.
- Enter your full name. Note that an account name (commonly called the short name) will be generated for you automatically. You can choose to enter a different account name before proceeding.
- Enter the password for the new user account. Repeat the same password in the Verify field. If you would like to add a password hint, do so.
- Finally, click Create User.
2. Rename the original home folder
Next, you need to log out of the admin account you want to rename and log in to the other admin account, either an existing one or a newly created account.
Then:
- Open the Finder on your Mac.
- Click on Go (one of the menus in the menu bar) and choose Go to Folder (refer to Figure 3).
- In the window that pops open, enter /Users and either double-click on Users (Figure 4) or simply click the Return key.
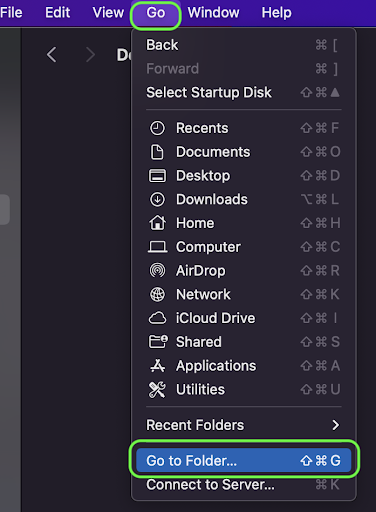
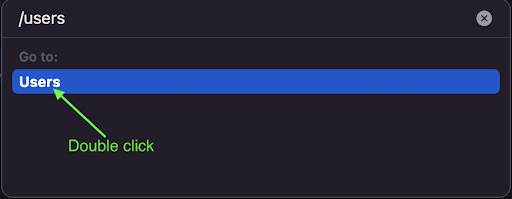
Figure 4.
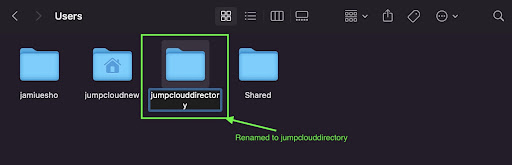
Then, change the home folder name of the user account you are renaming to your preferred new name (Figure 5). For this tutorial, we are changing the name from jumpcloudplatform to jumpclouddirectory. Ensure that there are no spaces in the new name.
You will be prompted to provide an admin name and password to make this change. It is important to note at this juncture that if you are using file sharing to share the home folder, you can’t rename it until you stop sharing the folder.
3. Rename your admin account
The last step in changing your macOS admin name is to rename your user account following these steps:
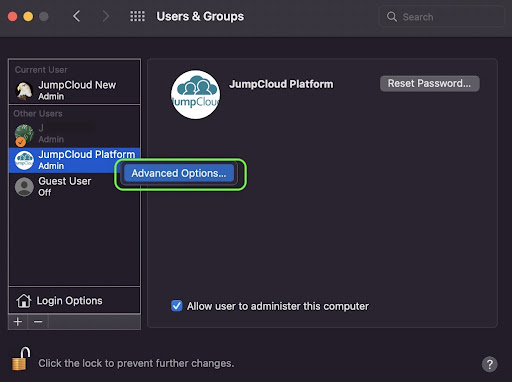
- Open “User & Groups” by navigating to Apple menu > System Preferences > Users & Groups. Click the lock icon at the bottom left corner of the preference pane and provide your password to unlock the pane.
- Hold the control button and click on the admin you are renaming from the list of users on the left side of the pane. Then, click Advanced Options as shown in Figure 6.
- A new window will pop up (Figure 7). Here, change the Account name to match the new name you gave the home folder. Your Full name field should generally match the Account name. As you can see in Figure 7, we are using the same jumpclouddirectory as the home folder.
- Also, you will notice that your old home directory name appears in the Home directory field, after /Users/. Either:
- Change it to match the new name of the home folder or
- Click “Choose” and navigate to the newly renamed home folder.
- Finally, click OK and restart your device. Then, log in to the renamed account.
If you can’t log in, it means what you typed is not the same as your Account name. If you log in and do not have access to the Finder or desktop, that means your home folder name was mistyped in System Preferences. This would be a good reason to use the “Choose” button instead of typing the name. Follow the above bullet points again to make the necessary correction(s) and retry.

Wrap Up
In this article, we explored how you can change your admin name on macOS. Make sure you follow the steps carefully to avoid losing your data or damaging your account.
If you’d like to go a step further in protecting the data on your macOS device, check out the following tutorial: How to Enable Full Disk Encryption on macOS.