
Connect


Contents
Pop!_OS, an Ubuntu-based Linux distribution developed by System76, is known for its user-friendly interface and powerful performance. One of the fundamental aspects of managing a Linux system is user access and permissions. In this tutorial, we will guide you through the process of creating sudo users on your Pop!_OS system.
Benefits of adding users to the sudo group
Whether you’re setting up a new user account or granting additional privileges to an existing one, understanding how to create sudo users is crucial for maintaining the integrity and security of your Pop!_OS system.
Some benefits of adding users to the sudo group include:
- Enhanced security. Sudo users can perform administrative tasks with elevated privileges, reducing the risk of unauthorized access to critical system files and settings, thereby enhancing system security.
- Granular control. Sudo allows you to specify which commands and actions sudo users are allowed to execute, providing fine-grained control over system management and minimizing the potential for errors or misuse.
- Accountability. Sudo usage is logged, allowing you to track who performed specific administrative tasks, enhancing accountability and facilitating auditing for system changes and security-related activities.
Note that it is important to manage sudo group members and their associated permissions carefully. Only trusted users should be added to the sudo group, and their privileges should be managed diligently to ensure system security.
In the following steps, we will explore the commands and procedures required to create and manage sudo users effectively, ensuring a secure and well-controlled environment for your Pop!_OS installation.
Steps to add a root user to a sudo group
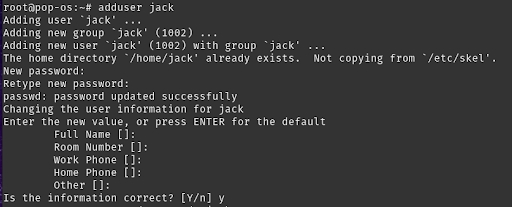
1. Create a new user
Create a new user using the following command:
adduser [username]
Replace [username] with the desired username. Follow the prompts to enter the necessary user information and password.
Note: It is highly recommended to set a strong password for the new user.
2. Add user to the sudo group
Add the user to the sudo group using the following command:
usermod -aG sudo [username]
This will add the user to the “sudo” group.

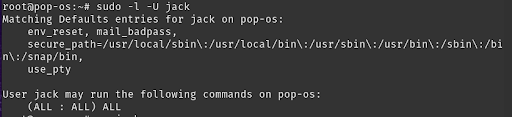
3. Verify sudo privileges
To confirm the successful addition, you can try running the following command to check if the new user has sudo privileges:
sudo -l -U [username]
Replace [username] with the actual username you added. If it displays the user’s sudo privileges, then the addition was successful.
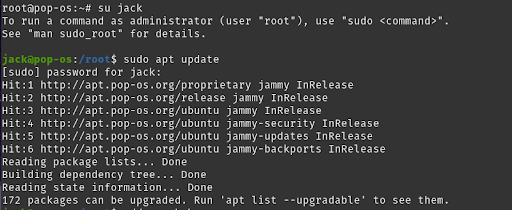
4. Switch to user and test whether sudo works
Switch user command:
su [username]
Replace [username] with the actual username you added.
After the user is switched, run the sudo command for verification:
sudo apt update
Steps to add a standard (non-root) user account
If the current user is not root, but is in the sudo group, the below steps show how to create a new user and add it to the sudo group also.
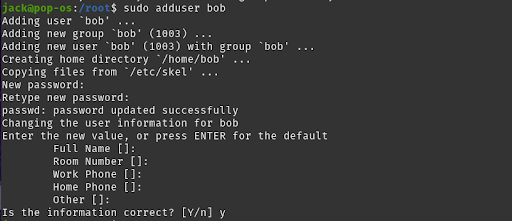
1. Create a new user
Create a new user using the following command:
sudo adduser [username]
Replace [username] with the desired username. Follow the prompts to enter the necessary user information and password.
Note: It is recommended to set a strong password for the new user.
2. Add user to the sudo group
Add the user to the sudo group using the following command:
sudo usermod -aG sudo [username]
This will add the user to the “sudo” group.

3. Verify sudo privileges
To confirm the successful addition, you can try running the following command to check if the new user has sudo privileges:
sudo -l -U [username]
Replace [username] with the actual username you added. If it displays the user’s sudo privileges, then the addition was successful.

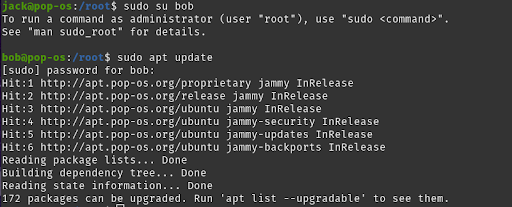
4. Switch to user and test whether sudo works
Switch user command:
sudo su [username]
Replace [username] with the actual username you added.
After the user is switched, run the sudo command for verification:
sudo apt update
Conclusion
In this tutorial, we demonstrated how to create a sudo user on Pop!_OS. These basic steps can be applied to other Linux distributions, and it’s always recommended you create sudo users instead of using root user accounts. Want to learn how to create sudo users in other Linux distros? Check out the tutorials below.
How to Create Sudo Users on Rocky Linux
How to Create Sudo Users on Ubuntu 22.04