


 Subscribe to Help Center RSS Feed
Use Agent Groups to organize and grant agents application access in JumpCloud. Agent Groups operate similarly to User Groups for users: a single place to manage membership and assign which applications are available to agents.
With agent groups you can:
- Organize related agents (for example infrastructure automation or ITSM integrations).
- Assign SSO applications to the group once, so member agents inherit those apps as available.
- Scale access review and updates without associating each application to every agent.
Application access for agents is group controlled in Public Preview. Direct agent-to-application assignment is not supported. For how groups link to SSO applications and AI Gateway, see Get Started: Agent Identities.
Prerequisites:
- You must have the Administrator with Billing, Administrator, or Manager role to manage agent groups. See Admin Portal Roles to learn more.
- Create at least one agent if you want to add members immediately. You can also create an empty group first.
Considerations:
- Agent Group Membership is static only. Dynamic group membership is not supported.
- Removing an agent from a group removes access inherited through that group. It does not delete the agent.
- Removing an application from a group removes inherited availability for agents in that group. It does not delete the SSO application.
- Deleting an agent group removes agent and application associations for that group. Agents themselves are not deleted. Agents may lose app access granted through the group.
Accessing Agent Groups
- Log in to the JumpCloud Admin Portal.
- Go to Identity Management > Agent Groups.
- The Agent Groups list displays.

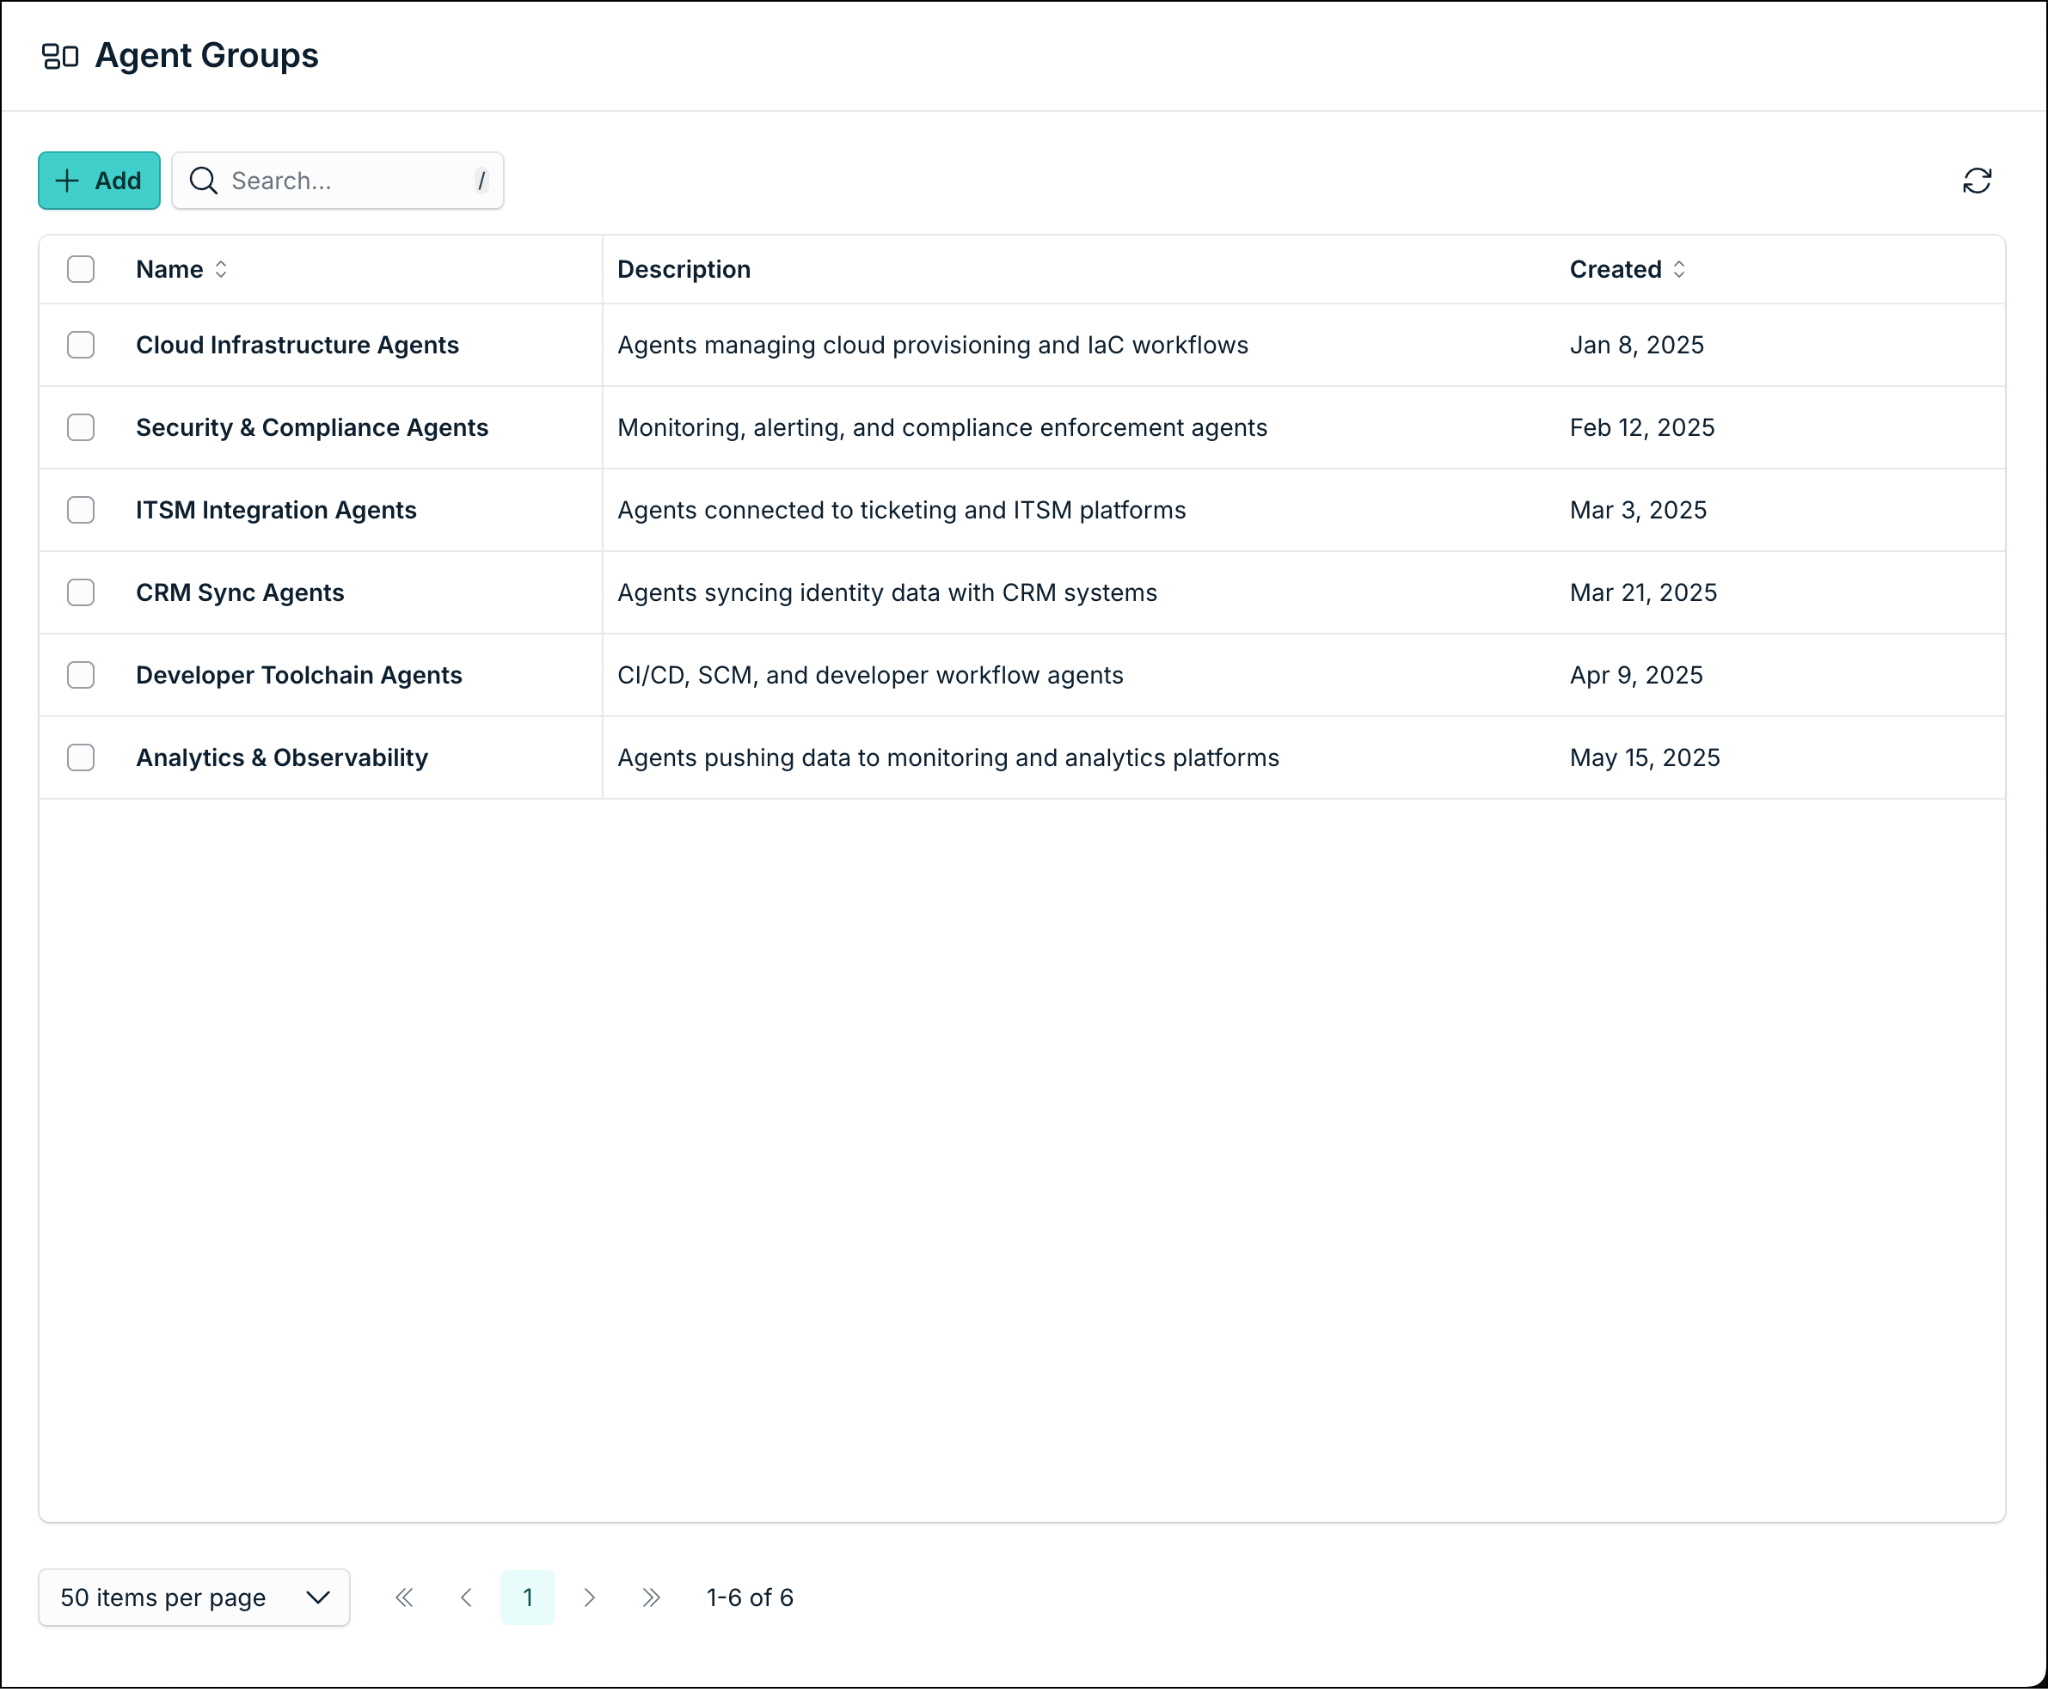
Viewing Agent Groups
From the Agent Groups list you can:
- Add and delete agent groups.
- Search for groups.
- Open a group to manage members and applications.
The table displays columns:
- Name: Agent group display name. Click to open the group.
- Description: Optional short description.
- Created: Date the group was created.
Creating Agent Groups
- From the JumpCloud Admin Portal, go to Identity Management > Agent Groups and click + Add.
- (Required) Enter the group’s Name.
- (Optional) In Description, enter a short description of the group.
- Click Add.

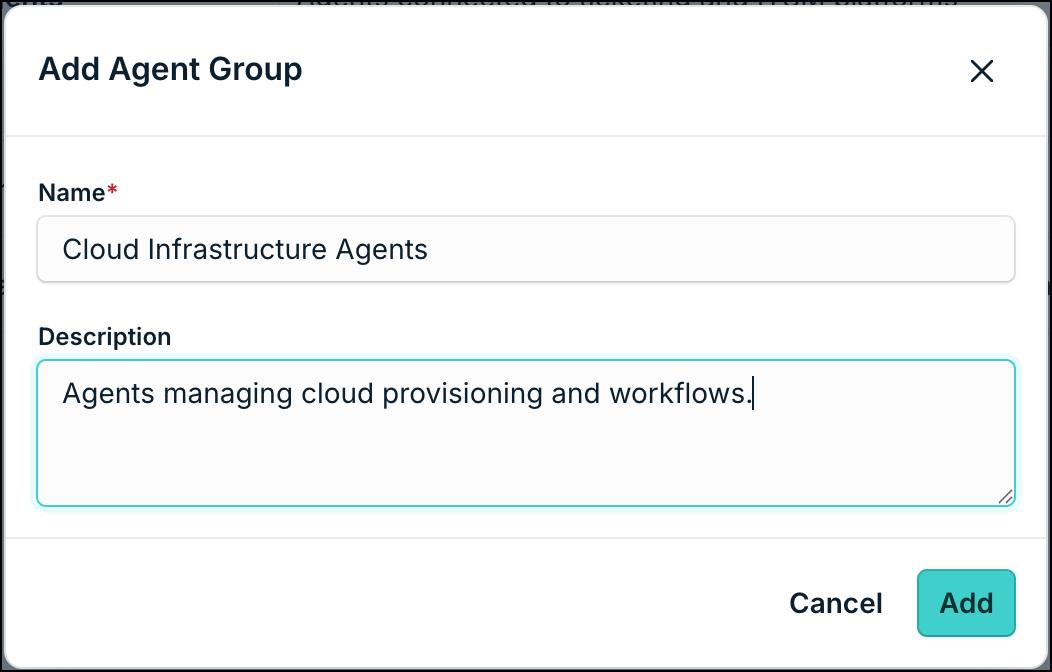
Adding Agents to a Group
- Open the agent group.
- Select the Agents tab.
- Select agents from the list (use show assigned only if available).
- Save your changes when prompted by the page save bar.

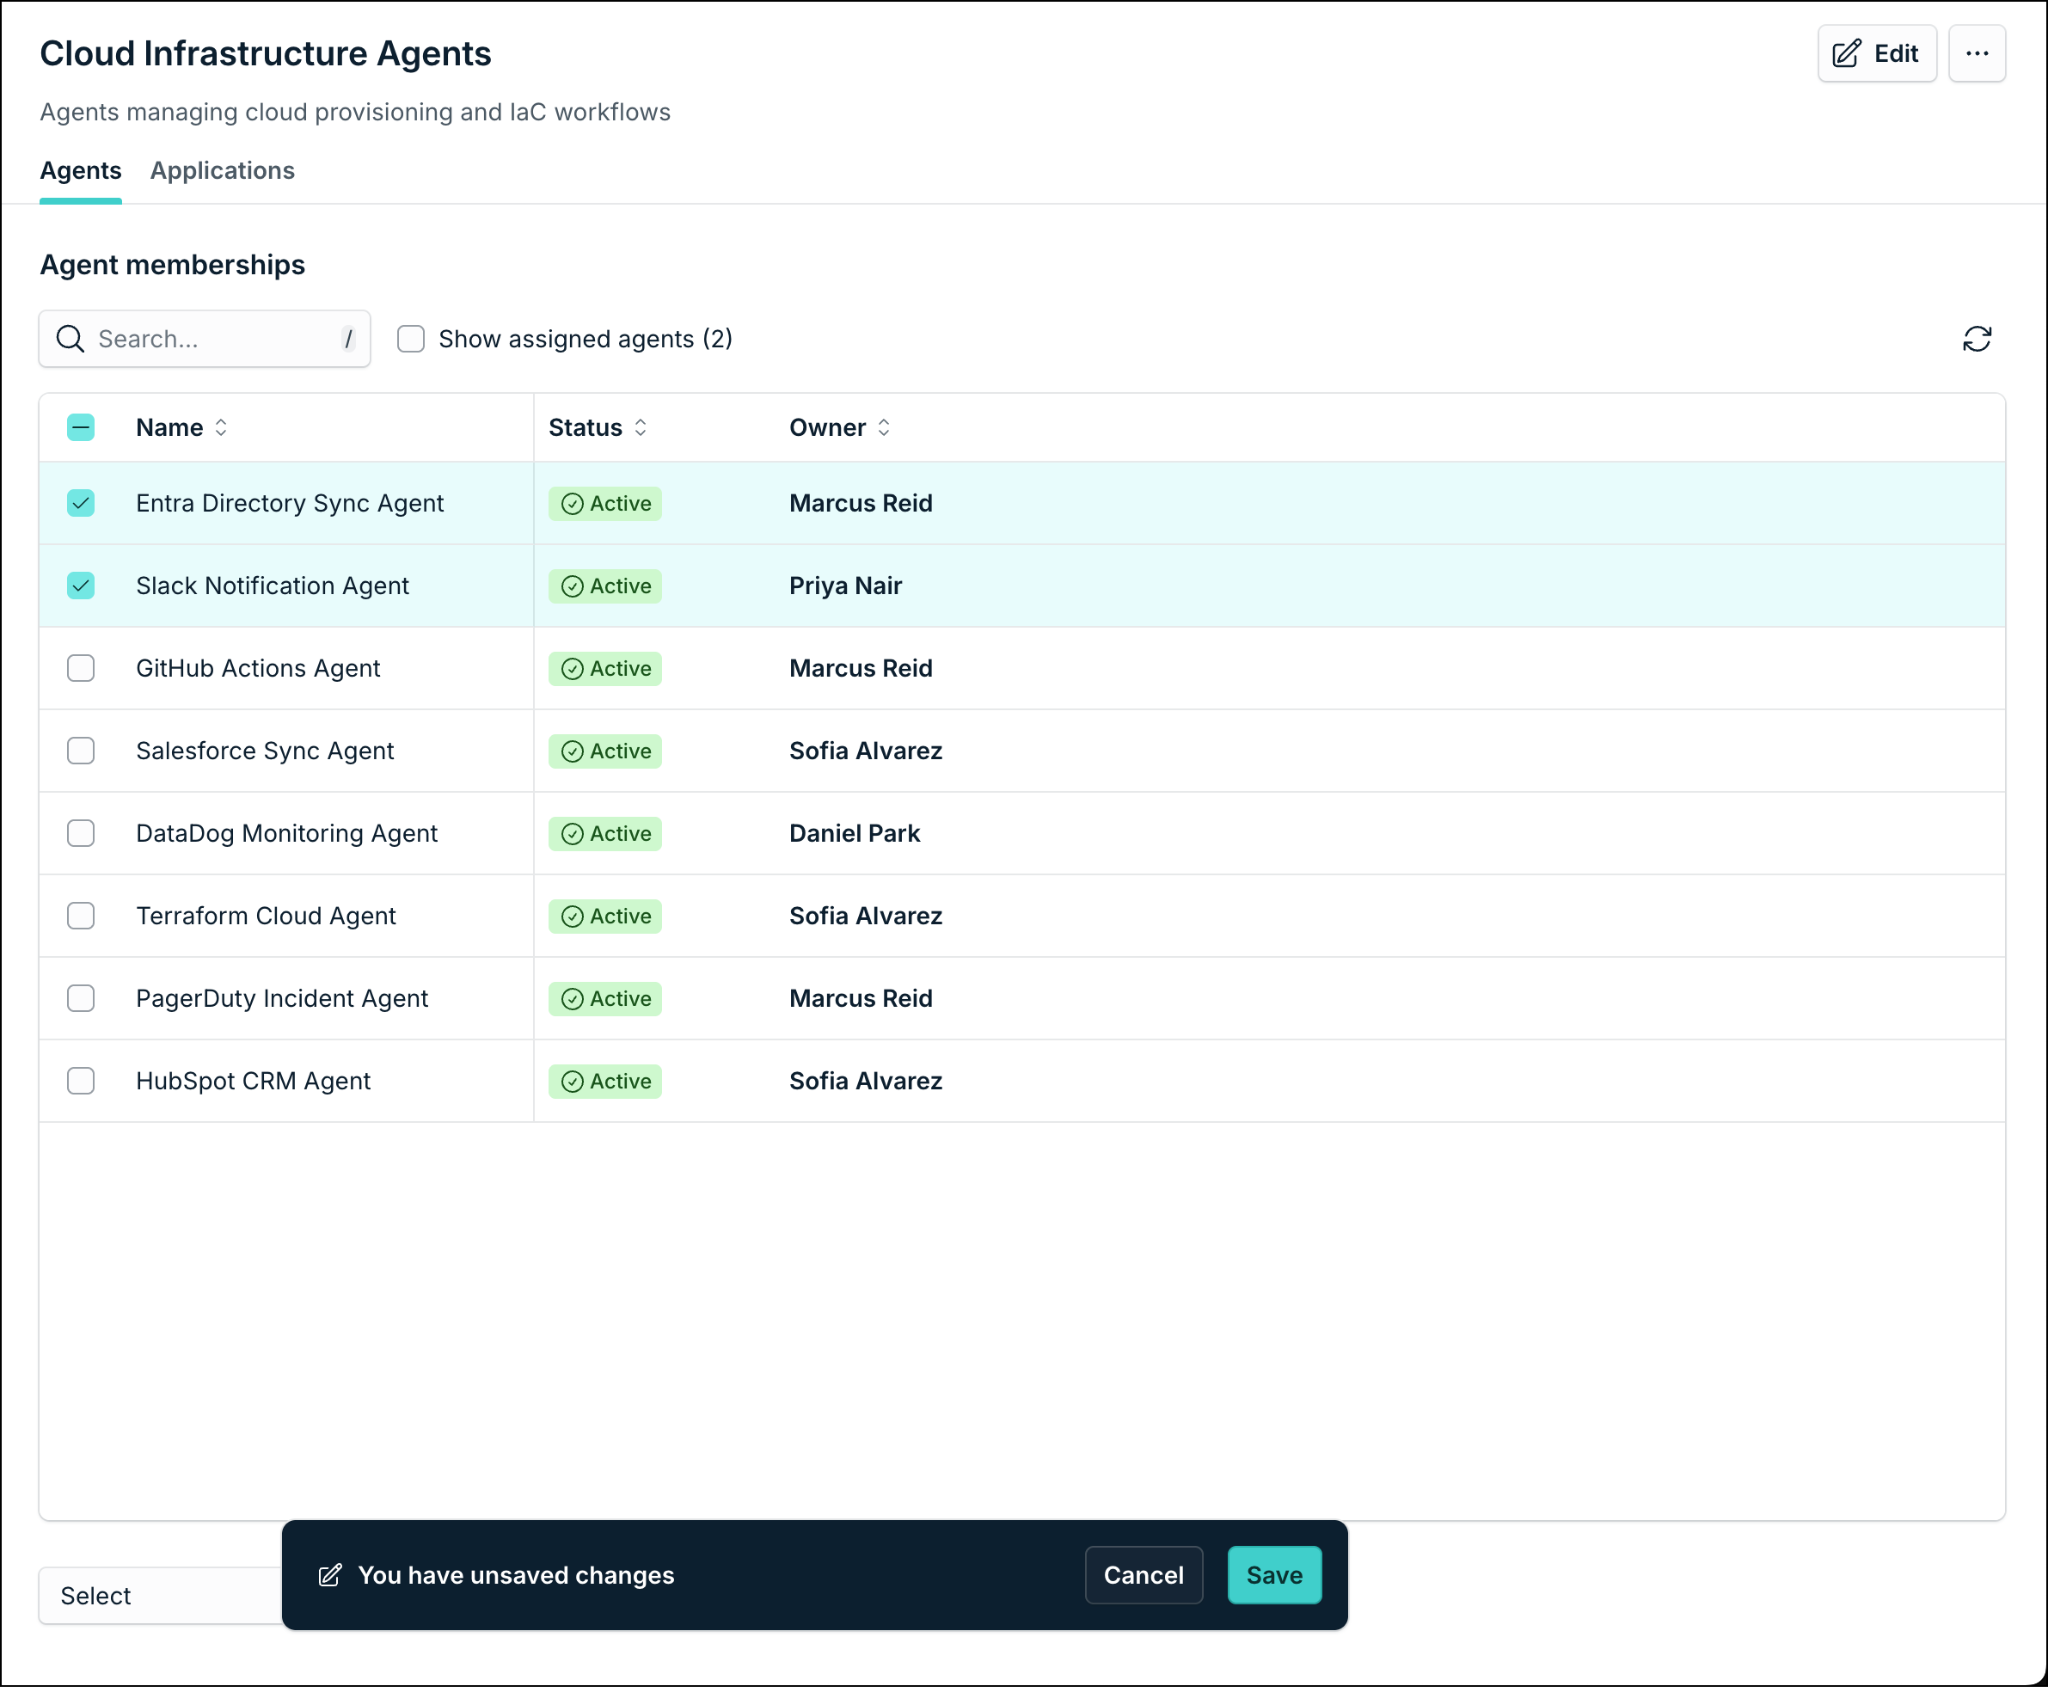

You can also manage group membership from an individual agent’s Agent Groups tab.
Connecting Groups to Applications
All agent application access is denied until an agent is connected through group membership.
To connect SSO applications to an agent group:
- Open the agent group.
- Select the Applications tab.
- Select the SSO applications to assign to the group.
- Save your changes.
Member agents then see those applications on their Applications tab as available. Each agent still uses Manage connections to finish MCP authorization for that specific agent.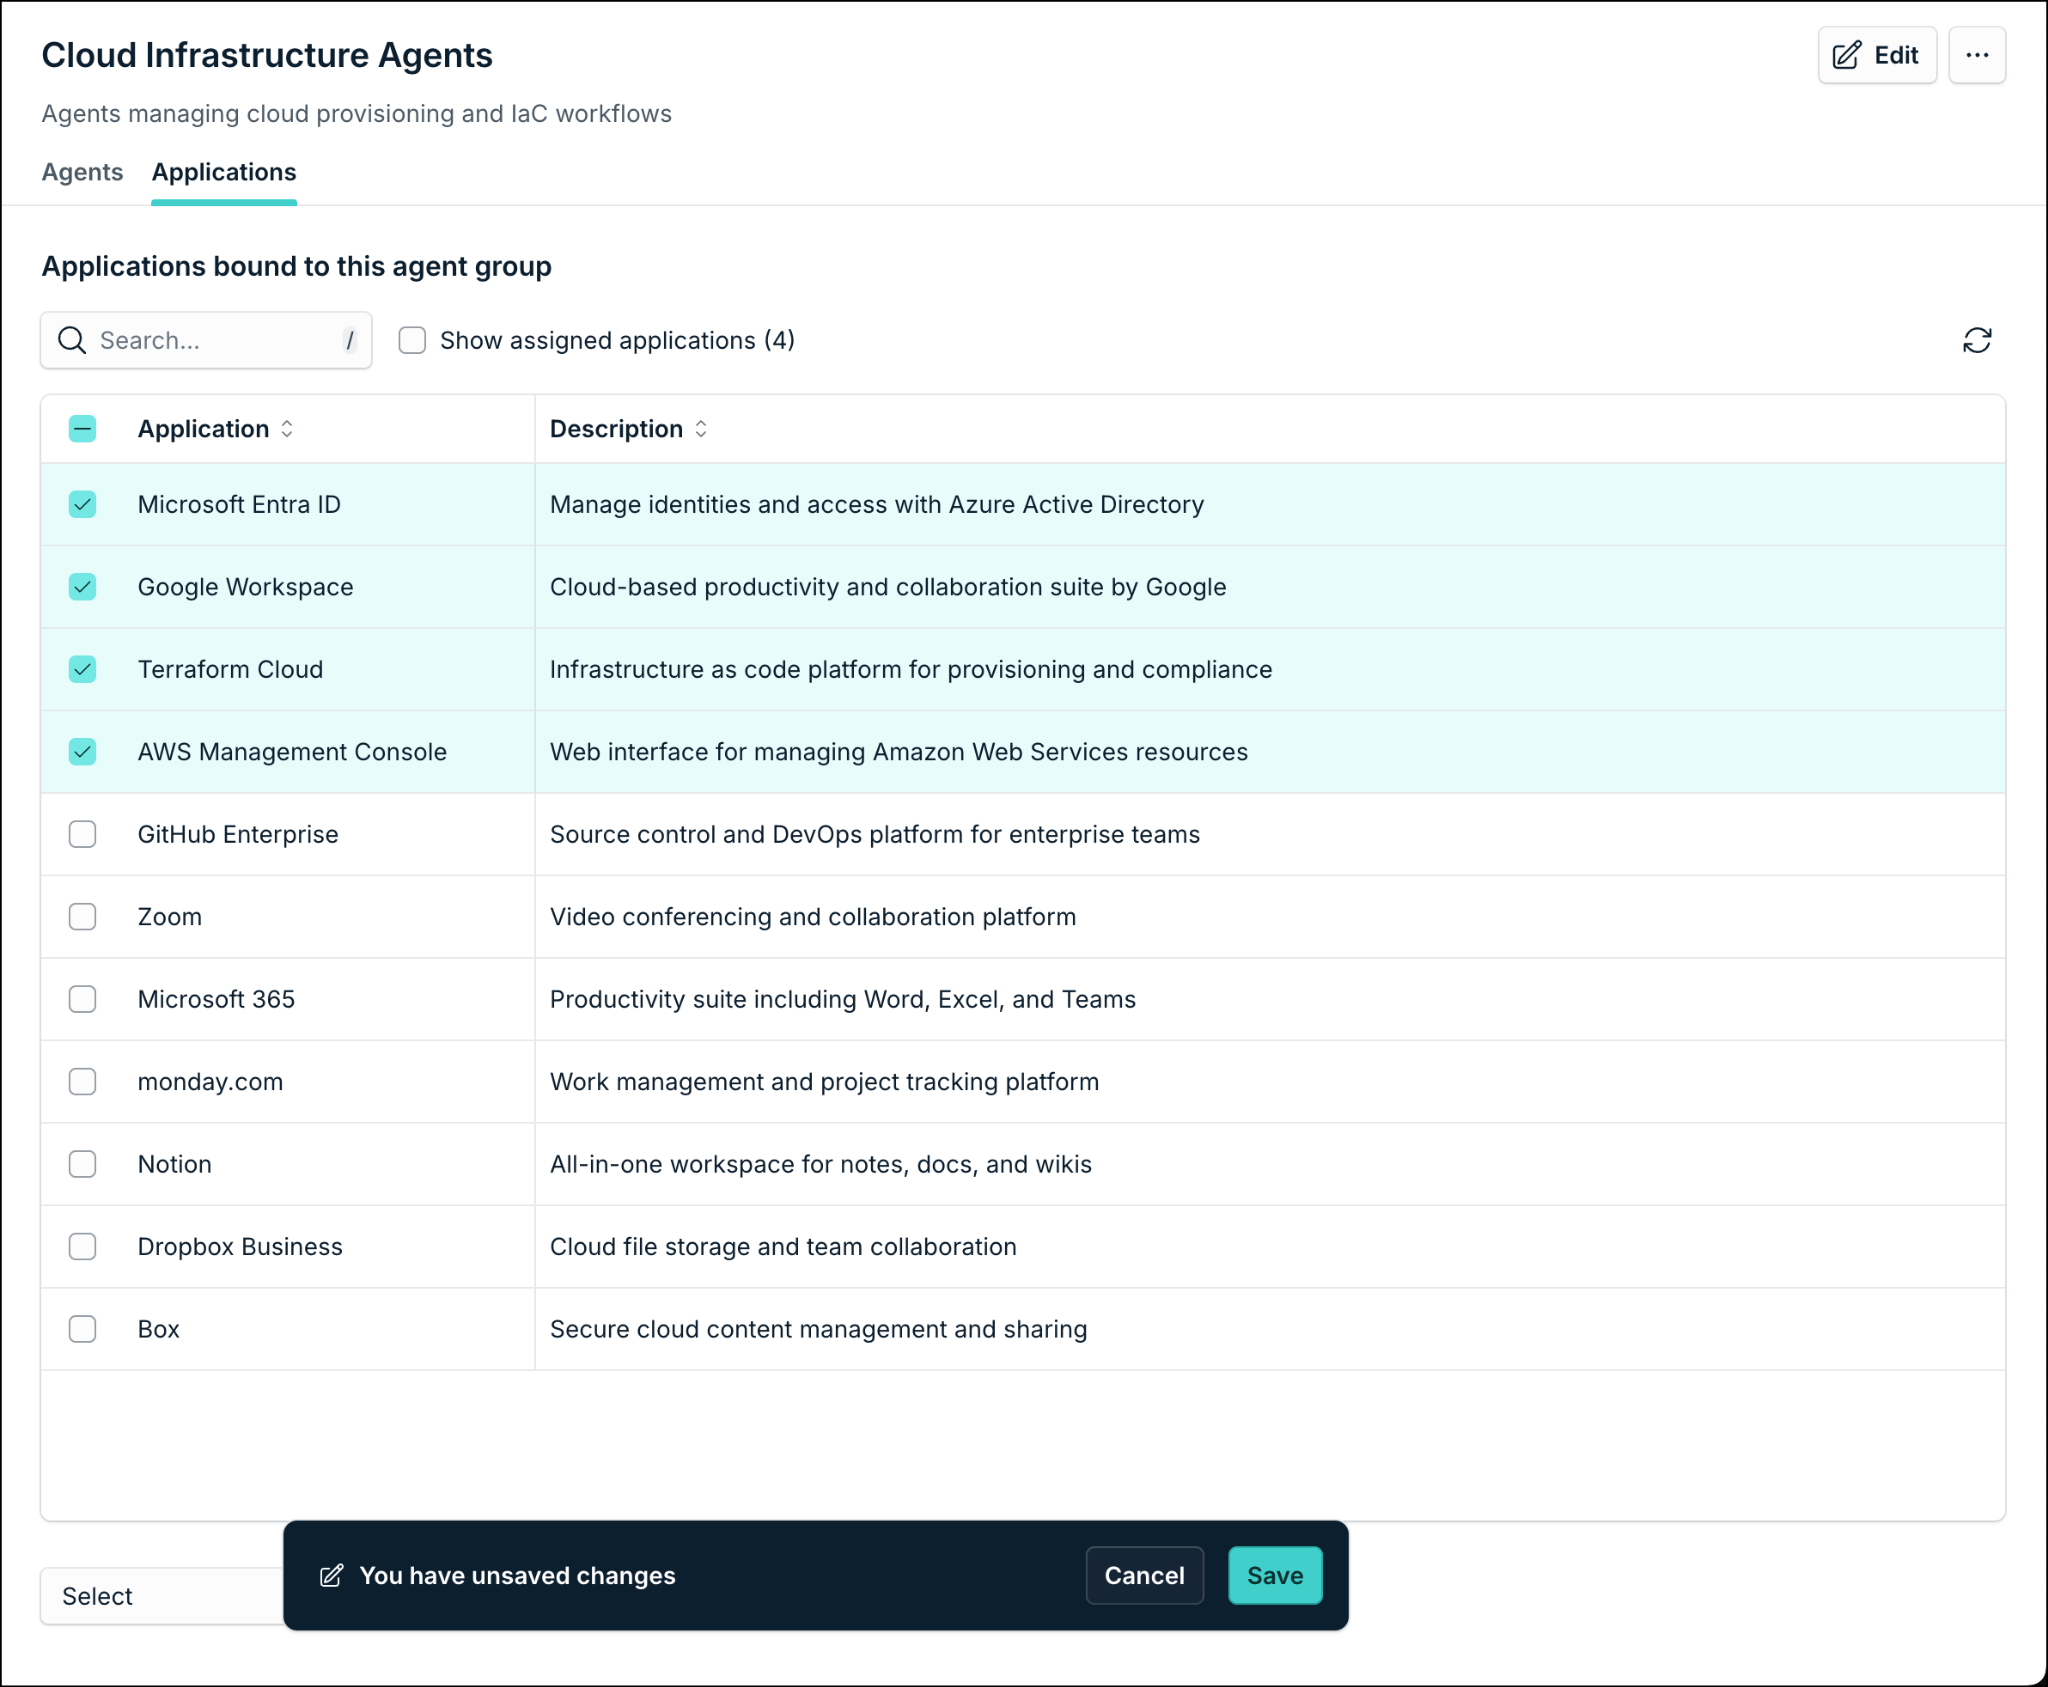
See the following articles to learn more:
Editing and Deleting Agent Groups
Edit group name or description
- Open the agent group.
- Click Edit.
- Update Name and Description.
- Click Save.
Delete an agent group
Deletion permanently removes this agent group and its associations. This can’t be undone.
When you delete an agent group, associated agents aren’t deleted. Agent and application associations for this group are removed, and agents may lose app access granted through this group.
- Open the agent group (or select groups on the list).
- Choose Delete group (or bulk delete).
- Confirm when prompted.
Understanding Agent Groups and User Groups
| User Groups | Agent Groups | |
|---|---|---|
| Members | Users | Agents |
| Typical resources | Devices, apps, LDAP, networks, and more | SSO applications (for agent access to AI Gateway MCP servers) |
| Membership | Static and dynamic (attribute-driven) options | Static only |
| Admin path | Identity Management > User Groups | Identity Management > Agent Groups |
 In this Article
 Learn More