


 Subscribe to Help Center RSS Feed
AI Agents are automation and AI workloads you register in JumpCloud, giving you control how they authenticate and which applications they can use.
Like users, each agent is registered, owned, and managed in the Admin Portal. Unlike users, agents authenticate with OAuth client credentials and do not use the User Portal. Keeping agent access in its own identity means you can suspend or delete the agent without tying its access to a user’s login.
Use Identity Management > Agents to add agents, assign owners, configure authentication, join agent groups, and connect applications available through those groups.
Agents are separate from users. They do not appear in user lists, user search, user exports, or the User Portal. For why Agent Identities matter and how agents link to SSO apps and AI Gateway, see Get Started: Agent Identities.
Prerequisites:
- You must have the Administrator with Billing, Administrator, or Manager role to manage agents. See Admin Portal Roles to learn more.
- To use AI Gateway authentication for agents, you must configure the application’s MCP server in Access > AI Gateway. See Get Started: AI Gateway.
Accessing Agents
- Log in to the JumpCloud Admin Portal.

If your data is stored outside of the US, check which login URL you should be using depending on your region. If your organization uses LDAP, RADIUS, or requires firewall allow list configuration, the Fully Qualified Domain Names (FQDNs) will also be region specific. See JumpCloud Data Centers for the URLs, FQDNs, and IP addresses.
- Go to Identity Management > Agents.
- The Agents list displays.

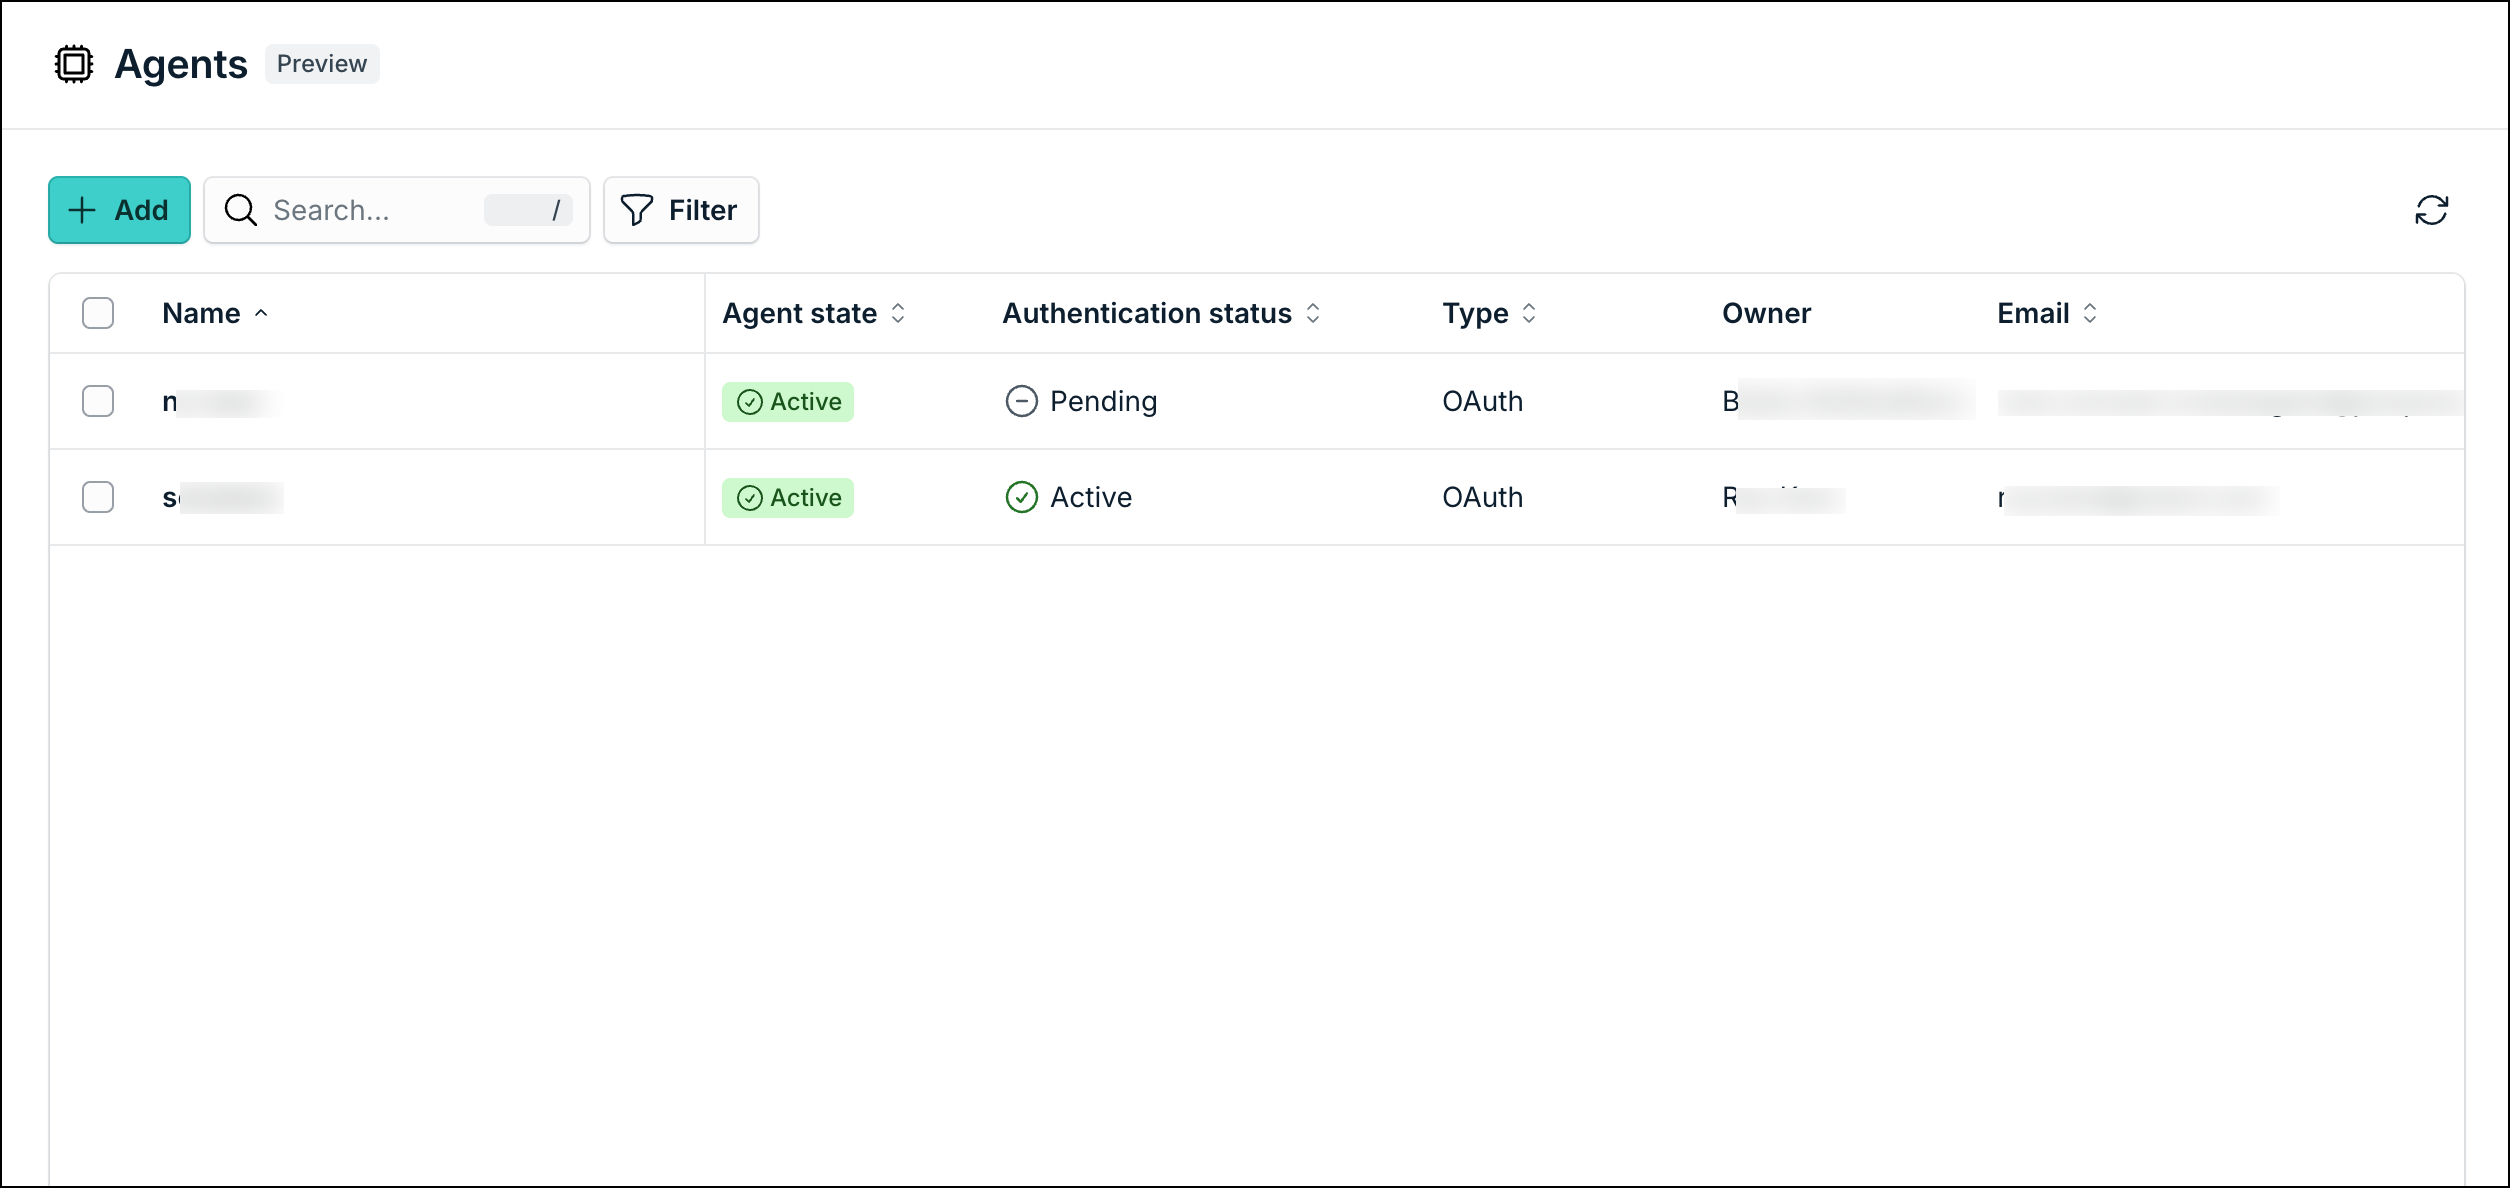
From the Agents list you can:
- Add and delete agents.
- Search for agents.
- Filter the list (for example by agent state or owner).
- Use bulk actions when agents are selected.
- Open an agent to view and edit details.
The agents list displays the following columns:
- Name: Agent display name. Click to open the agent detail page.
- Agent State: The agent lifecycle state, Active or Suspended.
- Authentication Status: The agent’s credential status, Pending, Active, or Expired.
- Owner: Required JumpCloud user accountable for the agent.
- Company Email: Email used to provision and federate the agent to SSO applications.
Creating an Agent
- From Identity Management > Agents, click + Add.
- On the Details tab, enter:
- Name (required)
- Owner (required): JumpCloud user accountable for this agent
- Company email (required): A unique email address used to provision and federate the agent to SSO applications
- Description (optional)
- Click Create agent.
The agent is created as Active with Authentication Status set to Pending until you configure credentials on the Authentication tab.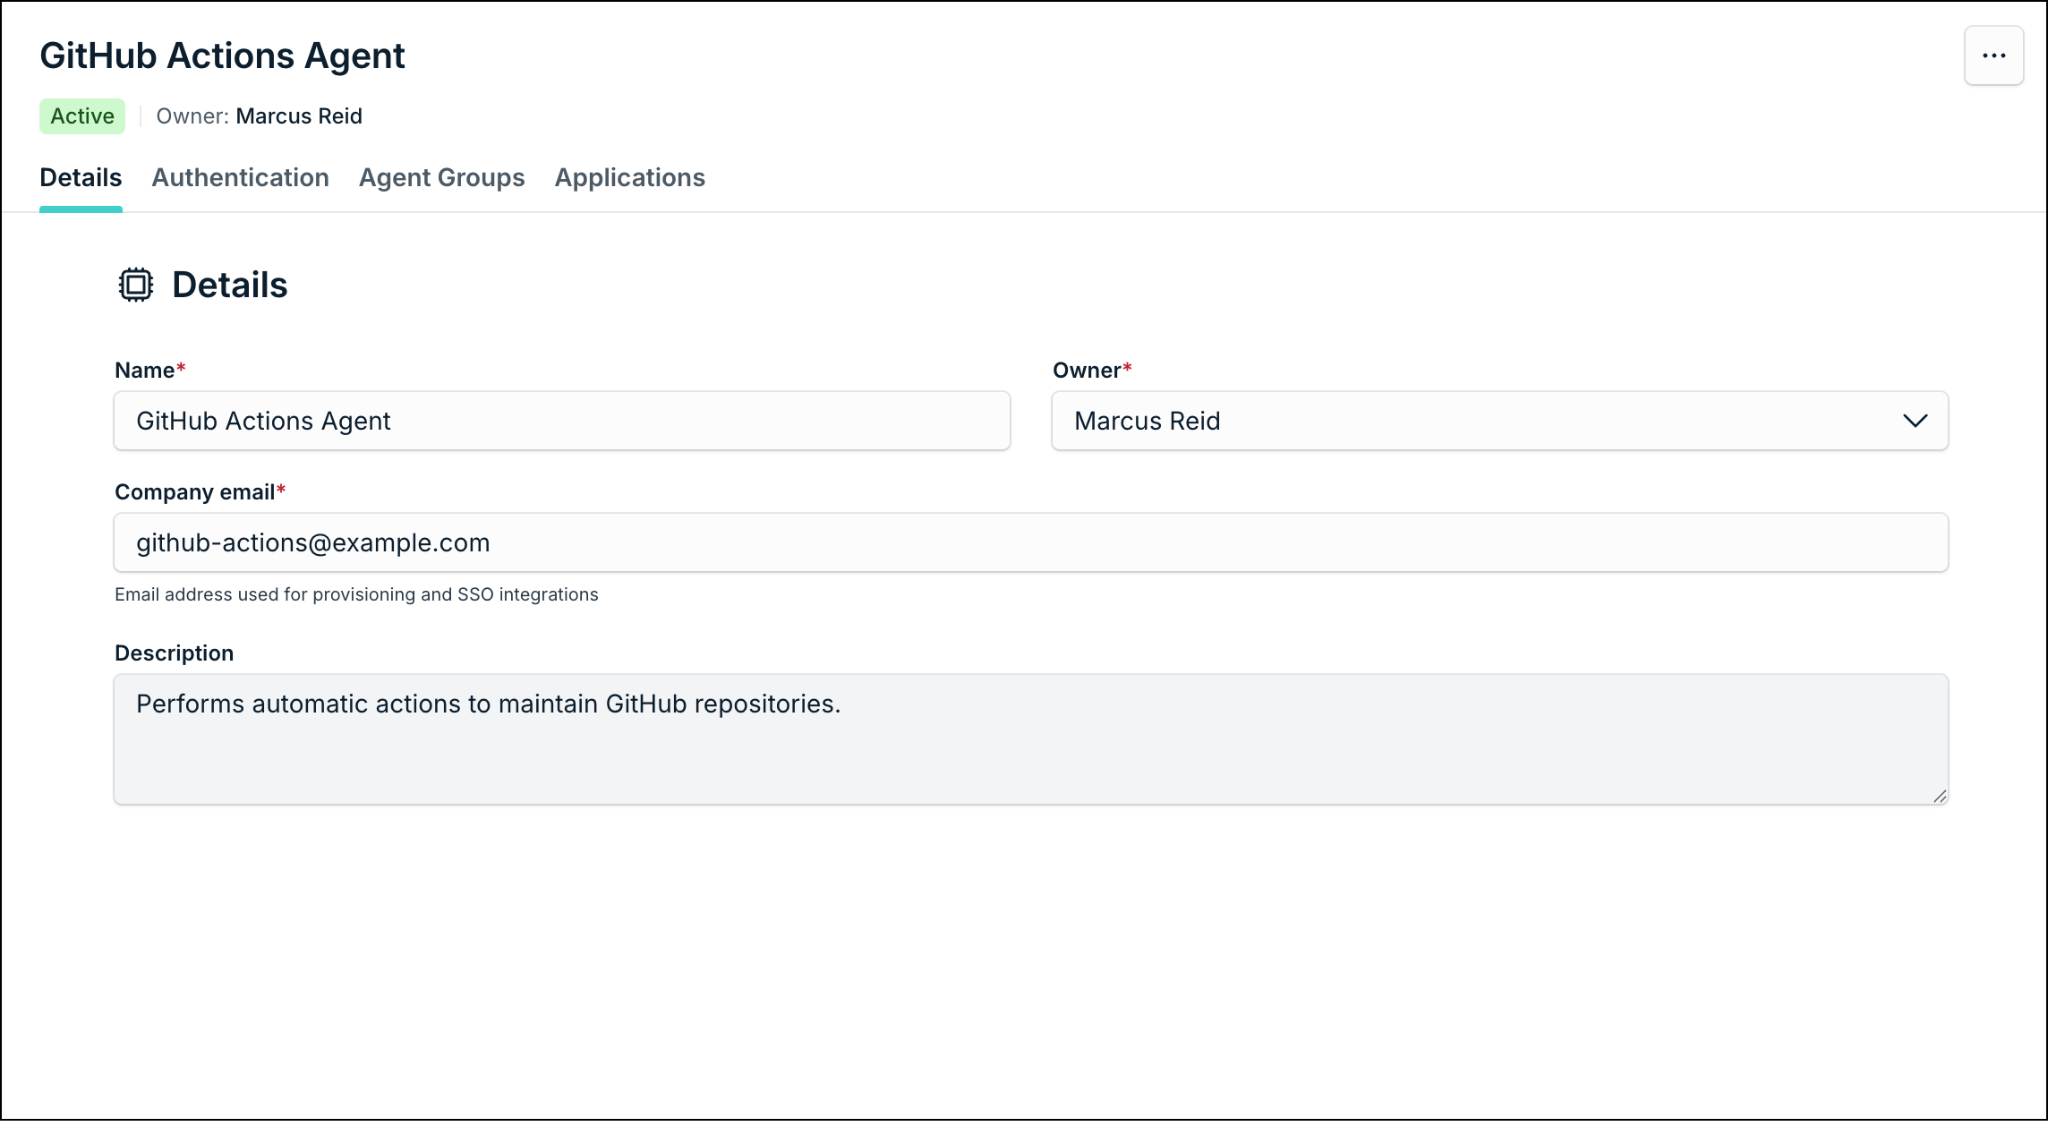
Viewing Agent Details
Opening an agent shows the following tabs:
- Details: Name, owner, company email, and description.
- Authentication: OAuth client credentials for authenticating the agent to JumpCloud.
- Agent Groups: Groups this agent belongs to.
- Applications: SSO applications from the agent’s groups, with connection status.
Editing Agent Details
You can edit an agent's details after creating it:
- Name (required)
- Owner (required): JumpCloud user responsible for this agent
- Company email (required)
- Description (optional)
Save or discard changes with the page save bar.
Configuring Agent Authentication
The Authentication tab defines how the agent authenticates to JumpCloud using OAuth client credentials (similar to service account client credentials).
To generate agent client credentials:
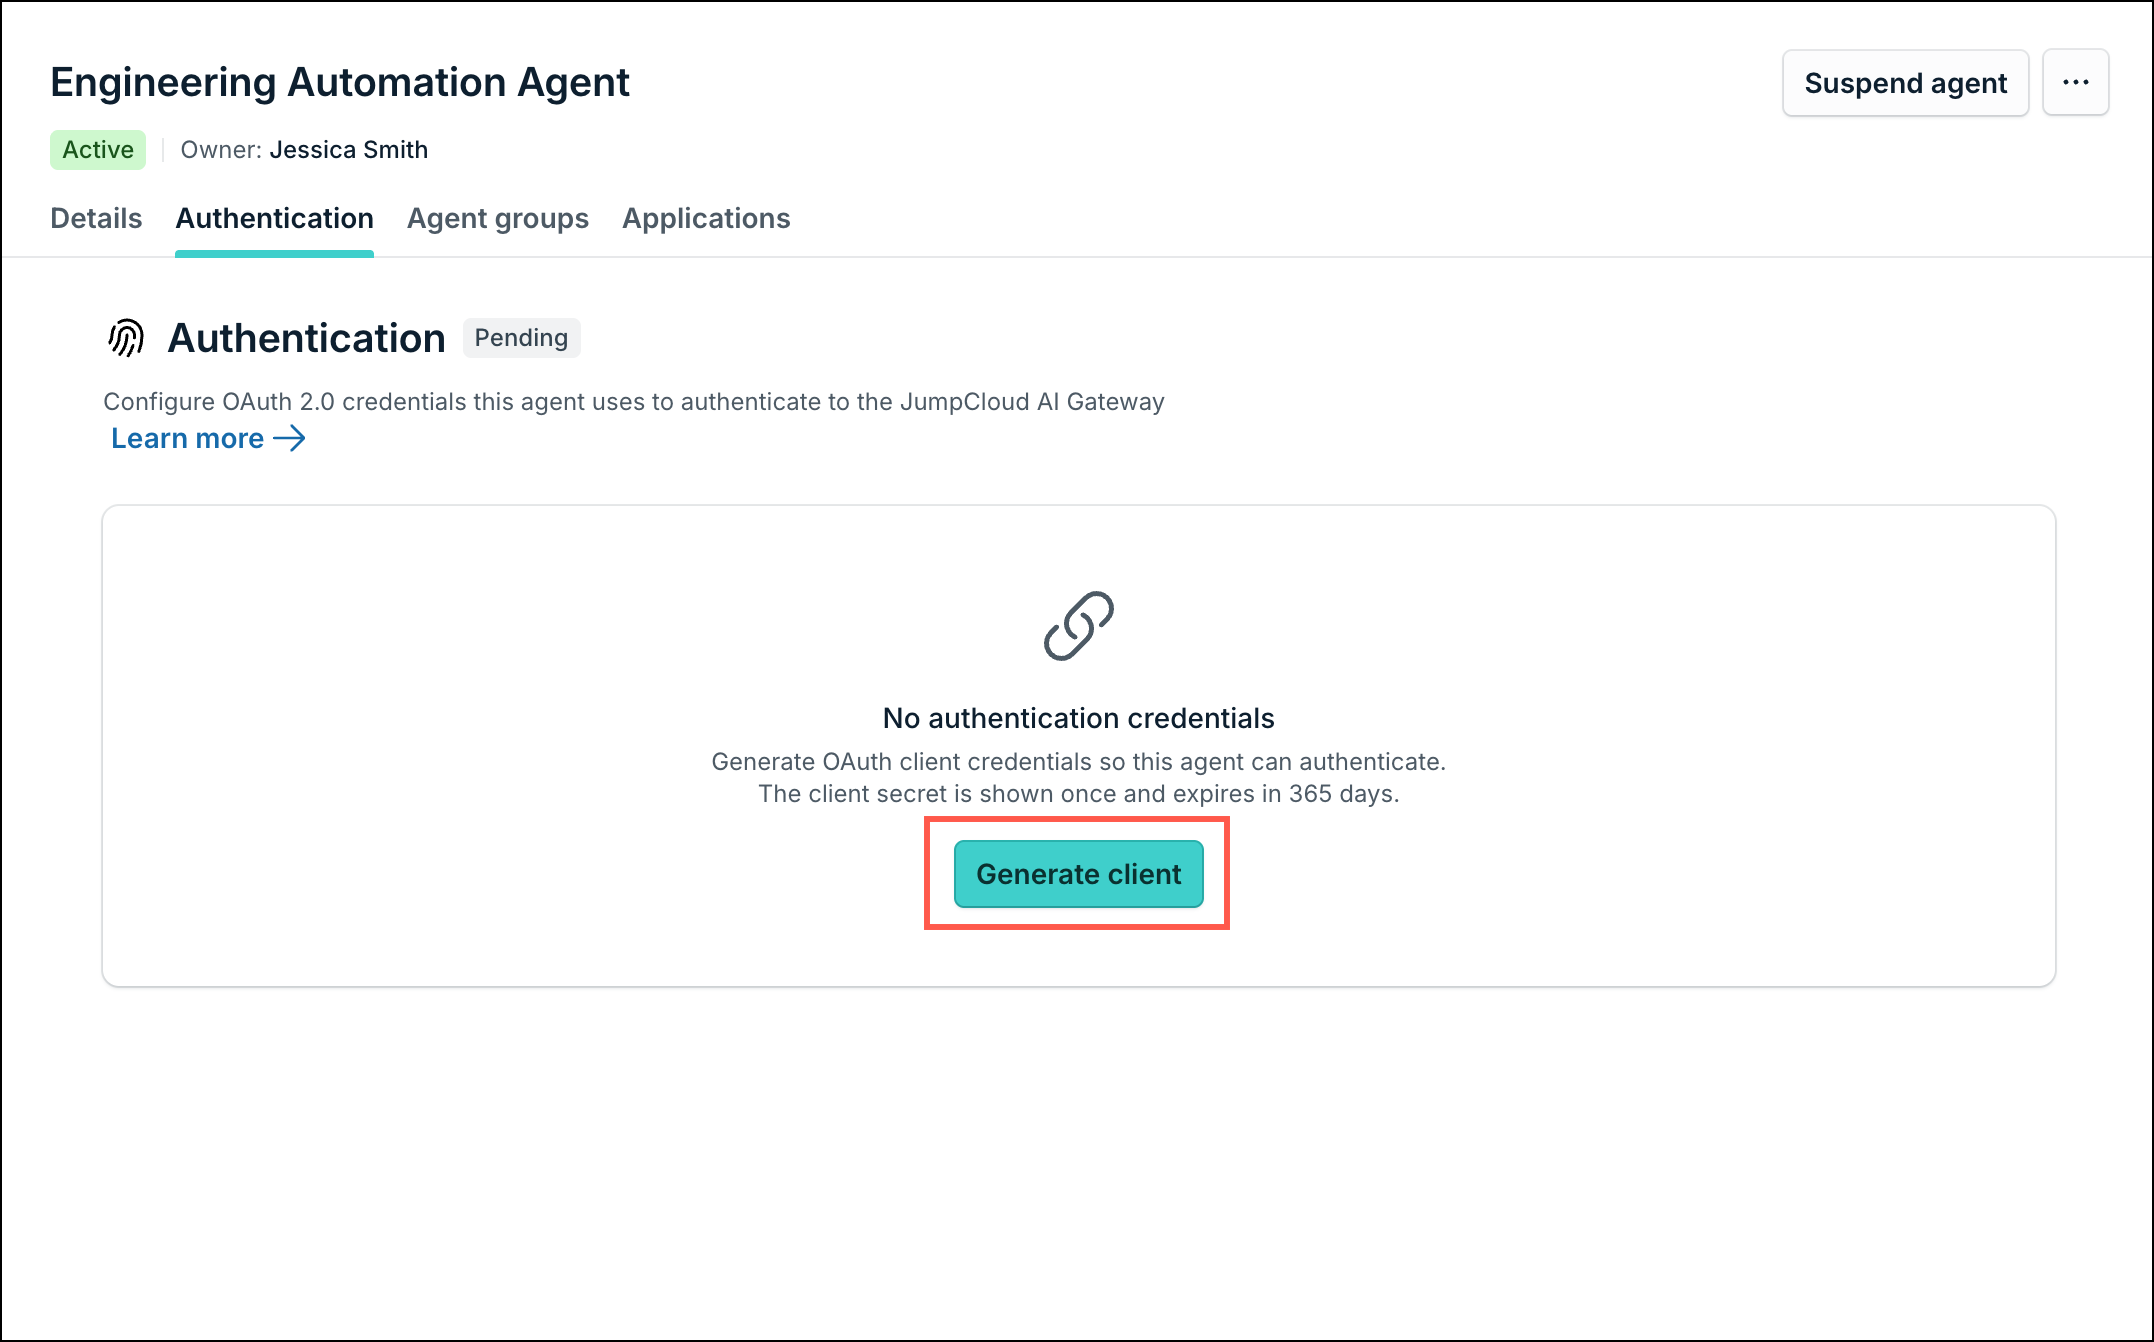
- In the Agent details, go to the Authentication tab.
- Under No authentication credentials, click Generate client.

- Copy the client secret when it is shown.

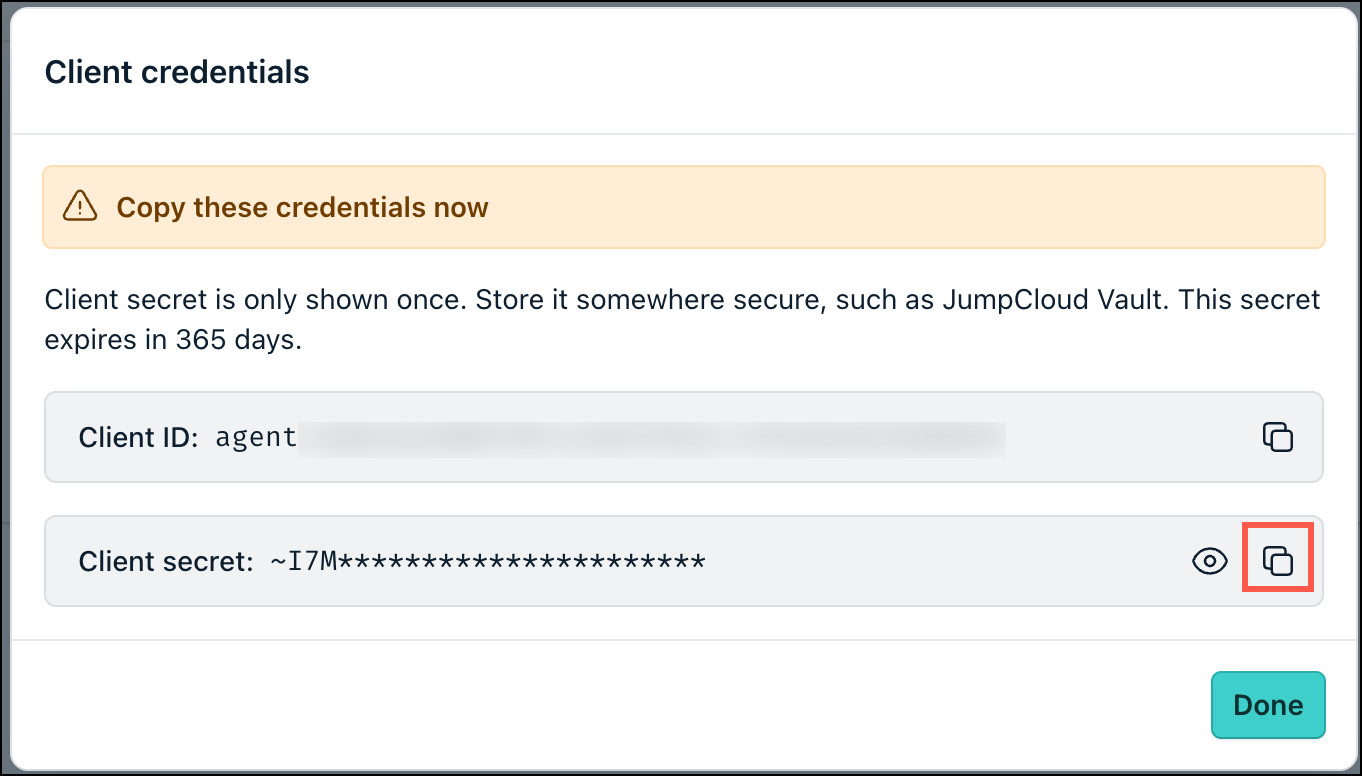

- The client secret is displayed once and expires after 365 days.
- Generating client credentials moves the agent status from Pending to Active.
- After generating and saving the client secret, use Access details for the well-known URL and token URL used to configure OAuth for this agent.

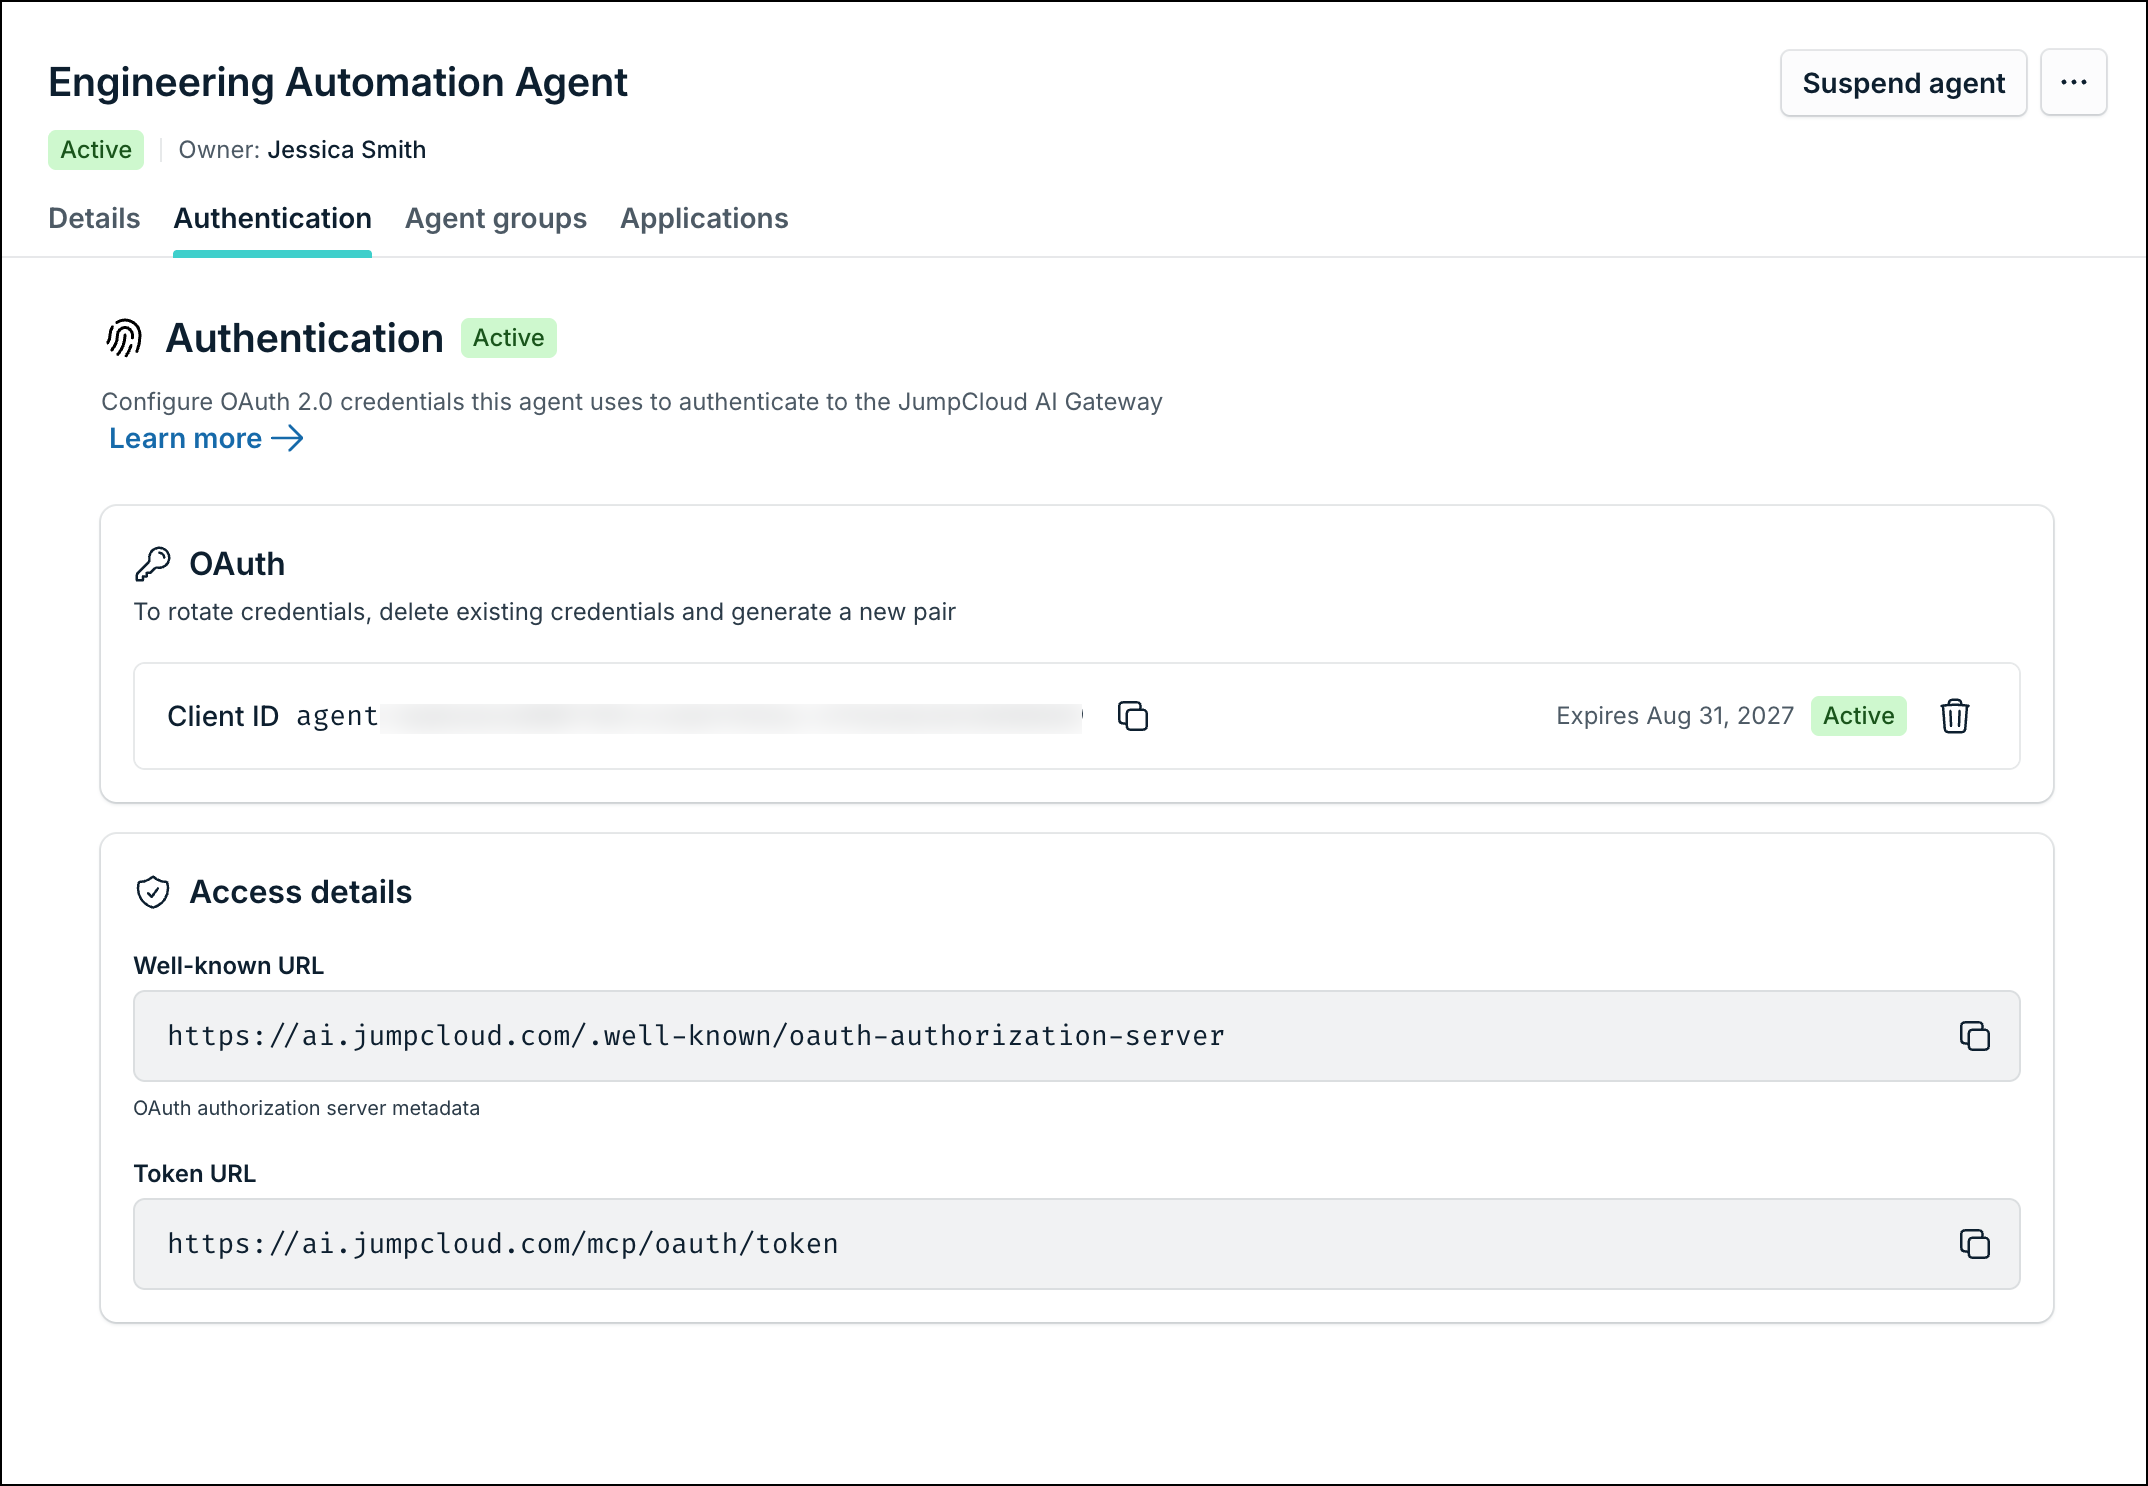
For reference, the URL values shown under Access Details:
- Well-known URL: https://ai.jumpcloud.com/.well-known/oauth-authorization-server
- Token URL: https://ai.jumpcloud.com/mcp/oauth/token
Revoking connections on an agent disconnects all connected apps for that agent.
Assigning an Agent to Applications
Applications listed here are JumpCloud SSO applications assigned through this agent’s groups.
- Connected: This agent has finished MCP connection setup for the app.
- Not Connected: The app is available from a group, but this agent is not connected yet.
- Setup AI Gateway: Register the app’s MCP server in AI Gateway before you can connect.
Use Manage connections to authorize as this agent (open the connection URL in a private window).
Connecting an Agent to AI Gateway MCP Servers
To connect an agent to AI Gateway MCP servers:
- In the agent's Authentication tab, click Manage connections.
- Manage connections displays. Copy the URL and open it in a private or incognito browser window.

- Under Authorize Tool Access, authorize each app's MCP server in the AI Gateway.
- Click Authorize tools to complete authorization.
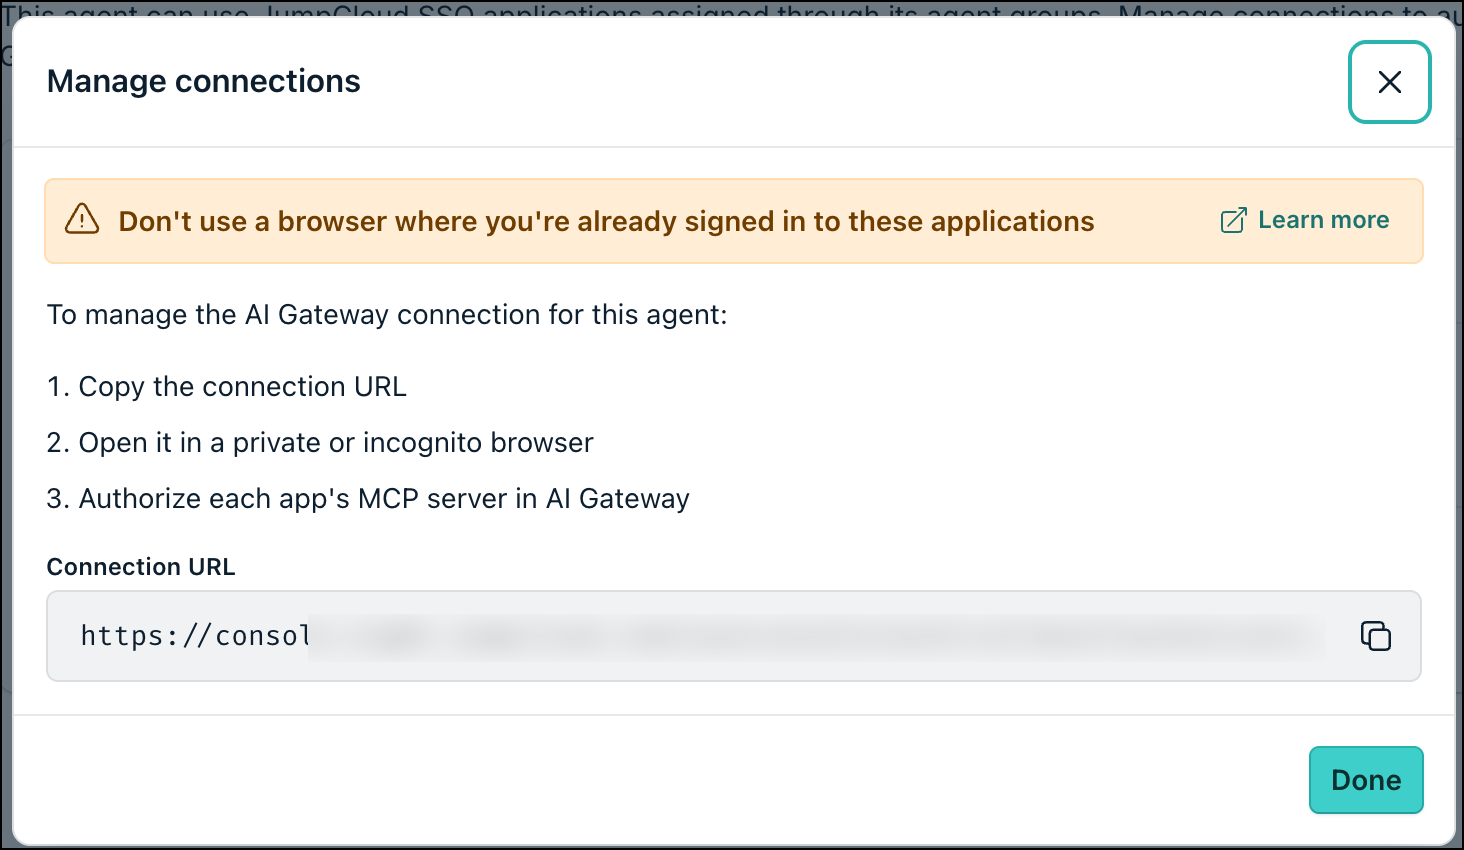
Agents inherit available applications from group membership. Connecting establishes the per-agent MCP authorization for those apps. See Get Started: Agent Identities and Get Started: Agent Groups.
Suspending and Reactivating an Agent
Suspending an Agent
Suspending blocks authentication and application connections. The agent record, owner, and group memberships remain for investigation and later reactivation.
- Open the agent.
- From more actions, choose Suspend agent.
- Confirm when prompted.
Activating an Agent
- Open a suspended agent.
- From more actions, choose Activate agent.
- Confirm when prompted.
Deleting an Agent
Deleting permanently revokes credentials, disconnects applications, and removes the agent from agent groups. This can’t be undone.
- Open the agent (or select agents on the list).
- Choose Delete agent (or bulk delete).
- Confirm when prompted.
 In this Article
 Learn More