
Learn how to leverage JumpCloud's Conditional Access Policies to act as a device trust factor for your Okta environment. This article is for IT admins who use JumpCloud for device management and Okta for SSO, and want to ensure that users can only access resources from their managed devices.
Prerequisites:
- You need to have JumpCloud Admin with Billing permissions to configure an IdP.
- You need to have a valid Okta account with admin permissions and have configured it as an Identity Provider (IdP). See Configure Okta as an Identity Provider to learn more.
- All JumpCloud users must have unique company email addresses, and the email of the JumpCloud user and external IdP email used for Federation must match.
- Conditional Access Policies, which let you relax, restrict, or deny user access to resources, work in tandem with Device Trust Certificates for any policy that uses a device condition. You’ll need to create a conditional access policy before you can implement Device Trust.
- See Configure a Conditional Access Policy to learn more.
- Conditional Access is a Platform Prime feature. See JumpCloud pricing to learn more.
- Enable Global Certificate Distribution in the JumpCloud Admin Portal. To do this,
- Go to Conditional Policies > Settings.
- Toggle Global Certificate Distribution to ‘ON’.
Considerations:
- Once device trust is enforced, users will be redirected to JumpCloud for a certificate check during SSO sign in. To improve the user experience, you can use an Okta policy to enforce this secondary check on a less frequent schedule.
- Device Trust certificates covered in this article apply only to desktop devices using the JumpCloud Agent and supported web browsers.
- Certificates are distributed only to JumpCloud managed users on devices.
![]()
This configuration applies only to desktop devices using Device Trust certificates. This configuration doesn't apply to mobile devices.
Configuring Settings in JumpCloud and Okta
Step 1: Configure a Custom OIDC App in JumpCloud
Create a custom OIDC app in your JumpCloud Admin Portal. This app acts as the Identity Provider that Okta will use for authentication.
- Log in to your JumpCloud Admin Portal.
![]()
If your data is stored outside of the US, check which login URL you should be using depending on your region. If your organization uses LDAP, RADIUS, or requires firewall allow list configuration, the Fully Qualified Domain Names (FQDNs) will also be region specific. See JumpCloud Data Centers for the URLs, FQDNs, and IP addresses.
- Go to Access > SSO Applications.
- Click the Add New Application button to add a new application.
- Select Custom OIDC App.
- Populate the following settings:
- Redirect URIs: https://dev-xxxx.okta.com/oauth2/v1/authorize/callback (Replace dev-xxxx.okta.com with your Okta tenant URL).
- Login URL: https://dev-xxxxx.okta.com (Replace with your Okta tenant URL).
- Attribute Mapping: Map the following attributes (Okta requires preferred_username):
| Service Provider Attribute Name | JumpCloud Attribute Name |
| preferred_username |
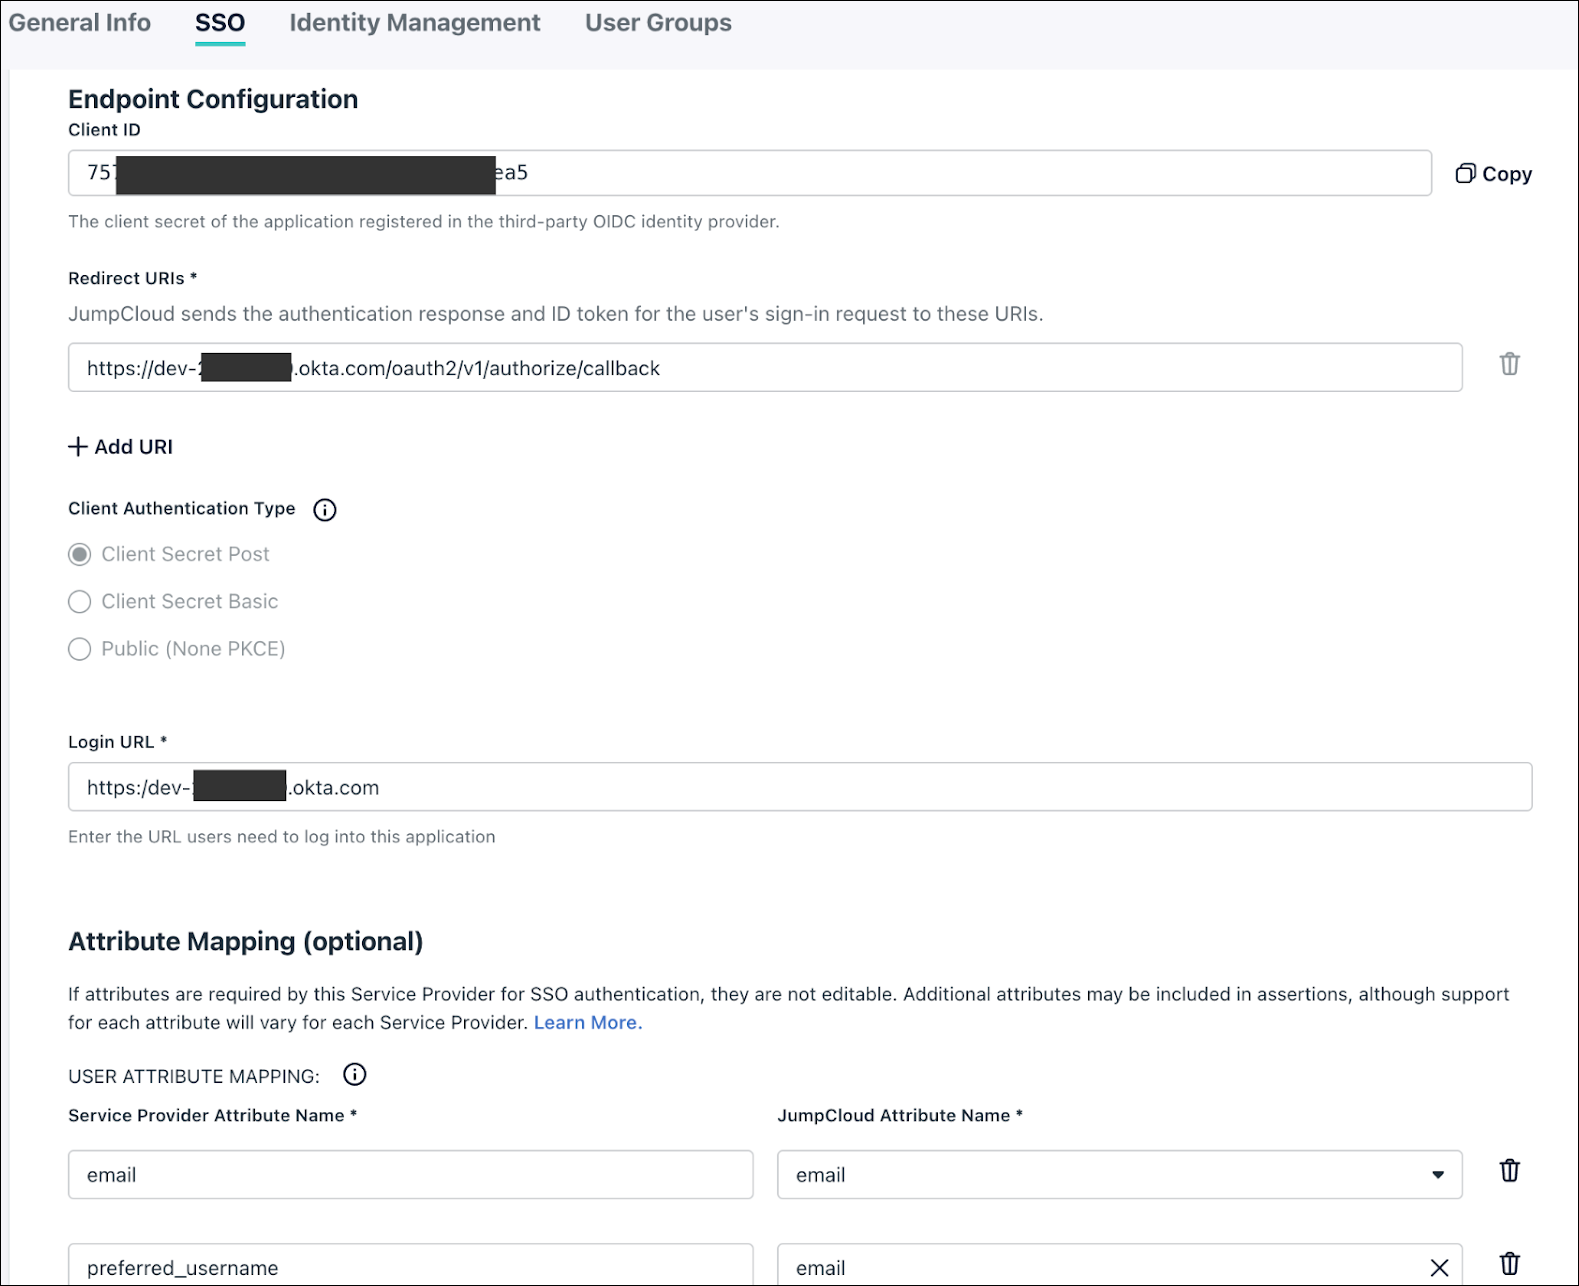
- Click Activate to save the application. Make a note of the Client ID and Client Secret; you will need them for the next step.
Step 2: Add JumpCloud as an Identity Provider in Okta
Go to your Okta Admin Console and add JumpCloud as an authenticator. This process establishes the connection, so you can use it as a required authentication factor.
- Log in to your Okta Admin Console.
- Go to Security > Authenticators.
- Click Add Authenticator and select IdP Authenticator.
- Choose the OpenID Connect option.
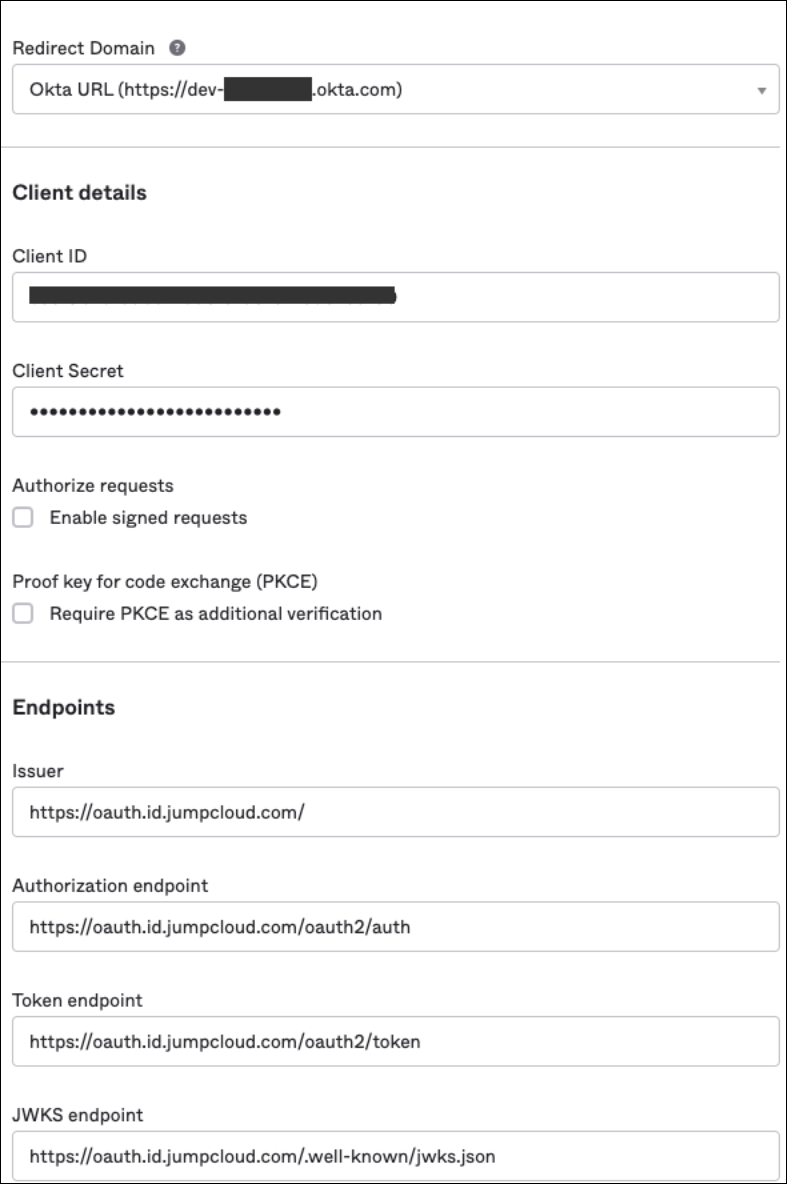
- Name the authenticator and populate the fields using the information from your JumpCloud OIDC App:
- Redirect Domain: Your Okta tenant URL.
- Client ID and Client Secret from your JumpCloud configuration.
- Issuer: https://oauth.id.jumpcloud.com/
- Authorization endpoint: https://oauth.id.jumpcloud.com/oauth2/auth
- Token endpoint: https://oauth.id.jumpcloud.com/oauth2/token
- JWKS endpoint: https://oauth.id.jumpcloud.com/.well-known/jwks.json
- Click Add.
- Go back to Security > Authenticators and enroll this new authenticator for your users.

Step 3: Configure Authentication Policies in Okta
Create an authentication policy in Okta. This policy requires users to authenticate with the "JumpCloud Factor," which triggers the device trust check.
- In the Okta Admin Console, go to Security > Authentication Policies.
- Add a new policy or edit an existing one.
- For testing, you can assign this policy to a specific test application and user group.
- Within the policy, add a rule that requires the JumpCloud Factor for authentication. You can set the re-authentication frequency to suit your needs.
- Go back to Security > Authenticators and enroll this new authenticator for your users.
Step 4: Configure Conditional Access Policies in JumpCloud
Configure a Conditional Access Policy in JumpCloud. This policy evaluates the device condition and enforces the device trust check you need to protect your resources.
- In your JumpCloud Admin Portal, go to SECURITY MANAGEMENT > Conditional Policies.
- Click Create Conditional Policy.
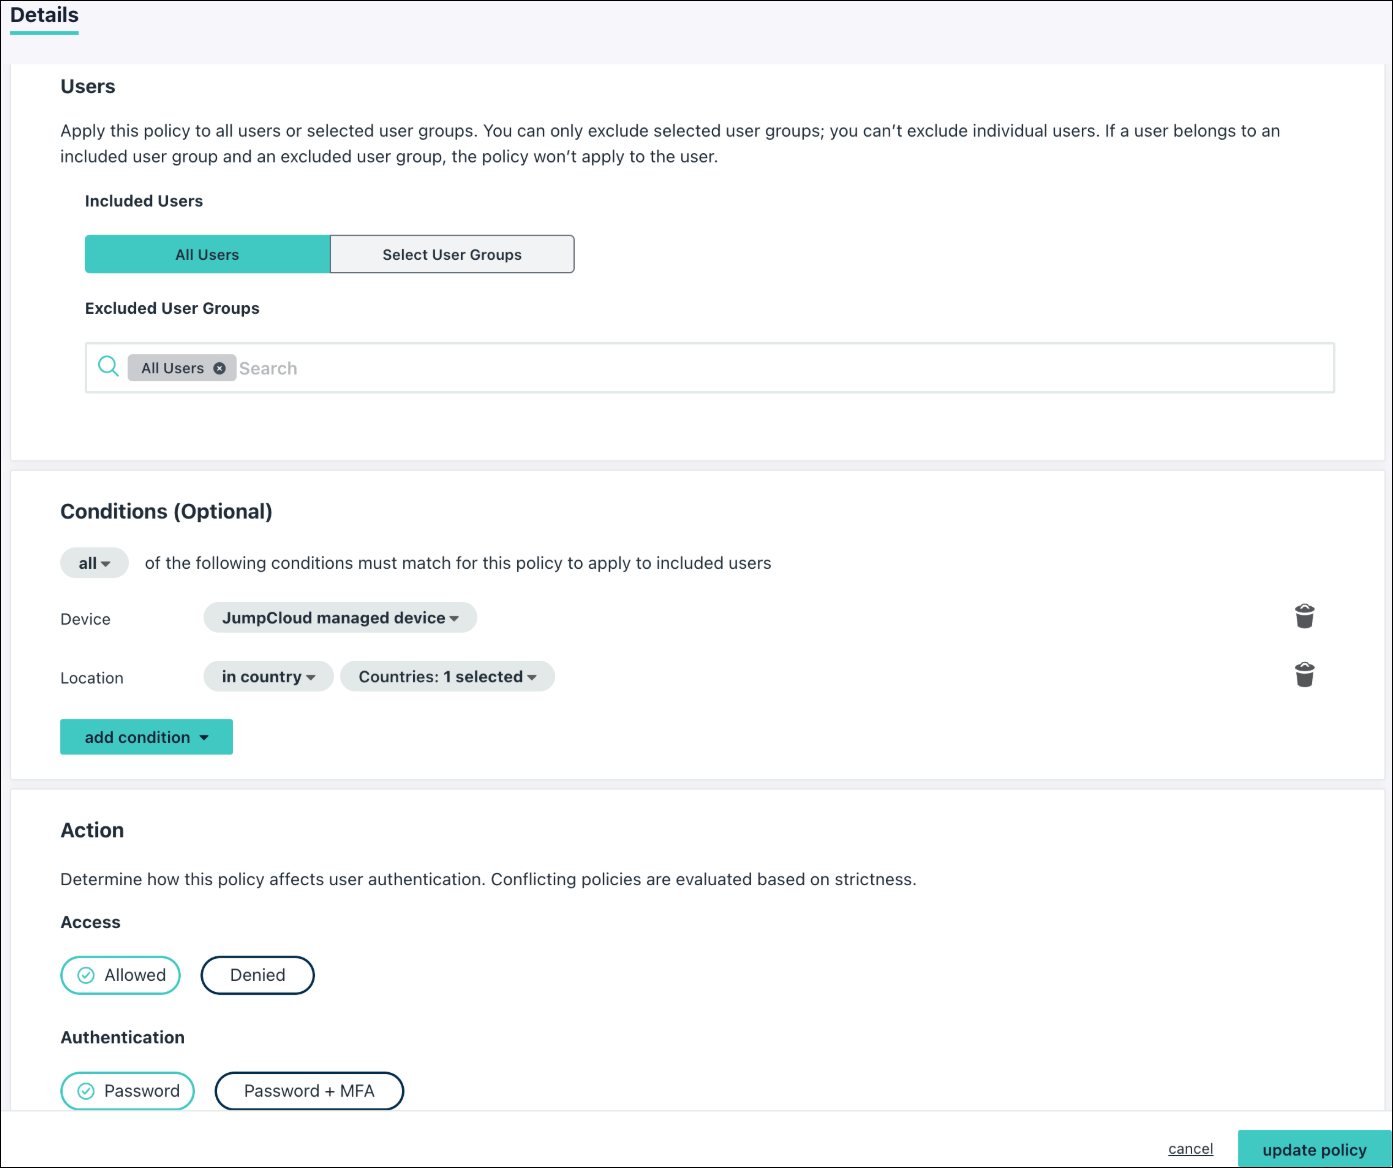
- Fill out the policy details:
- General Info: Give the policy a descriptive name, such as "Okta Device Trust."
- Assignments: Assign the policy to the relevant user groups or "All Users."
- Conditions:
- Add a Device condition and select JumpCloud managed device.
- Add a Location condition, select in country and choose the required countries.
- Action:
- Set Access to Allowed.
- Set Authentication to Password.
- Click update policy.

After completing these steps, the configuration is ready for testing. Users attempting to access an application protected by your Okta policy will be redirected to JumpCloud for a device trust check, ensuring they are on a managed device before being granted access.