
You can view a high-level overview of your company’s fleet of devices by OS version. You can also see the release train details for macOS and Windows releases.
To view your OS distribution:
- Log in to the JumpCloud Admin Portal.
![]()
Important:
If your data is stored outside of the US, check which login URL you should be using depending on your region. If your organization uses LDAP, RADIUS, or requires firewall allow list configuration, the Fully Qualified Domain Names (FQDNs) will also be region specific. See JumpCloud Data Centers for the URLs, FQDNs, and IP addresses.
- Go to Device Management > Devices.
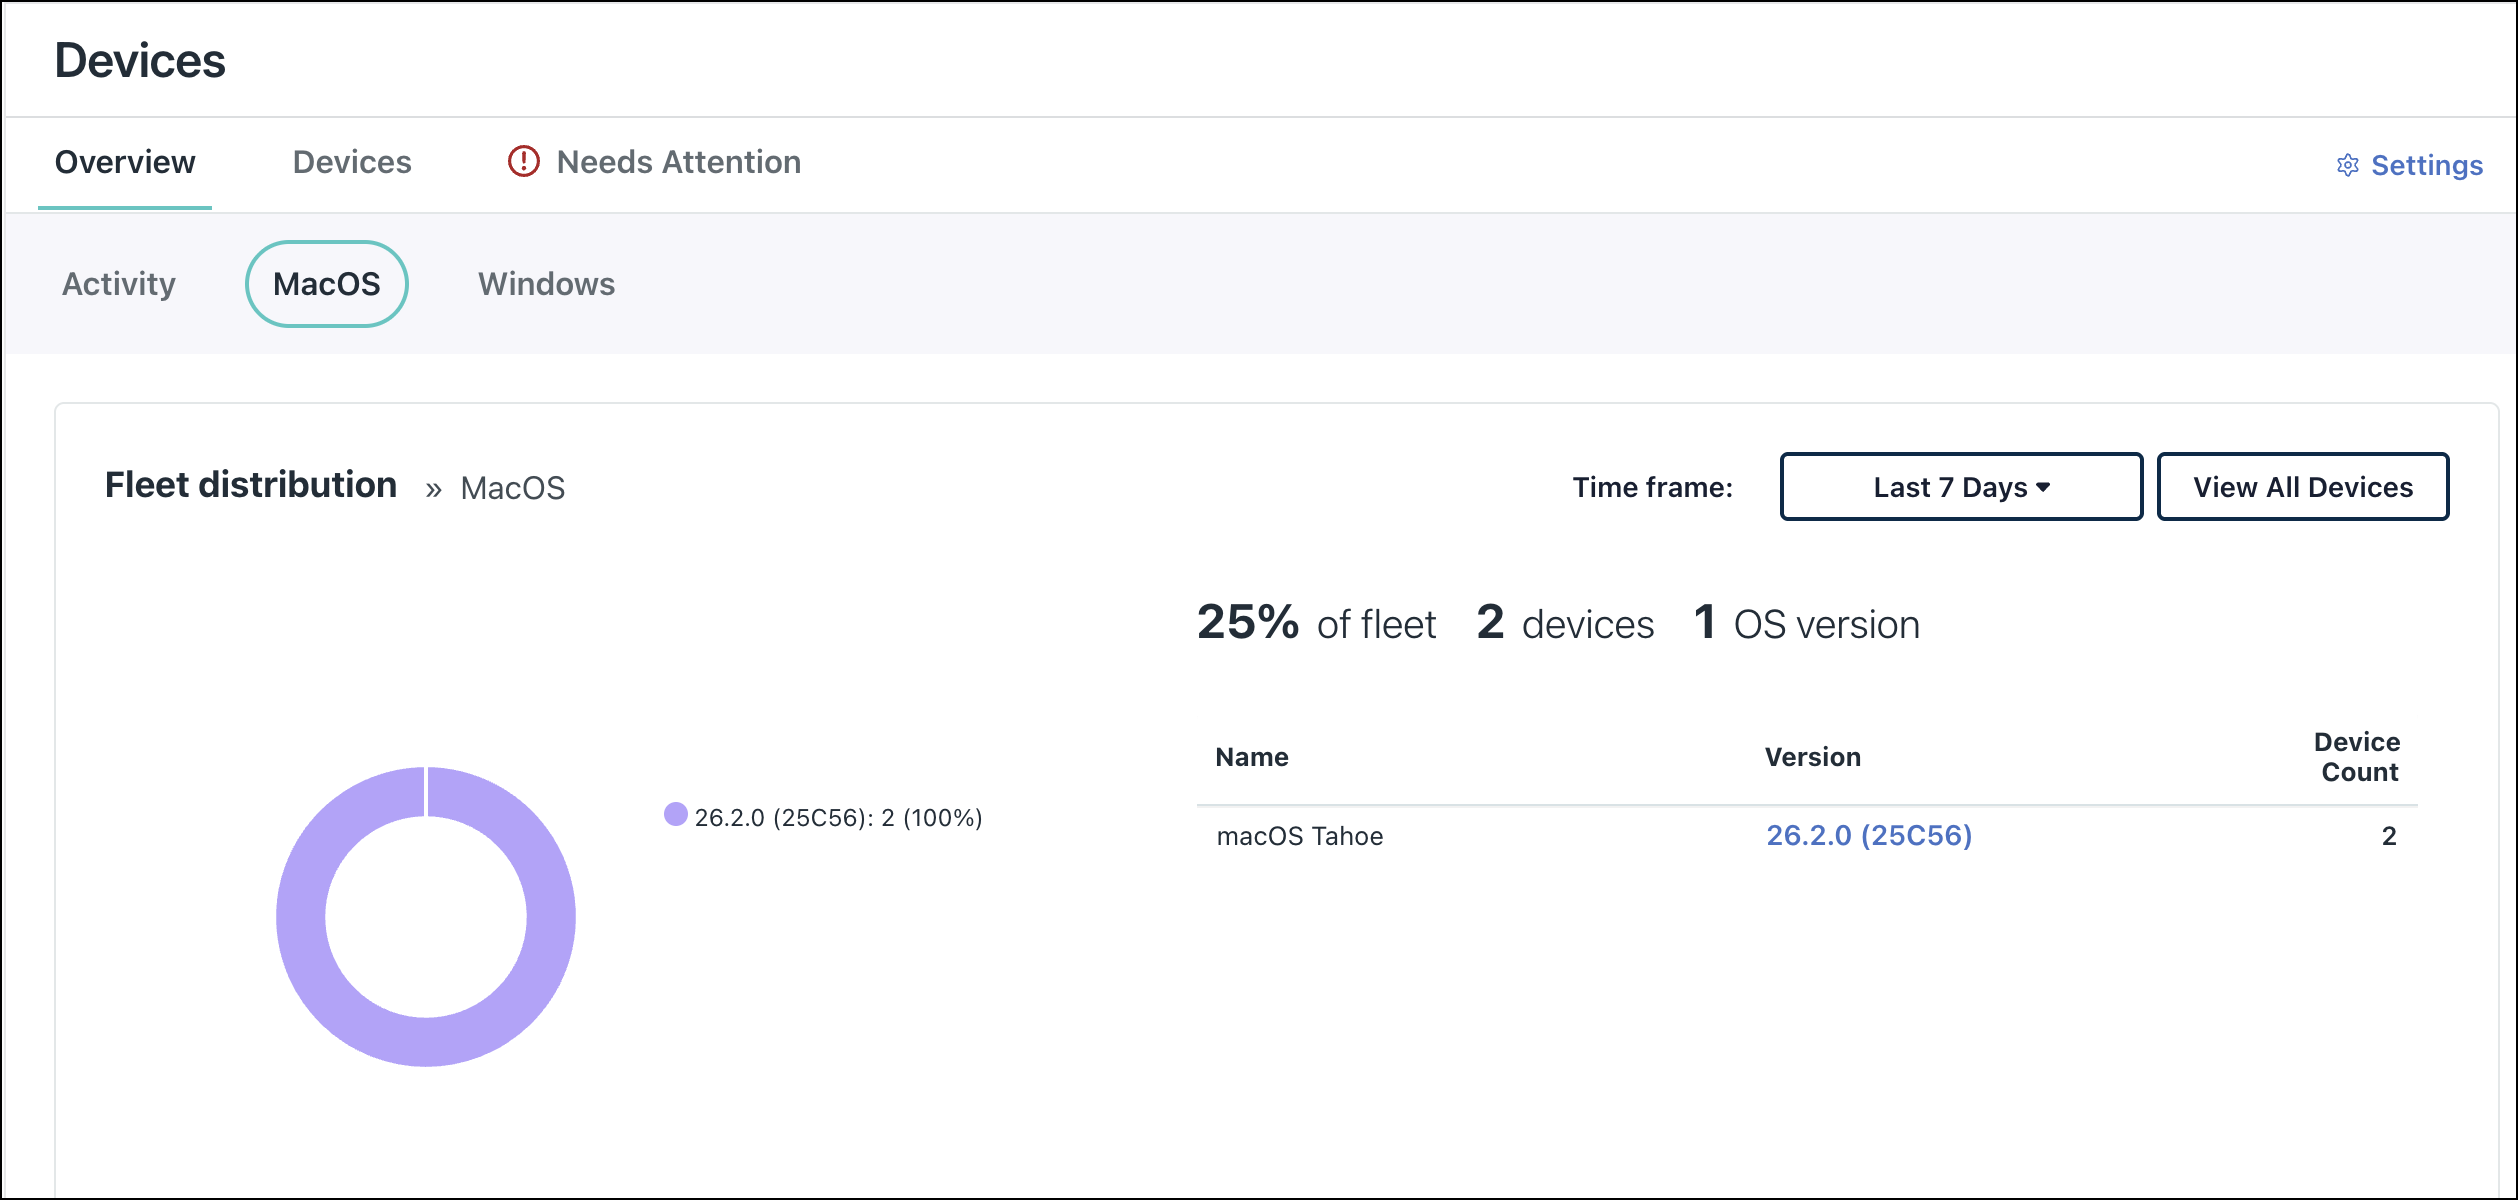
- Select the Overview tab and hover over each part of the Fleet Distribution graphic to see the number of installed devices by OS type. The tabs in the Fleet Distribution section are conditional and only appear if you have those types of devices in your fleet for the selected Time Frame.
- Select the Activity tab to see a summary of the total number of new and deleted devices, as well as patch events like major and minor OS updates. The OS tabs display a breakdown of your devices by OS version. This screenshot shows device additions, deletions, and patch events for your entire fleet when the Activity tab is selected:

You can sort the columns that contain your fleet information. For example, select MacOS, then click Name, Version, or Device Count to reorder that column’s information. Clicking Version (or Build for Windows) provides additional details for devices that use that specific OS version. You can then filter that list by macOS version, Windows build, or Ubuntu version.
Get detailed release information by selecting a tab to view the percentage of devices by OS, the number of devices running each version, and End of Service status for Windows and Mac. For example, select the Win tab to see Windows information:
Major OS release information for Windows and macOS appears in the third column:- LATEST - This OS version is the most recent release.
- NEAR END OF SERVICE:
- Windows - The end of service date published by Microsoft for Windows Home and Pro is less than 90 days from the current date, so Windows versions display an EOS date. See JumpCloud Agent Compatibility, System Requirements, and Impacts to learn more.
- END OF SERVICE:
- MacOS - This OS version is not receiving security updates from Apple as it is running a version greater than the latest three major releases. See Prepare Now for End of Support to learn more.
- Windows - This OS version for Windows Home and Pro is not receiving security updates from Microsoft. See Prepare Now for End of Support to learn more. Windows versions also display Microsoft’s published EOS dates.
- No banner - This OS version is supported, but is not the latest version.


![]()
Note: OS version release information is not available for Linux.
- You can click View All Devices to link to the Devices tab with the specific OS family filter already applied. The Activity tab shows you the Event Frequency graph.
- (Optional) With the Activity tab selected, click the Time frame filter and choose a range to narrow the time range to filter events and active devices. The Event Frequency graph at the bottom of the page lets you filter by event type.
For accounts that have Directory Insights included in their plans, the Time frame filter allows Admins to filter up to 90 days. For accounts without Directory Insights, the time range is limited to 15 days:
For example, Last 7 Days indicates that the device has been contacted by JumpCloud within the last 7 days. If you are unable to select the 7 Days option, there were no devices active during this time. The filter default is Last 7 Days.
The Last 30 Days indicates that the device has been contacted by JumpCloud within the last 30 days. If it’s been more than 30 days since a device was contacted, the device will not display here - Depending on the tab you chose in Step 4, you can quickly view a detailed summary of the total number of new and deleted devices, as well as patch events like major and minor OS updates. Select the Activity tab, then click View Activity Log to go to Directory Insights to see more detail. You can also click the device’s Hostname link to get more detail about the device.
- You must enable Directory Insights to view data older than 15 days. To learn how to subscribe, see JumpCloud Directory Insights.
- To view OS-specific release information, select an OS tab in Fleet Distribution to view the Recent OS Releases table. Viewing the latest available releases, latest versions, and release dates for a specific OS can help you plan your update schedule.
For example, select the MacOS tab to view the latest macOS versions:
- (Optional) To view your existing OS patch policies:
- Go to DEVICE MANAGEMENT > Policy Management, then select the Patch Management tab.
- Select the OS tab, then view existing OS patch policies. You can also click (+) to create a policy with customized rules to automatically upgrade your devices. See Create a MacOS Patch Policy, Create a Windows Patch Policy, and Create a Linux Patch Policy to learn more.
- You can also view the latest OS releases by going to the Release Trains area and selecting an OS tab.

![]()
Tip:
You can view existing Chrome browser patch policies by selecting the Browser tab.
- The Overview page is the default view when you go to Device Management > Devices. To make the Devices List be your default page, follow these steps:
- Select the Devices tab, then click Manage Devices.
- Toggle Set Devices List as Default Page On so that the white button moves to the right. The setting below is the ON setting and the Devices List page is now your default.


Back to Top