VaultOne operates with a hybrid software architecture, meaning part of the system runs in the cloud and another part operates within your company's infrastructure. Connectors are a crucial component of this architecture, serving three main functions: acting as an access proxy, recording sessions (if your subscription includes this feature), and performing password backups.
Only VaultOne administrators can perform the connector installation.
Prerequisites
Operational System
Ubuntu
Ubuntu Server 24.04
Docker
The connector run with docker, so you must install docker on the machine before the Connector installation. Refer Docker Documentation for more information.
Hardware
To install the VaultOne Connector correctly, make sure you meet one of the hardware requirements options based on the number of concurrent sessions per Connector:
Storage: 80GB HD

Network
Some basic firewall settings must be applied on the server by the network administrator. This configuration consists of allowing the Connector's Server to receive connections (Inbound) on ports 443 and 2222 (For bastion access only), in addition to its default SSH port. It will also be necessary to ensure that this server, where the connector will be installed, can communicate with the resources that will be accessed through communication protocols (HTTP, HTTPS, RDP, SSH, Telnet or VNC).
Installing a VaultOne Connector
Installation of a new VaultOne Connector is a two stage process. The first stage involves creating and configuring a new connector. And the second stage involves installation of the connector.
Registering a Connector in VaultOne
- Log in to VaultOne platform.
- Go to Administration > Connectors. A list of available connectors is displayed.
- Click +Add Connector. The Create new connector page is displayed.
- On the Create new connector, configure the connector by entering the following details:
- Name
- IP
- Web Port
- Shell Port
- Click Save to save the details and register the connector.
Installing the Connector
The first step has already been completed, but your connector will still not work properly, you now need to INSTALL IT.
- After registering the connector, you will be redirected to the connectors board.
- Locate the connector you just registered and click on Actions then Install.
- You have two options:
- Copy the command line and paste it on the Linux machine
- Click Download to download the installation script and run the script on the Linux machine prepared to be the connector
- Access the linux machine and change to root user by using the
sudo sucommand. - After being the root user, paste the command from the platform. This requires an authentication from a local VaultOne user.

Verify Installation
You can verify the installation by the following options:
- To confirm that the connector has been successfully installed, check the connectors menu in your VaultOne platform. If the software version and the last access date of your newly installed connector appear correctly, the installation was successful.
- Use the
docker ps -acommand to verify if all containers are up and healthy.

Checking Connector Health
You can check the status, performance, and other parameters of a connector by:
- Log in to VaultOne platform.
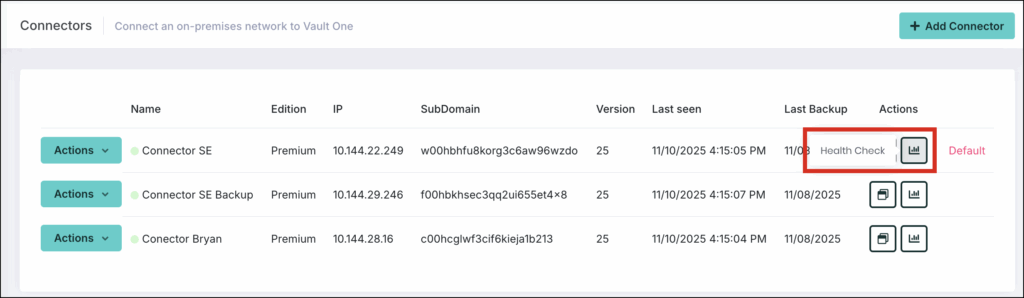
- Go to Administration > Connectors. A list of available connectors is displayed.
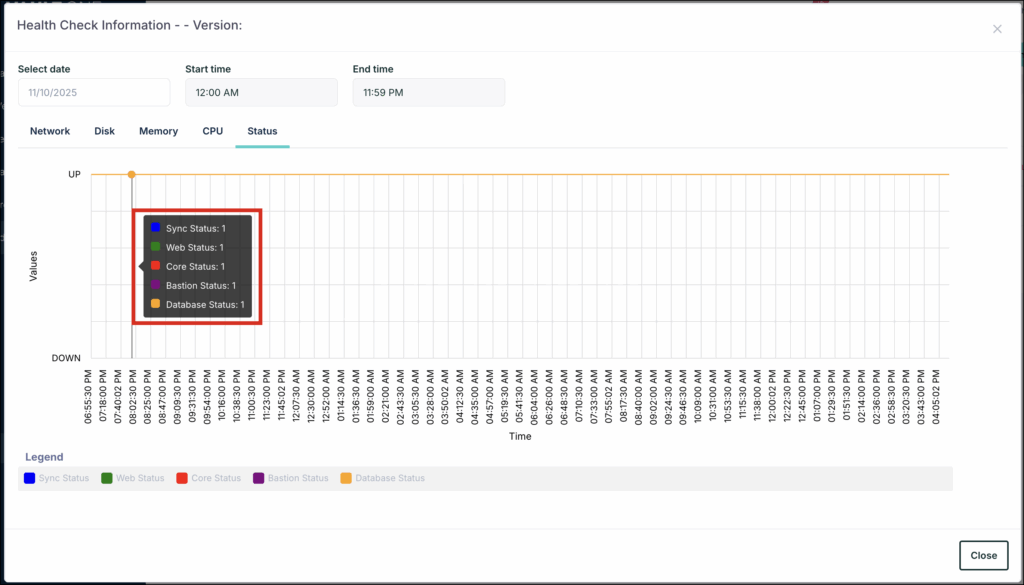
- Select a connector and click the Health Check icon under Actions column. The Health Check Information page is displayed.
- On the Health Check Information page, select the Status tab to view the connector's operational status. A status value of 1 indicates the connector is working as expected, while 0 indicates it is down.