
You can configure Vault to allow users to log in using Microsoft’s Azure Active Directory (Azure AD), including support for on-premises AD environments integrated via Azure AD Connect.
Follow the steps below to complete the integration.
![]()
For On-Prem AD it will require Azure AD Connect
If you’re integrating Vault Platform with an on-premises Active Directory, first install Azure AD Connect on your local environment. This tool synchronizes your local AD with Azure AD, enabling cloud-based authentication.
Step-by-Step Setup
Step 1 – Open Identity Providers in Vault
In your Vault portal:
- Navigate to Administration → Settings → Identity Providers.
To enable authentication only, you'll only need to fill in:
- Application ID
- Directory ID
![]()
Important: If you also want to synchronize groups, you must complete all the required fields in this section.
Step 2 – Access the Azure Portal
In a new browser tab, go to https://portal.azure.com
Select Azure Active Directory from the available services.

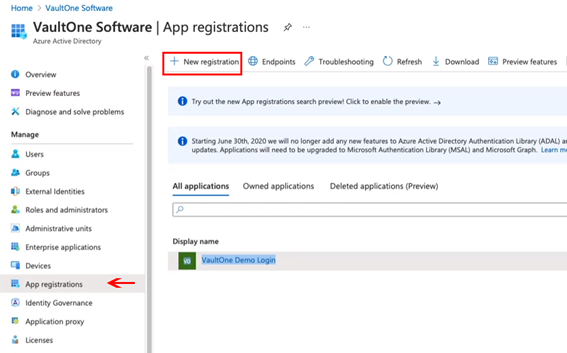
Step 3 – Register a New Application
In the left-hand menu, go to App registrations and click + New registration.
Step 4 – Configure the Application Registration
- Set a name for the app.
- Under Supported account types, select:
- Accounts in this organizational directory only.
- Click Register.

Step 5 – Get Application Information
After registration, a new app will be created. Copy the following values for use in Vault:
- Application (client) ID
- Directory (tenant) ID
Step 6 – Fill in Vault Settings
Return to Vault and paste the values above into the corresponding fields under Identity Providers.
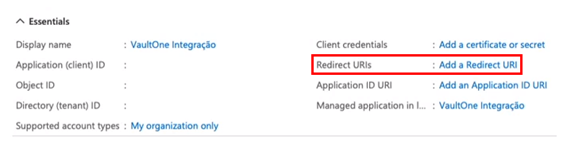
Step 7 – Add a Redirect URI
In the registered app, go to Authentication → Add a Redirect URI.
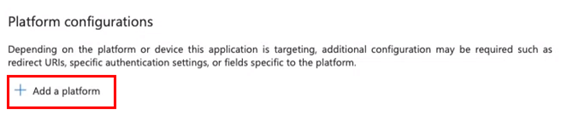
Step 8 – Add a Platform Configuration
- Click Add a platform.
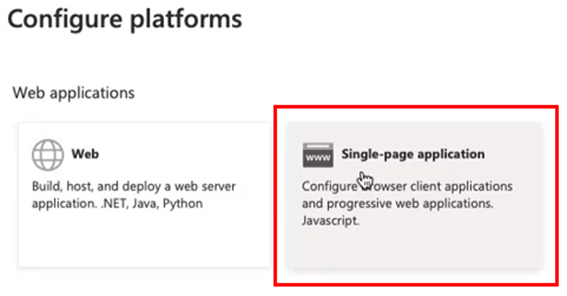
- Select Single-page application.
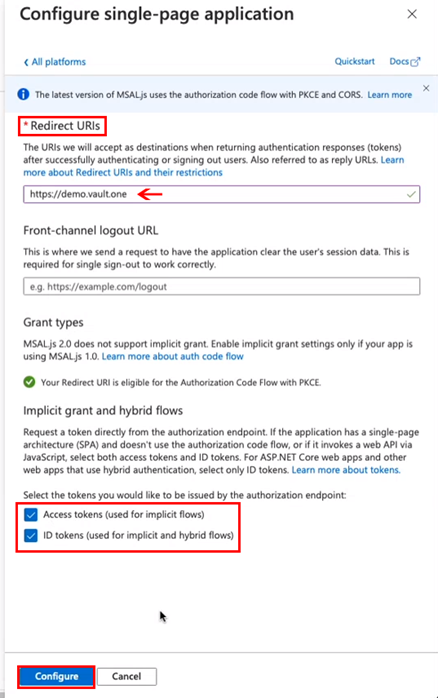
Step 9 – Configure the Redirect URI
In the Redirect URIs field, enter your Vault subdomain, e.g.:
https:////.vault.jumpcloud.comCheck:
- Access tokens (used for implicit flows)
- ID tokens (used for implicit and hybrid flows)
Click Configure.
With this, users will be able to log in to Vault using Azure AD.
Group Synchronization Setup
If you want to import AD groups, continue with the steps below:
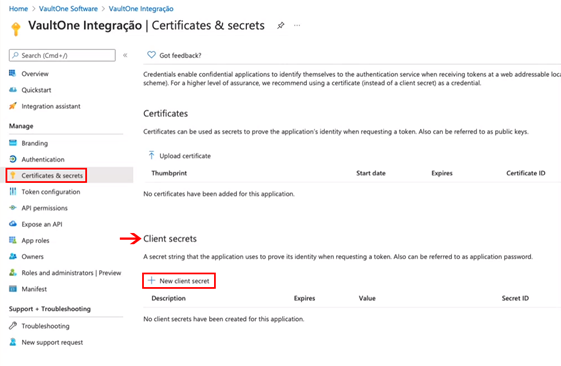
Step 10 – Create a Client Secret
In the side menu:
- Go to Certificates & secrets → Client secrets → + New client secret.
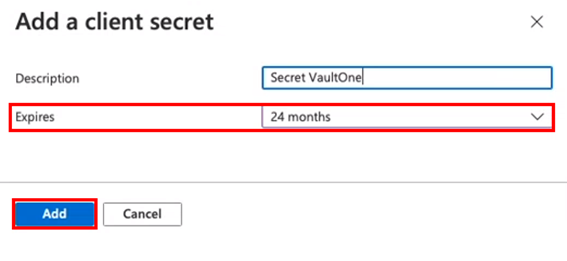
Step 11 – Define Secret Details
Add a description (e.g., Vault Integration).
Set expiration to 24 months.
Click Add.
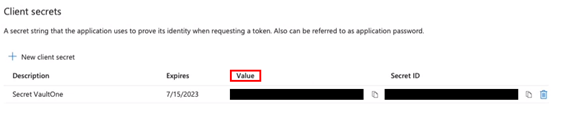
Step 12 – Copy the Secret Value
After creation, copy the value (not the ID) and paste it into the Application Key field in Vault.
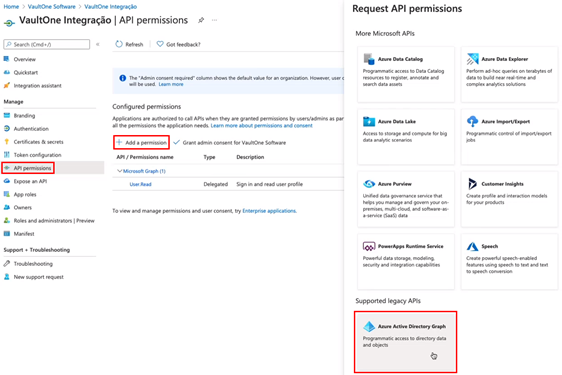
Step 13 – Grant API Permissions
Go to API permissions → + Add a permission.
Scroll to the bottom and select Azure Active Directory Graph.
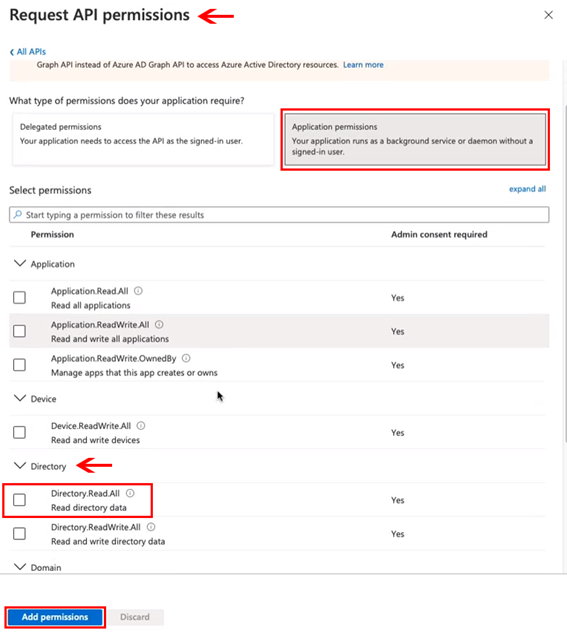
Step 14 – Configure Required Permissions
Choose Application permissions.
Under the Directory section, check:
- Directory.Read.All
Click Add permissions.
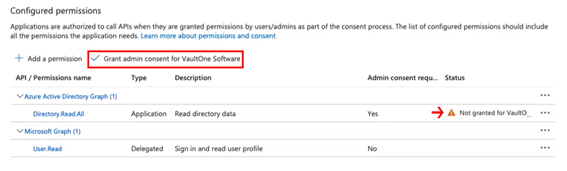
Step 15 – Grant Admin Consent
You’ll notice that permissions haven’t been granted yet.
Click Grant admin consent for Vault Software to finalize.
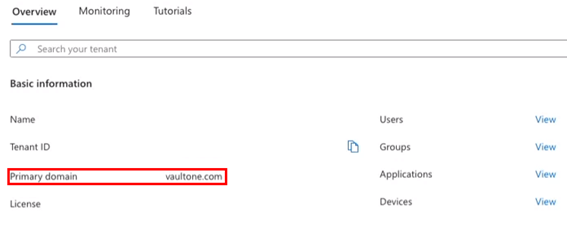
Step 16 – Set Primary Domain in Vault
In the Overview section of Azure AD:
- Locate your Primary domain.
- Paste it into the Directory Domain field in Vault and save the configuration.
All Set!
You have successfully configured Azure AD (or Entra) SSO integration with Vault. Users can now authenticate using their Microsoft credentials, and groups can be synchronized if configured.