
JumpCloud's Customer Portal allows IT Admins to easily view and track support cases. It centralizes all of your organization's cases into a filterable list with clickable case numbers to view each item's details.
Accessing the Customer Portal
- Log in to your JumpCloud Admin Portal.
![]()
If your data is stored outside of the US, check which login URL you should be using depending on your region. If your organization uses LDAP, RADIUS, or requires firewall allow list configuration, the Fully Qualified Domain Names (FQDNs) will also be region specific. See JumpCloud Data Centers for the URLs, FQDNs, and IP addresses.
- Click the support icon on the top right.
- Go to Case Portal > View Case Portal.
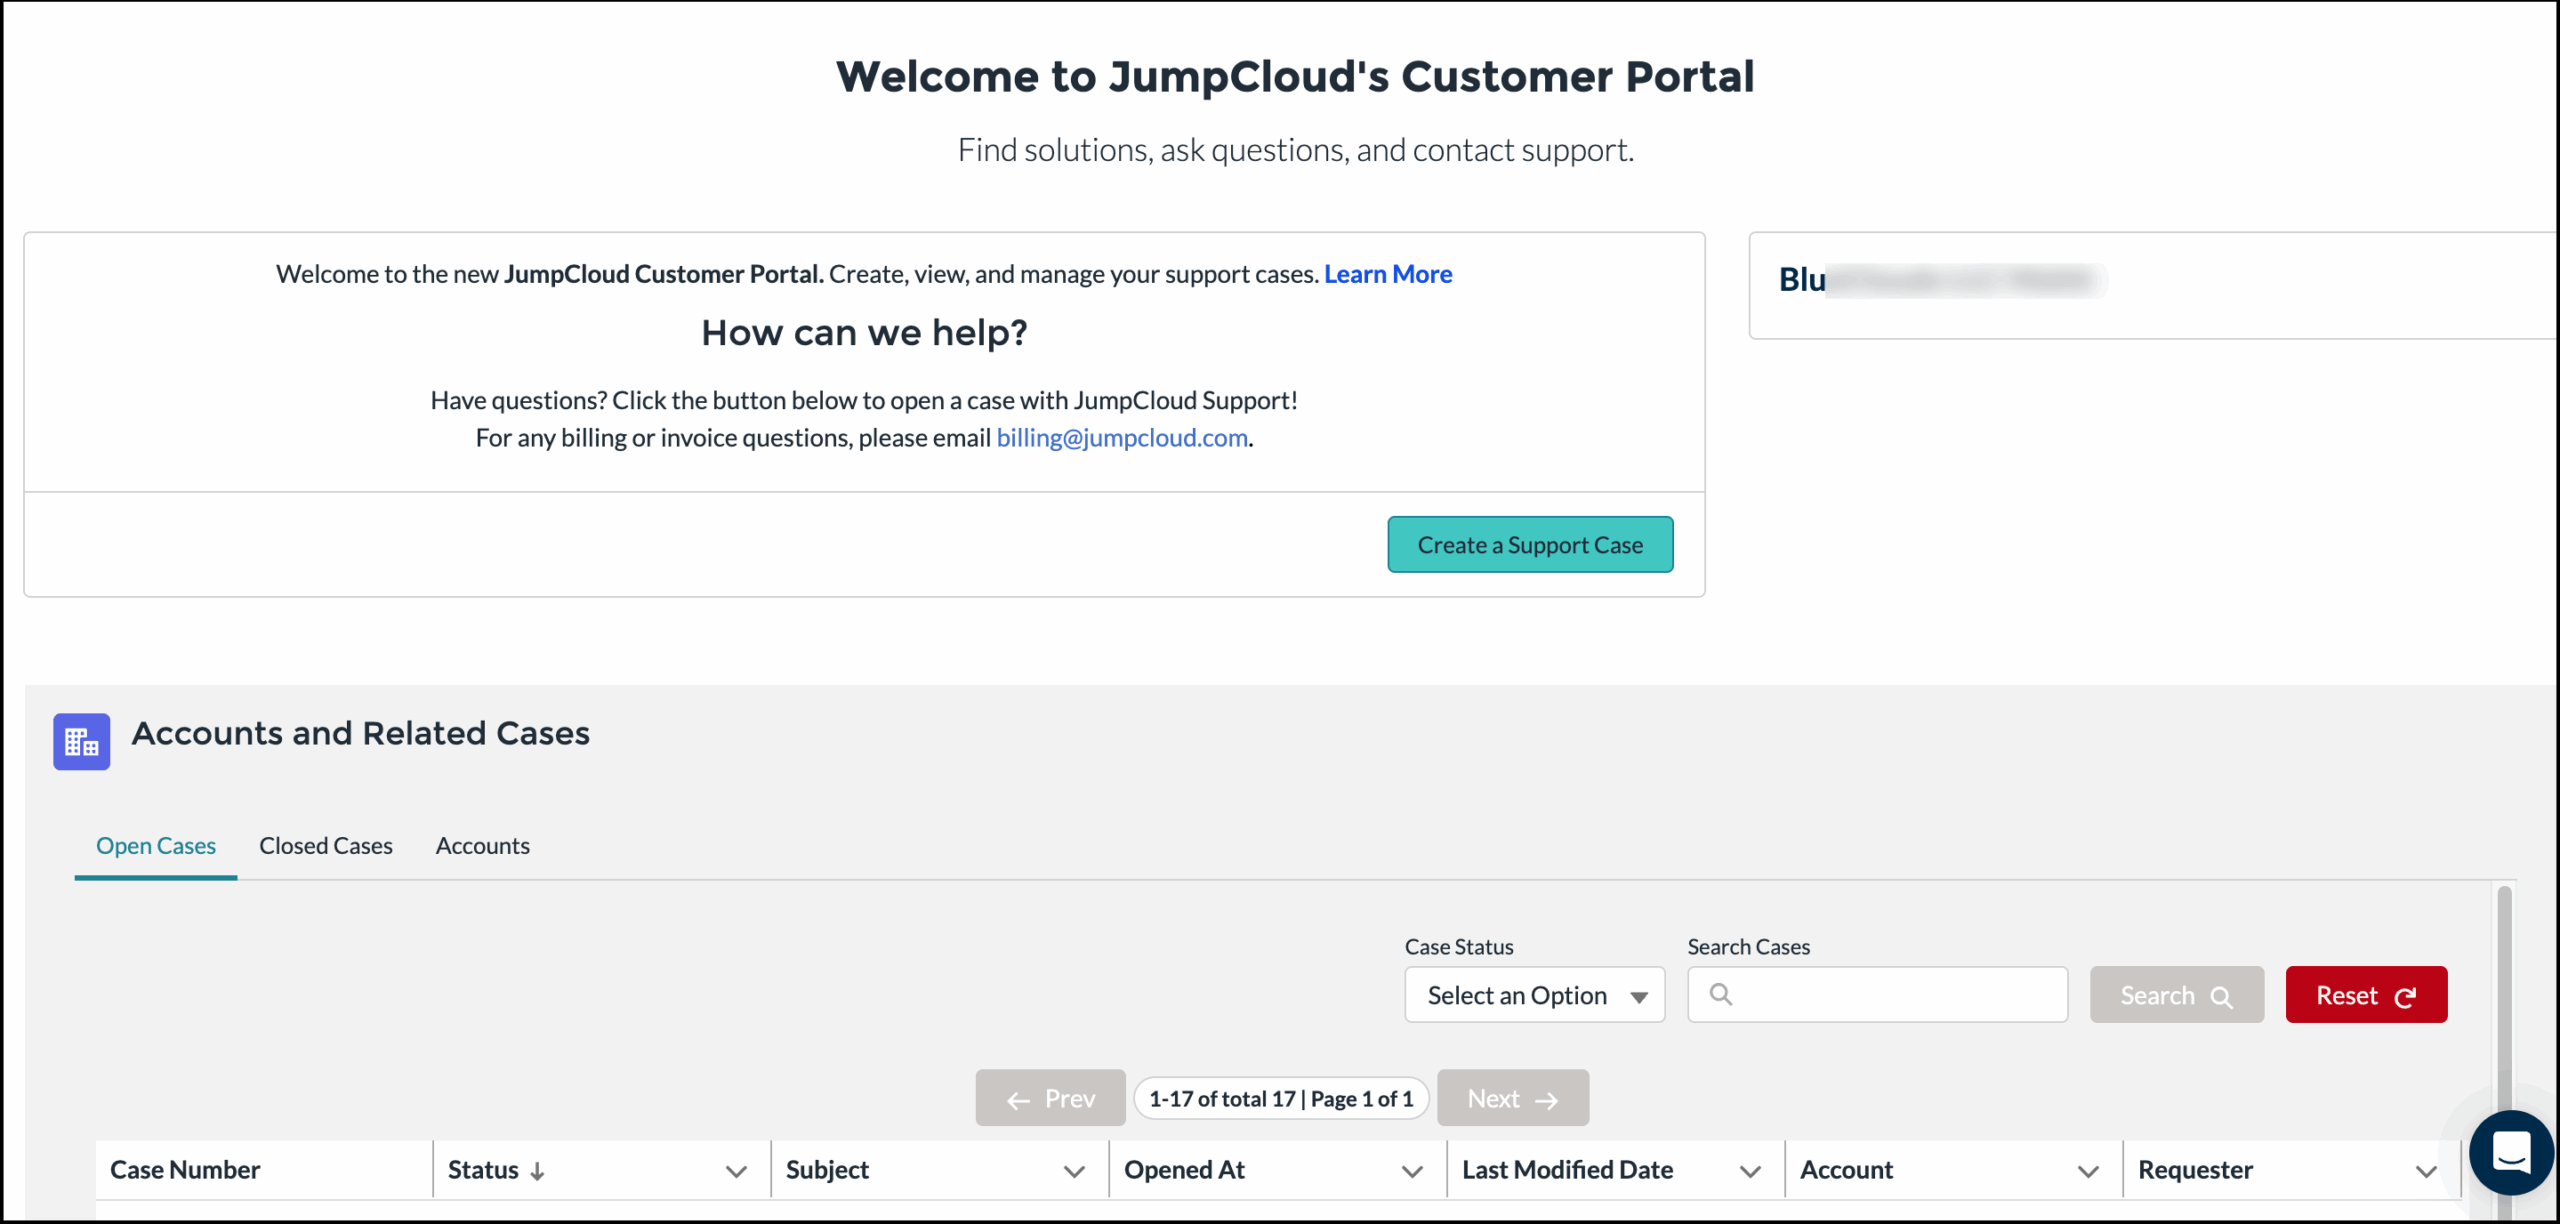
- This will launch JumpCloud’s Customer Portal in a new tab. You'll see a list of all your org's cases on the main page.
![]()
The newest cases will always be at the top.
Using the Customer Portal
Viewing Your Cases
- On the portal's main page, view your active and historical cases under the Open Cases, Closed Cases, or Accounts tabs. They are listed in the following sortable columns:
- Case Number
- Status
- Subject
- Opened At
- Last Modified Date
- Account
- Requester
You can click the caret (⋀) next to a column's name to sort it in ascending or descending order.
- You can use the search field to look up a case number, or keywords associated with a case subject, account, or reporter.
- To filter by Case Status, select one of the options from the dropdown:

- New: The case hasn't been reviewed by an Admin.
- Waiting on Support: A JumpCloud support engineer is actively working on resolving the issue with the reporter via email.
- Waiting on Customer: The ticket requires further information from the customer.
- On Hold: The case is temporarily on hold.
- To view case details, click the case number.

Updating and Editing a Case
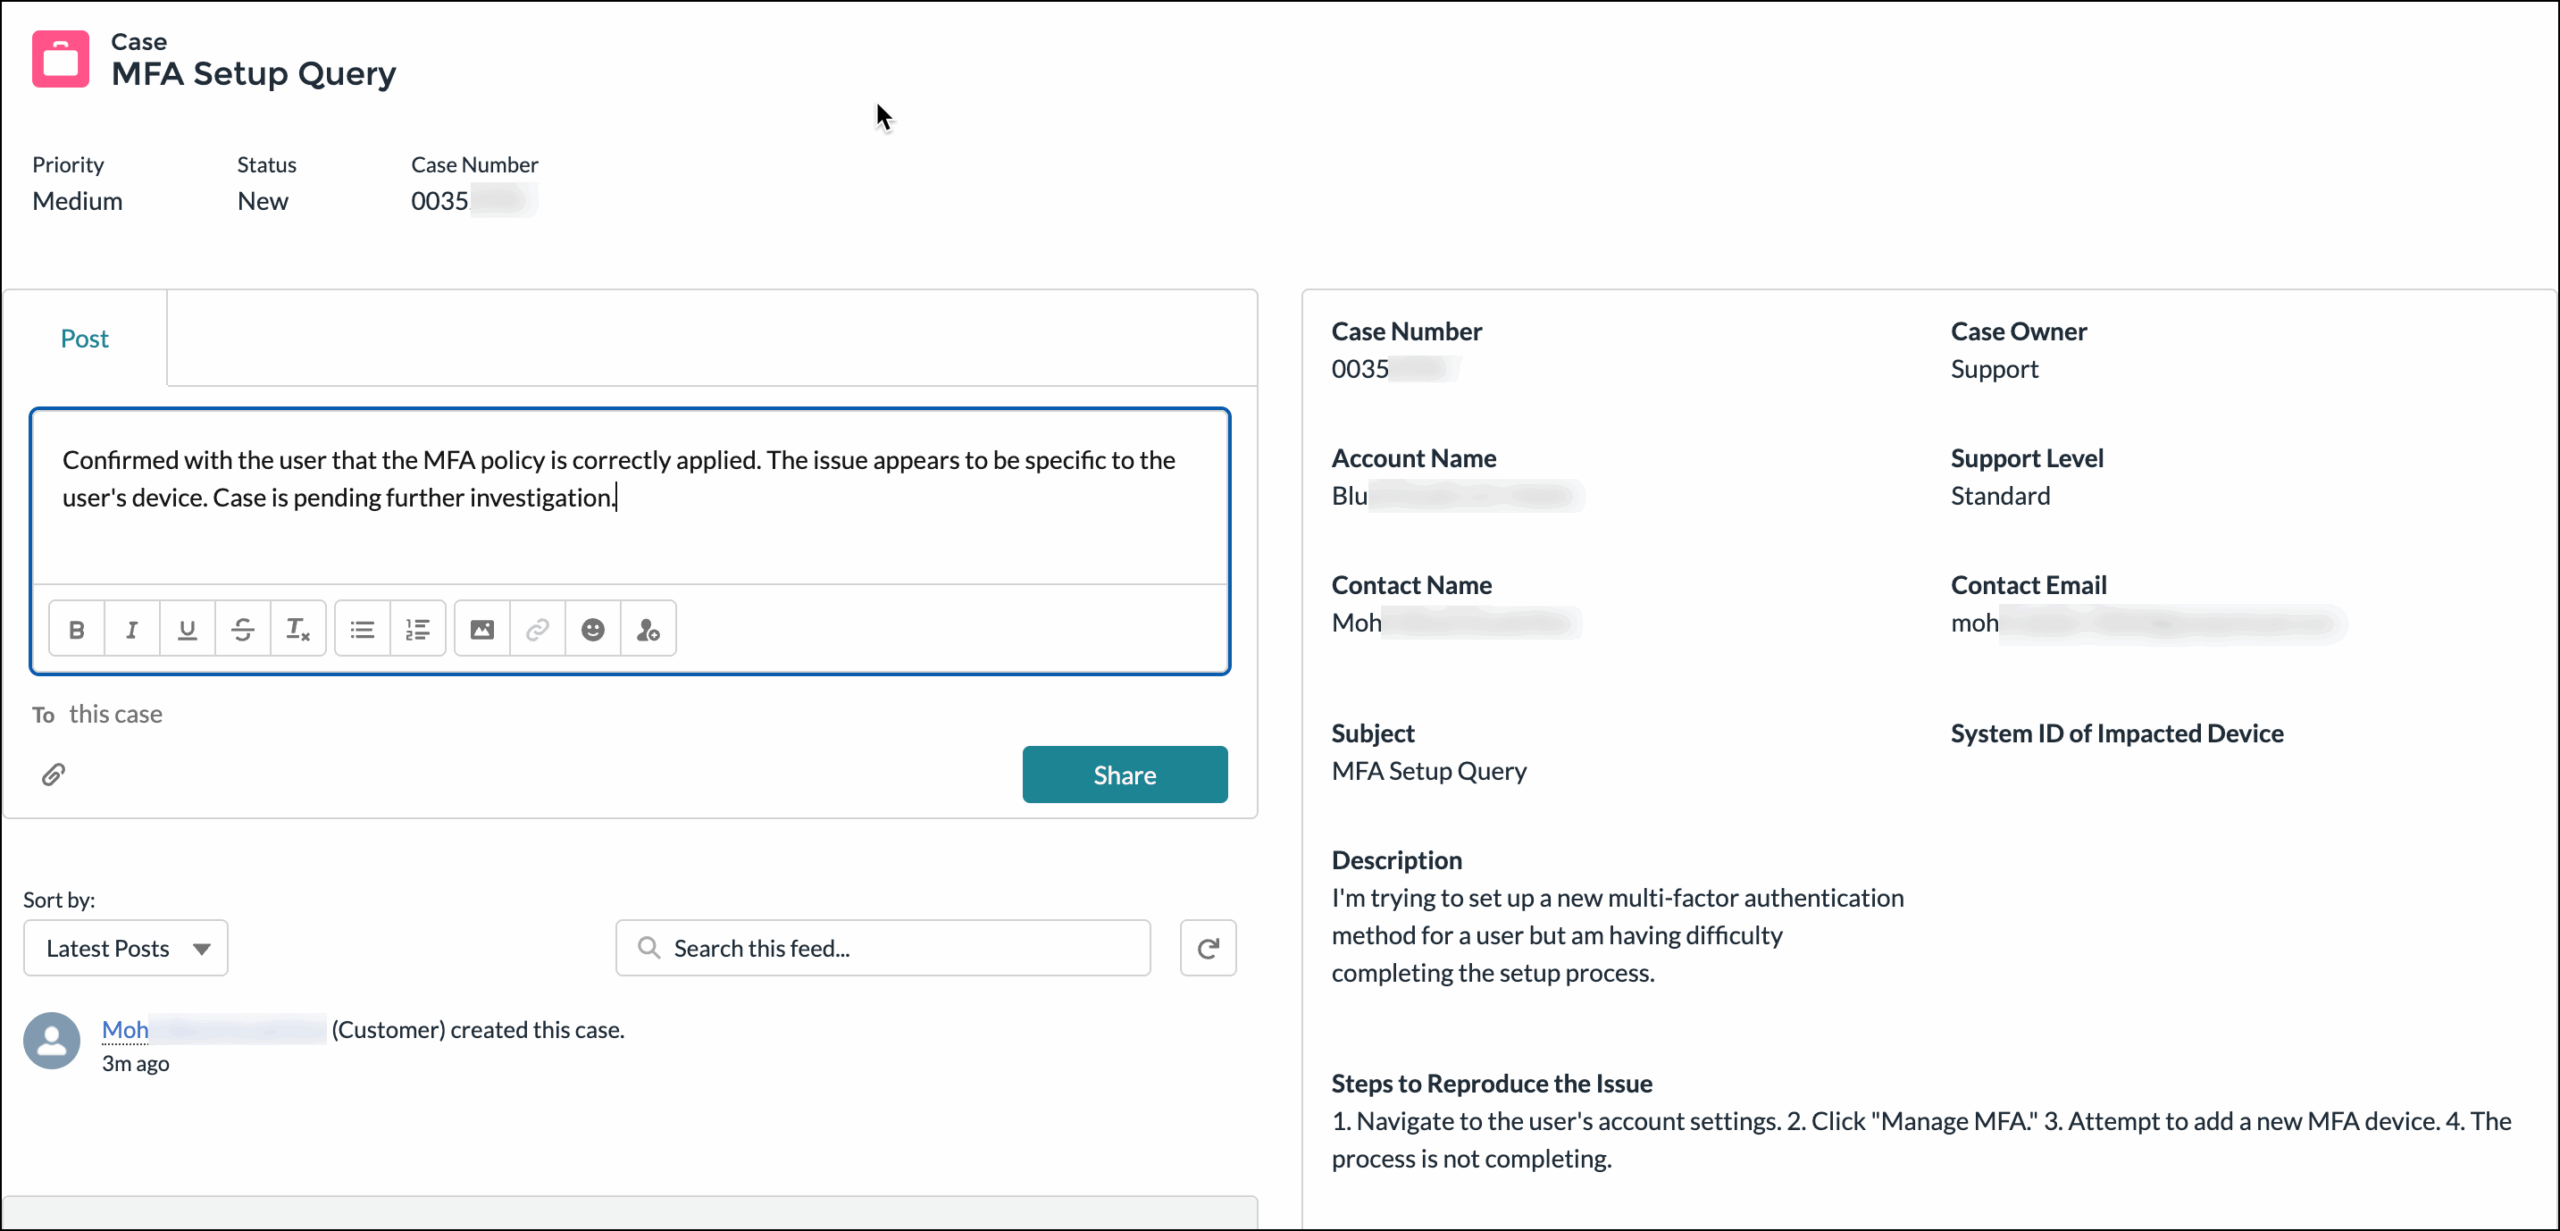
You can post updates for a case as you progress with the communication and resolution steps, and update certain fields for a case.
To share updates for a case:
- From the customer support portal’s main page, click the required case. The case details will appear in a new tab.
- Click the Share an update… field, and enter the details.

- Click the ‘attachment’ icon to upload supporting files for the case.
- Click Share.
To edit details for a case:
- From the customer portal’s main page, click the required case. The case details will appear in a new tab.
- Scroll down and click Edit in the right hand corner.
- You can update the OS, Steps to Reproduce the Issue, and System ID of Impacted Device.
- Click Save.