
Overview
Bulk enrollment with Windows MDM improves the onboarding process for IT Admins by simplifying and expediting device enrollment of Windows 10/11 laptop and desktop devices.
Users can download a XML archive containing configuration files, import the files in Windows Imaging and Configuration Designer (WCD), export the provisioning package to a USB flash drive, start the device, enroll in MDM, download the Agent, and access the device with a dynamically created account readily available on the Home screen.
Features
- Create a pre-configured installation enrollment provisioning package file (.ppkg) and deploy to all Windows 10 and 11 endpoints.
- Highly scalable: bulk enroll devices with the same configuration files quickly and efficiently.
- Reduce the time it takes to deploy from hours to minutes.
- Reduce the calls to Support for manual deployments.
Prerequisites
- Make sure your device is running Windows 10 or 11.
- Install Windows Configuration Designer.
- Admin must have “Administrator” or “Administrator with Billing” privileges to download the XML configuration from the JumpCloud Admin Portal.
- Internet access is required. Devices must either be connected to LAN, or the WiFi configuration must be added to the provisioning package.
- To streamline the provisioning process for you and your end-users, enable self-service account provisioning. For more information, see Provision New Users on Device Login.
Considerations
- These configuration files expire after 90 days and are eligible for a maximum of 500 devices.
- If you create a new configuration file any older file will become invalid.
Create a Provisioning Package
Download the JumpCloud configuration file and create a provisioning package in WCD.
- Log in to the JumpCloud Admin Portal.
![]()
If your data is stored outside of the US, check which login URL you should be using depending on your region. If your organization uses LDAP, RADIUS, or requires firewall allow list configuration, the Fully Qualified Domain Names (FQDNs) will also be region specific. See JumpCloud Data Centers for the URLs, FQDNs, and IP addresses.
- Go to Device Management > Devices.
- Download the configuration file.
- Click the Devices tab.
- Click the + icon to add a new device.
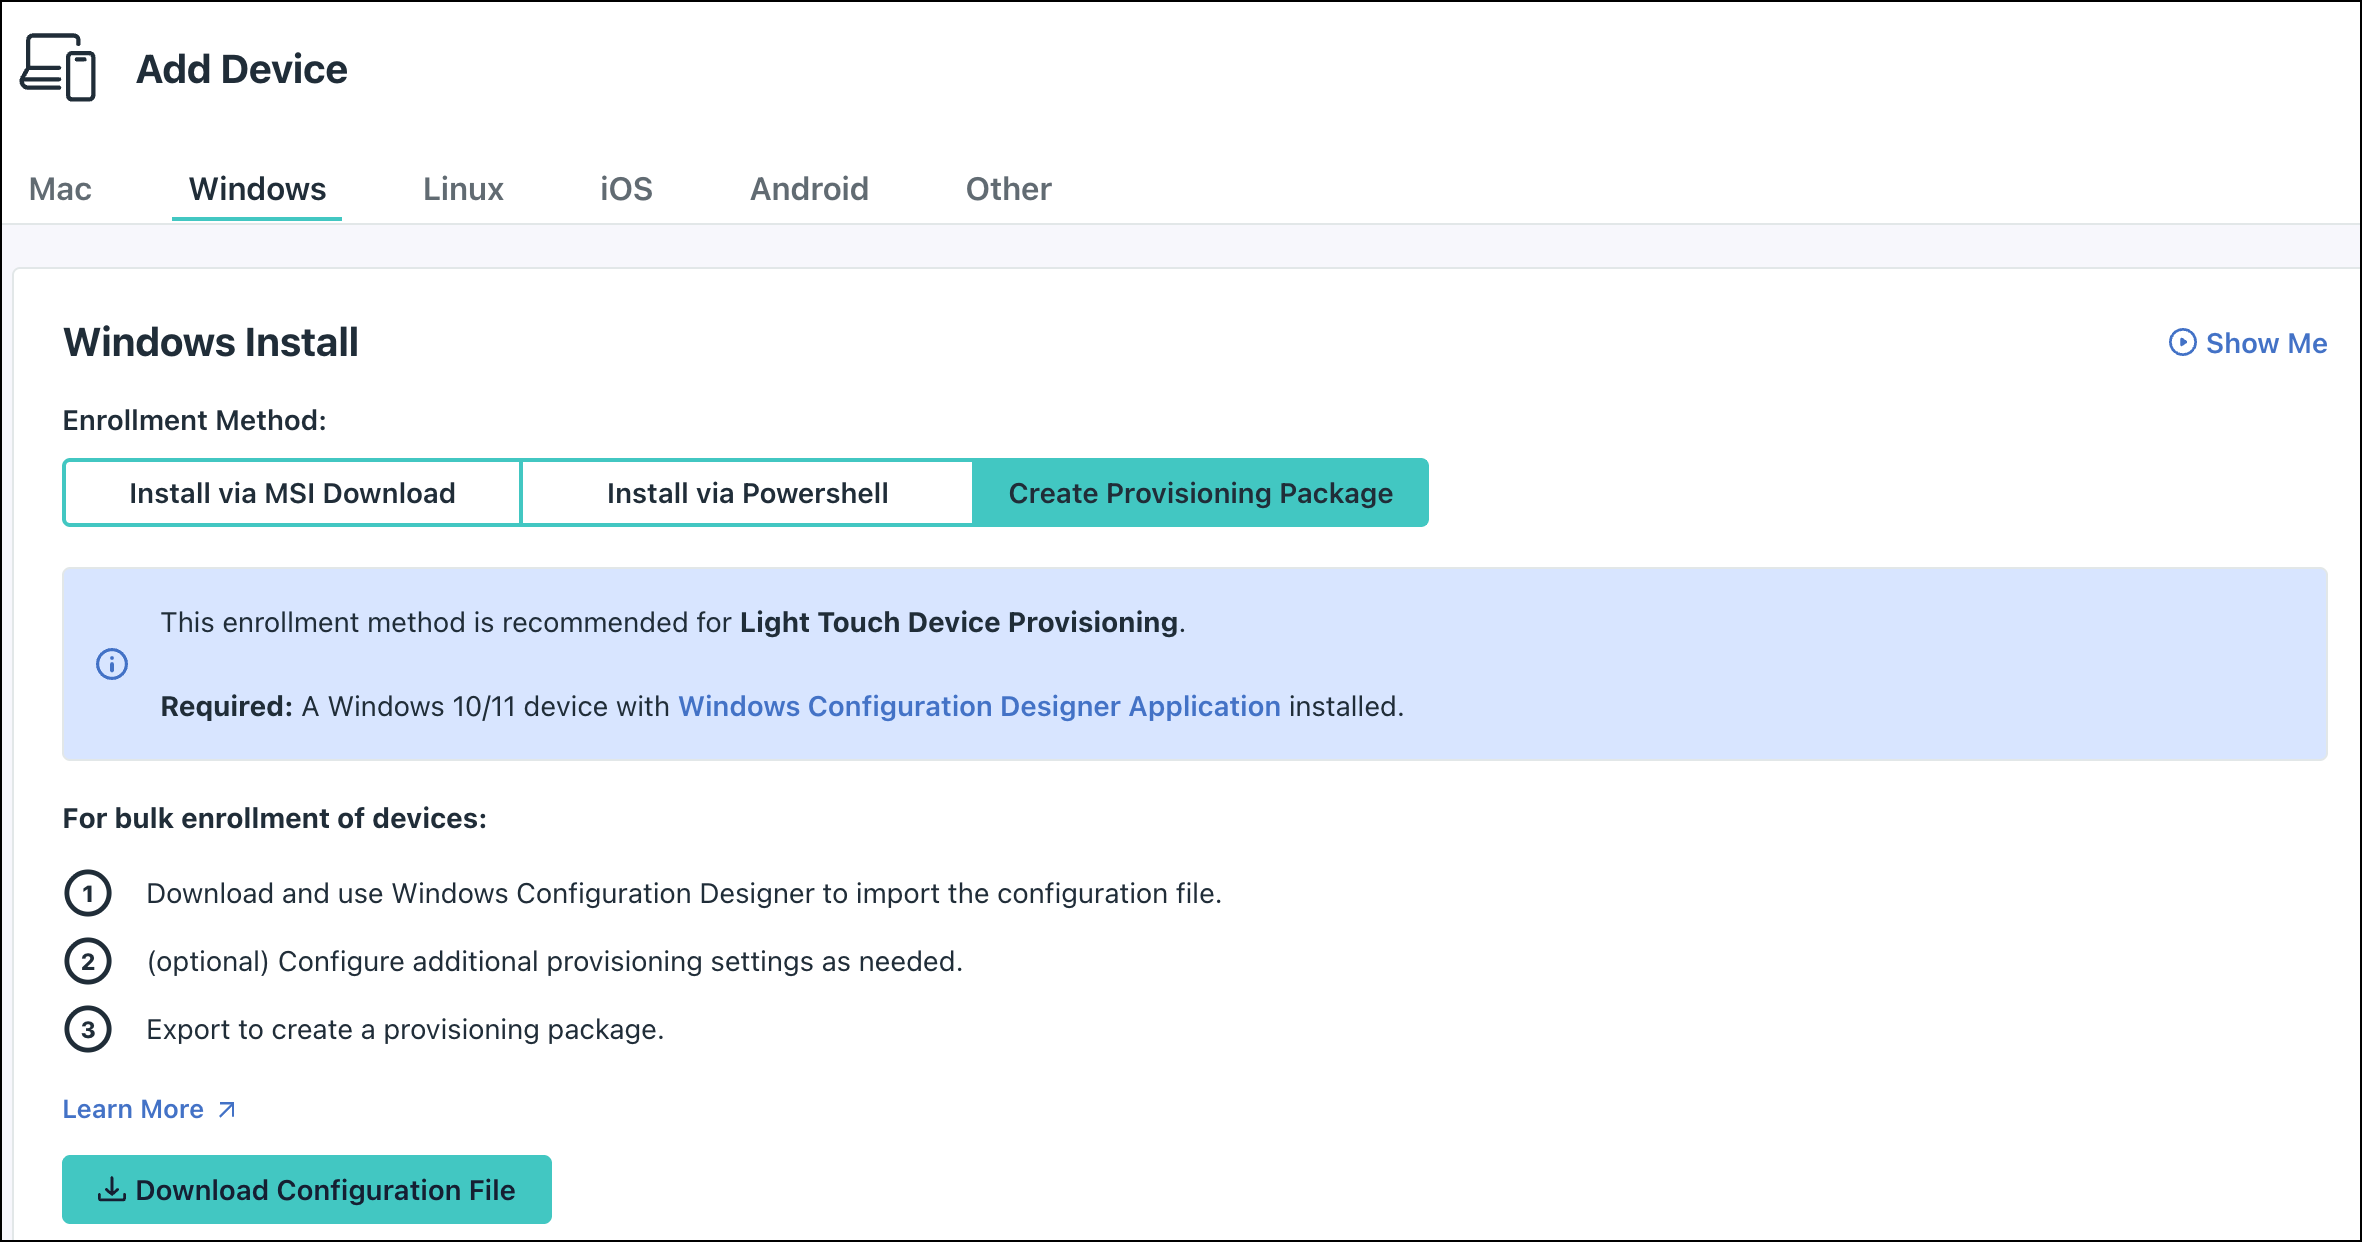
- Click the Windows tab.
- In the Windows Install section, click the Create Provisioning Package tab, then click Download Configuration File.

![]()
Make sure you save the configuration file in a recognizable folder so that you can easily add the ICD customization file to it later.
- Import the configuration file.
- Open Windows Imaging and Configuration Designer (WCD).
- Go to File > Open Project.

- Browse to the ICD project file in the location where you stored the XML configuration file.


![]()
Make sure you open the ICD project file from a directory where the customizations.xml file is colocated. The pre-configurations will only work if the admins load the ICD project file from a directory that also has the customizations.xml.
- Select
jumpcloud.icdprojand click Open.
![]()
A new tab in WCD displays with the provisioning package project.
- Add customizations in WCD.
- Configure an Admin account with administrator privileges.
- Expand Accounts, and select Users.

- In the UserName field, enter the name of the local admin user you want on your device, and then click Add. A red exclamation mark appears next to Users.
- Expand Users and then select the UserName field.
- In the Password field, enter a password.
- In the UserGroup field, select Administrators in the drop down.
- Expand Accounts, and select Users.
- (Optional) To configure settings for wireless connectivity, make sure you have internet access and see the Microsoft documentation.

- (Optional) If you are using a Windows Home device, make sure you enter a Windows product key to upgrade to an MDM-compatible OS version.
- Configure an Admin account with administrator privileges.
- Export the provisioning package to a USB drive.
- On the newly created tab in WCD, click Export then select Provisioning package.

- (Optional) Configure additional policy settings in the ICD project before export in the Settings section.
- The Build wizard displays. Go through the Build wizard options.
- (Optional) Encrypt and sign the package with a certificate.

- On the Select where to save the provisioning package screen, save the file to a USB drive.
- Finish the Build wizard and then click Build.
- When the build is complete, click Finish.
- Click Output location to make sure everything looks correct.
- On the newly created tab in WCD, click Export then select Provisioning package.


![]()
For more information, see the Microsoft documentation.
Apply a Provisioning Package
Apply a provisioning package from a USB drive during initial device setup.
- Start the Windows device on the initial setup screen.

- Insert the USB drive and click Install provisioning package, then click Next.

![]()
- If there is only one provisioning package on the USB drive, the provisioning package is automatically applied.
- If nothing happens when you insert the USB drive, press the Windows key five times.
- When the
.ppkgfile is installed, remove your USB drive and Windows will continue provisioning the device.
![]()
It may take up to 5 minutes for the provisioning package to finish installing.

Apply a Provisioning Package to Previously Setup Devices (Non-OOBE)
Apply a provisioning package to a device that has been previously set up.
- Go to Settings > Accounts > Access work or school > Add or remove a provisioning package, then click Add a package.
- In the Choose a method section, select Removable Media.
- Select the JumpCloud .ppkg file you want to apply, then click Add.
- Confirm you want to allow the file to make changes to your device, and that it is from a trusted source.
![]()
For more information, see the Microsoft documentation.
Troubleshooting
Symptoms
The provisioning package completes but presents the following errors:
- "Setup completed with errors"
- "Enroll in device management: Failed"
Cause
The device isn't connected to the internet while running the provisioning package. This can be caused by lack of LAN/ Ethernet connection, or an incorrect WiFi configuration.
Resolution
Ensure the device is connected to LAN while running the provisioning package, or ensure the WiFi configuration within the package is correct. To check the WiFi configuration, see Step 5b under Create a Provisioning Package.