If your fleet has macOS devices that use Touch ID, users can use a fingerprint to unlock their devices and do other tasks. JumpCloud’s Enforced Fingerprint Timeout Policy lets you change the fingerprint timeout period for your users. Adding this policy to a user's device shortens the period between required entry of the password. After you set a timeout value and it expires, the user can unlock the device by entering a password to authenticate.
This policy only applies when users are using Touch ID. The policy works on macOS devices running macOS 11 and later.
To create a macOS Enforced Fingerprint Timeout policy:
- Log in to the JumpCloud Admin Portal.
![]()
If your data is stored outside of the US, check which login URL you should be using depending on your region. If your organization uses LDAP, RADIUS, or requires firewall allow list configuration, the Fully Qualified Domain Names (FQDNs) will also be region specific. See JumpCloud Data Centers for the URLs, FQDNs, and IP addresses.
- Go to Device Management > Policy Management.
- Click (+).
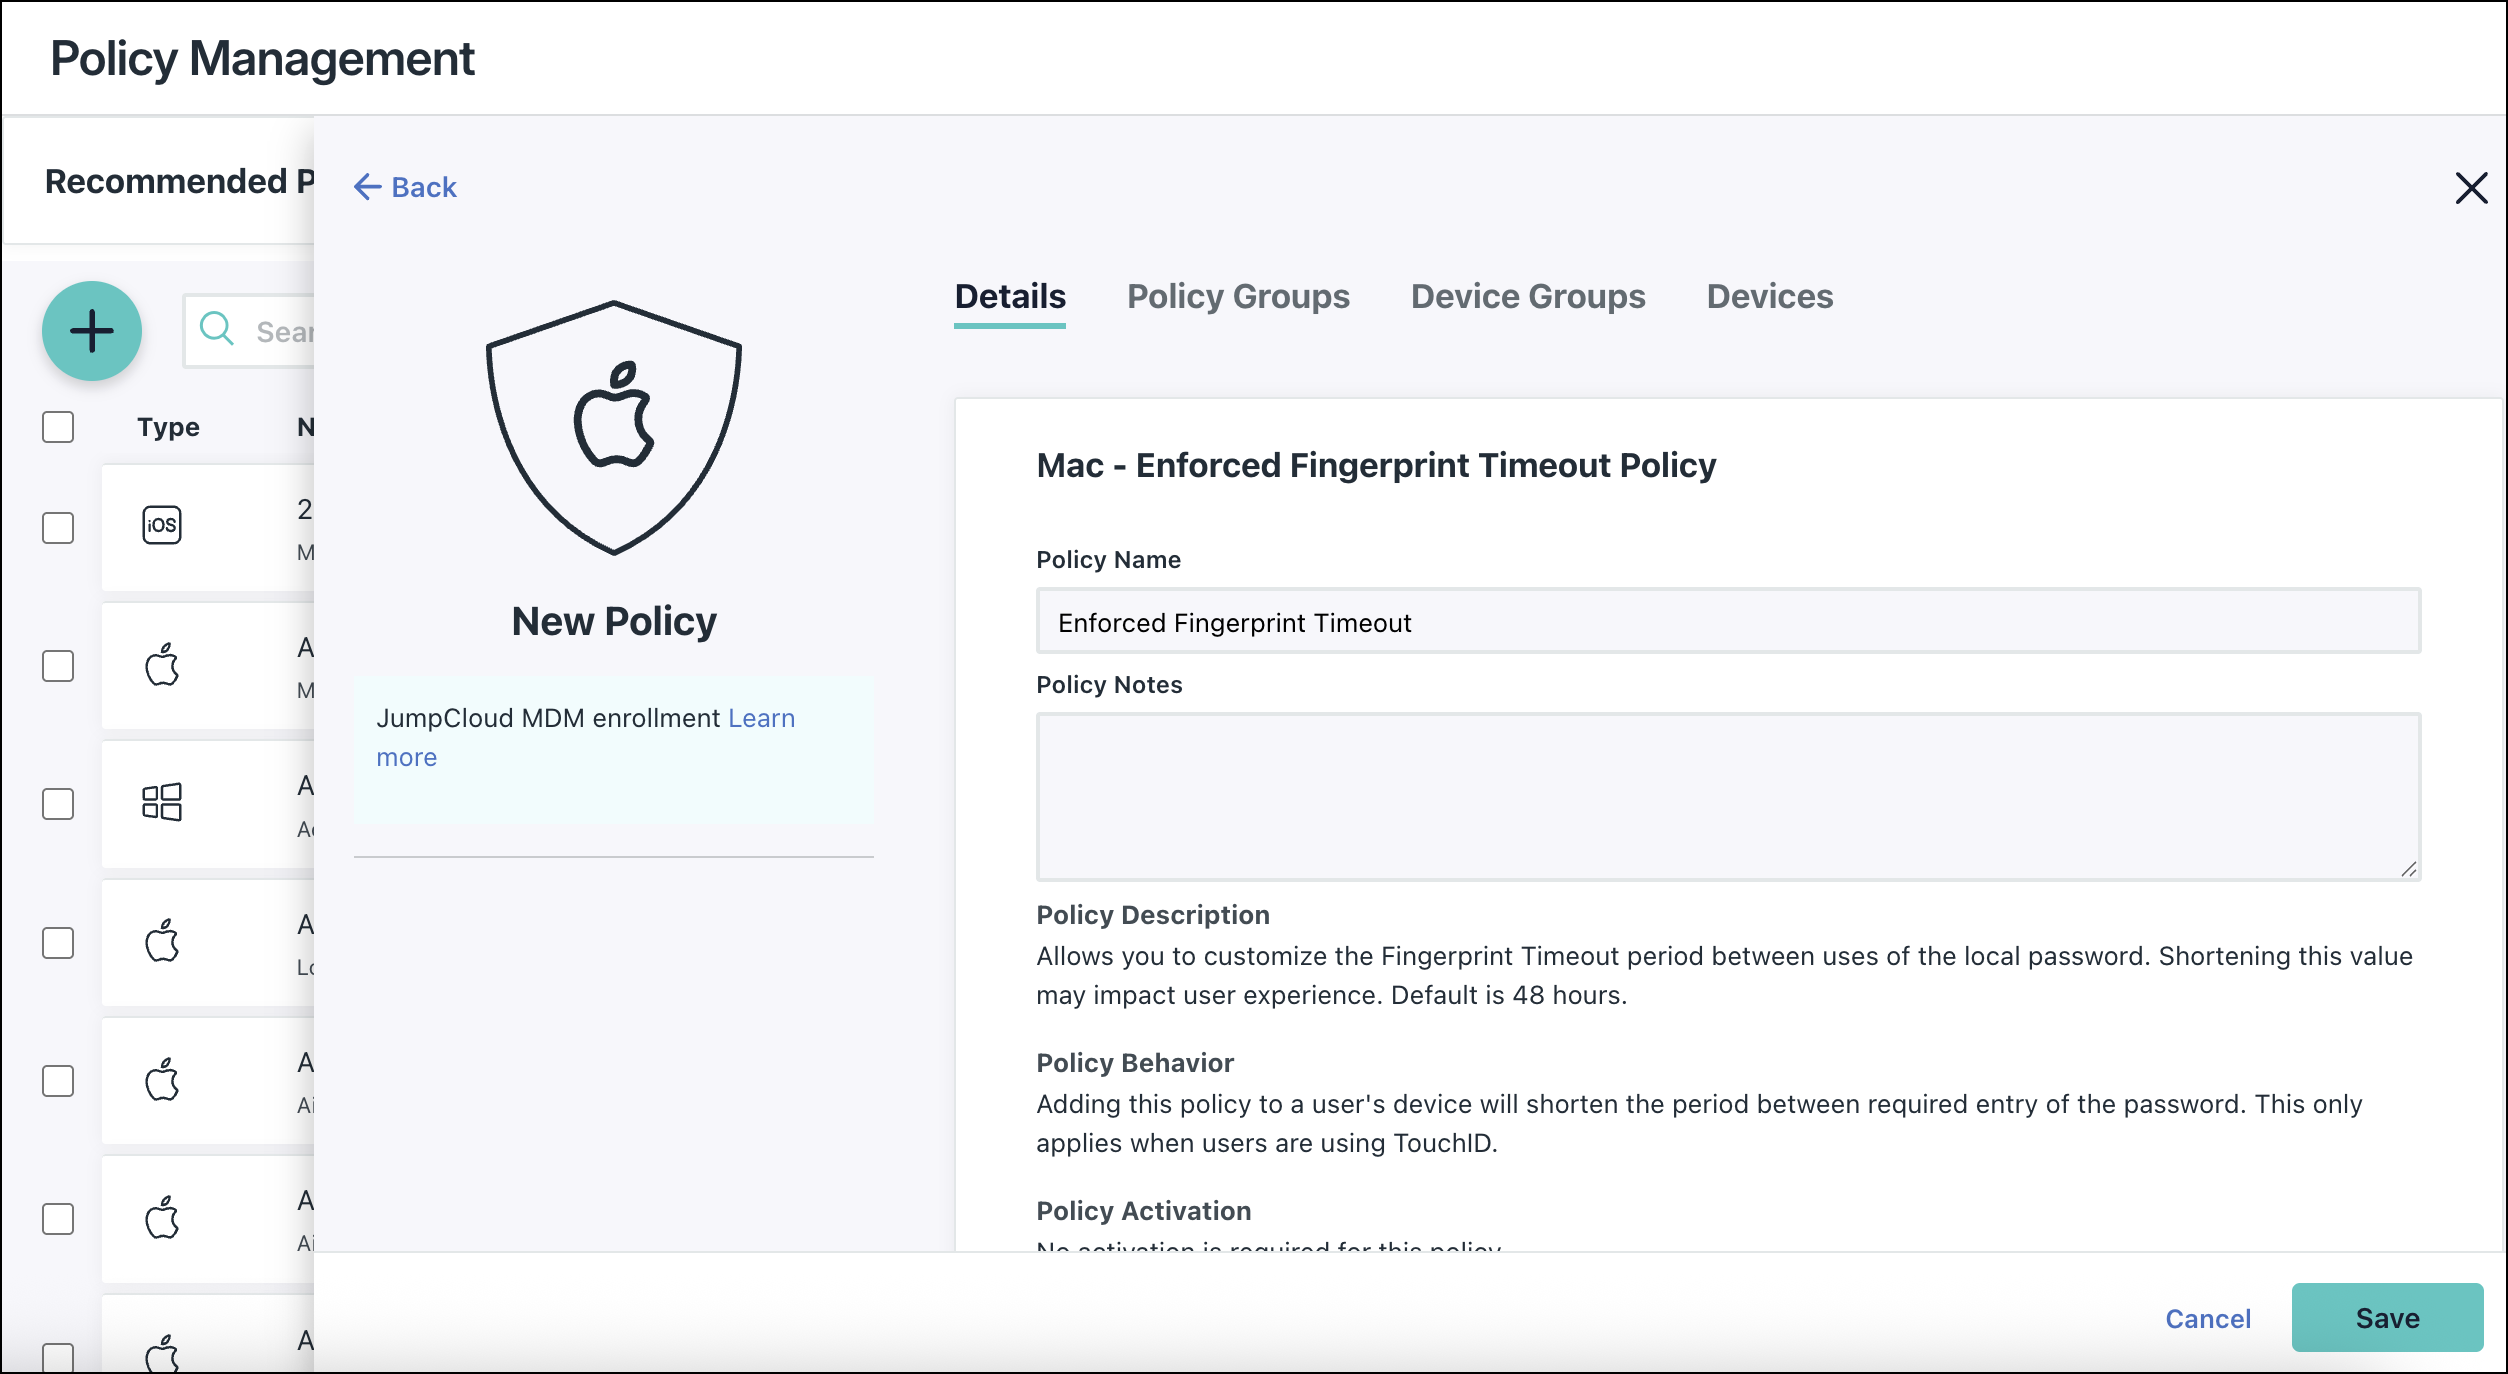
- On the New Policy panel, select the Mac tab.
- Select Enforced Fingerprint Timeout from the list, then click configure.

- (Optional) In the Policy Name field, enter a new name for the policy or keep the default. Policy names must be unique.
- (Optional) In the Policy Notes field, enter details like when you created the policy, where you tested it, and where you deployed it.
- Under Settings, select Enforced Fingerprint Timeout and choose the amount of time before users have to enter their password again. Choosing a shorter timeout can impact your users, because they’ll be required to re-enter their password more often. The maximum timeout value is 48 hours.
- (Optional) Select the Device Groups tab. Select one or more device groups where you'll apply this policy. For device groups with multiple OS member types, the policy is applied only to the supported OS.
- (Optional) Select the Devices tab. Select one or more devices where you'll apply this policy.
- Click save.
- If prompted, click save again.