Add a Notifications Profile for JumpCloud in Jamf Pro
Jamf Pro does not currently support uploading a signed or unsigned configuration profile that specifies a Notifications payload. Instead, a workaround is to craft the JumpCloud Notifications payload yourself in the Jamf Pro application. You can enable Self Service notifications for macOS using the Self Service Configuration settings in Jamf Pro.
To add a JumpCloud notifications profile in Jamf Pro:
-
Click Computersat the top of the page.
-
Click Configuration Profiles.
-
Click New.
-
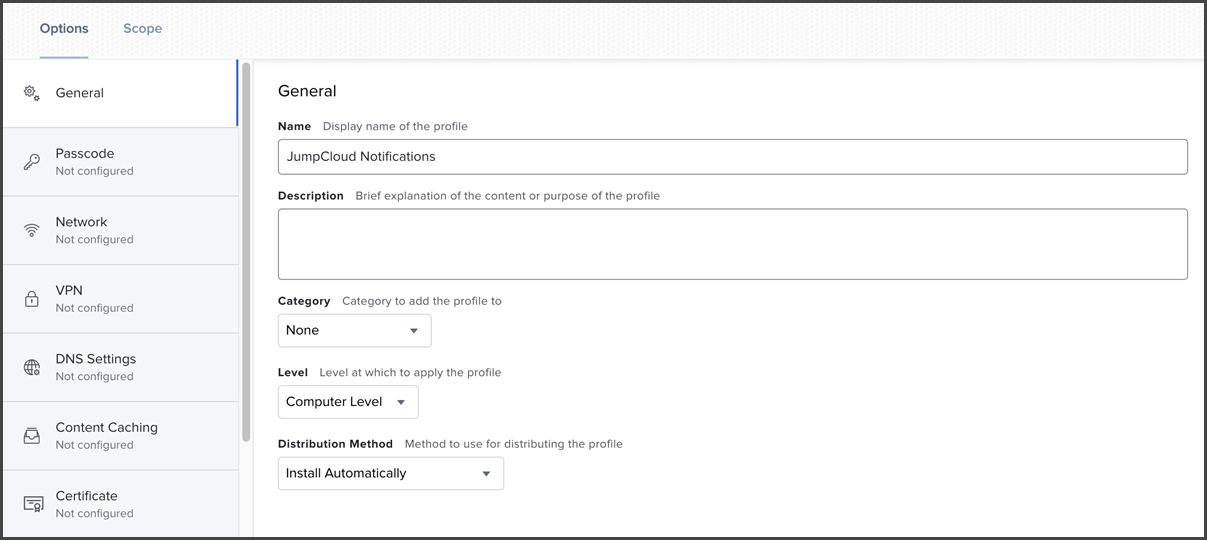
In the Optionstab, configure basic settings under the Generalpayload. Include the level at which to apply the profile and the distribution method.
- **Name -**Enter JumpCloud Notifications.
- Description- Briefly describe the purpose of this profile. For example, Provides automated display of JumpCloud’s Notifications from the Tray App in an approved manner.
- Category- Choose a value that is appropriate for your organization.
- Level - Choose Computer Level.
- Distribution Method - Choose Install Automatically.
-
Select the Scopetab and configure the scope of the profile to include all of your Mac computers that have the JumpCloud Agent. For more information on how to configure this, see Jamf’s documentation on Scope.
-
Select the Optionstab to add a Notifications Payload to the profile.
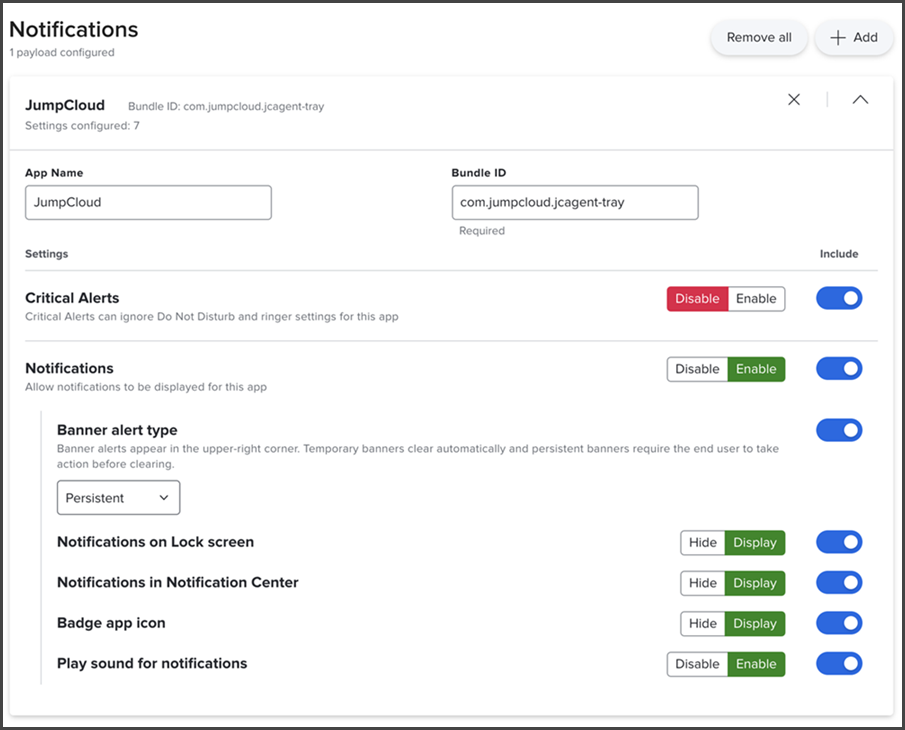
- App Name- Enter JumpCloud.
- Bundle ID- Enter com.jumpcloud.jcagent-tray.
- Notifications -Click Enableand select the Includeswitch.
- Banner alert type - Choose Persistentand select the Includeswitch.
- Notifications on Lock screen- Click Displayand select the Includeswitch.
- Notifications in Notification Center - Click Displayand select the Includeswitch.
- Badge app icon - Click Displayand select the Includeswitch.
- Play sound for notifications - Click Enableand select the Includeswitch.
- Save the profile. It will be sent to the group that was selected in the Scope.
Was this information helpful?