Connect


Contents
Linux Mint 19 series reached end of life in April 2023, which means in order to continue to receive feature updates and patches, you must upgrade to Mint 20: Ulyanna. Mint 20 is a long-term support (LTS) release based on Ubuntu 20.04 LTS, so it will be supported until June 2025.
In this tutorial, we’ll guide you step-by-step on how to upgrade from Linux Mint 19 to Linux Mint 20, codenamed ‘Ulyanna’.
Preparing for the Upgrade
There’s a few things you’ll want to prepare in advance and keep in mind before upgrading from Linux Mint 19 to Mint 20.
- Internet connection quality: You’ll need a fast and stable internet connection to download the upgrade package, which is around 1.4 GB.
- Time requirement: The upgrade procedure may take 1-2 hours to complete, dependending on your internet speed. Make sure you have the time (and patience!) for the process.
- Backup before beginning: Although most upgrades take place without an issue, they are not 100% fail proof. Thus, it’s highly recommended that you backup your files or system snapshot prior to initiating the upgrade.
With that out of the way, let’s begin the installation!
Step 1: Verify System Requirements
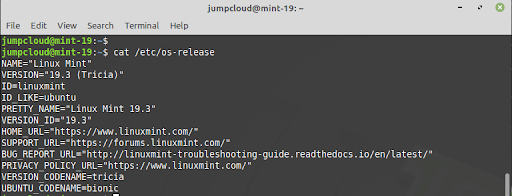
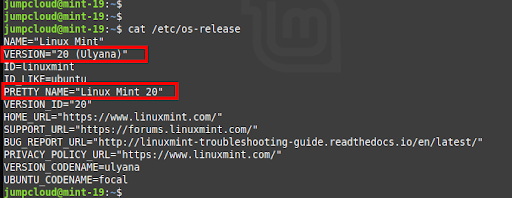
To start off, make sure you’re running Linux Mint 19.3, codenamed ‘Tricia’. The instructions for this tutorial will not work with Mint 19.2, codenamed ‘Tina’, or any earlier releases, so you must upgrade to 19.3 before proceeding. To check your release version, run the command:
$ cat /etc/os-release
The following output confirms you’re running Linux Mint 19.3.
You must also ensure that you are running a 64-bit system. You can verify this using the following command:
$ dpkg –print-architecture
If your system’s architecture is 64-bit, you should get amd64 as the output.

If the output on the terminal reads i386, you’re running a 32-bit architecture PC, and the upgrade will not be successful.
Step 2: Update the system
Once you’ve confirmed you’re running Mint 19.3 with a 64-bit system, you need to ensure that the local cache and installed packages are up-to-date. To do that, run the following command:
$ sudo apt update && sudo apt upgrade -y
Note: This might take a while depending on the number of installed packages.

Step 3: Create a System Snapshot
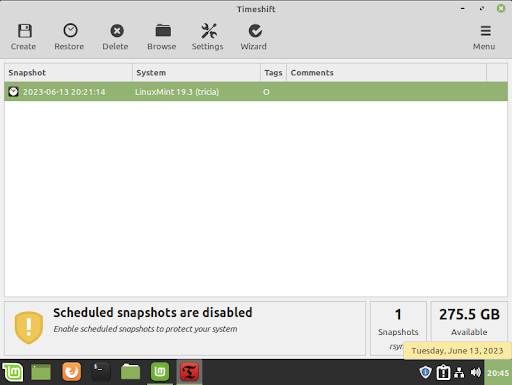
As mentioned before, you should perform a backup prior to upgrading from one release to another. Modern Linux Mint releases come pre-installed with Timeshift, a backup tool designed to take a snapshot of your system. If anything goes wrong during the update, you can use the snapshot to restore the system to an earlier date or point in time.
Timeshift provides a similar functionality to System Restore in Windows, and only backs up system settings and files. User files such as documents, images, and videos are excluded from the backup, so you’ll also need to back those up to another device.
To create a snapshot, simply search and launch Timeshift from the application menu and follow the instructions displayed.

It’s always advisable to store the snapshot in an external storage device for better data security. The created snapshot will be displayed on the Timeshift GUI as shown.
Step 4: Install the Mintupgrade Tool
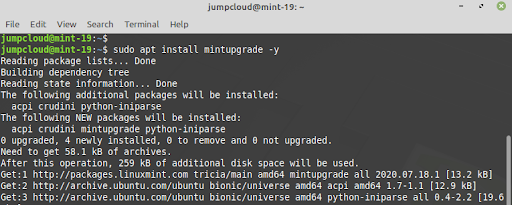
Linux Mint provides the Mintupgrade utility, an upgrade tool that lets you upgrade from one Mint release to the next.
You can easily install Mintupgrade from Ubuntu repositories by running the following command:
$ sudo apt install mintupgrade -y
Before you initiate the actual upgrade process, it’s recommended to run a simulation to check for any issues or errors that might affect the upgrade.
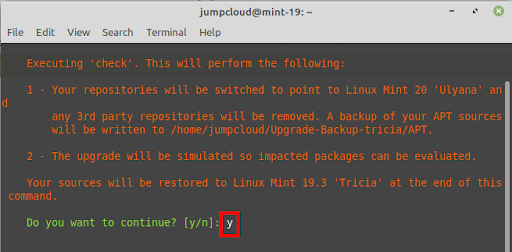
To perform the upgrade check, run the following command on the terminal:
$ sudo mintupgrade check
The simulation tool loads a GUI that performs a test run of the actual upgrade process and checks if the system is ready for the upgrade. To proceed, press ‘Y’ and hit ENTER.
The simulation also reports any errors encountered. In our case, the simulation encountered foreign packages that needed to be downgraded.
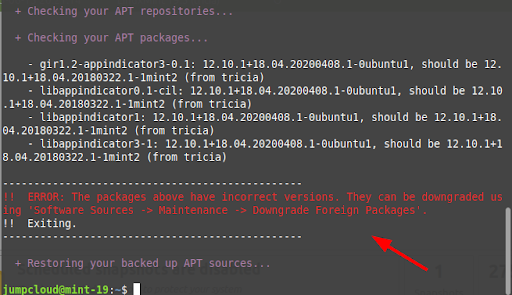
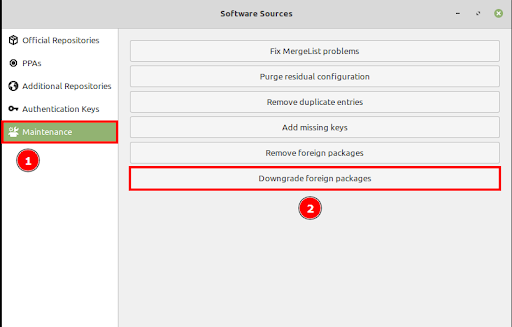
To resolve this error, head over to ‘Software Sources’ from the Mint menu. Click ‘Maintenance’ on the left sidebar and select ‘Downgrade foreign packages’. Some packages no longer exist in Mint 20, and can be safely removed – check out Mint’s user guide for more info.
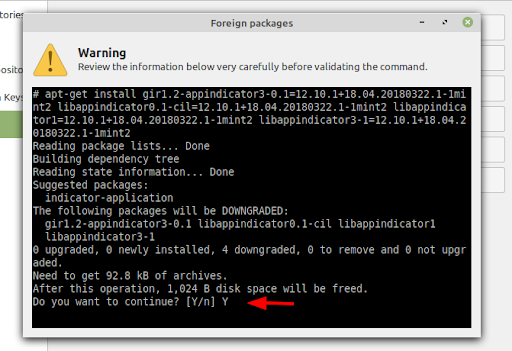
A terminal will pop up. To proceed, type ‘Y’ and hit ENTER.
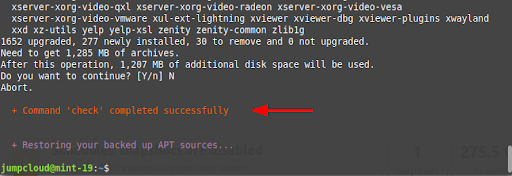
If all goes well, you will see the following output confirming that the simulation was successful, giving you the green light to proceed with the upgrade.
Step 5: Download the Packages required to Perform the Upgrade
Once the simulation is complete, download all the packages required to perform the upgrade using the following command:
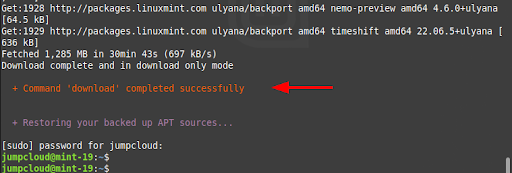
$ mintupgrade download
Once again, type ‘Y’ and hit ENTER to continue with the download.
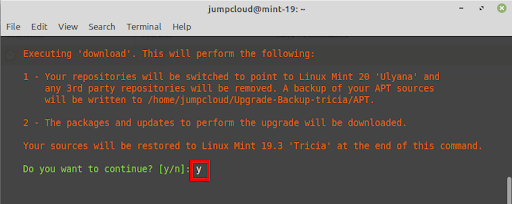
Warning: this step takes quite a while. In our case, it took roughly 30 minutes.
Step 6: Upgrade from Mint 19.3 to Mint 20
With all the packages downloaded, perform the upgrade to Mint 20 by executing the following command:
$ mintupgrade upgrade
To continue, type ‘Y’ and hit ENTER.
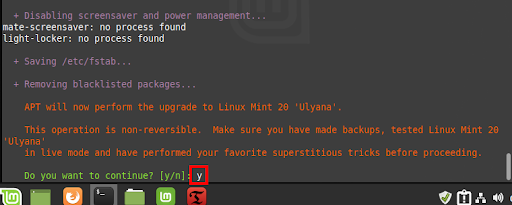
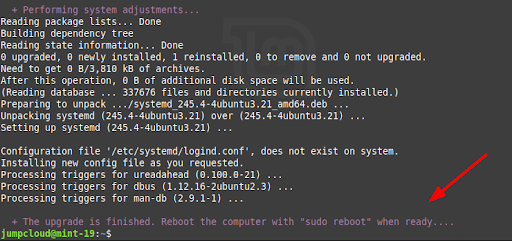
The upgrade process installs new packages, removes obsolete and unused ones, and performs system adjustments. The entire process takes roughly 50 minutes.
Once the upgrade is complete, you will be prompted to reboot your system. Do so using the following command:
$ sudo reboot
Step 7: Boot into Linux Mint 20
When the system has rebooted, verify that the upgrade to Mint 20 was successful with the following command:
$ cat /etc/os-release
The output confirms that you’ve successfully switched to Linux Mint 20.
Be Proactive about Future End of Life Notices
You’be now successfully performed an upgrade from Linux Mint 19.3 Tricia to Linux Mint 20 Ulyana. As you have seen, it’s quite a straightforward procedure that takes just a few commands and a bit of patience.
Not knowing in advance that your distro version is reaching end of life is never fun. Thankfully, we’ve made it easy for you to keep track of all end-of-life due dates. Head over to our End-of-life listing so you can proactively upgrade your systems before it’s too late.