This article outlines common issues that can occur with devices enrolled in Windows MDM and how to resolve them.
If a device fails to enroll in JumpCloud MDM, there are two common causes:
- It is still enrolled with another MDM provider.
- Or there are remnants of the previous MDM provider on the device.
When users try to enroll in JumpCloud MDM via the User Portal and enrollment fails, the following error may appear: The device is already being managed by an organization.
You can use JumpCloud Commands or the JumpCloud PowerShell Module to check the MDM enrollment status of your devices.
Using JumpCloud Commands to Confirm Enrollment
If the device has the JumpCloud Agent installed, you can use the following command to check the status of a specific device.
To check the device’s enrollment status using JumpCloud Commands:
- Log in to the JumpCloud Admin Portal.
If your data is stored outside of the US, check which login URL you should be using depending on your region, see JumpCloud Data Centers to learn more.
- Go to Device Management > Commands.
For more information on commands in JumpCloud, see Get Started: JumpCloud Commands.
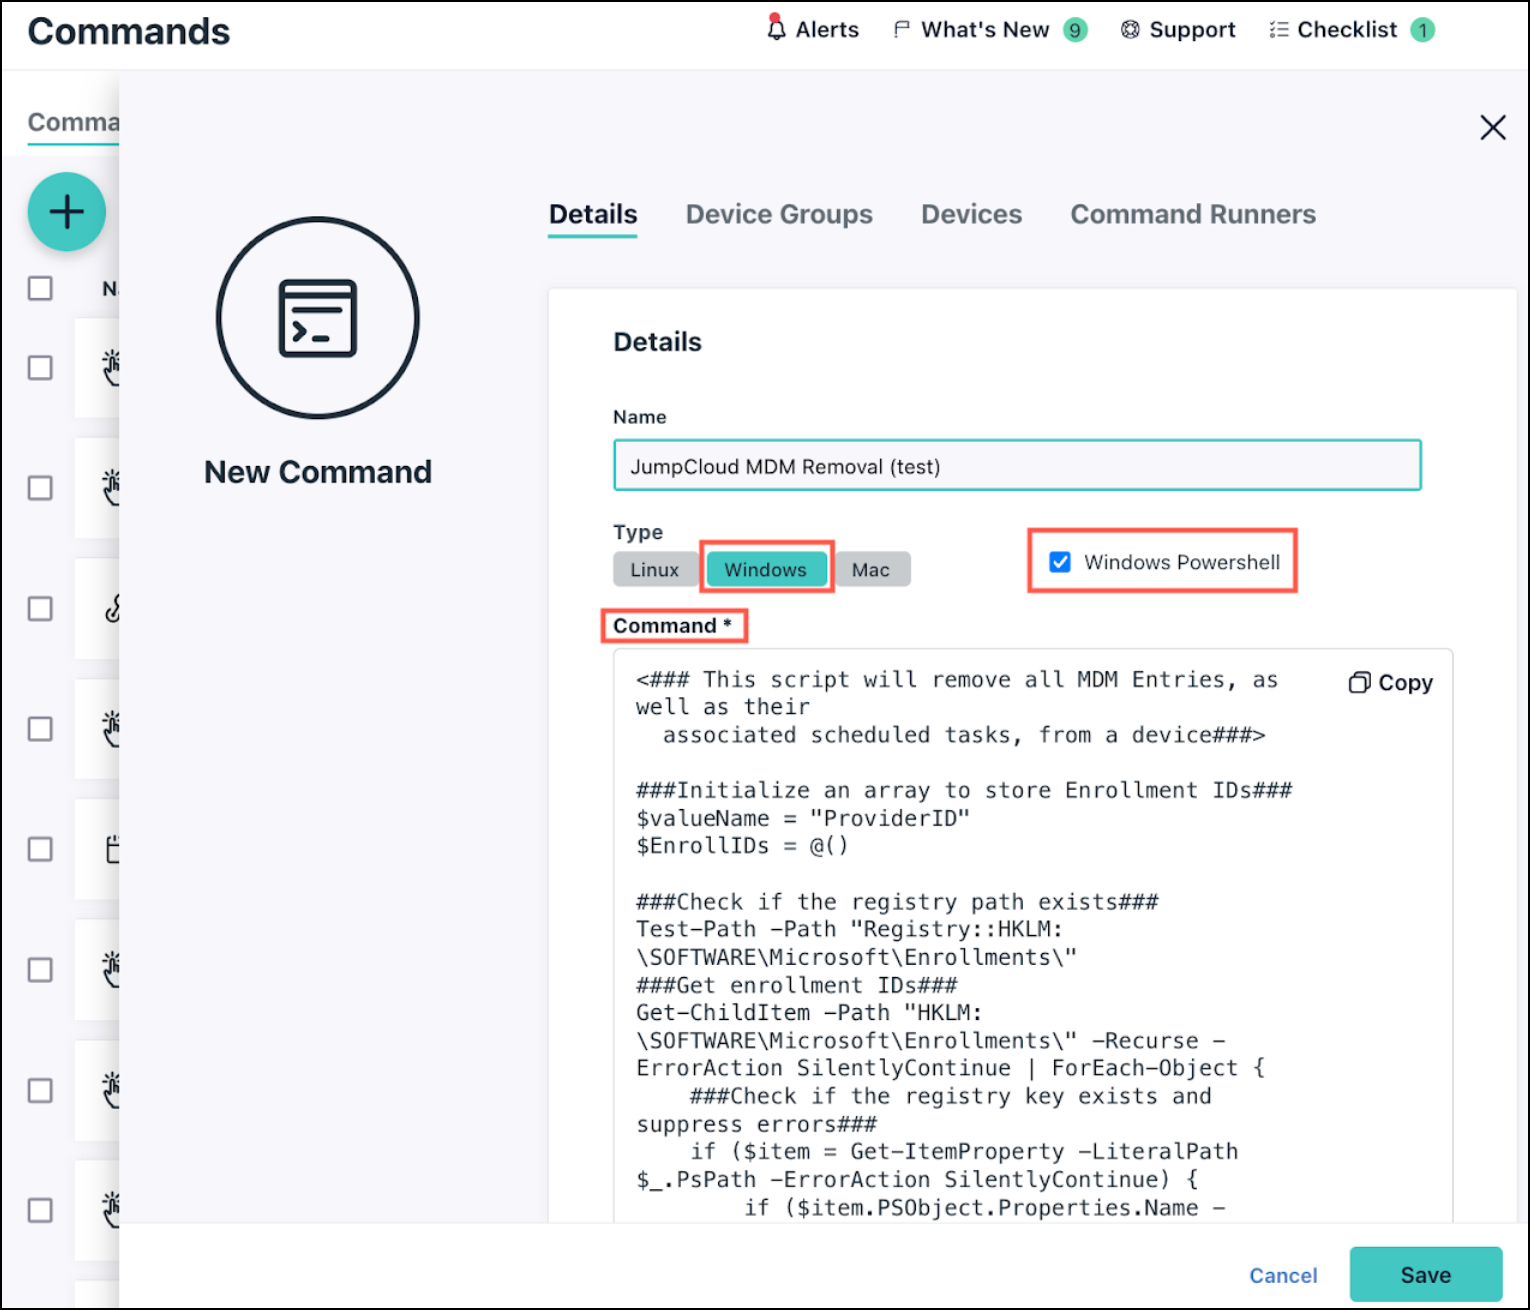
- Click (+), then click Command to create a new command. The Details tab for the new command displays.
- In the Type field, click Windows.
- Select Windows PowerShell.
- In the Command field, paste the following:
get-jcsystem -hostname Workbox | select-object mdm - Select the Devices tab. Select one or more devices where you want to apply this command.
- Click Save.
- From your list of commands, run the newly created command on the affected device by clicking Run Now.
- Go to the Results tab and click view. Locate the vendor value in the results.
In the following example, the vendor is Internal, meaning that this device has successfully enrolled in JumpCloud MDM. If the Vendor is None there is no detected MDM provider on this device. If the vendor value is External, that means another MDM provider has been detected on the system.
mdm
---
@{vendor=internal; profileIdentifier=; dep=; userApproved=; enrollmentType=unknown; enrollmentAttempts=0; createdAt=2024-04-05T16:47:49.026Z; prov...
Using the PowerShell Module to Confirm Enrollment
You can also use the JumpCloud PowerShell Module to check the enrollment status of all of your devices in JumpCloud.
See Installing the JumpCloud PowerShell Module to learn how to install and run the PowerShell Module.
To use the PowerShell Module to check enrollment status:
- Run the following command in the PowerShell Module:
$SystemMDMStatus = Get-JCSystem
foreach ($system in $SystemMDMStatus) {
$MDMStatus = $system.mdm.vendor
if ($system.hostname -ne $null) {
$Provider = $system.mdm.providerID
$hostname = $system.hostname
write-host "$hostname, $MDMStatus, $Provider"
}
}
- Check the $MDMStatus and $Provider values in the command results:
- If the device is enrolled with another MDM provider, follow the vendor’s specified steps to unenroll the device.
- If the device was unenrolled but it is still detected as an enrolled device, we recommend you contact the vendor for assistance with removing the remnants of the previous MDM enrollment.
There are times when a Windows device enrollment in JumpCloud MDM can’t be removed by normal methods, such as when the device is still linked with a previous MDM provider. When normal MDM removal methods don’t work, you can run the JumpCloud_MDM_Removal script to manually locate and remove an MDM profile.
Considerations:
- The MDM removal script can run either remotely (from the JumpCloud Admin Portal) or locally without user intervention.
- The script locates existing MDM Enrollment IDs in the HKLM:\SOFTWARE\Microsoft\Enrollments location of the registry then removes all other keys related to the MDM enrollment.
Prerequisites:
- Your device must have the JumpCloud agent installed in order to receive PowerShell commands. See Install the JumpCloud Agent.
The script will use the Enrollment ID to remove the device’s associated MDM enrollment data from the following locations:
- Registry Entries:
- HKLM:\SOFTWARE\Microsoft\Enrollments
- HKLM:\SOFTWARE\Microsoft\Enrollments\Status\
- HKLM:\SOFTWARE\Microsoft\EnterpriseResourceManager\Tracked\
- HKLM:\SOFTWARE\Microsoft\PolicyManager\AdmxInstalled\
- HKLM:\SOFTWARE\Microsoft\PolicyManager\Providers\
- HKLM:\SOFTWARE\Microsoft\Provisioning\OMADM\Accounts\
- HKLM:\SOFTWARE\Microsoft\Provisioning\OMADM\Logger\
- HKLM:\SOFTWARE\Microsoft\Provisioning\OMADM\Sessions\
- Scheduled Tasks:
- Related tasks under \Microsoft\Windows\EnterpriseMgmt\
- Related tasks under \Microsoft\Windows\EnterpriseMgmt\
To run the MDM removal script on a Windows device in the JumpCloud Admin Portal:
- Download the PowerShell script from GitHub: JumpCloud MDM Removal Script.
- From the JumpCloud Admin Portal, go to Device Management > Commands.
For more information on commands in JumpCloud, see Get Started: JumpCloud Commands.
- Click (+), then click Command to create a new command. The Details tab for the new command displays.
- In the Type field, click Windows.
- Select Windows PowerShell.
- In the Command field, paste the contents of the JumpCloud MDM removal script.
- Select the Devices tab. Select one or more devices where you want to apply this command.
- Click Save.
- From your list of commands, run the newly created command on the affected device by clicking Run Now.
The MDM enrollment profile should now be removed from the Windows device. To confirm the command results, go to Device Management > Commands, then click the Results tab.
- (Optional) If the MDM enrollment removal script fails to run using JumpCloud Commands (or the device is inaccessible for other reasons), you can run the script locally:
- Open an elevated PowerShell or PowerShell_ISE session on your Windows device.
- Paste the contents of the JumpCloud MDM removal script.
- Press Enter to run the script.


